Repost: Easter “Resurrection Roll” Bible Story and Recipe

Easter is just a few weeks away, which means it’s time to bring back all of my favorite lent activities. Easter is such a special time to share with children, and I’m always looking for fun and creative ways to share the truth of this season with my boys. This week we will begin using our resurrection eggs and we’ll also be doing one of my all-time favorite cooking projects: resurrection rolls. Resurrection rolls are a simple (and, might I add, delicious) way to share the gospel with children, a truly memorable experience. I thought I’d repost the recipe and story here for you if you’d like to join in the fun–enjoy!

Original Post: Resurrection Roll Recipe and Bible Story

I love finding creative ways to teach important truths to kids. And I love it even more if I can find a way to tie food into the “lesson”. You can imagine my excitement, then, when I first discovered Resurrection Rolls.

Basically, Resurrection Rolls are a treat that you make where each step of the cooking process represents part of the Easter story. It’s a wonderful way to tell kids the Easter story AND the rolls themselves are sublime. I’ve had people make the rolls for me before, but this was my first time doing the whole project with David. He was able to help out a bit and was pretty engaged the whole time (even if he did keep trying to swipe marshmallows from my stash). I’ll definitely be doing this again next year–a new tradition has been born!

What you’ll need:

IMG_1498

  • 1 package of crescent rolls
  • 8 large marshmallows (plus extras to snack on while you’re waiting for the rolls to bake!)
  • 3 Tablespoons melted butter
  • 3 Tablespoons sugar plus 1 Tablespoon cinnamon
  • Parchment paper
  • Baking sheet
  • Bible (or use the “script” below)

How It’s Done:

IMG_1513Start by preheating your oven to 350 degrees. While the oven is preheating, get out your Bible and open up to John 19 or find the Easter story in a children’s Bible (my favorite is the Jesus Storybook Bible). Below you’ll find the pictures and the “script” for how I told the story to David (he’s only 2 years old, so I kept it simple for him).

IMG_1509

Say: “Even though Jesus was perfect and had never sinned–he had never ever done anything wrong– some people did not like him. They wanted to hurt Jesus because he said he was God. They made Jesus carry a cross and they killed him. This made God very sad, but it was all part of His great rescue plan. When Jesus died, his friends took his body off the cross.”

IMG_1510

Do: Give your child a marshmallow
Say: “This marshmallow represents Jesus’ body. Jesus died for you and for me, because we have sinned and we need to be rescued from our sin.”

IMG_1512

Say: “After Jesus died, his friends came and they put special oil and spices on Jesus’ body to get him ready for burial.”
Do: Roll the marshmallow in melted butter, then in cinnamon sugar

Say: “Next, Jesus’ friends wrapped his body in special cloths–almost like a mummy! Jesus had died, and they were getting his body ready to bury.”
Do: Roll the cinnamon-sugar marshmallow up in a crescent roll (it won’t look like a crescent roll). Press all of the seams firmly. Repeat for each of the crescent rolls. Place the rolls on a parchment paper-lined baking sheet.

IMG_1511

Say: “Next, they laid Jesus’ body in a tomb. A tomb is like a big cave carved out of rock. Then big, strong soldiers rolled a heavy rock in front of the tomb so nobody could get in or out of the tomb. They even put a special seal over the entrance so they would know if anybody tried to move the rock that was in front of the entrance. Soldiers stood in front of the tomb to guard it day and night.”
Do: Put the rolls in the oven and set your timer for 10-12 minutes. Let the rolls bake until they are golden-brown. I even let David stand guard in front of our oven “tomb” with his toy sword.

IMG_1506

Say: “Jesus was dead in the tomb for three days. Let’s count to three: one, two, three. How many days was he in the tomb? That’s right, three days.”
(We had some time to wait for the rolls, so I let David play while they were baking. I kept going back to him, though, and we’d repeat this whole conversation about how long Jesus was in the tomb.)

IMG_1514

Do: When the rolls are done baking, take them out of the oven and let them cool (I let mine cool for about 20 minutes, and that was perfect). The marshmallow will probably have exploded out of your rolls, but that’s to be expected (that’s why we put down the parchment paper!). After the rolls have cooled…

IMG_1516

Say: “Three days after Jesus had died, an angel of God appeared to one of Jesus’ friends. He told her that Jesus was alive! Jesus’ friends decided to look in the tomb where they had put Jesus’ body, but when they did, it was empty! Jesus had risen! And still today, Jesus is alive. Today he lives in heaven with God.”
Do: Cut open one of the rolls. The marshmallow has melted, so the “tomb” is now empty.

IMG_1522

Do: Eat your yummy rolls!
Say: “These rolls are sweet, just like the love of God. God made you and he loves you very much. And some day, if you choose to love and follow God, you will be able to spend forever and ever in heaven with him and Jesus. The Bible tells us that Jesus is our Great Rescuer. The Bible tells us that the only way to Heaven is through loving and believing in Jesus. We celebrate Easter, because Jesus died and rose again so that we could have a way to Heaven.”

Cinnamon Cookie Butter Muffins

IMG_1324

When we went back to the states for Christmas I noticed several changes that had already taken place since we’d move: new housing developments had sprung up all over the place, all of our friends had new babies, and the Seahawks were on their way to the Superbowl (!). Lots of big changes. No change struck me as much, however, as the introduction of this new product into the American marketplace: cookie butter. What the what?! Cookie BUTTER? I mean, come ON.

IMG_1326

I just had to try it. Thankfully, my ever-observant sister-in-law read the desires of my heart and I was the happy recipient of my own (rather large) jar of cookie butter on Christmas morning. The stuff is good. Really good. It tastes a bit like creamy shortbread or graham cracker pie crust. The only problem is, what am I supposed to do with nearly two pounds of cookie butter?

I’ve tried the cookie butter spread on toast (yummy) and as a dip for fruit (delicious), but I was ready to step out of my cookie-butter-comfort-zone and try something new. I found this recipe for cinnamon cookie butter muffins and, after a few tweaks, I was on the road to cookie butter perfection. It’s not exactly health food in a muffin tin but, man, are they tasty:

Cinnamon Cookie Butter Muffins
Makes 1 dozen mouth-watering muffins

Ingredients:

1 ½ cups flour
½ Tablespoon baking powder
¼ teaspoon salt
½ teaspoon cinnamon
5 Tablespoons unsalted butter, softened
½ cup sugar
1 large egg
½ teaspoon vanilla
¼ cup cream cheese
¼ cup milk
8 Tablespoons cookie butter (find cookie butter at Trader Joe’s, Costco, or on Amazon)
Cinnamon sugar (combine 2 Tablespoons sugar and 1/2 teaspoon cinnamon)

Directions:

1. Preheat oven to 375 degrees F (190 degrees C for all of my Irish friends who may be reading this!).
2. Line a muffin tin with muffin papers.
3. In a medium bowl, whisk together the flour, baking powder, salt, and cinnamon.
4. In a large bowl using a hand mixer, beat butter and sugar together until light and fluffy. Add the egg and vanilla and beat until well combined. Add the cream cheese, milk, and 2 Tablespoons of cookie butter and beat until combined.
5. Add the flour mixture to the wet ingredients and mix until just combined.
6. Spoon muffin batter into muffin liners until about 1/2 full. Spoon about 1/2 Tablespoon of cookie butter onto each muffin, then top with another small spoonful of muffin batter.

IMG_1310

7. Top each muffin with a sprinkling of cinnamon sugar.
8. Bake muffins for 10-12 minutes, until the muffins start to turn golden brown.
9. When you go to pull your muffins out of the oven, DO NOT TOUCH THE SIDE OF THE OVEN thus burning your hand and spilling the muffins in the process. This may have happened to a friend. Her muffins looked like this:
IMG_1313 (Don’t worry, I was able to salvage all but one muffin from this little incident)

10. Let the muffins cool completely before you eat them (remember, there’s a molten core of cookie butter in the middle). Enjoy!

IMG_1319

The final verdict? Cinnamon cookie butter muffins are every bit as delectable as you imagine they would be. So go bake yourself a batch. Now!

IMG_1316

Christmas in Cork

IMG_5460

It’s the most wonderful time of the year…CHRISTMAS!!! And, for the first time ever, I get to experience this magical season in another part of the world. In many ways, Christmas in Ireland is very similar to Christmas in America–there are trees and lights and carols and Santa. Some things are a bit different, though.

For starters, the beginning of the actual Christmas season is a bit more ambiguous here. Without Thanksgiving and BLACK FRIDAY (ugh.) to mark the official beginning of all things Christmasey, you start seeing decorations and marketing for the holiday amp up right after Halloween.  Another difference in Ireland is the big guy in the red suit. Santa is everywhere here–even more prevalent than America, which I didn’t expect. But he’s cooler here, too. Instead of just getting a photo and a 2-inch candy cane when you sit on Santa’s lap, he gives all the kids actual presents. Proper presents. Like MagnaDoodles and marble mazes and books and farm sets complete with tractors and all the animals. Man, Santa is already so busy with the Irish kids that I’m not sure he’ll have enough loot for the rest of the world come December 25th.

Differences aside, Christmas is Christmas no matter where you are in the world. It is a special time of year full of tradition and festivities. Here are a few highlights from our Christmas season in Cork:

We walked through downtown Cork to see the big wheel and the “German” Christmas market. We ate bratwurst and felt like we were in Leavenworth. It was grand.

IMG_5451

The city was all decked out with lights and wreaths and Christmas trees. David liked the Christmas trees the best because, obviously, they were covered in balls. Lots and lots of little red balls that he tried to rip off every tree we passed. Luckily for us, the city planners anticipated his ornament-swiping attempts and they actually zip-tied all of the decorations to the trees. Cork:1, David:0.

IMG_5456

We  did some holiday baking so Mommy could eat some sweets. I found a kit at the grocery store to bake polar bear cupcakes. They turned out super cute and tasted as good as they looked.

IMG_5566


December has been really pleasant weather-wise with mild, dry days. We’ve had fun getting outside to play with our friends:

IMG_5546


…and even take a trip to the zoo:

IMG_5553

After a failed mid-week attempt to go to a local “Christmas farm” I begged Jon to take us back on the weekend. He’s a good husband, and he obliged. Rumley’s is an “open farm” (a real working farm that they deck out so the public can visit it) and they had lots of animals and fun activities for the kids. They had quite a range of animals for a farm–it was really more like a zoo. They had water buffalo, alpaca, sheep, cows, donkeys, pigs, birds, lemurs, monkeys, mongoose, ostriches and even camels.

IMG_5585

There were go-karts to drive:

IMG_5591

…and golf balls to drive (David’s favorite):

IMG_5593

We rode on a tractor pull:

IMG_5598

…and got to pet some cute cuddly creatures:

IMG_5601


And to wrap up our Christmas in Cork we celebrated with David’s first-ever preschool Christmas pageant. David was the cutest little shepherd I ever have seen (I wonder if real shepherd’s wear dish towels on their heads?). Here’s our little shepherd David with his friend Jack the donkey:

photo 2


And here’s the whole class getting ready to perform (there were about 30 preschoolers and about 5,000 parents in the audience):

photo 1


And, finally, here’s David with his sweet teacher Miss Aisling:

photo 3

We have had such a wonderful time here in Cork celebrating the first part of this Christmas season. Tomorrow, though, we leave Ireland for our big trip home to Seattle for Christmas. We will be spending three (3!) glorious weeks with our loved ones. I can’t wait to go home and see everyone and everything that I’ve been missing but, truth be told, I will also be missing Ireland.  Merry Christmas, Ireland–we’ll see you again soon!

Resurrection Roll Recipe and Bible Story

I love finding creative ways to teach important truths to kids. And I love it even more if I can find a way to tie food into the “lesson”. You can imagine my excitement, then, when I first discovered Resurrection Rolls.

Basically, Resurrection Rolls are a treat that you make where each step of the cooking process represents part of the Easter story. It’s a wonderful way to tell kids the Easter story AND the rolls themselves are sublime. I’ve had people make the rolls for me before, but this was my first time doing the whole project with David. He was able to help out a bit and was pretty engaged the whole time (even if he did keep trying to swipe marshmallows from my stash). I’ll definitely be doing this again next year–a new tradition has been born!

What you’ll need:

IMG_1498

  • 1 package of crescent rolls
  • 8 large marshmallows (plus extras to snack on while you’re waiting for the rolls to bake!)
  • 3 Tablespoons melted butter
  • 3 Tablespoons sugar plus 1 Tablespoon cinnamon
  • Parchment paper
  • Baking sheet
  • Bible (or use the “script” below)

How It’s Done:

IMG_1513Start by preheating your oven to 350 degrees. While the oven is preheating, get out your Bible and open up to John 19 or find the Easter story in a children’s Bible (my favorite is the Jesus Storybook Bible). Below you’ll find the pictures and the “script” for how I told the story to David (he’s only 2 years old, so I kept it simple for him).

IMG_1509

Say: “Even though Jesus was perfect and had never sinned–he had never ever done anything wrong– some people did not like him. They wanted to hurt Jesus because he said he was God. They made Jesus carry a cross and they killed him. This made God very sad, but it was all part of His great rescue plan. When Jesus died, his friends took his body off the cross.”

IMG_1510

Do: Give your child a marshmallow
Say: “This marshmallow represents Jesus’ body. Jesus died for you and for me, because we have sinned and we need to be rescued from our sin.”

IMG_1512

Say: “After Jesus died, his friends came and they put special oil and spices on Jesus’ body to get him ready for burial.”
Do: Roll the marshmallow in melted butter, then in cinnamon sugar

Say: “Next, Jesus’ friends wrapped his body in special cloths–almost like a mummy! Jesus had died, and they were getting his body ready to bury.”
Do: Roll the cinnamon-sugar marshmallow up in a crescent roll (it won’t look like a crescent roll). Press all of the seams firmly. Repeat for each of the crescent rolls. Place the rolls on a parchment paper-lined baking sheet.

IMG_1511

Say: “Next, they laid Jesus’ body in a tomb. A tomb is like a big cave carved out of rock. Then big, strong soldiers rolled a heavy rock in front of the tomb so nobody could get in or out of the tomb. They even put a special seal over the entrance so they would know if anybody tried to move the rock that was in front of the entrance. Soldiers stood in front of the tomb to guard it day and night.”
Do: Put the rolls in the oven and set your timer for 10-12 minutes. Let the rolls bake until they are golden-brown. I even let David stand guard in front of our oven “tomb” with his toy sword.

IMG_1506

Say: “Jesus was dead in the tomb for three days. Let’s count to three: one, two, three. How many days was he in the tomb? That’s right, three days.”
(We had some time to wait for the rolls, so I let David play while they were baking. I kept going back to him, though, and we’d repeat this whole conversation about how long Jesus was in the tomb.)

IMG_1514

Do: When the rolls are done baking, take them out of the oven and let them cool (I let mine cool for about 20 minutes, and that was perfect). The marshmallow will probably have exploded out of your rolls, but that’s to be expected (that’s why we put down the parchment paper!). After the rolls have cooled…

IMG_1516

Say: “Three days after Jesus had died, an angel of God appeared to one of Jesus’ friends. He told her that Jesus was alive! Jesus’ friends decided to look in the tomb where they had put Jesus’ body, but when they did, it was empty! Jesus had risen! And still today, Jesus is alive. Today he lives in heaven with God.”
Do: Cut open one of the rolls. The marshmallow has melted, so the “tomb” is now empty.

IMG_1522

Do: Eat your yummy rolls!
Say: “These rolls are sweet, just like the love of God. God made you and he loves you very much. And some day, if you choose to love and follow God, you will be able to spend forever and ever in heaven with him and Jesus. The Bible tells us that Jesus is our Great Rescuer. The Bible tells us that the only way to Heaven is through loving and believing in Jesus. We celebrate Easter, because Jesus died and rose again so that we could have a way to Heaven.”
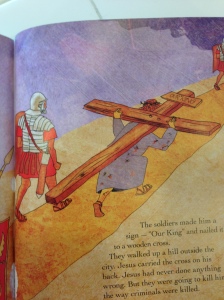
Our Family Recipe For The Best Darn Cinnamon Rolls You’ll Ever Eat!

Sometimes things just don’t go according to plan. Last week was one of those weeks. Jon and I were both sick with bronchitis and ear infections (not sure how we both got the same two unusual ailments). Between caring for our own illnesses and trying to take care of the boys, we were pretty wiped out. But, what’s that I hear?! Duh-duh-duh-duh! Grandma to the rescue!

Jon’s mom was kind enough to come over last week and help us out a bit. She helped take care of the boys while I took a shower (all by myself, no munchkins at my feet!) and attempted (but failed) to actually take a nap. She also made us dinner before she left–such a welcome treat to this tired mama. One of the things grandma made for us was while she was visiting was our family recipe for dinner rolls. They are one of my absolute favorite foods–there’s nothing better than the smell of warm bread baking in your oven. Well, there’s actually one thing that’s better. Turning those dinner rolls into cinnamon rolls.

A number of years ago my mother-in-law figured out how to use the dinner roll recipe to make cinnamon rolls, and they are the best cinnamon rolls you’ll ever taste. Better than Cinnabon. They’re ooey-gooey, melt-in-your-mouth, close-your-eyes-and-sigh delicious. They take a bit of time and effort but, trust me, they’re worth it. You may gain 10 pounds after making this recipe (because you’ll want to eat the whole batch) but, again, it’s worth it! So, with no further ado, our cinnamon roll recipe.

Attachment-1

Peterson Family Cinnamon Rolls (AKA The Best Darn Cinnamon Rolls You’ll Ever Eat)
Makes about 30 rolls

2 1/4 cups milk
1/2 cup butter, plus an additional 1-2 cups (2-4 sticks) of softened butter
3 cups flour, plus an additional 3-5 cups flour (can be white, wheat, or a combination of flours–this time I used half white and half whole wheat flour)
1/2 cup sugar
2 teaspoons salt
2 packages rapid rise yeast
2 eggs
2 pounds brown sugar
1/2 cup cinnamon
1 recipe for frosting or glaze (we like this one)

  • Heat the milk and butter to 120-130 degrees (use a thermometer to ensure accuracy–too hot and you’ll kill the yeast, too cool and the yeast won’t grow)
  • In a large mixing bowl, combine, 3 cups flour, the sugar, salt, and yeast.
  • Lightly mix the flour mixture (I use a stand mixer with the dough hook attachment, but you could do this by hand), then add the heated milk/butter
  • After slightly blended, add the eggs one at a time, blending well after each egg.
  • Slowly add 3-41/2 cups flour to form a dough that holds together well but does not stick to the mixer. This part you just have to go by feel–not too dry, not too sticky.
  • Turn the dough onto a floured board and knead the dough into a soft smooth ball.
  • Lightly grease a clean mixing bowl, put dough ball in the bowl, cover with a clean dish towel, and let your dough rise (follow the instructions on your yeast packet for how long the first rising should be, usually about an hour if you’re using rapid rise).
  • During the first rising, mix together the brown sugar and cinnamon (use a fork and/or your fingers and make sure there are no lumps in the mix)
  • After the first rising, divide the dough in half. Cover half of the dough. Roll out the other half of the dough to a thickness of about 1/2 inch (it should make about a 12″ x 18″ rectangle).
  • Spread with 1-2 sticks of softened butter
  • Sprinkle with about half of the cinnamon sugar mix; pat the mixture into the dough
  • Roll the dough tightly, then pinch tightly along the seam to keep it sealed
  • Slice into 1 1/2 inch thick rounds and place in a lightly greased pan
  • Repeat the roll out/butter/cinnamon sugar/slicing steps with the second half of the dough
  • Bake at 375 for 15-20 minutes, until lightly browned.
  • After baking, flip rolls upside down onto a cookie sheet covered in wax paper and scrape all of the extra cinnamon goo on top. Then, flip the cinnamon rolls with the wax paper right-side up onto a cooling rack.
  • Let rolls cool, then top with icing. (I usually can’t wait for them to cool before I eat about half the batch, but if you have the self-control to wait, kudos to you)
  • Eat, eat, eat!