How To Homeschool On The Fly In The Age Of The Coronavirus

Image result for e learning

Late last night our school district outside of Seattle became the first school district in the nation to close due to concerns about the Coronavirus. Effective immediately, and for an indefinite period of time, all schools are closed and shifting to a remote learning model “on the cloud”. Translation: ready or or not, we’re all about to homeschool!

While I 100% support our district’s decision to move to this model, I know from experience how daunting the task ahead will be for families. I used to be a classroom teacher, and I’ve homeschooled before. Teaching is my jam, but helping my own children learn at home was a totally different league.  Let’s just say there’s a very good reason why I’m not still homeschooling.

My kids were only 3- and 5-year olds the last time I attempted homeschooling, so I’m definitely a bit out of practice (And I’ve never done this with a 1st grader, a 3rd grader, and a preschooler, as I’m about to attempt.). While I am by no means a homeschooling (or “cloud schooling”) expert, I did pick up a few tips and tricks during our oh-so-fun year of “Mommy School” that I want to pass along. Just remember: we’re all in this (separately) together!

Set Expectations
Make sure the kids know that this isn’t just a never-ending weekend. These days at home will be a learning time that they will be expected to participate in the same as if they were away at school. Attendance will be taken, they will need to check in for certain online classes, and they will have assignments to complete within specific time frames. Bonus: They can do it all in their pajamas with their dog curled up underfoot.

Gather Supplies
For our particular scenario, students will need a computer, internet access, and a few  physical supplies in order to attend Coronavirus School.

Our school district has come up with a plan to move all learning “outside the four walls of the school and onto the cloud”, which basically means kids will be completing and/or submitting their school work online. Each physical class in the real world now has a virtual Google Classroom where students and teachers can interact with each other virtually. It’s actually really cool! And, since we had a bit of warning that this was coming, teachers spent the school day yesterday as a bridge day. They trained students how to use these new-to-them online tools and had time to practice using them under teacher guidance. In addition, our school district has made available computing devices and WiFi hotspots for any students that need them in order to complete their “cloud learning” at home. Really, I can’t believe how well-planned this whole thing is on such short notice and in such an unprecedented circumstance!

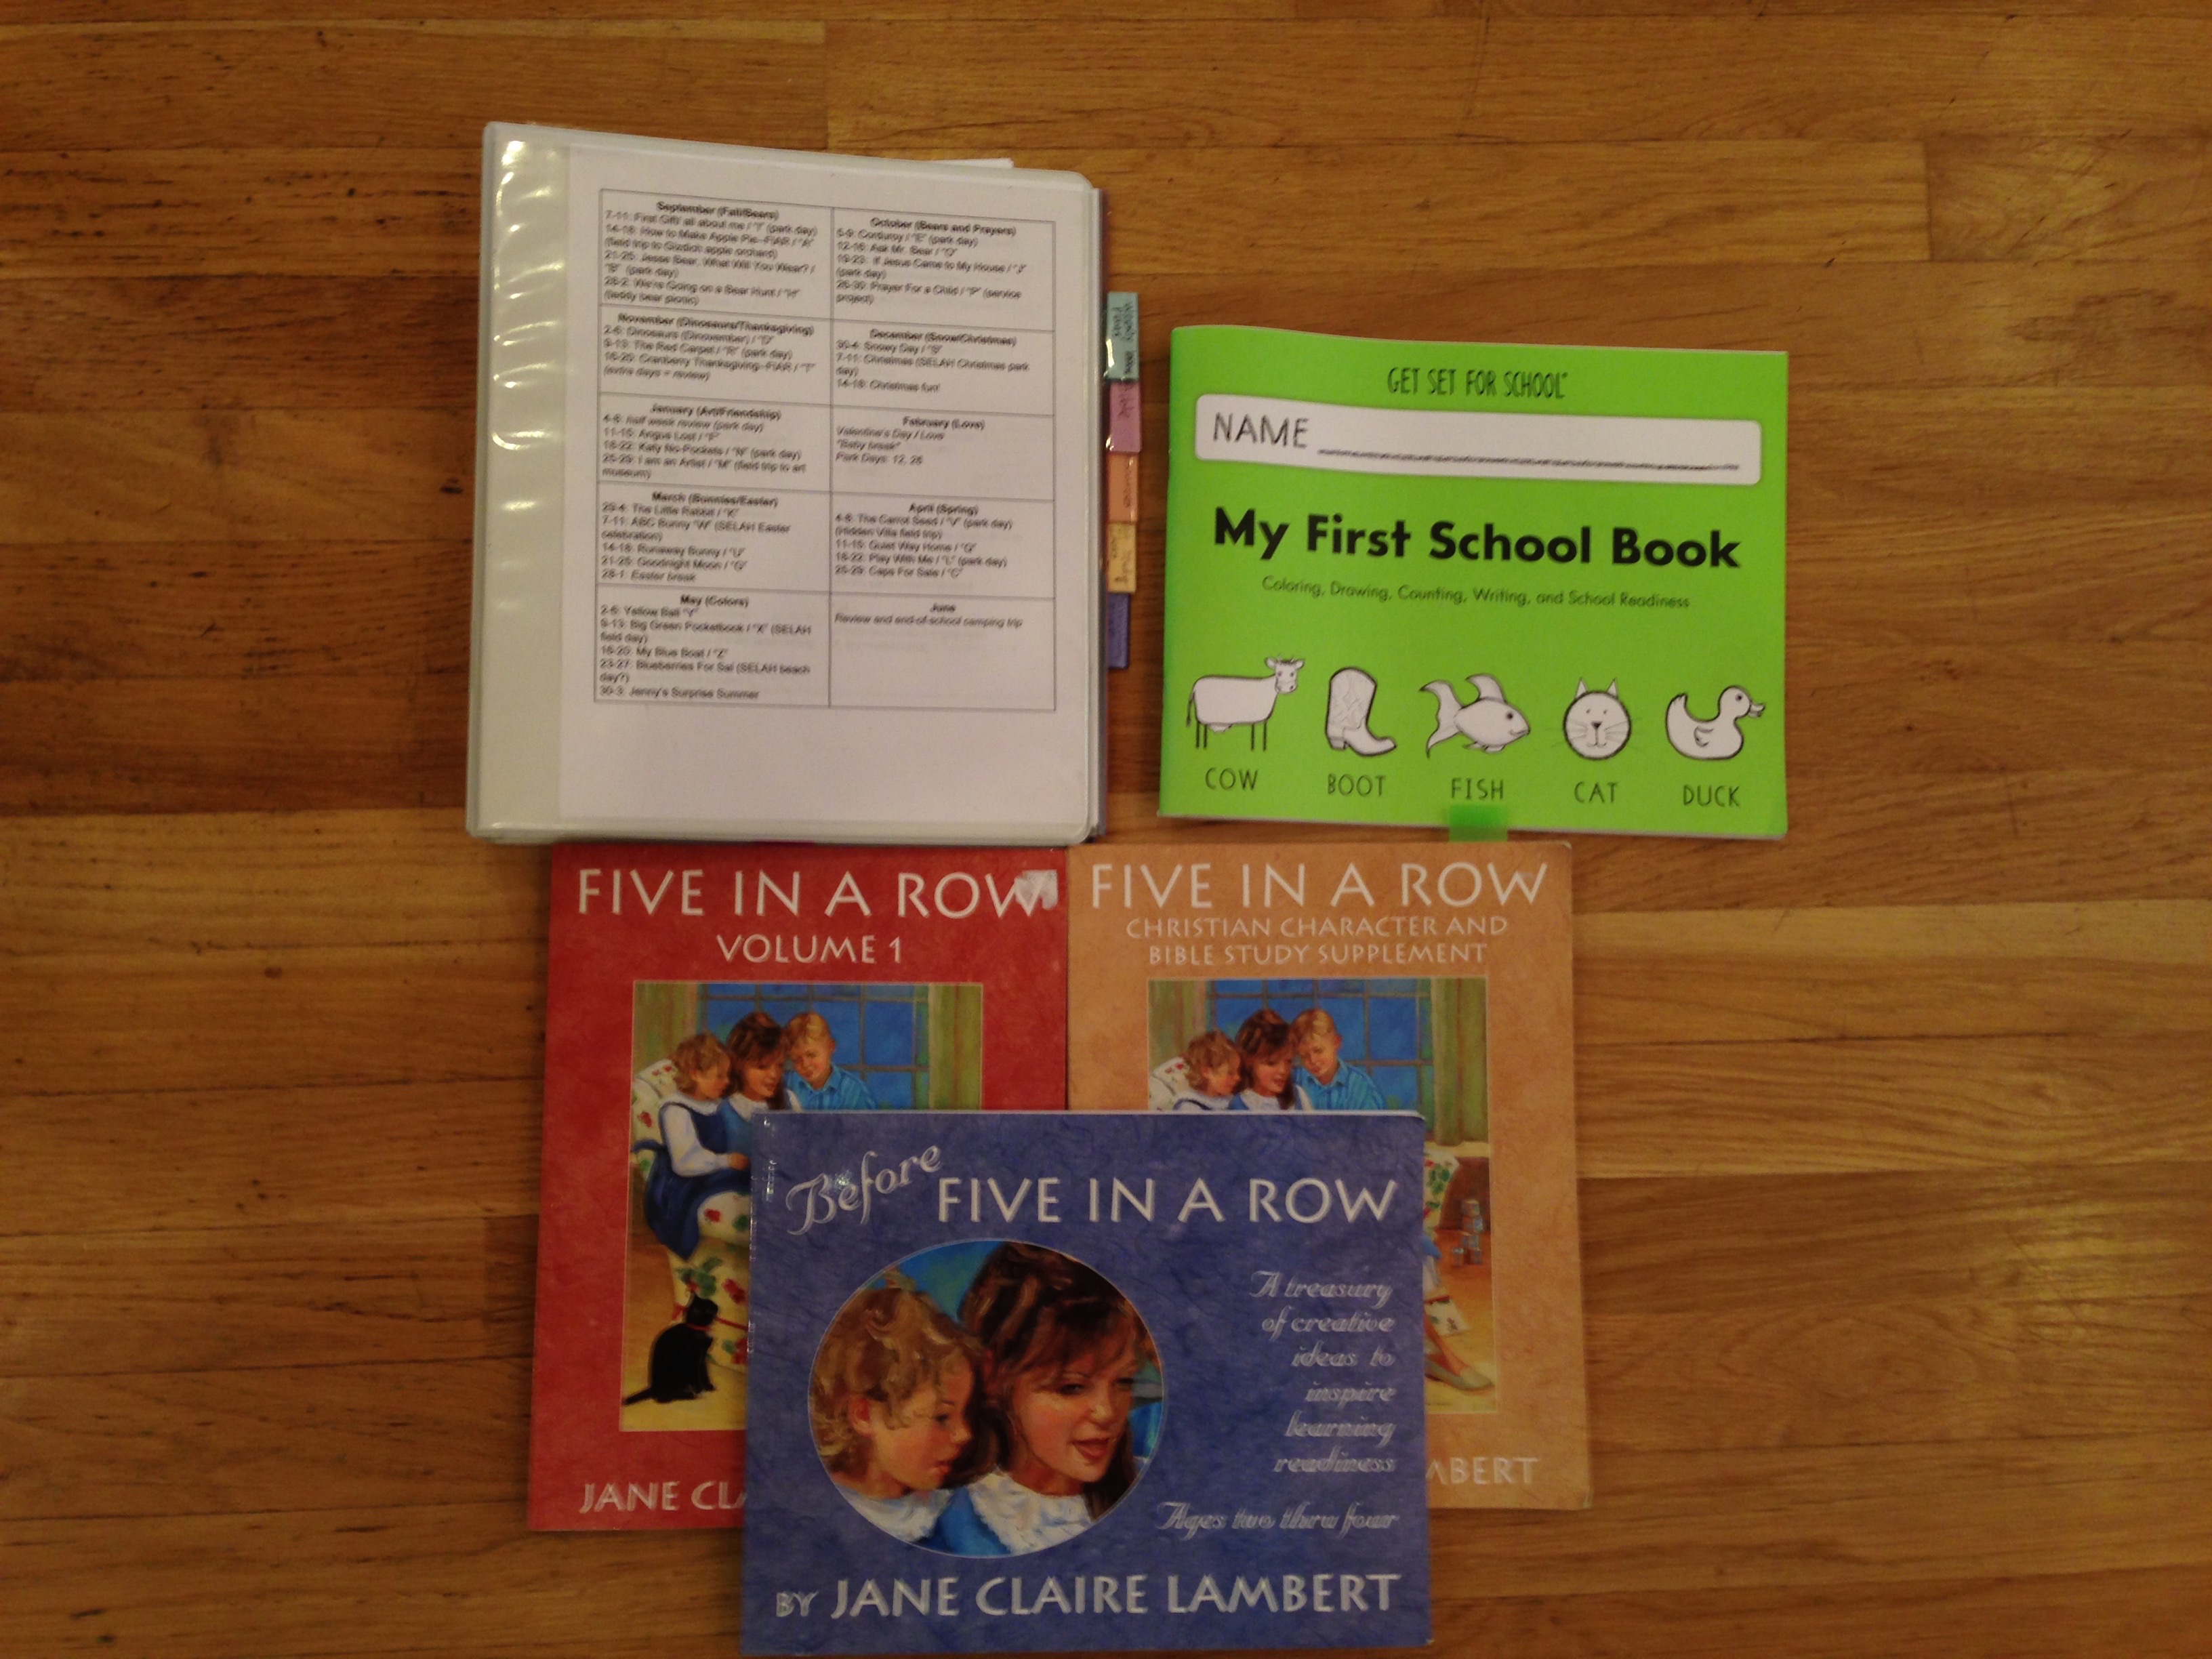
Each of my kids also came home yesterday with a backpack full of physical tools (textbooks, workbooks writing journals, books) to use at home. In addition to these supplies, it will probably be a good idea to have basic school supplies on hand. This is what I’m going to have available in our homeschool space (More on that in the next section!):
-Pencils
-Pencil Sharpener (At the beginning of the school year I bought this fancy sharpener and it’s been a great tool to have at home!)
-Crayons/markers/colored pencils
-White printer paper
-Lined notebook paper
-Headphones (so my kids can work on their computers simultaneously with minimal disruptions to each other).
-Computer microphone (we had to get one for my third grader because his PC doesn’t have a built-in microphone)
-Small dry erase boards with markers and erasers
-Ibuprofen (for Teacher-Mom)

Since we are yet to put any of this into practice, I’m sure this list will evolve over the next couple of weeks. In the meantime, if you want to stock up you can find most of these items in the Dollar store (Or, if you don’t want to even set foot in the world of viral outbreak, just have them delivered from Amazon).
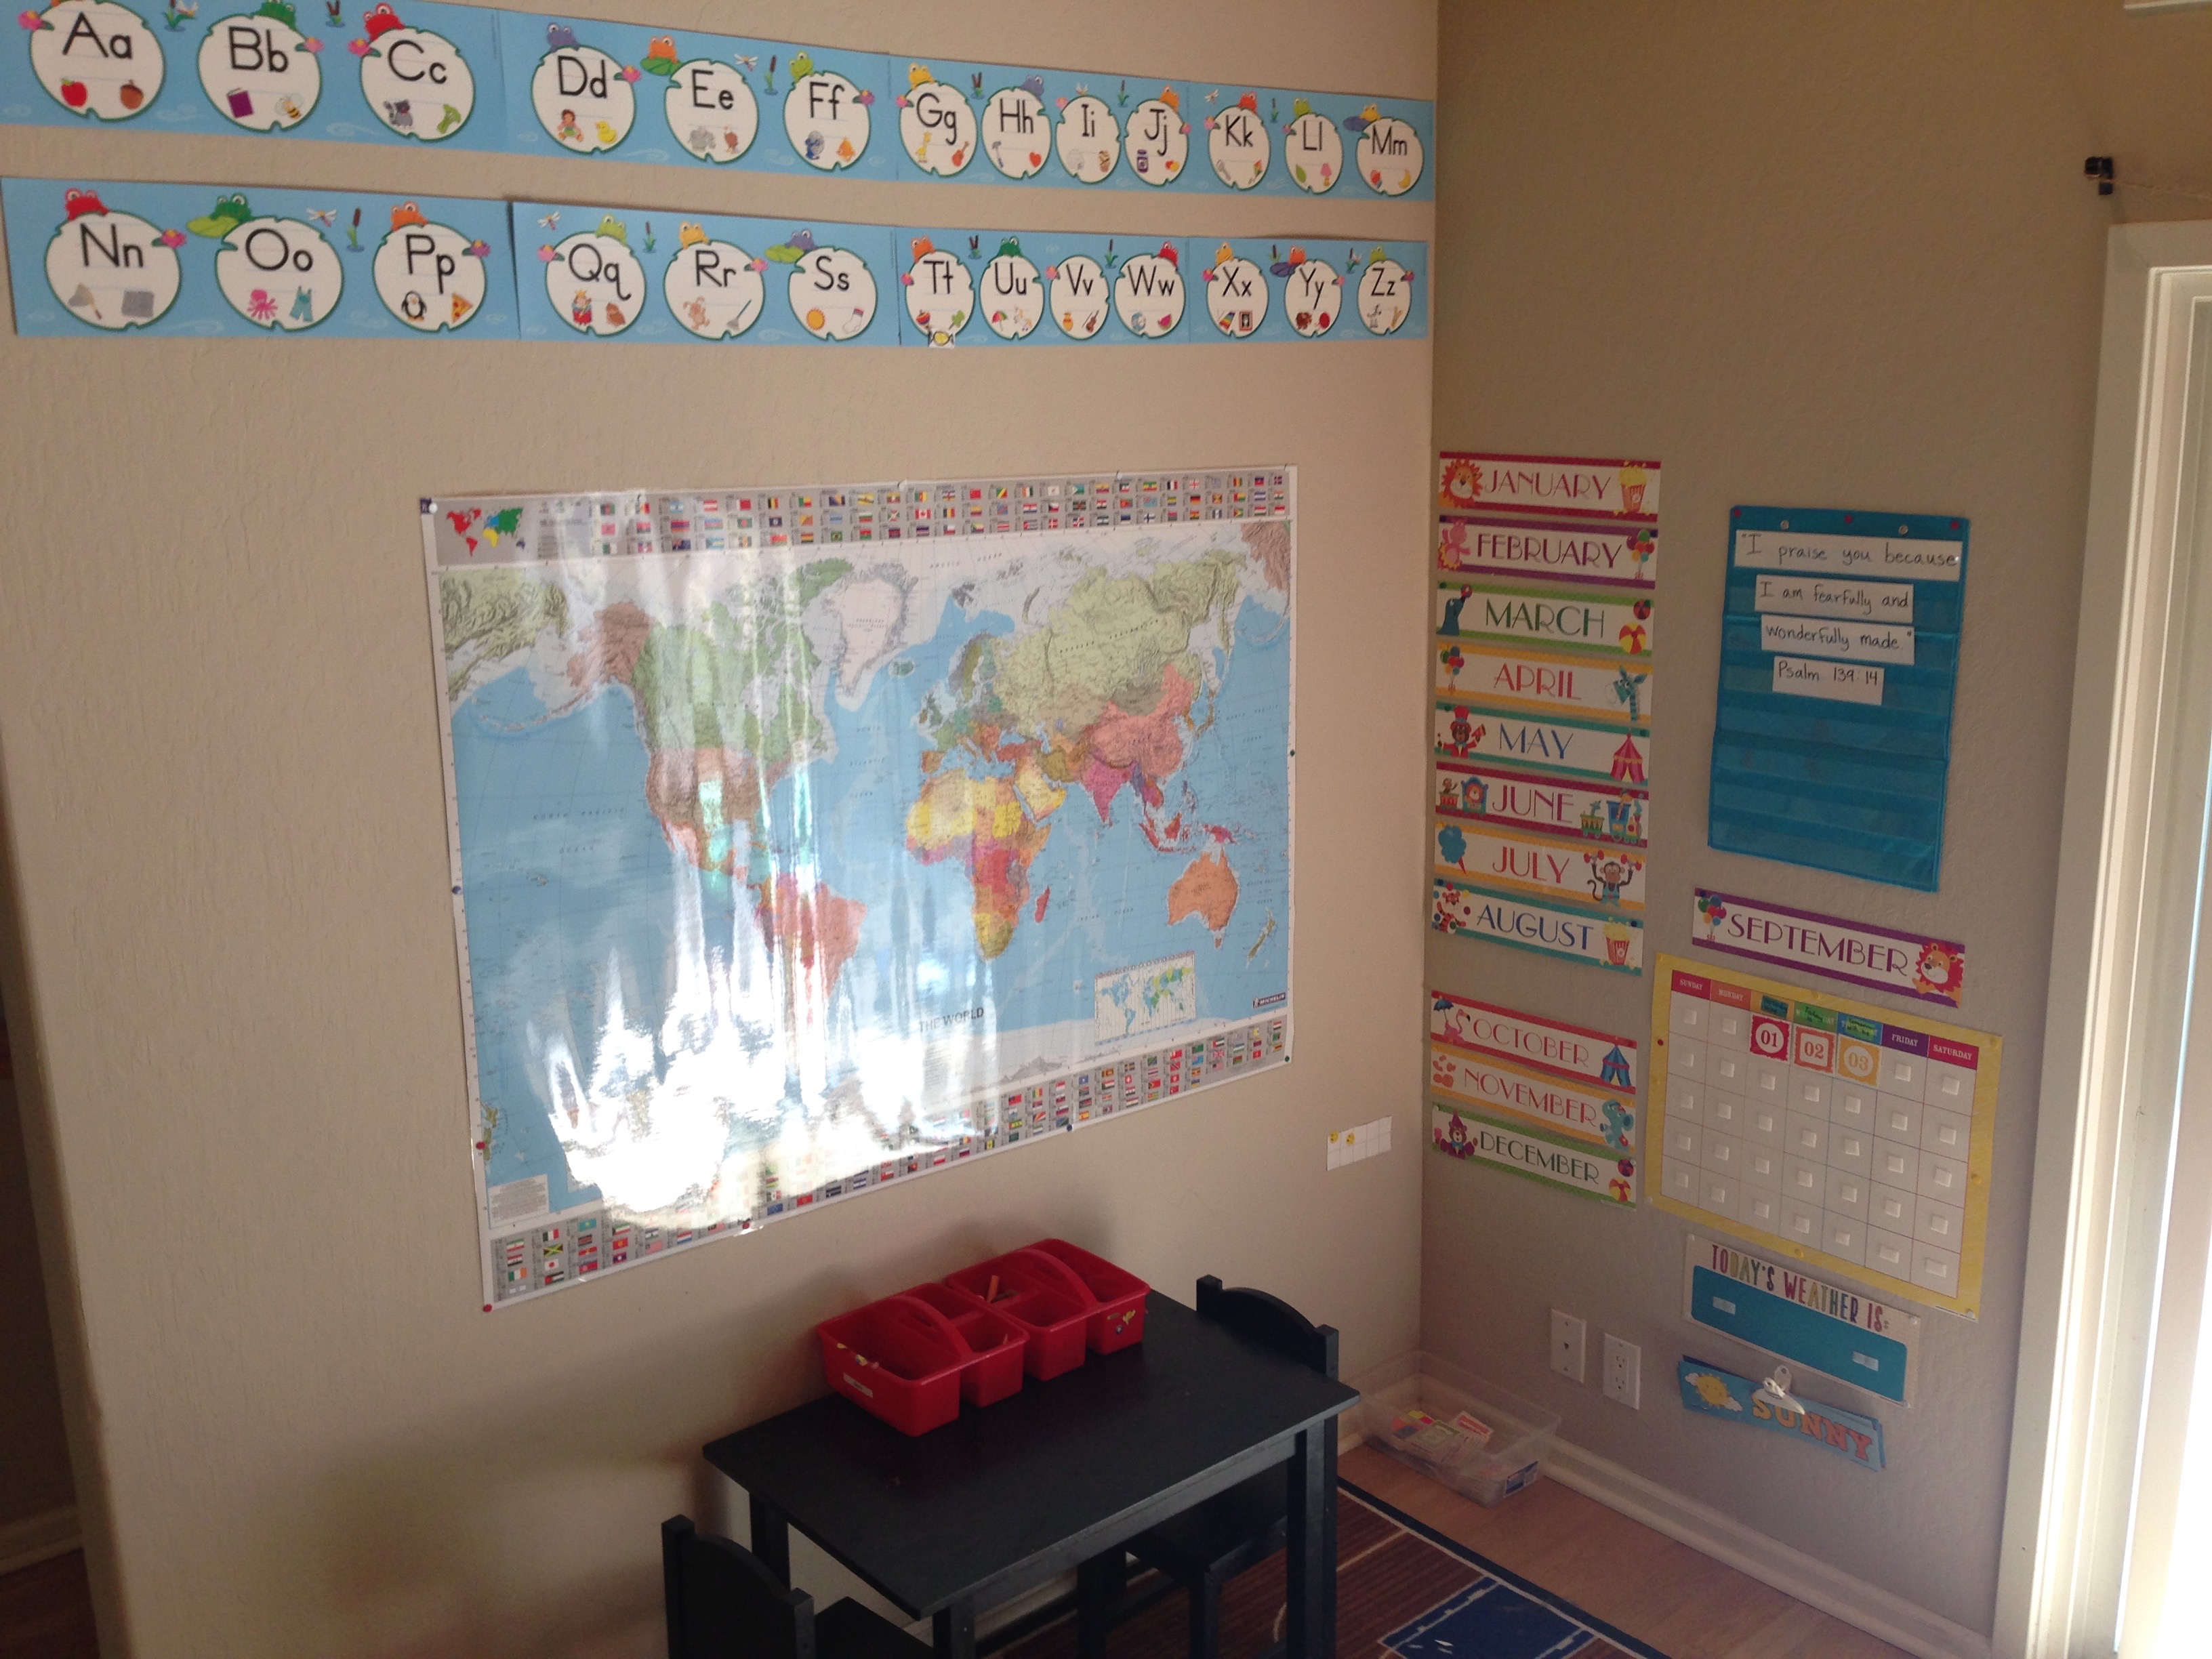
Set up Your Space
It’s important for you (Teacher-Mom or Teacher-Dad) and for the kids to have a dedicated space for school at home. This can be the kitchen table (This is a great choice because it’s central and you can spread out a lot of junk learning tools on it at once) or a home office with tables  set up for the kids. Or, really, just sitting on the floor in a hallway. For the love, do NOT set up school near a TV/XBox/Switch/Pokemon card collection that will be more enticing than the schoolwork that lies ahead!

Schedule Your Day
You need a plan some structure for your day or you will all go crazy and quite possibly end up in a mental institute (Which is probably quite clean and Coronavirus-free, actually, so that might not be a terrible back-up plan).

As you make your “School Day on The Cloud” schedule, think about what will work best for your family, and don’t be afraid to adjust as you go. Set a time in your day when schoolwork will get done–maybe this is first thing in the morning when everyone is fresh, or maybe it’s in the evening after Mom and Dad get home from work. Agree on an amount of work and/or an amount of time that you will dedicate to schoolwork during the first chunk of work time, then take a break (this is when you kick your kids outside for 30 minutes to roll around in the mud puddles). If your kid usually eats snack at school, eat a snack at the same time. Try to have lunch at the same time every day…again, consistency is key. Plan a block of time for independent or shared reading somewhere in there, then schedule a second chunk of work time later in the day (if you can muster it) and call it a day.

A typical homeschool day usually lasts only 2-4 hours, compared to 6.5 in a regular school day. YOU DO NOT NEED TO DO 6 HOURS OF SCHOOL “ON THE CLOUD” (Sorry to my childrens’ teachers who are probably reading this, but I’m just telling it how it is in the real world!). Just do what you need to do, and don’t burn yourselves out.

I’m using a checklist with my kids so they know what needs to be accomplished each day and can move at their own pace. Here is the checklist I’ve made for my kids to follow:
IMG_1111

What About Younger Siblings?
Great question! I have a preschooler who will be joining us on this grand learning adventure, so I will also be curious to see how this aspect all plays out in practice. Some tactics I’ve tried before to help minimize the distraction of a younger sibling with marginal success:
-Having simple activities prepped and available that the younger sibling can work on independently while I assist the older sibling(s). Think: coloring pages, simple puzzles, Play-Doh, building with blocks, Duplos, or an iPad with noise cancelling headphones (#kiddingnotkidding).
-Do “school time” during the younger sibling’s nap time
-Childcare swap with a neighbor or trusted friend so you can take turns playing with younger siblings and helping your school-aged kids complete their schoolwork.
-Hire a teenage babysitter (They’re all out of school right now, too!) to come entertain one or more children while you help your school-aged child.
-(Weather permitting) move school outside–younger siblings can play outside while you sit in the grass or at a picnic table to do schoolwork with your child
-Let your school-aged child work independently while you care for the younger sibling.
-Involve the younger sibling in the learning. Have your school-aged child read to them or teach them a concept they’re learning about (Teaching is the best tool for testing comprehension!).
-Turn on Frozen 2 in another room and walk away.

Use Bribery Liberally
Please don’t judge me, but you’ve gotta do what you’ve gotta do, and bribes work wonders. Maybe the kids earn screen time for finishing assignments. Or a trip to the drive-thru for ice cream after they’ve chosen to read rather than squabble with their siblings for __ minutes. We’re only trying to make it through a few weeks here, so no long-term habits are going to have time to fully grab root–I say bribe away!

Plan Enrichment
School is all well and good, but we all need a break from the rigor every now and then. Consider both academic and non-academic enrichment you can offer your children while they’re at home to help keep everyone’s minds and bodies moving. And since we’re trying to maintain social distancing, here are some ideas you can implement from the comfort of your own home.

Academic Enrichment Ideas:
-Learning games such as Uno, Cribbage, Chess, Scrabble, and Bananarams
-Do a puzzle
-Read! You can even ask Alexa to tell you a story and “she” will comply
-Play academic games on a website like Starfallor ABCMouse (subscription required)
-Write a letter to someone–they would probably love to hear how you’re doing in Ground Zero of the Coronavirus Apocalypse!
Do a science experiment 

Non-Academic Enrichment Ideas:
-Get moving with an app like Go Noodle! or Cosmic Kids Yoga
-Bake (Math, Literacy, and Science all wrapped up in one!)
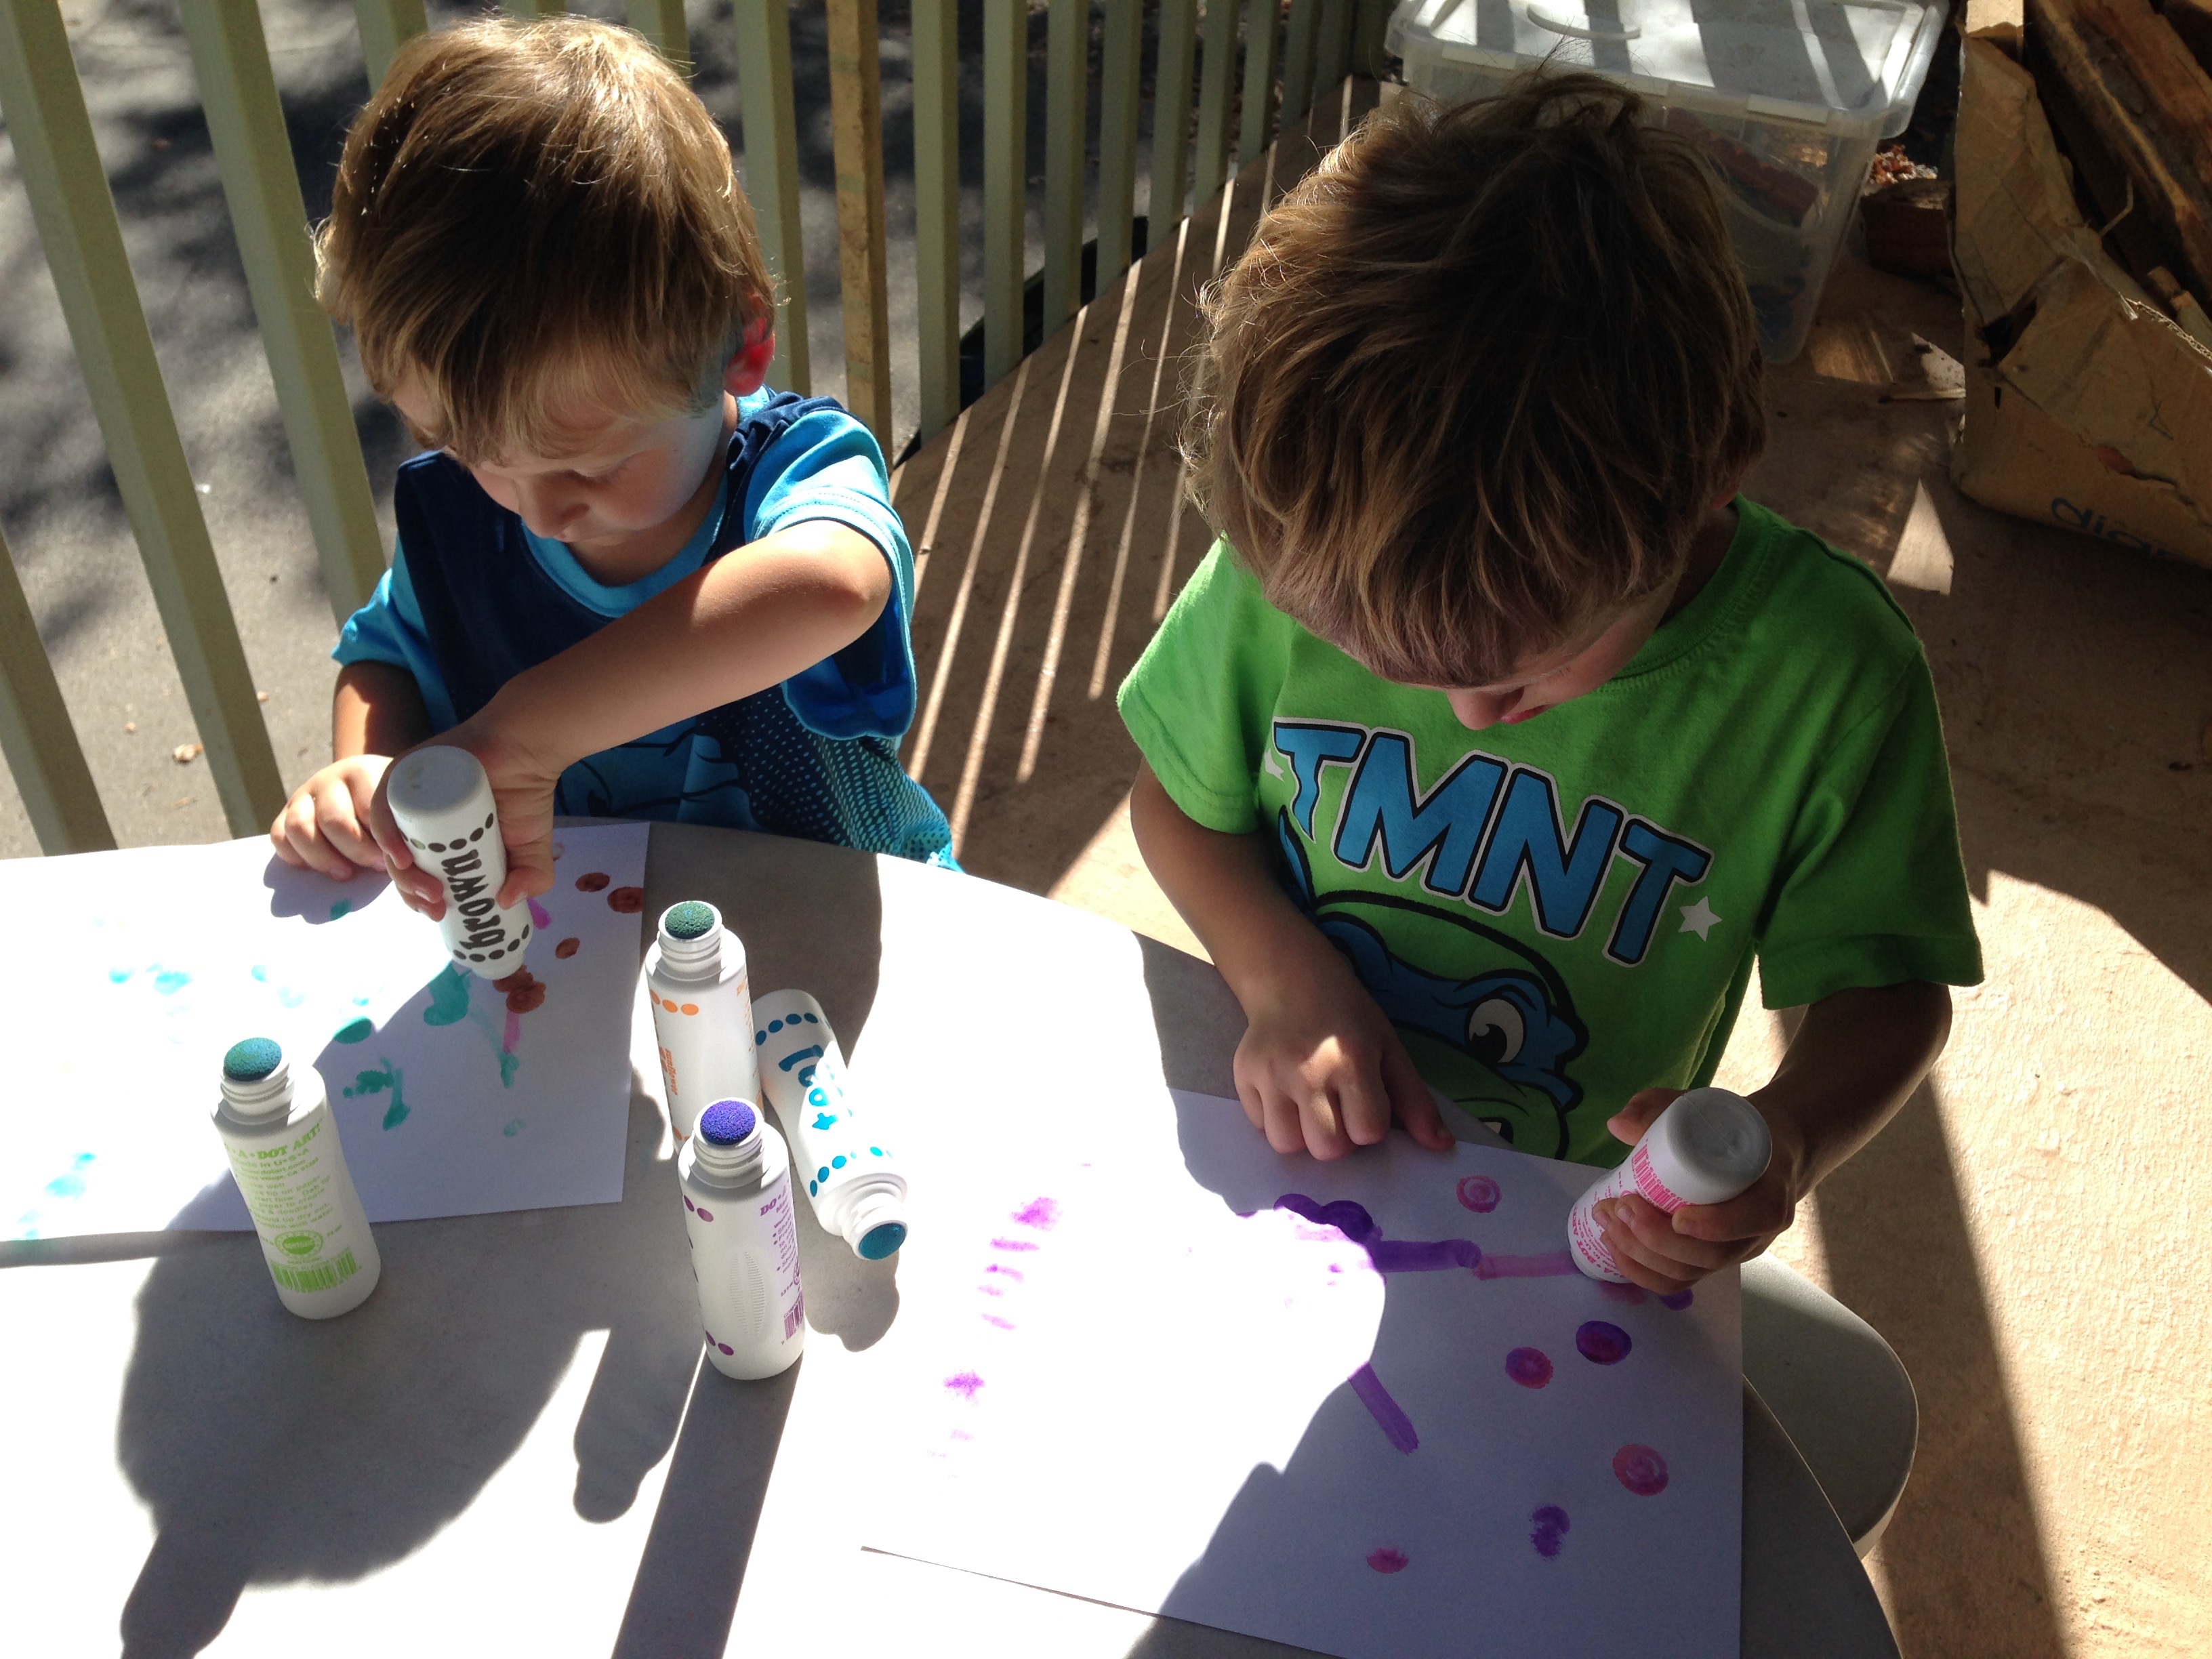
-Arts and crafts (You can literally just pull stuff out of your recycling bin and tell your kids to get creative with it!)
-Make homemade Play-Doh or Slime
-Create a song in Chrome Music Lab

Give Yourself Grace and Space
School-at-home can be stressful. There is a different dynamic when the environment and the people involved in school change, and this is a process that can take a very long time to feel comfortable. Give yourself (And your kids! And the teachers!) grace–this is a big learning curve!

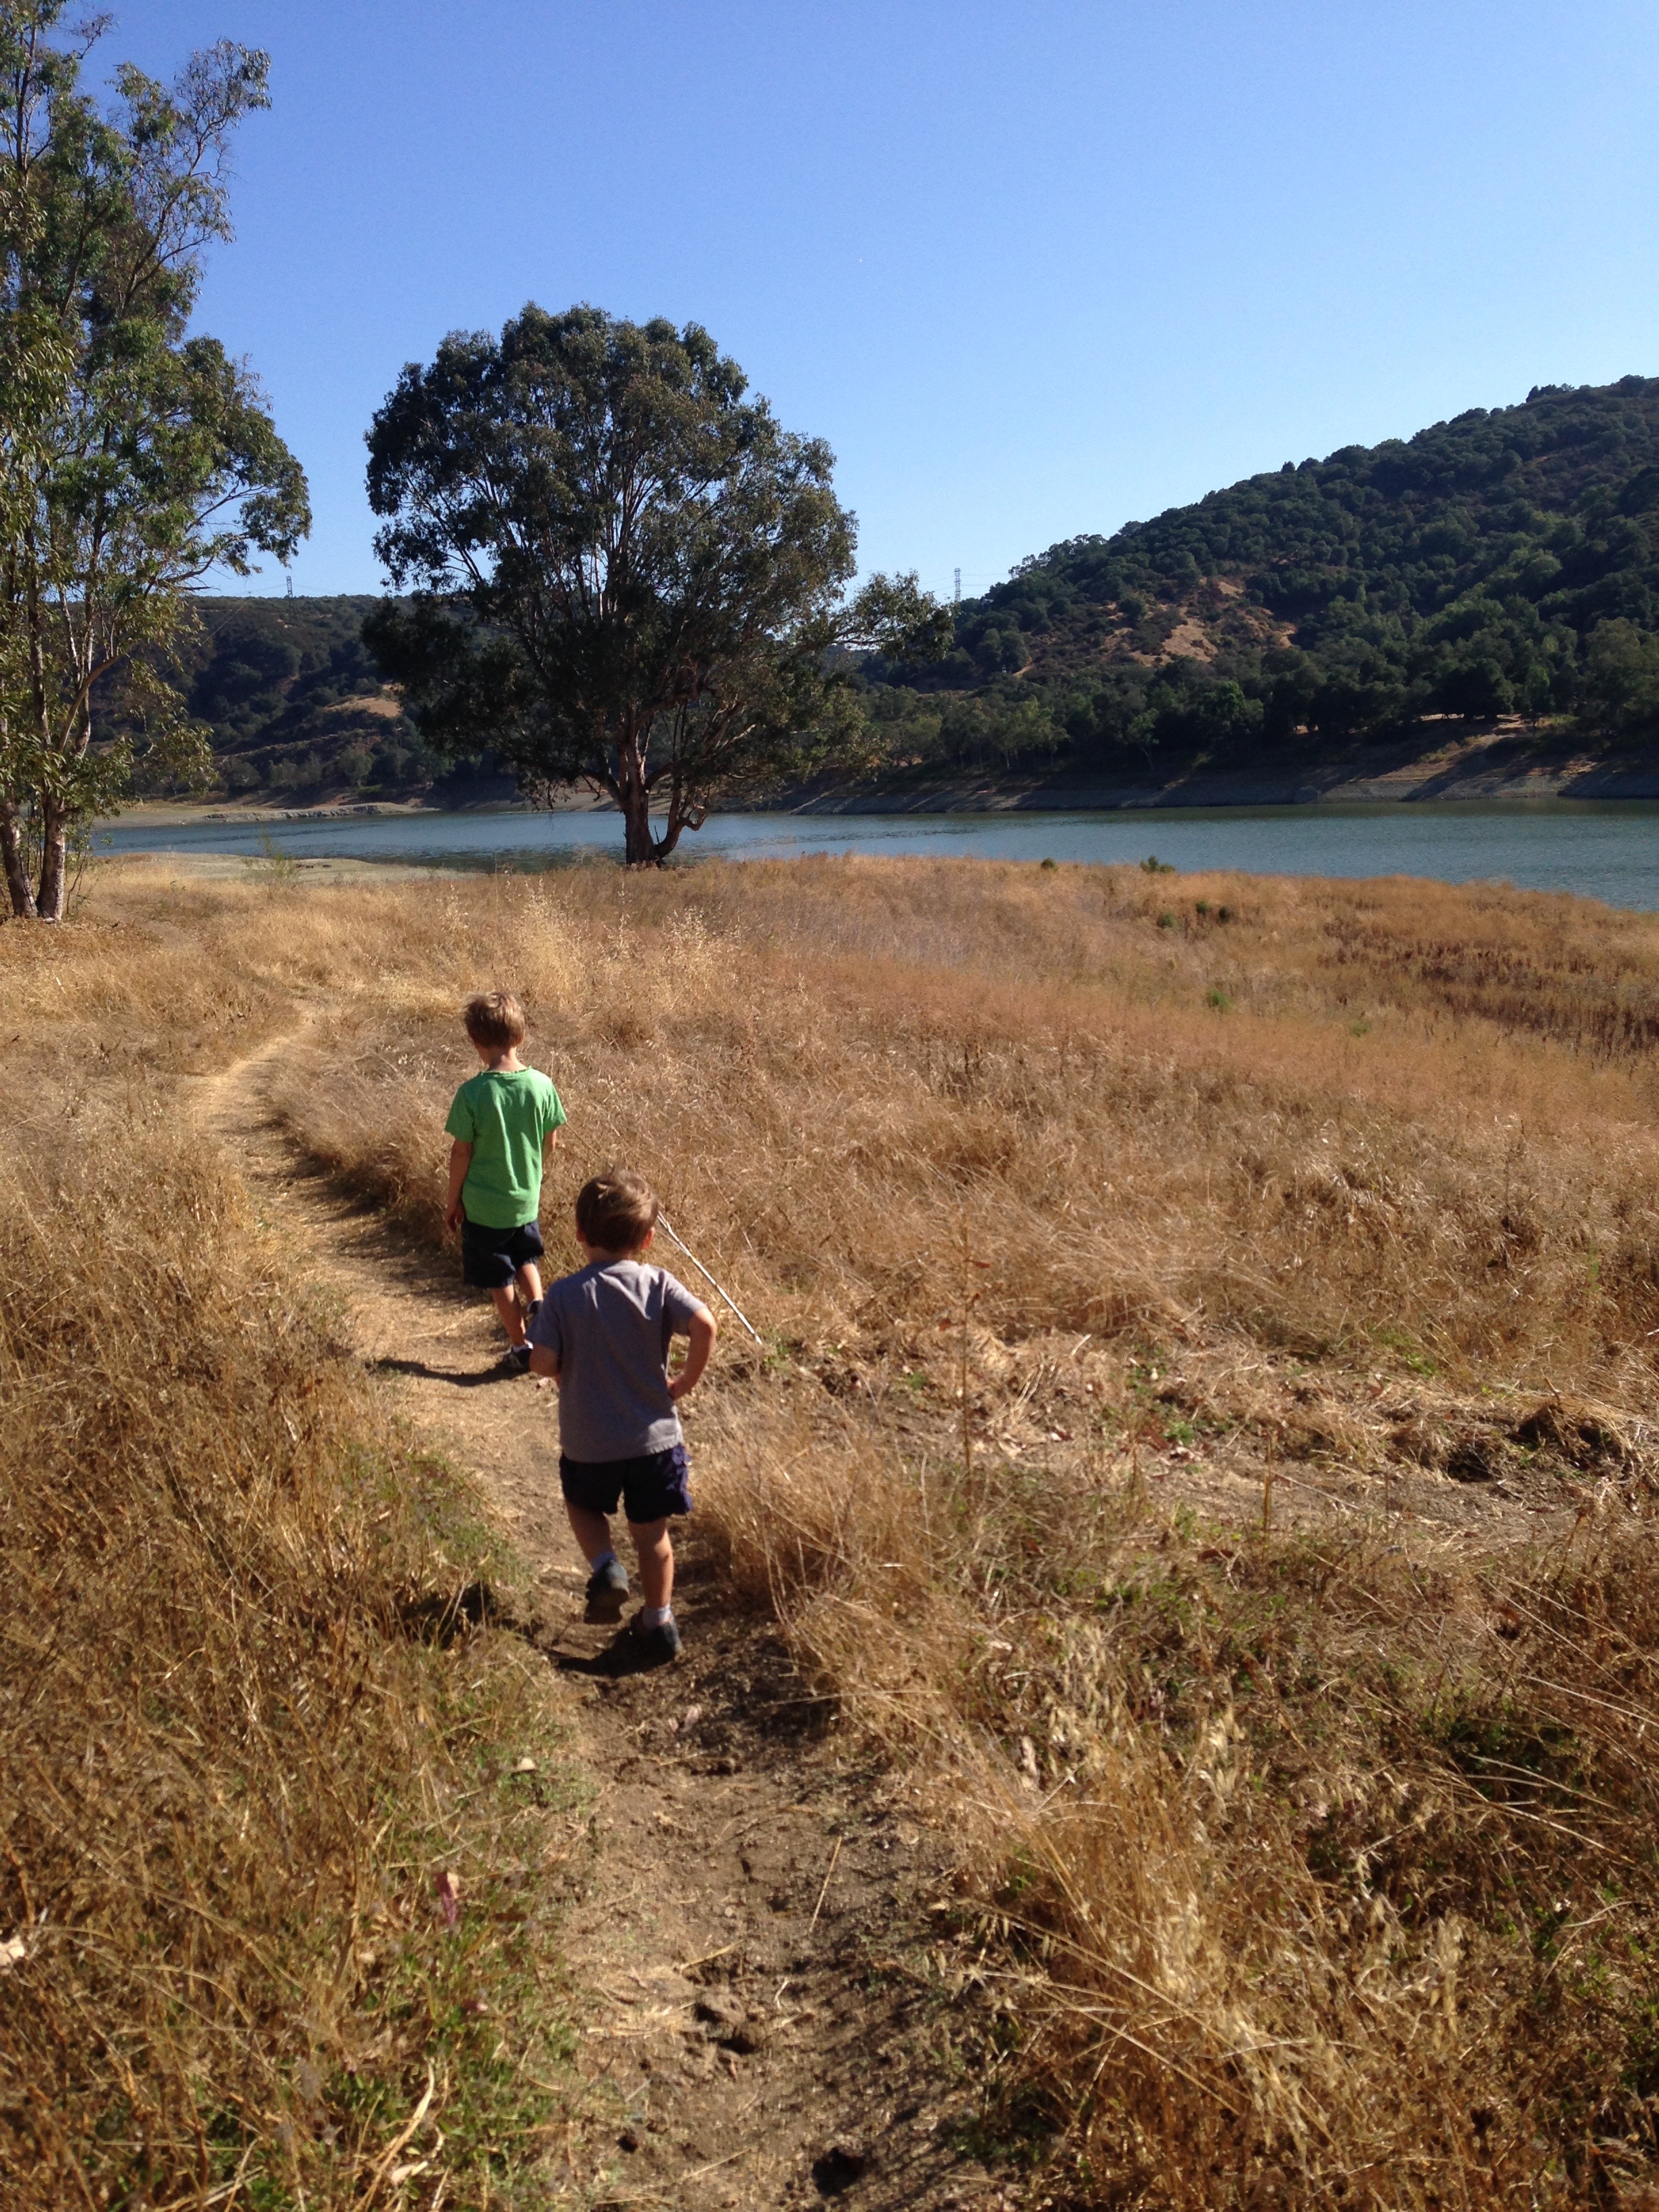
Also, give yourself physical space to decompress. If things in the living room-schoolroom start to get rowdy or out of control or just feel off, take a break.  Maybe this means taking your kids outside for a walk around the neighborhood or banishing everyone to their bedrooms for “silent reading” so you can take a shower and eat the chocolate you have hidden in the laundry room. After everyone catches their breath, come back together and begin again–I promise, you’ll all feel better!

And if all else fails, just remember: This, too, shall pass.

Stay healthy out there, friends!

Ready For (Home)School!

IMG_6045

Can you believe it? Summer is OVER, and hi-ho-hi-ho it’s back to school we go. Back-to-school is always a special time of year, but this year is totally unique for us as it will be our inaugural year of homeschool. The butterflies are stirring.

Even though I’ve formally been out of the classroom for the last five years, I still suffer from Teacher Complex A. I can’t walk by the school supply aisle in a store without stopping to ogle the newest offerings, and I have a strong affinity for paper cutters and laminators. I speak in my Teacher Voice when I mean business–even with other grown adults. I’ve been known to opt out of traditional home décor in favor of colorful die-cut shapes so we can practice our letters and counting skills. You can take the teacher out of the classroom, but you can’t take the teacher out of me.

You can imagine how giddy I’ve been these last couple of weeks, then, as I’ve eagerly set up my own classroom at home (and by classroom, I mean I have completely taken over the entire house). This was no small feat considering we just moved into this house a 12 days ago, but where there’s a will there’s a way, amirght?

We’re officially starting school next Tuesday after Labor Day, although we’ve already started tinkering around with some of the school stuff because the boys saw it and were curious and I’m not about to miss the opportunity to capitalize on their eagerness. Since this will be our first year of homeschool, I know that I’ll be making tweaks and adjustments as the year goes on. For now, though, here is the set up for the 2015-2016 school year at Peterson Learning Academy:

IMG_6117

This year we will be using a curriculum (and I use that term lightly) called Five In A Row (FIAR). After reviewing the first volume of FIAR, however, I decided that Before Five In A Row (BFIAR) would be a better fit for us this year since most of the FIAR lessons are geared toward early readers and writers and we’re just not quite there yet.

Each week we will read a different classic children’s book (think Going On A Bear Hunt and The Runaway Bunny) every day for a full week (five days in a school week = five in a row). The curriculum/guide suggests learning activities across all subject areas that go along with the themes of the story. This is called a unit study approach, and I really like this idea for my multi-age preschool (see how fancy we are here at the Peterson Learning Academy?). FIAR allows me to adapt ideas to meet the interests and needs of both boys while keeping the focus on hands-on activities (I have a strong aversion to worksheets and rote seat work for kids of this age, but we can get more into that later…).

I will also be supplementing a the BFIAR guide a bit as I find necessary. For Bible I plan on using the FIAR Bible Study Supplement, The Jesus Storybook Bible, and Five Minute Devotions for ChildrenFor handwriting practice (for David only) we’ll use the Get Set For School My First School Book by Handwriting Without TearsI made my own planning notebook because that’s just how I’ve always done it and it works and I like it.

As far as the classroom goes, we have several spaces to choose from. I’m sure as the year goes on I will see how each space works best and we’ll move around all day as it suits us. This is our learning corner where we will do calendar/circle time and work on projects at the boys’ small table.
IMG_6112

I also set up some bookshelves and storage on the opposite wall so I can keep books and supplies at the ready.IMG_6113

The drawers next to the bookshelves contain supplies (crayons, markers, scissors, glue, tape) and manipulatives (teacher speak for Stuff We Use…letter and number magnets, big foam dice, ice cube trays for sorting activities, blocks, felt board pieces, puppets, pointers…all kinds of goodies).IMG_6115

The living room just happens to be in the center of our learning space, so we’ll use the couch and fireplace for story time and cuddle breaks.IMG_6121

Our dining room table will be another great workspace since we can clear it off and have plenty of room to lay out projects.IMG_6123

The kitchen will play a big role in our learning adventures this year. I plan on doing at least one cooking project each week that goes along with our story, so I wanted to make sure the kitchen was accessible for the boys. I dedicated several lower drawers to the supplies they’ll be using most often in our cooking: measuring cups and spoons, baking dishes, bowls, and cutting boards.IMG_6126

Perhaps what I’m most excited about, as far as the actual learning space is concerned, is the fact that we will have nearly unlimited access to the Outdoor Classroom (thank you, California sunshine!). One of our decks will host our outdoor learning stations: a sensory table (designed and built by Jon, our resident playtime architect and Principal Daddy), the “Play Doh Table”, and a big tub of plastic toys and Play Doh tools (plus a comfy chair for Teacher Mommy).IMG_6130

Our new house is in an awesome location for outdoor explorations. We live in a mountain canyon with a creek in our back yard–what else could two little boys ask for? We will spend plenty of time out in nature exploring and using our senses as we learn about the world around us.IMG_5921

Right up the street from us is a large lake with trails and beaches. Yet another exciting venue to explore in our outdoor classroom.IMG_5971

Since reading books will be a big part of our year, we will also be spending plenty of time at our local library enjoying books together.IMG_5925

I’ve joined a local homeschool co-op that a fellow homeschooling friend of mine is a part of, and we’ll be having weekly park days and field trips throughout the year. Not only will the park days and field trips be fun for us, but they will also give me and the boys an opportunity to connect with our peers. In addition to the co-op, we’ll also be attending MOPs (Mothers of Preschoolers) or CBS (Community Bible Study) each Wednesday morning, and AWANA on Sunday evenings. We’ll have quite the varied schedule, but I’m sure we’ll never get bored!IMG_3285

I can’t wait to see what this year has in store for us as we embark on this new homeschool adventure together–wish us luck!

IMG_6040

We’re Going To Homeschool?!?!

FullSizeRender (1)

Seeing as yesterday was David’s last day of preschool, I thought it would be fitting to make our big announcement. After much thought, prayer, and deliberation we have decided to take on a new challenge in the Fall: homeschool. That’s right, folks–HOMESCHOOL.  As in, me having my own little classroom of two darling pupils located halfway between our kitchen and the boys’ bedroom. Every day. All year. By myself.

This is a relatively recent decision for us, and we’re still piecing together what “homeschool” will look like for our family. As I’ve started to share our news with people, however, I  have discovered that our somewhat unconventional decision has the potential to spark a lot of debate/dismay/panic. So, in order to answer some of your burning questions, I thought I’d put together a little Q and A session for us:

Q) Are you crazy?!
A) Yes, but I think we established that fact long before the topic of homeschooling came up.

Q) I could never homeschool my kids. They’d drive me nuts.
A) That’s not really a question but yes you could, and yes they would.

I believe that homeschooling is a calling–it is not something that you simply fall into or decide on a whim. One lesson I have learned (repeatedly) is that God equips the called, not that He calls the equipped. To be quite honest, I don’t have a clue how I’m going to do this. I do know, however, that God has called our family to take this on for this “season”, and I trust that He will lead us every step of the way.

I’m fairly certain my kids will still drive me nuts, though.

Q) Have you always wanted to homeschool?
A) I’m going to answer this one with an emphatic NO. No no no nooooo no. Because I used to be a teacher, a lot of people assume that I’ve always wanted to teach my own children–not the case. Not at all. My response to the “Would you ever homeschool…” question has always been, “Only if it’s the only best choice for my kids.” I know that homeschool is night-and-day-different from traditional school, and I never really thought I was cut out for the job. Plus, I REALLY like my free time (which just so happens to only occur during the hours my children are away at school).

Which leads me to the next question:

Q) Why on earth would you decide to homeschool?
A) The short answer is: because it’s the best choice for our kids and our family right now.

The long answer is…well, longer. I could write a whole post on this one question, but I’ll try to summarize some of our thoughts here. The main factors that went into our decision include: the privilege of building our childrens’ character and teaching from a Biblical worldview; the ability to address the specific learning needs and learning styles of our children (our boys are c-r-a-z-y); flexibility in the daily schedule to allow more “wiggle time” and play time (which research shows is more beneficial than strictly academic instruction for young children); more time for pursuing outside interests and extra-curricular activities; proximity to home (as in, roll out of bed and you’re already at school); the absolute absence of the term “high-stakes testing” (and for those homeschooled students who choose to participate in state-mandated testing, consistently scoring 30% above their “typically schooled” peers);  allowing our children to get enough sleep, at the times that naturally work for them; having more time together as a family mid-week (like, we can actually be awake during some of the hours when Daddy is home); and financial considerations (one local private school that I visited had an annual tuition of $24,000. For KINDERGARTEN. For the love…).

Plus, I genuinely enjoy teaching and being home with my children (they’re actually really cool people), so it’s kind of a perfect fit.

That, and I also think I enjoy torturing myself a bit.

Q) Are you trying to shelter your kids from the world?
A) Yes, and no. The world shelter is defined as “a place giving temporary protection”. There are several matters in The World to which I would like to offer temporary protection to my children while I build a strong foundation for them so they will be able to weather storms on their own. I am not naïve enough to assume that I will shield my children from every potential Bad Thing that is out there, but I’m happy that I will have more time in these early ears to equip them for the challenges that lay ahead.

Q) What will you DO all day?
A) Here’s the thing: I can’t STOP my kids from learning. All day, every day, they are learning. When my boys work together to build the world’s tallest Lego tower, they are learning. When we go to a new park and spend 3 hours exploring nature trails observing the flight pattern of a butterfly or which objects sink or float when they throw them in a creek, they are learning. When we bake cookies and they measure and count each ingredient, they are learning. For children, the world is a classroom.

While my children are little, I want them to…well…stay little. To explore. To play. To be bored for awhile and sort their own selves out. To sit in a cozy lap and read books all afternoon. Next year we will do a lot of that: exploring, playing, reading, learning as their interests lead us (plus some hardcore academics thrown in for good measure).

If this homeschooling thing sits well with us, there are hundreds (if not thousands) of curriculum options available to us. We can use “official” curriculum provided by our local public school district, formal curriculum packages available for purchase, an assortment of unit studies pieced together from Pinterest/library books/my brain, or anything in between.

All I know is we’ll be doing it all (or most of it all) in our pajamas.

Q) Going against the stream, are you?
A) I guess so. Strange as homeschooling may sound, though, it’s not that strange. A growing number of my friends already homeschool–so it doesn’t seem that unusual to me. In fact, with nearly 2 million families choosing homeschool for their children this year, homeschooling is the single fastest growing form of schooling in the United States. 90% of Americans still choose traditional schooling for their children…but 10% (and growing each year) are choosing homeschool. I dunno…a part of me has always kind of enjoyed the challenge of an upstream battle.

Q) How long are you going to homeschool?
A) As long as it’s the best choice for our kids and our family.

We’re going to use next year as a trial year to work out the kinks and see how we like it. David will be in Pre-K next year and Jacob will be entering preschool, so we still have plenty of time to decide if this will be a good long-term choice. We’re just going to take each year as it comes, and go from there.

If I’m comatose or neurotic by this time next year, we may have to call it quits.

Q) So, are you against “normal schools” now?
A) Absolutely not! Jon and I both went to public schools (whoop!), and I’ve taught in both private schools and public charter schools. Each school setting has different strengths and challenges, as does each individual school. We plan on transitioning the boys to a traditional school some day–whether that’s in a year or two or ten, I don’t yet know. I love schools and I’m excited to try out one more type of school for myself.

Q) Won’t your kids become socially awkward now that they’re being homeschooled?
A) You’re wondering if Boy 1 who believes his toys are actually alive and Boy 2 who has full-blown conversations with my hair might possibly become socially awkward? Not a chance. There are actually plenty of opportunities for homeschool kids to interact with their peers: homeschool co-ops and support groups, church groups, sports, extra-curricular clubs or lessons, and playing with friends in the neighborhood. My boys will also have plenty of time to interact with their favorite life-long friend: their own brother/new-schoolmate.

Q) Now that you’re homeschooling, are you get an ugly haircut and frumpy clothes and move off the grid?
A) Now that you mention it, that doesn’t sound half-bad. I actually don’t even know what my hair looks like any more because I only ever wear it pulled back in a “messy bun”, my clothes are already about as frumpy as yoga pants and t-shirts can get, and I’m kind of over this whole overcrowded-too-much-traffic-people-everywhere thing. As long as we have internet access so I can binge watch Netflix after the boys go to bed, “off the grid” could work out just fine for us.

And so the ending to this school-choice saga is the same as the ending to any good story: unexpected, yet inevitable. It’s been a huge decision–but now that our choice has (finally) been made, we are excited and confident that it’s the right one!

I hope that this Q&A session has been helpful for you and that I’ve answered all of your questions. If you have any additional concerns, feel free to keep them to yourself for awhile so I don’t have a nervous breakdown before this whole homeschooling thang goes down.

Wish me luck!

How We Do Allowance: The 4-Year Old Version

IMG_2238

Money: we all need it, we all want it. But when is the right time to introduce kids to money? I think the answer to that question varies from family to family and kid to kid but, generally speaking, early is best. From a very young age kids can understand wants and needs, and money is the mechanism by which we acquire our wants and needs.

A few months ago it became quite clear to us that David was ready to start learning about money and the responsibility that comes with it. For Christmas this year, David had created a wish list of all the toys and games and books and doo-dads that he wanted. Well, Christmas came and went, but the wish list kept growing. Every day–nay, every minute of every day–he was begging us to add more items to his “wish list”. The want, want, wants were getting out of control. We knew that it was time for an intervention, and the Allowance Jars were born.

Since he is only 4 years old, we wanted David’s allowance to be pretty simple. We had three main goals with his allowance: to start teaching him the value of money, to encourage him to save some of his “income”, and to be generous with his “assets”. As a result, we decided to set up three jars, one for each goal: spend, save, and serve.

To make the jars, I just cut slits in the tops of three mason jars. Then I printed off the labels spend, save, and serve, and I glued one label to the front of each jar. Each week we give David three quarters, one quarter for each jar, as his allowance. He puts the money into the jars himself so that he is learning the responsibility of tracking where his money goes.

IMG_2237

He is allowed to use the money in the spend jar whenever he chooses (usually a gumball from a vending machine or a trinket from the dollar store). This money never lasts long, but that’s fine! He’s learning what he can buy with his money and, as an added bonus, it’s cut down a lot on the gimme’s when we’re in a store (I just remind him that he can use his own money to buy that bright blue lollipop in the checkout line). I’ve also taken David on a couple of special outings with me specifically so he can go shopping with his money–he feels so grown up when he places his goody up on the check stand and pays for it all by himself!

IMG_2290

With the save jar, he is working toward a spending goal. We came up with a goal together of something more expensive that he really wanted (a Zurg action figure). We researched the cost of his goal purchase then printed off a picture of the toy to put on the jar as a visual reminder of what he is saving up for. He still has a long way to go, but I’m sure with grandparents visiting soon he’ll reach his goal in no time at all 😉

IMG_2344

The serve jar is my favorite. Right now we have him bring the contents of that jar with us to church each week so he can put his money in the offering basket. As we’re packing up his coin to bring to church he always exclaims, “That’s the money I get to give to Jesus! That’s God’s money!”. As David gets older we’ll probably work with him to come up with more ways to use his “serve” money to be generous and help others, but for now he’s grasping a simple and wonderful truth.

So, there you have it! Easy-peasy allowance that even a 4-year old (and their parents) can handle.

X

The True Story of St. Patrick’s Day

Tomorrow we’ll celebrate one of my new favorite holidays: St. Patrick’s Day–and it’s not because I have a strong affection for leprechauns and green beer. As with most holidays today, St. Patrick’s Day has become a commercialized celebration of silly nonsense. And I get it–it’s fun. I love fun just as much as the next person–and there is certainly a place for fun in all of our holidays–but what gets to me is that up until very recently I didn’t even know the “true” story of St. Patrick’s Day. In fact, I didn’t even know there was a true story.

In fact, the true story of St. Patrick’s Day is one of deep historical–and spiritual–significance. Far more than celebrating pots of gold and wearing green, St. Patrick’s Day is a vivid illustration of God’s power and redemption. For me personally, the day is also a reminder of the singularly beautiful place that I got to call home for a short time: Ireland. The Emerald Isle will always hold a special place in my heart, and I want people to know her story.

This week I’ll be going to David’s preschool to share my rousing rendition of The True Story of St. Patrick’s Day. It will go something like this:

IMG_7450


Last year our family lived in a country far away from here called Ireland. When we were living in Ireland, we learned a lot about the country and the people who live there.


IMG_2495


You know how in fairytales there are princes and princesses and castles? Well, in Ireland there are real castles! The castles in Ireland were built a long, long time ago. We got to visit many castles in Ireland to learn about the stories of the people who built them and lived in them. Although plenty of castles are still standing today, people don’t live in them any more.


IMG_4801


Not everybody in Ireland lived in castles. A long time ago, people built other kinds of houses to live in. This is called a beehive hut. It is made from small stones stacked on top of each other to make a kind-of rock igloo. Grass has grown on top to make a roof. Does this look like the house you live in?


IMG_4768Quite a bit later, people in Ireland built another kind of house. These houses looked more like the houses that we live in today, but most of them were still built entirely out of stone. The people who lived in this village all left during a time when many people in Ireland were very poor and sick. In just a few years’ time, the entire village became deserted. Many of the people who left this village boarded ships that were going to America. They hoped to find a better life in America. Today in America, there are many people whose families came from Ireland long ago.

IMG_2822This is called the Dromberg Stone Circle, and it is a very, very old statue. There are several stone circles like this in Ireland. Nobody today knows exactly why people long ago built the stone circles, but they think it had something to do with the gods they worshiped. Throughout history, people in Ireland have worshiped different things. For a long time, though, people did not worship the one true living God.

images


Over 1,000 years ago, in about the year 400, a man helped to tell the people in Ireland about the one true God. He was not the first or only person to be a missionary in Ireland, but God used his words and his work to change many peoples’ lives. Today, we know this man as St. Patrick.


ef4248406036f7cc716b9bb135f6424a


Before St. Patrick was called St. Patrick, he was a boy with another name. He was born in a country called Scotland that is just north of Ireland. When he was 16 years old, he was captured and sent on a ship to Ireland as a slave. The young boy was scared and alone.


Sunny Sheep Pastures near Kingston

Once he arrived in Ireland, the boy was given a new name: Patrick. He worked each day as a shepherd, taking care of his master’s sheep. Patrick would be alone outside all day, every day taking care of the sheep. While he was alone, he came to know the one true living God. He started praying to God, and asked God to protect him.

Irish_clover

God answered Patrick’s prayers and, a few years later, Patrick escaped to safety. He left Ireland and didn’t think he would ever return. But God had a different plan. God changed Patrick’s heart to love the people in Ireland, and Patrick knew that he had to return to tell the people there about the one true living God. When Patrick returned to Ireland as a grown man, he spent the rest of his life teaching the Irish people about God. He used shamrocks, a plant that grows everywhere in Ireland, to teach people about the trinity. He would point out that each of the three heart-shaped leaves is unique, but part of one unit. In the same way, God the Father, God the Son, and God the Holy Spirit work together as one.

IMG_2968


Patrick would also point to the rainbows in the sky–and there are many of them in Ireland!–and tell people the story of the flood and God’s promise to protect His people.


IMG_4683


Partly because of Patrick’s work teaching about God, many people in Ireland came to know the one true God. Today, there are many churches in Ireland where people can go to worship God.


IMG_2614


Because of his work in Ireland, Patrick became known as St. Patrick. Today, we even have a special holiday named after him: St. Patrick’s Day. On St. Patrick’s Day we dress in green to remind us of the green hills in Ireland where Patrick used to live and teach.


IMG_2637


Today we celebrate St. Patrick’s Day with fun activities like games and parades. Now when you see green and shamrocks you’ll know the reason why we celebrate this special day!


As I was putting together my little preschool presentation, I was struck by how significant St. Patrick is. Yes, Patrick was just a person, but God used him mightily. In his day, Ireland was widely considered to be the most heathen corner of the planet–and, yet, God broke through. Using the voice of an obedient man, God spoke Truth to a people who so desperately needed it. More significantly, however, there are many ways that Patrick actually points to the work and life of Jesus.

Patrick was a slave to his master. We are all enslaved to sin, yet Jesus came to conquer sin once and for all.

Patrick was given a new name and identity upon his arrival in Ireland. God gives His sons and daughters a new identity in Christ Jesus.

Patrick was a shepherd. Jesus was the lamb of God.

Patrick was obedient to God’s call on his life to rescue the lost. Jesus was obedient to His Father to the point of death on the cross and resurrection.

Patrick has been immortalized as a “saint” who we celebrate once a year. Jesus is a Saint who we worship every moment of every day, for now and forever.

So now when you’re eating corned beef and cabbage or setting leprechaun traps with your kids, you’ll know that there’s something more to the revelry. We can all celebrate because God is, and always has been, GOOD!


DIY Paper Heart Animal Valentines

FullSizeRenderIf you’ve been following my posts lately, then you know I was SO over January. When February 1 rolled around last weekend, I seized the opportunity to start something new. I “took down January” (recycled all of the paper snowflakes we had hanging around the house) and decided it was time to “put up February” (cover my house in hearts). Plus, since Jon was off for the day starring in his first major Hollywood blockbuster (OK, he was just an extra in a new Steve Jobs movie, but I’m sure he rocked it!) I took advantage of the quiet morning at home with the kids to do a little Valentine project.

We had gone to the library earlier in the week and checked out this cute little book, My Heart Is Like a Zoo:

41HglsWdxEL._SY344_BO1,204,203,200_

It’s a rhyming book with timely similes about the many ways our heart can love. What makes the book really unique, though are the illustrations–every picture is an animal constructed entirely of hearts. There are silly seals and a rugged moose:

Hall-3

Eager beavers and a steady yak:Hall-2

And even happy hippos sipping their juice:

Hall-4Each page features a different heart animal, and my boys couldn’t get enough of them. After reading the book for about the 5,000th time that week, David suggested that we make some heart animals of our own. And, since I’m never one to shy away from a cheesy craft, I obliged. We (and by we, I mean I) set to work making our little love zoo.

Here’s a brief how-to if you want to join in the heart-animal fun:

What you need
~Paper–any paper will work, but I used a combination of construction paper and scrapbook paper. If you want more sturdy animals, use colored cardstock.
~Scissors
~Glue–glue sticks work best for this project
~Black marker
~(if you’re the perfectionist-type) Heart-shaped stencils, paper punches or die cuts

What you do
~Decide what animal you want to make. After making about a dozen of these critters, I’m convinced that you can make any animal imaginable out of hearts. If you need some inspiration, see my creations below or search Google or Pinterest for “paper heart animals” and you’ll find more animals than were on Noah’s Ark.

For instance, did you know that you could make a penguin, a blue jay, or a bear out of hearts?
IMG_1859Or a beaver and a fox?IMG_1858 What about a caterpillar and a butterfly?IMG_1857You see, the possibilities are endless…
~Next, choose what papers you want to use for each part of the animal, and just go to town cutting out hearts! I did the good ‘ol fold-your-paper-in-half freehand method for my hearts, but you could certainly use some other more-precise technique if you have the patience for that sort of thing. Cut out hearts in many sizes and colors to use for the different parts of your animal.
~Start puzzling together your animal. Cut hearts in half to make oval shapes, turn the hearts in different directions, or cut the points off the bottom of the hearts to make triangles–it’s amazing the different shapes you can form from simple hearts! If there’s a part of your animal that doesn’t lend itself to a heart-shape, I also give you permission to just cut out whatever random shape of paper you need. You’re welcome.
~After you’ve laid out your design, glue it all together. Use a black marker to add details like a nose, mouth, or whiskers.

And that’s it! Each animal only took me a few minutes to make, so I had a whole Valentine menagerie by the time my boys had finished watching Veggie Tales (yes, I also give you permission to enchant your children with television while you get lost in kids’ crafts that they should be helping you with).

Happy Heart Day, friend!


DIY Custom Children’s Books

IMG_6554

As a former classroom teacher, I know the power of reading with children. It is not a surprise, then, that reading is an important part of our daily routine. I’m always seeking out new reading material to keep my little guys engaged–something to keep the reading game fresh and interesting for them. Their favorite books, however, do not feature any characters you’ve ever heard of.  They aren’t books about a cat in a hat or a mouse you take to school (although they love those ones, too). No, their favorite books feature their favorite people: themselves!

IMG_8145

I started making storybooks for David when he was a baby. As I was sorting through the thousands of photos that we had of him up to that point, I came to the realization that most of those photos would never be seen by anyone. They would remain locked on my computer hard drive forever, never to be printed or put to any actual use.  I happened to have a voucher that I needed to use for a photo book, and the idea for a customized storybook was born.

To make the storybooks, I just order a photo book online that I have customized with photos and text. For inspiration, I use other books or basic concepts to write out a story that goes along with the photos I have selected. It’s quite simple, and the books have already become family keepsakes.

Here are a few tips for getting started on making your own customized storybooks:

  • I make all of my books using online photobook services. Shop around for photo book deals. By looking for bargains I can usually get the price of a book down to about $10 with shipping included–that’s cheaper than just about any new children’s book you can find in a book store! Group discount sites like GrouponLiving Social, and Amazon Local offer up photo book vouchers quite regularly. Also try visiting the photo book sites directly as they often run promotions on their website or on through their subscription mailing lists (some of my favorites are PicabooShutterfly, and Mixbook).
  • Try following a pattern that you find in another book your child enjoys. One of David’s favorite books I’ve made for him is called David’s Busy Day based on the book Lulu’s Busy Day by Caroline Uff.IMG_6553
  • If you really want to let your creative juices flow, make up a story adventure that features your child and some of their favorite things.
  • Older children can compose their own stories and you can work on the computer together to build their book. Make sure to include a dedication and an “About the Author” page!
  • You can also base your book on a concept that you want your child to practice: ABC’s, counting, opposites, rhyming words, feelings, animals, shapes, etc.IMG_6555photo (14)
  • Instead of using photos, try using your child’s artwork as the illustrations (just scan or snap a photo of their drawing or painting and upload it onto your computer).
  • Make a special folder on your computer for photos that you think you might like to use in a book. Every time you download photos from your camera, add to the folder any new photos that you like and build it up over time.
  • Enjoy the process and the product–hopefully these books will become treasures that you can look back on for years to come!

From our family to yours: happy reading!

IMG_6552

Frozen Frog Pond Activity

IMG_6344

Last week we had our first real week of summer. We had sunshine every day, which was both amazing and confusing to us. What do we do outside when it’s actually warm out?  I think it reached 70 degrees one day and, having grown up in a rain cloud, my poor children thought they were dying from the heat. So, I came up with a simple game that would help keep us cool. I call it:

Frozen Frog Pond

What you need:
small containers (I used snack size Ziploc food containers)
plastic frogs (I got mine at the dollar store)
kiddie pool or a large plastic tub (although the bath tub would work just fine, too)

What you do:
1. Put a few frogs into each container and fill with water until the frogs are just covered. Freeze for 2 hours or until the frog-cubes are frozen solid.

IMG_6329

2. Pop the frozen frog-cubes out of the containers

IMG_6330

3. Put the frog-cubes into the pool. Challenge your kids to see who can set the frogs free from their icy prisons. Whoever gets the most frogs out of the ice wins!

IMG_6346

That’s it! The boys had a lot of fun trying to get their frogs out of the ice and they certainly got cooled off in the process (Jacob kept muttering, “So cold…” as he fumbled with his ice cubes). Here are a few other ideas to extend the froggy play time:

IMG_6352

– Gather sticks, leaves, and rocks and make homes for your froggy friends in their pond (this one probably wouldn’t work so well if you’re using your bath tub…)
-See how many pairs of the same frog you can find
-Order the frogs from smallest to largest
-Sort the frogs into color groups
-Have a leapfrog race
-Count the frogs or work out simple story problems using the frogs (“If I have 3 frogs in the pond and one jumps out, how many are still left in the water?”)
-Have a color race: Hold up a solid-colored frog, set a timer for 30 seconds, and see how many items your child can find that are the same color.

Stay cool, friends!

Nature Scavenger Hunt

Spring is finally upon us and nature is beginning to wake up after the long winter.  With warmer days and new life appearing all around us, it is the perfect opportunity to get outside and observe nature–especially if you can bring your kids along for the fun!

One of our family’s favorite activities is to go exploring–just find a trail or a beach or a patch of woods and see where it takes us. This week I decided to take advantage of my boys’ excitement over exploring (and David’s new-found obsession with scavenger hunts) and embark on our first-ever nature scavenger hunt. The concept is simple, but there is so much (fun) learning that can happen on a hunt like this.

To begin, we needed only two supplies: our “treasure map” (a Nature scavenger hunt page that I created that included items I knew we could find in the woods behind our house) and a jar with a lid (I just used a clean, empty jam jar).

IMG_3062

Then, it was time to start searching! I held onto the “treasure map” and David carried the jar, where we placed our “treasures” as they were found.

IMG_3065

Jacob loved following his big brother on our hunt, and he even found a few treasures of his own to add to our collection.

IMG_3067

The boys were thrilled to be outside running around finding treasures to place in their nature jar. David couldn’t wait to see what was next on the treasure map and he carried his nature jar around with such pride.

IMG_3071

After we’d found every item on our treasure map we walked back home and brought the nature jar inside for observation. We had three ladybugs in our jar, and the boys were absolutely mesmerized by them. In fact, David sat like this for about half an hour while I made dinner (and, just so you know, that is highly unusual!):

IMG_3080

I poked some air holes in the lid of the jar for our little ladybug friends and we kept them for two days before releasing them back into the wild (our back yard). The boys couldn’t get enough of their nature jar, so this was the perfect opportunity to sneak in some learning. Here are a few questions I asked David to get him thinking about what he observed on our nature walk and in his nature jar:

  • How many (sticks, rocks, leaves) can you see in the jar?
  • Is this rock smooth or rough? Is it hard or soft?
  • Which (stick, rock, leaf) is the biggest/smallest/longest/shortest/darkest/lightest?
  • What colors do you see?
  • How many legs are on the ladybug? How many eyes? How many wings? How many dots on its back?
  • Which of these treasures are alive or come from living things?
  • Can you arrange these stones in a row from smallest to largest?
  • Which of these items starts with a b/r/t/f sound?
  • Can you think of a word that rhymes with bug/twig/rock?
  • How many syllables are in the word flower/pinecone/twig/leaf/berry?
  • What was your favorite part of the nature walk? Why?
  • Which of these items do not belong in nature? Why shouldn’t this be in nature? Where does it belong instead? (One of our items was litter and, unfortunately, we found lots of it on the trail. After this experience, I think our next nature walk may be a litter clean-up!)

We can’t wait to go on another scavenger hunt soon to see what else we can find!


Repost: Easter “Resurrection Roll” Bible Story and Recipe

Easter is just a few weeks away, which means it’s time to bring back all of my favorite lent activities. Easter is such a special time to share with children, and I’m always looking for fun and creative ways to share the truth of this season with my boys. This week we will begin using our resurrection eggs and we’ll also be doing one of my all-time favorite cooking projects: resurrection rolls. Resurrection rolls are a simple (and, might I add, delicious) way to share the gospel with children, a truly memorable experience. I thought I’d repost the recipe and story here for you if you’d like to join in the fun–enjoy!

Original Post: Resurrection Roll Recipe and Bible Story

I love finding creative ways to teach important truths to kids. And I love it even more if I can find a way to tie food into the “lesson”. You can imagine my excitement, then, when I first discovered Resurrection Rolls.

Basically, Resurrection Rolls are a treat that you make where each step of the cooking process represents part of the Easter story. It’s a wonderful way to tell kids the Easter story AND the rolls themselves are sublime. I’ve had people make the rolls for me before, but this was my first time doing the whole project with David. He was able to help out a bit and was pretty engaged the whole time (even if he did keep trying to swipe marshmallows from my stash). I’ll definitely be doing this again next year–a new tradition has been born!

What you’ll need:

IMG_1498

  • 1 package of crescent rolls
  • 8 large marshmallows (plus extras to snack on while you’re waiting for the rolls to bake!)
  • 3 Tablespoons melted butter
  • 3 Tablespoons sugar plus 1 Tablespoon cinnamon
  • Parchment paper
  • Baking sheet
  • Bible (or use the “script” below)

How It’s Done:

IMG_1513Start by preheating your oven to 350 degrees. While the oven is preheating, get out your Bible and open up to John 19 or find the Easter story in a children’s Bible (my favorite is the Jesus Storybook Bible). Below you’ll find the pictures and the “script” for how I told the story to David (he’s only 2 years old, so I kept it simple for him).

IMG_1509

Say: “Even though Jesus was perfect and had never sinned–he had never ever done anything wrong– some people did not like him. They wanted to hurt Jesus because he said he was God. They made Jesus carry a cross and they killed him. This made God very sad, but it was all part of His great rescue plan. When Jesus died, his friends took his body off the cross.”

IMG_1510

Do: Give your child a marshmallow
Say: “This marshmallow represents Jesus’ body. Jesus died for you and for me, because we have sinned and we need to be rescued from our sin.”

IMG_1512

Say: “After Jesus died, his friends came and they put special oil and spices on Jesus’ body to get him ready for burial.”
Do: Roll the marshmallow in melted butter, then in cinnamon sugar

Say: “Next, Jesus’ friends wrapped his body in special cloths–almost like a mummy! Jesus had died, and they were getting his body ready to bury.”
Do: Roll the cinnamon-sugar marshmallow up in a crescent roll (it won’t look like a crescent roll). Press all of the seams firmly. Repeat for each of the crescent rolls. Place the rolls on a parchment paper-lined baking sheet.

IMG_1511

Say: “Next, they laid Jesus’ body in a tomb. A tomb is like a big cave carved out of rock. Then big, strong soldiers rolled a heavy rock in front of the tomb so nobody could get in or out of the tomb. They even put a special seal over the entrance so they would know if anybody tried to move the rock that was in front of the entrance. Soldiers stood in front of the tomb to guard it day and night.”
Do: Put the rolls in the oven and set your timer for 10-12 minutes. Let the rolls bake until they are golden-brown. I even let David stand guard in front of our oven “tomb” with his toy sword.

IMG_1506

Say: “Jesus was dead in the tomb for three days. Let’s count to three: one, two, three. How many days was he in the tomb? That’s right, three days.”
(We had some time to wait for the rolls, so I let David play while they were baking. I kept going back to him, though, and we’d repeat this whole conversation about how long Jesus was in the tomb.)

IMG_1514

Do: When the rolls are done baking, take them out of the oven and let them cool (I let mine cool for about 20 minutes, and that was perfect). The marshmallow will probably have exploded out of your rolls, but that’s to be expected (that’s why we put down the parchment paper!). After the rolls have cooled…

IMG_1516

Say: “Three days after Jesus had died, an angel of God appeared to one of Jesus’ friends. He told her that Jesus was alive! Jesus’ friends decided to look in the tomb where they had put Jesus’ body, but when they did, it was empty! Jesus had risen! And still today, Jesus is alive. Today he lives in heaven with God.”
Do: Cut open one of the rolls. The marshmallow has melted, so the “tomb” is now empty.

IMG_1522

Do: Eat your yummy rolls!
Say: “These rolls are sweet, just like the love of God. God made you and he loves you very much. And some day, if you choose to love and follow God, you will be able to spend forever and ever in heaven with him and Jesus. The Bible tells us that Jesus is our Great Rescuer. The Bible tells us that the only way to Heaven is through loving and believing in Jesus. We celebrate Easter, because Jesus died and rose again so that we could have a way to Heaven.”