A Photo Tour Through Our California “Mountain” Home

IMG_6485

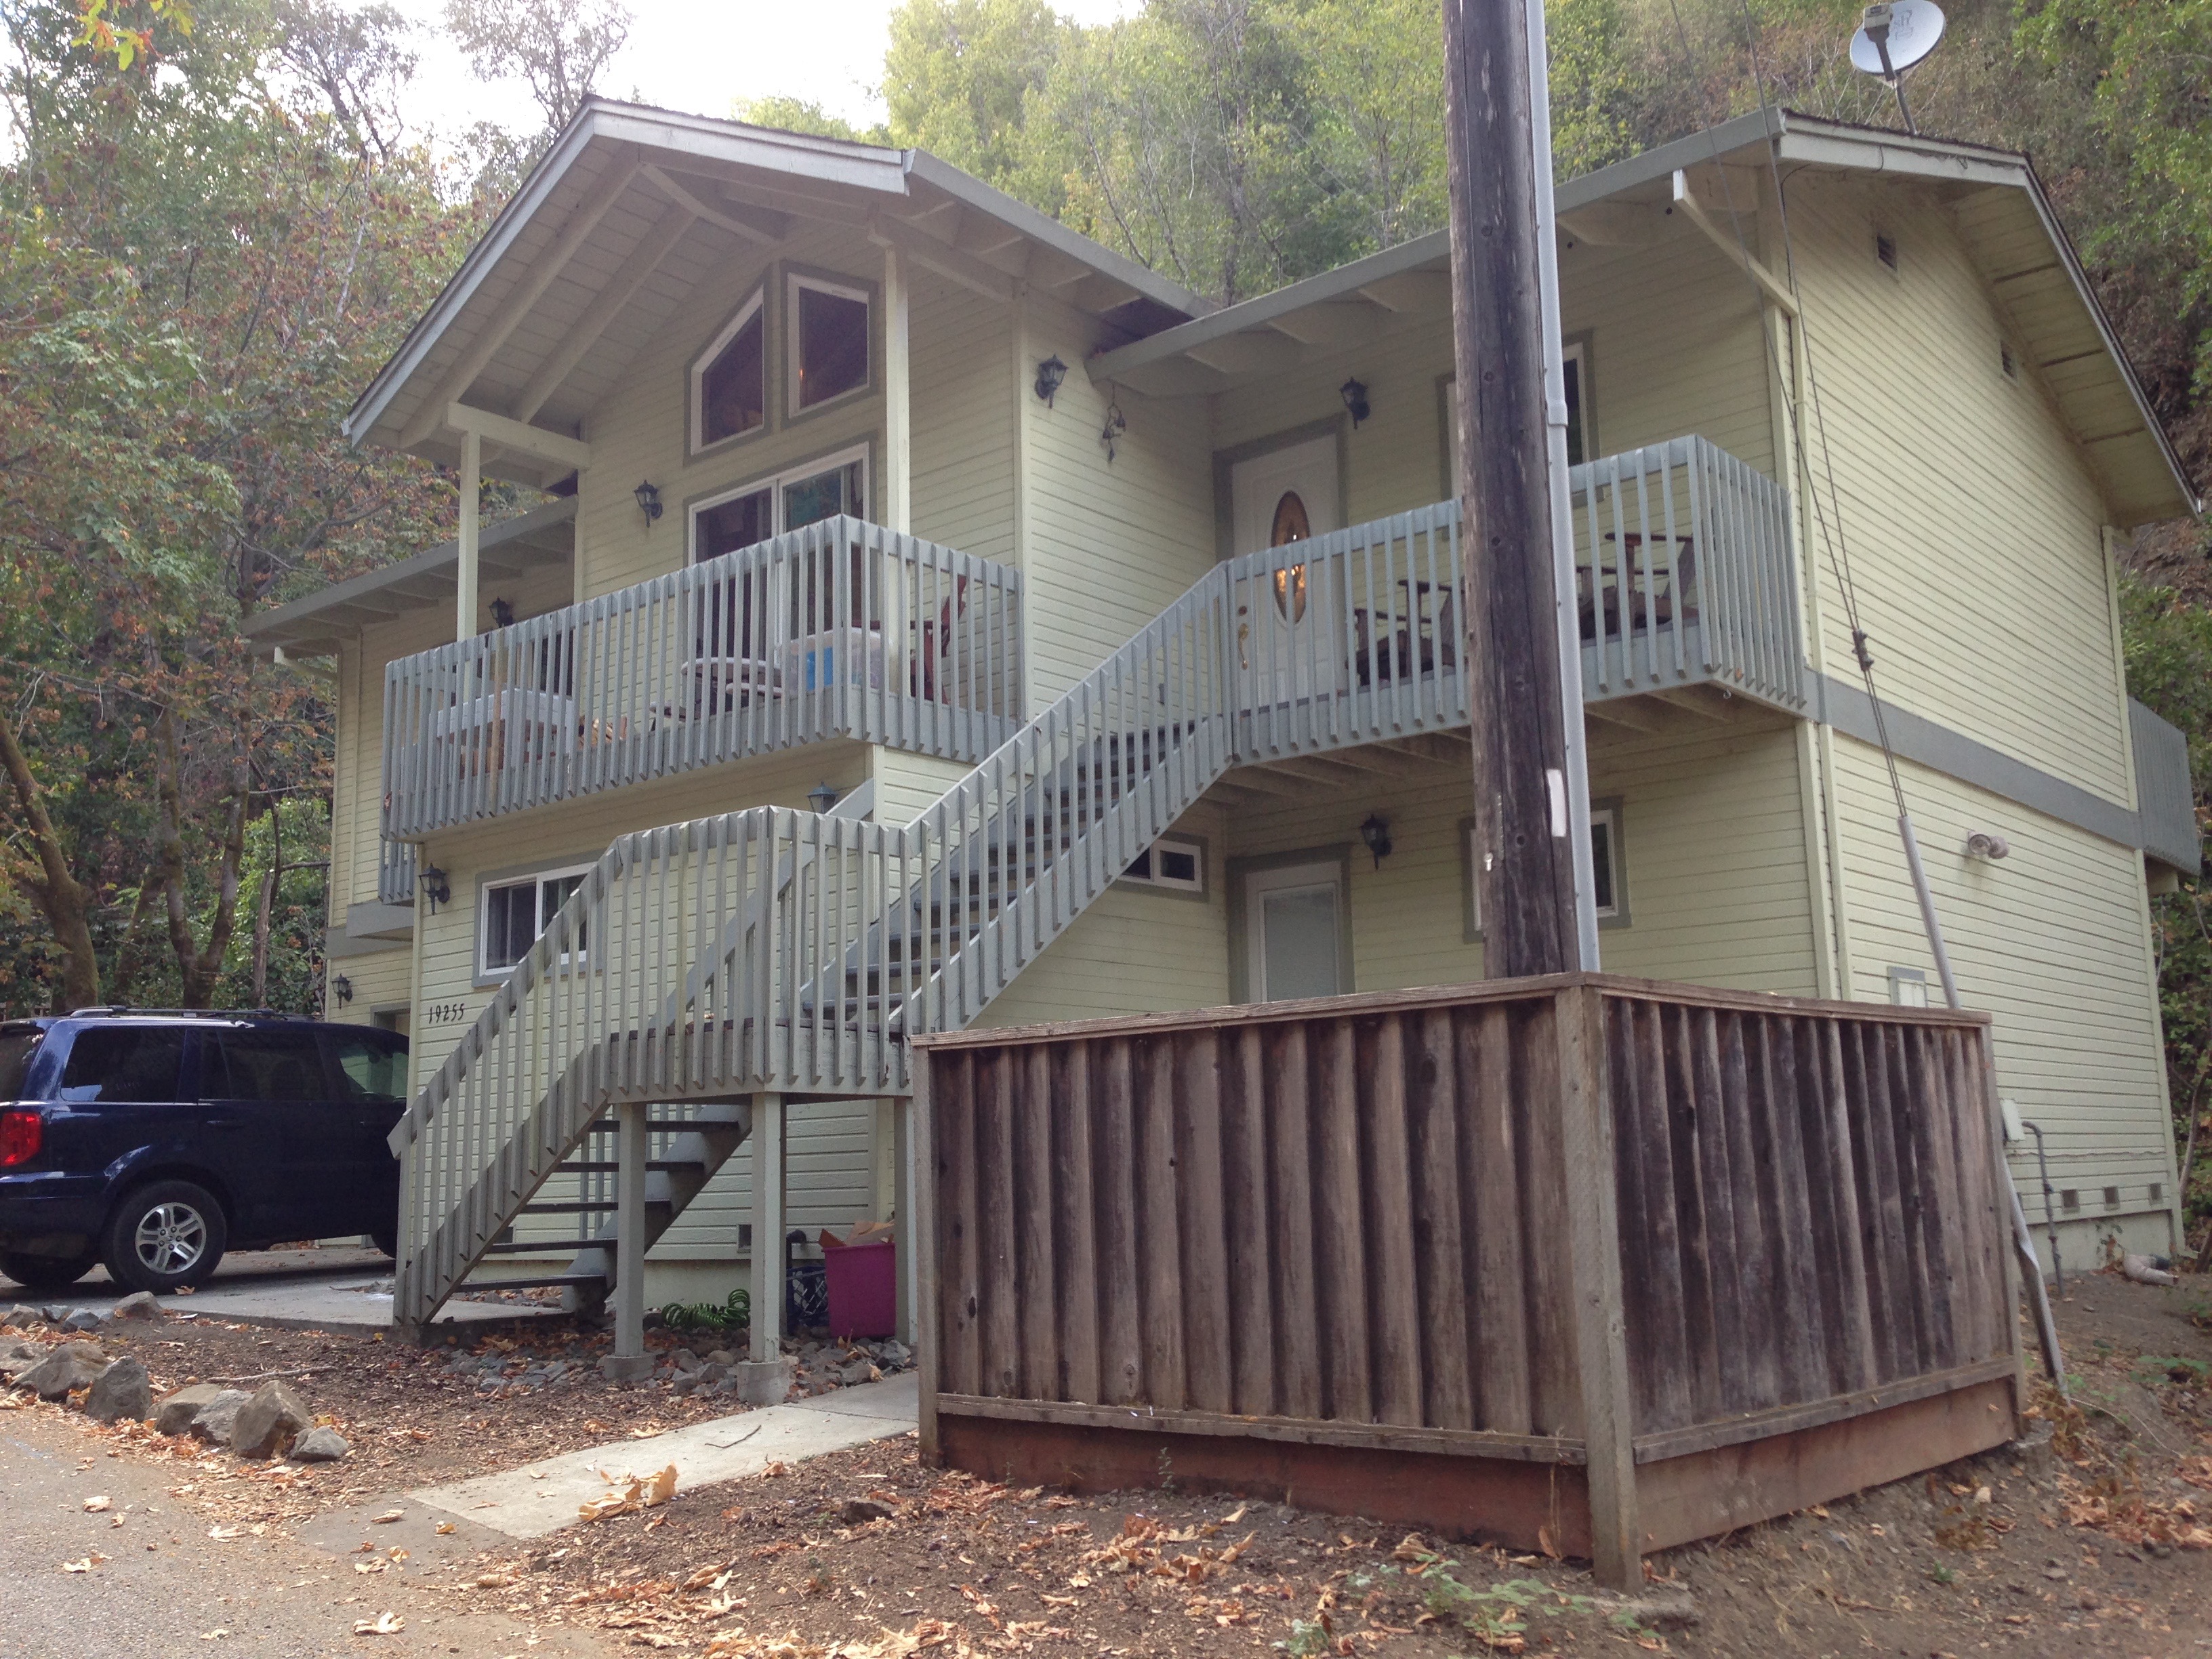
Ah, home sweet home. This week marks one month since we moved into the house we now affectionately refer to as River House (even though the “river” that supposedly runs behind our house is currently only a dry creek bed. I’m sure the massive El Niño they’re predicting for this winter will take care of that in no time, though).

It was a bit of a gamble moving out here–we’re getting a steal of a deal on the rent (by Bay Area standards, not by normal human standards), but the house is in the “mountains” (Californian for tree-covered hills). Even though it is physically quite close to civilization, there is an absolute feeling of remoteness. Though only two miles separate River House from town and the rest of Silicon Valley, the two places sometimes feel like they are worlds apart: Mountain people drive trucks instead of Ferraris; in the mountains you hear crickets and cougars (yes, large wild cats share our property) instead of The 101 or 85; in the mountains your gardener is Jesus, not Jesús from Ramirez Brothers Landscaping. And even though we’ve only been here for a month, I kind of love it.

I know you’ve all been curious to see what life is like out here in the boonies, so here’s a peek inside our little mountain life.

We are probably the only house in the mountains (or anywhere, for that matter) that has a large cement goose wearing a dress and an Irish welcome plaque at the front door. You really can’t miss us.
IMG_6490

Once inside the threshold you enter the Great Room. Turning left you’ll see our living room and school corner. My favorite part of this room is the massive vaulted cedar ceilings and the river rock fireplace (we’ll talk more about the necessity of that fireplace in a moment).IMG_6503

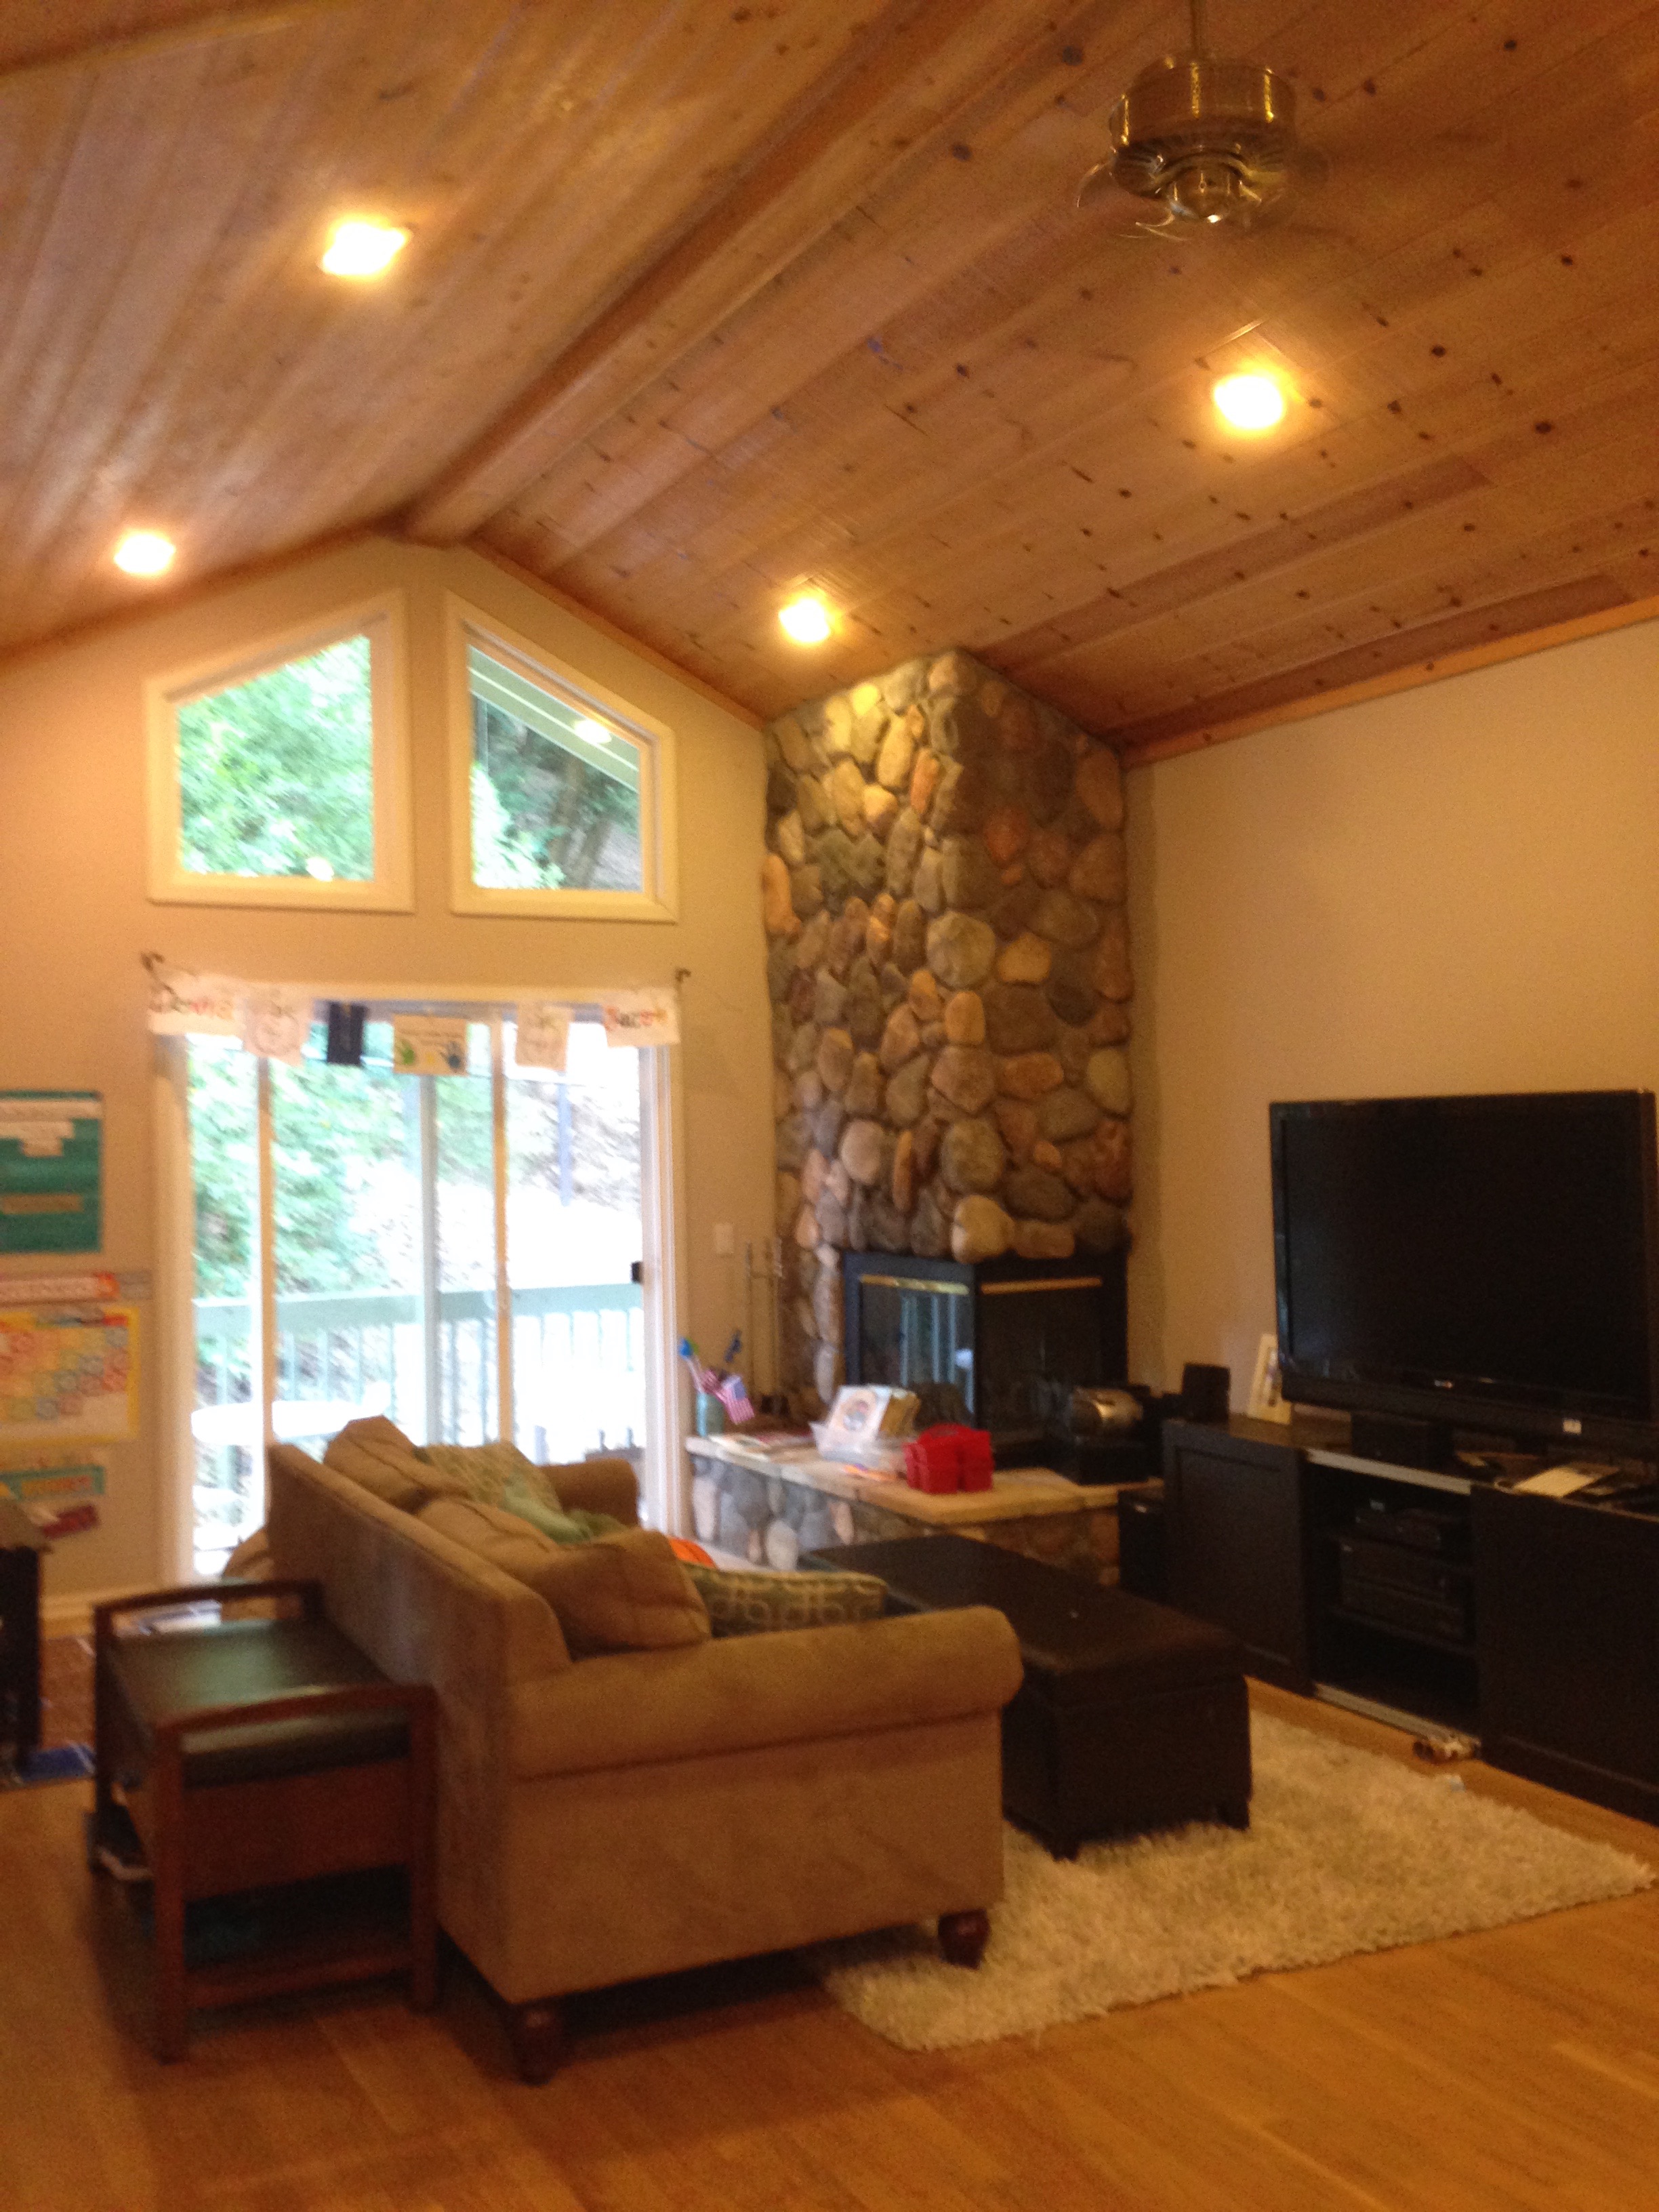
To the right of the living room is the area we’ve set up as the dining room and, beyond that, the kitchen.
IMG_6507

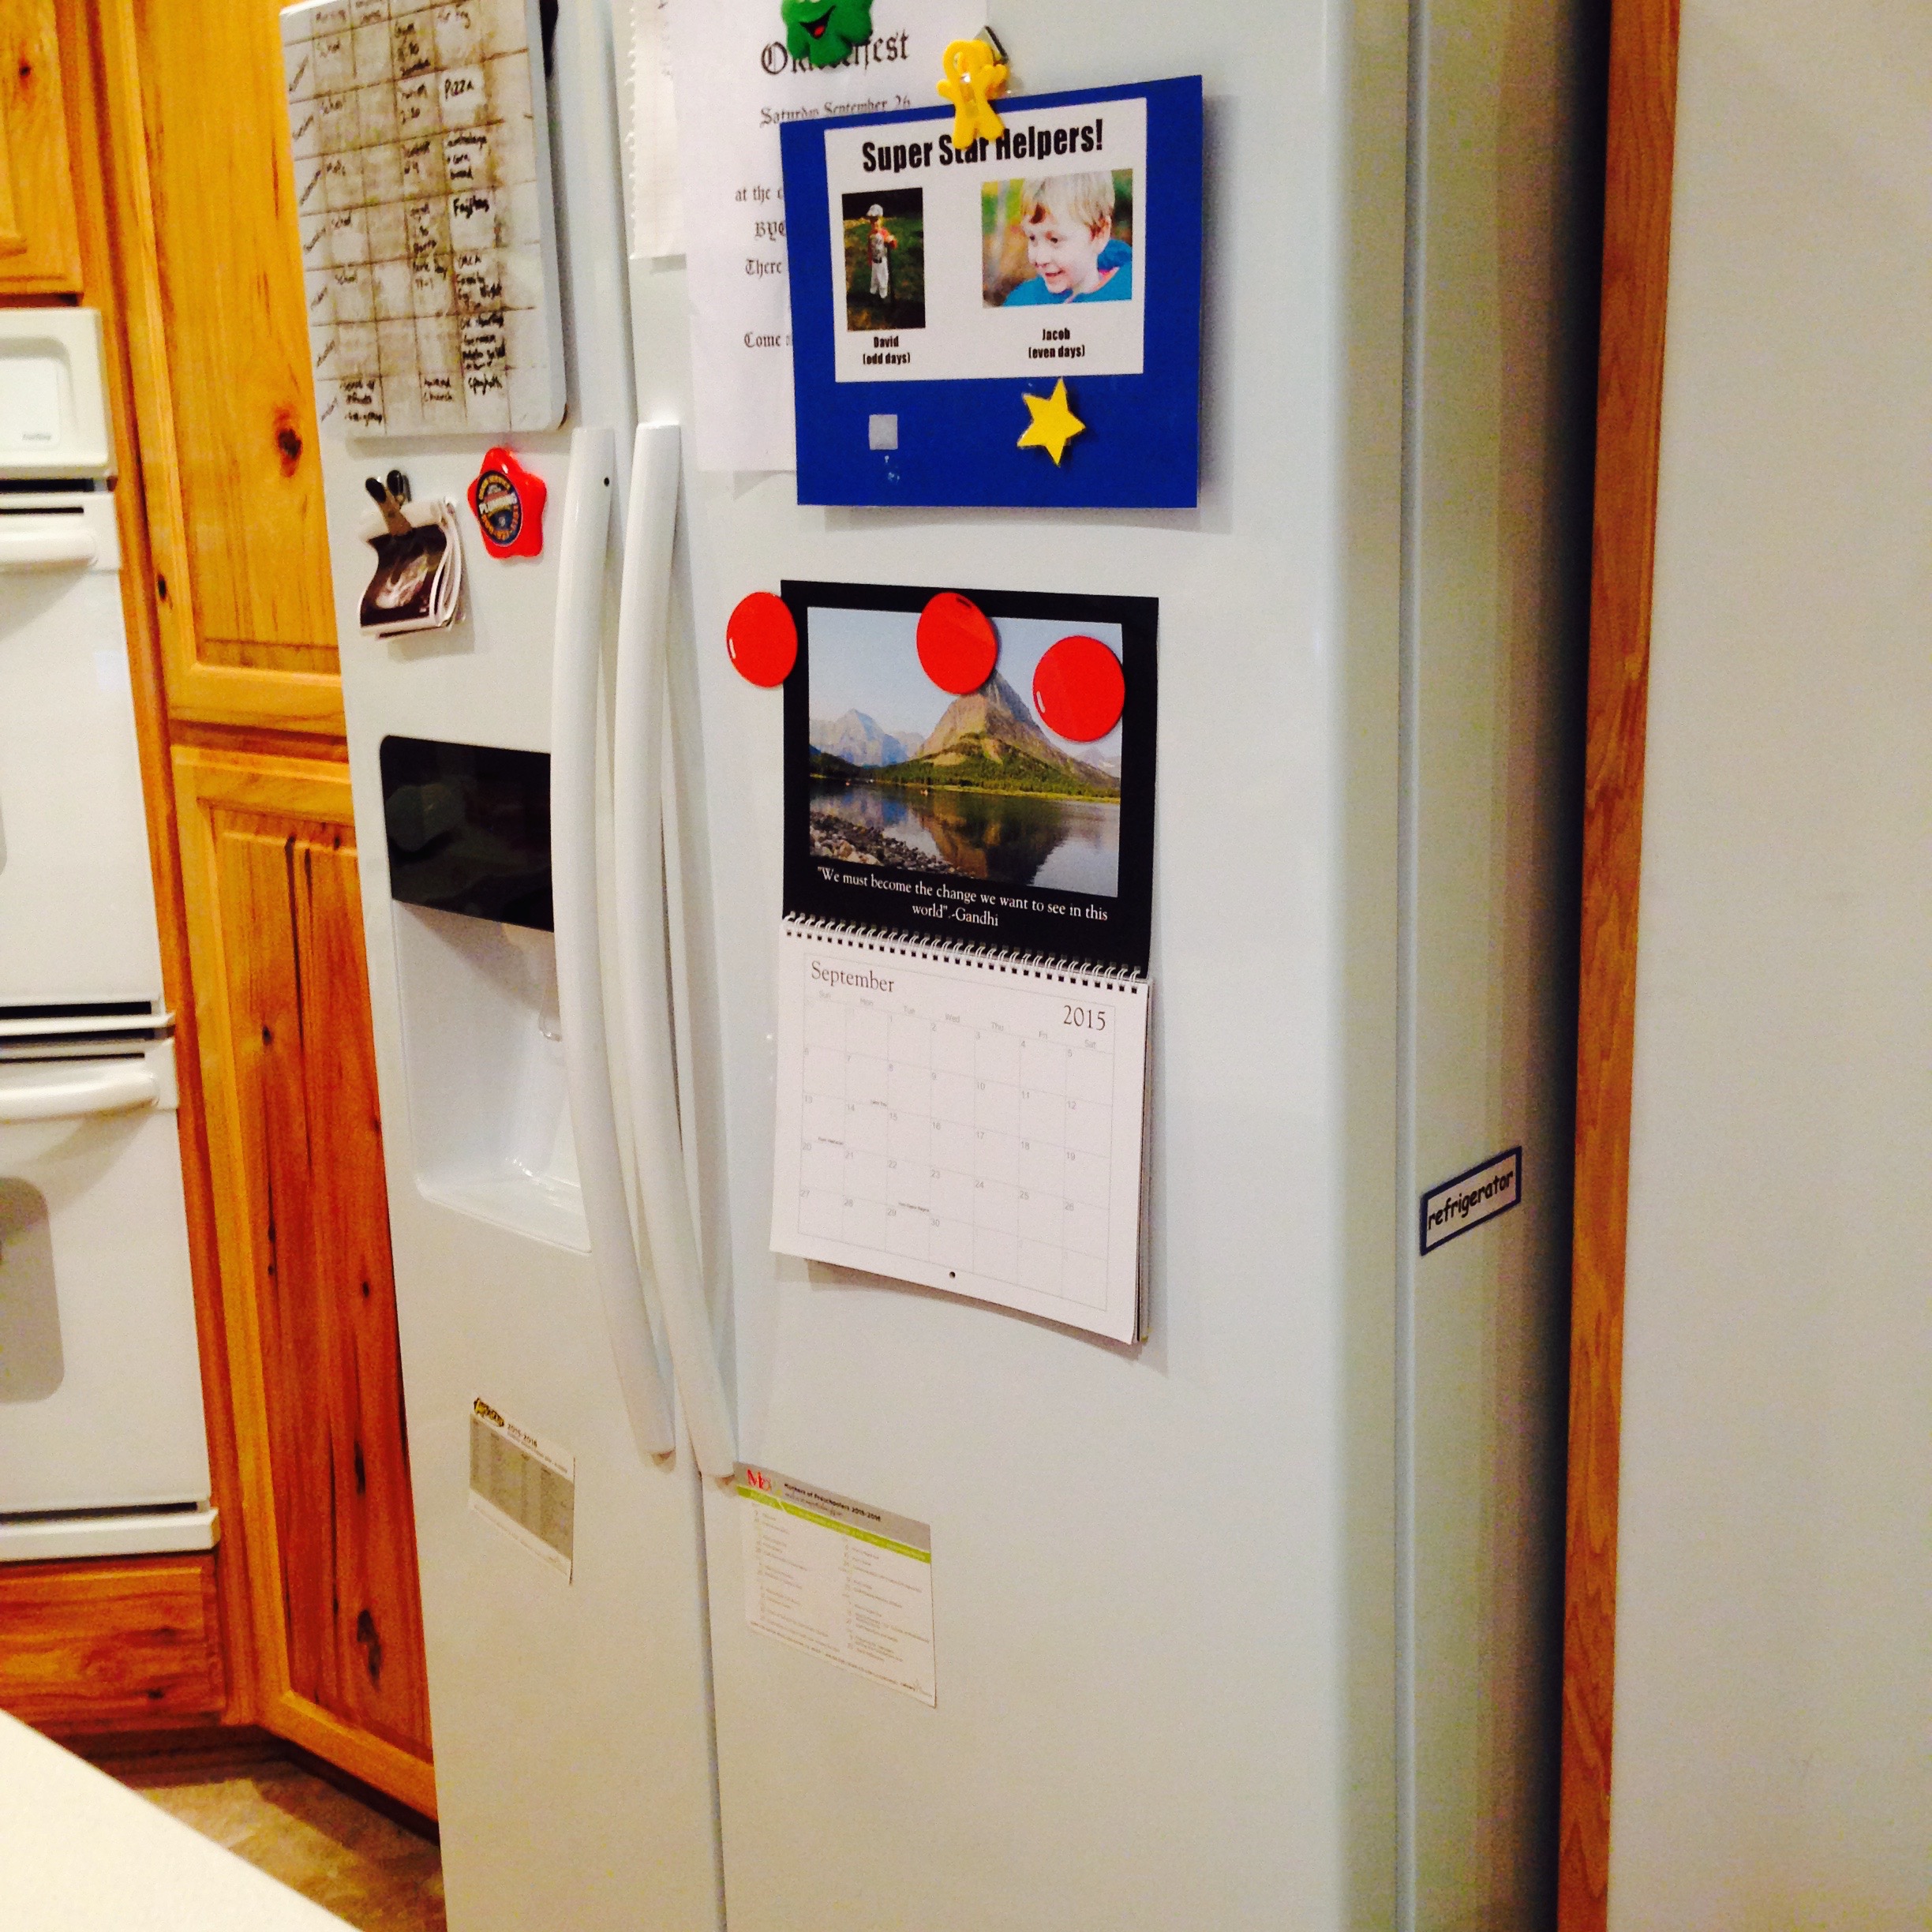
I love our kitchen at this house! It’s spacious and bright and, as of last week, fully functional. See our brand new fridge? This was a gift from our landlords two weeks after we moved in…after our old fridge died. We went 4 days with no working fridge which made storing food and eating fresh food a bit of a challenge. The ordeal gave me a greater appreciation for my pioneer ancestors. With the help of our generous neighbors offering us space in their fridge and a chest freezer in our garage, however, we persevered and survived the Great Fridge-pocalypse of 2015.
IMG_6481

The kitchen is so spacious that I actually have empty drawers and cabinets–and that’s saying something considering we own such obscure kitchen gadgets as an apple-peeler-corer-slicer and a Turkish coffee station.IMG_6519

Remember how we’re living in the mountains, and it’s full of wonderful surprises? Well, no tour of our kitchen would be complete without the inclusion of our little kitchen friends, the ants. And the gnats, but they’re too small and too fast to snap a photo of.IMG_6518

Off the kitchen is one of our five decks. This one is currently housing our BBQ…and a drying rack with our swim gear.IMG_6512

Speaking of the decks, we spend quite a bit of time out on them. This is Bota’s deck (she allowed a guest for the photo op):IMG_6514

And the boys’ play deck:IMG_6130

Back inside the house, we’ll finish the tour of the top floor of the house. Just off of the Great Room/Kitchen set up is the master bedroom (or, if you ask the boys, The Boys’ Second Bedroom):

IMG_6471Notice the utter lack of grown-up bedroom furniture. We had sold half of our bedroom furniture before we moved to Ireland, and then we sold the rest of it this summer so we wouldn’t have to move it. This was before we realized that we actually need bedroom furniture for absurd purposes like HAVING FURNITURE TO USE. Our mattress is currently sitting on the floor, I’m using a Rubbermaid container as a night stand, and I literally found Jon’s nightstand in a dumpster. It’s actually pretty cool, because we feel like we’re in college again. Not to worry, though, because our real Grown Up furniture has been ordered and is en route as we speak (!).

From the bed you can see our two private decks and gas fireplace–once you look past the Rubbermaid nightstands, it’s quite the retreat. IMG_6469

The white door you can see to the left of the fireplace is our closet. It’s a massive closet with ample storage for our clothing (and our full suitcases and boxes full of clothing, because it turns out bedroom furniture like dressers are actually useful for things like holding your clothes).IMG_6473Continuing on through the master suite you come to the master bath. The soaking tub is so inviting to my achy pregnant body but, unfortunately, I can’t use it. I don’t know if you’ve heard, but California is in a DROUGHT, which means there are water restrictions in place. And by water restrictions, I mean our mountain home is basically siphoning water from the city through a straw and if we go over our allotted amount, the water police will come knock down our front door. And they’ll fine us thousands of dollars, but whatever. Alas, the soaking tub will have to wait.
IMG_6510
Finishing up the tour of the master suite is our…office corner? I don’t even know what to call it. We have a dresser, filing cabinets, boxes of crap we don’t want to unpack, a bookshelf, school stuff, and a random office chair (with no desk) crammed in there.At least there’s a pretty little deck to go stand on if you want to get out of the mess!
IMG_6472This is also where we house our modem (for the world’s slowest internet) and our landline telephone (because we don’t get cell phone reception at the house). See, it really is like we’re in college again.

That wraps up the top floor of the house! Now, down to the first floor.

The boys’ bedroom is the first room you come to at the bottom of the stairs. We have their bunkbed set up so they can practice their climbing and diving skills from more precarious heights.
IMG_6495

Opposite the bunk bed is the boys’ dresser and reading corner. Pay special attention to the most important addition we’ve made to the bedroom: our eye in the sky camera.IMG_6496

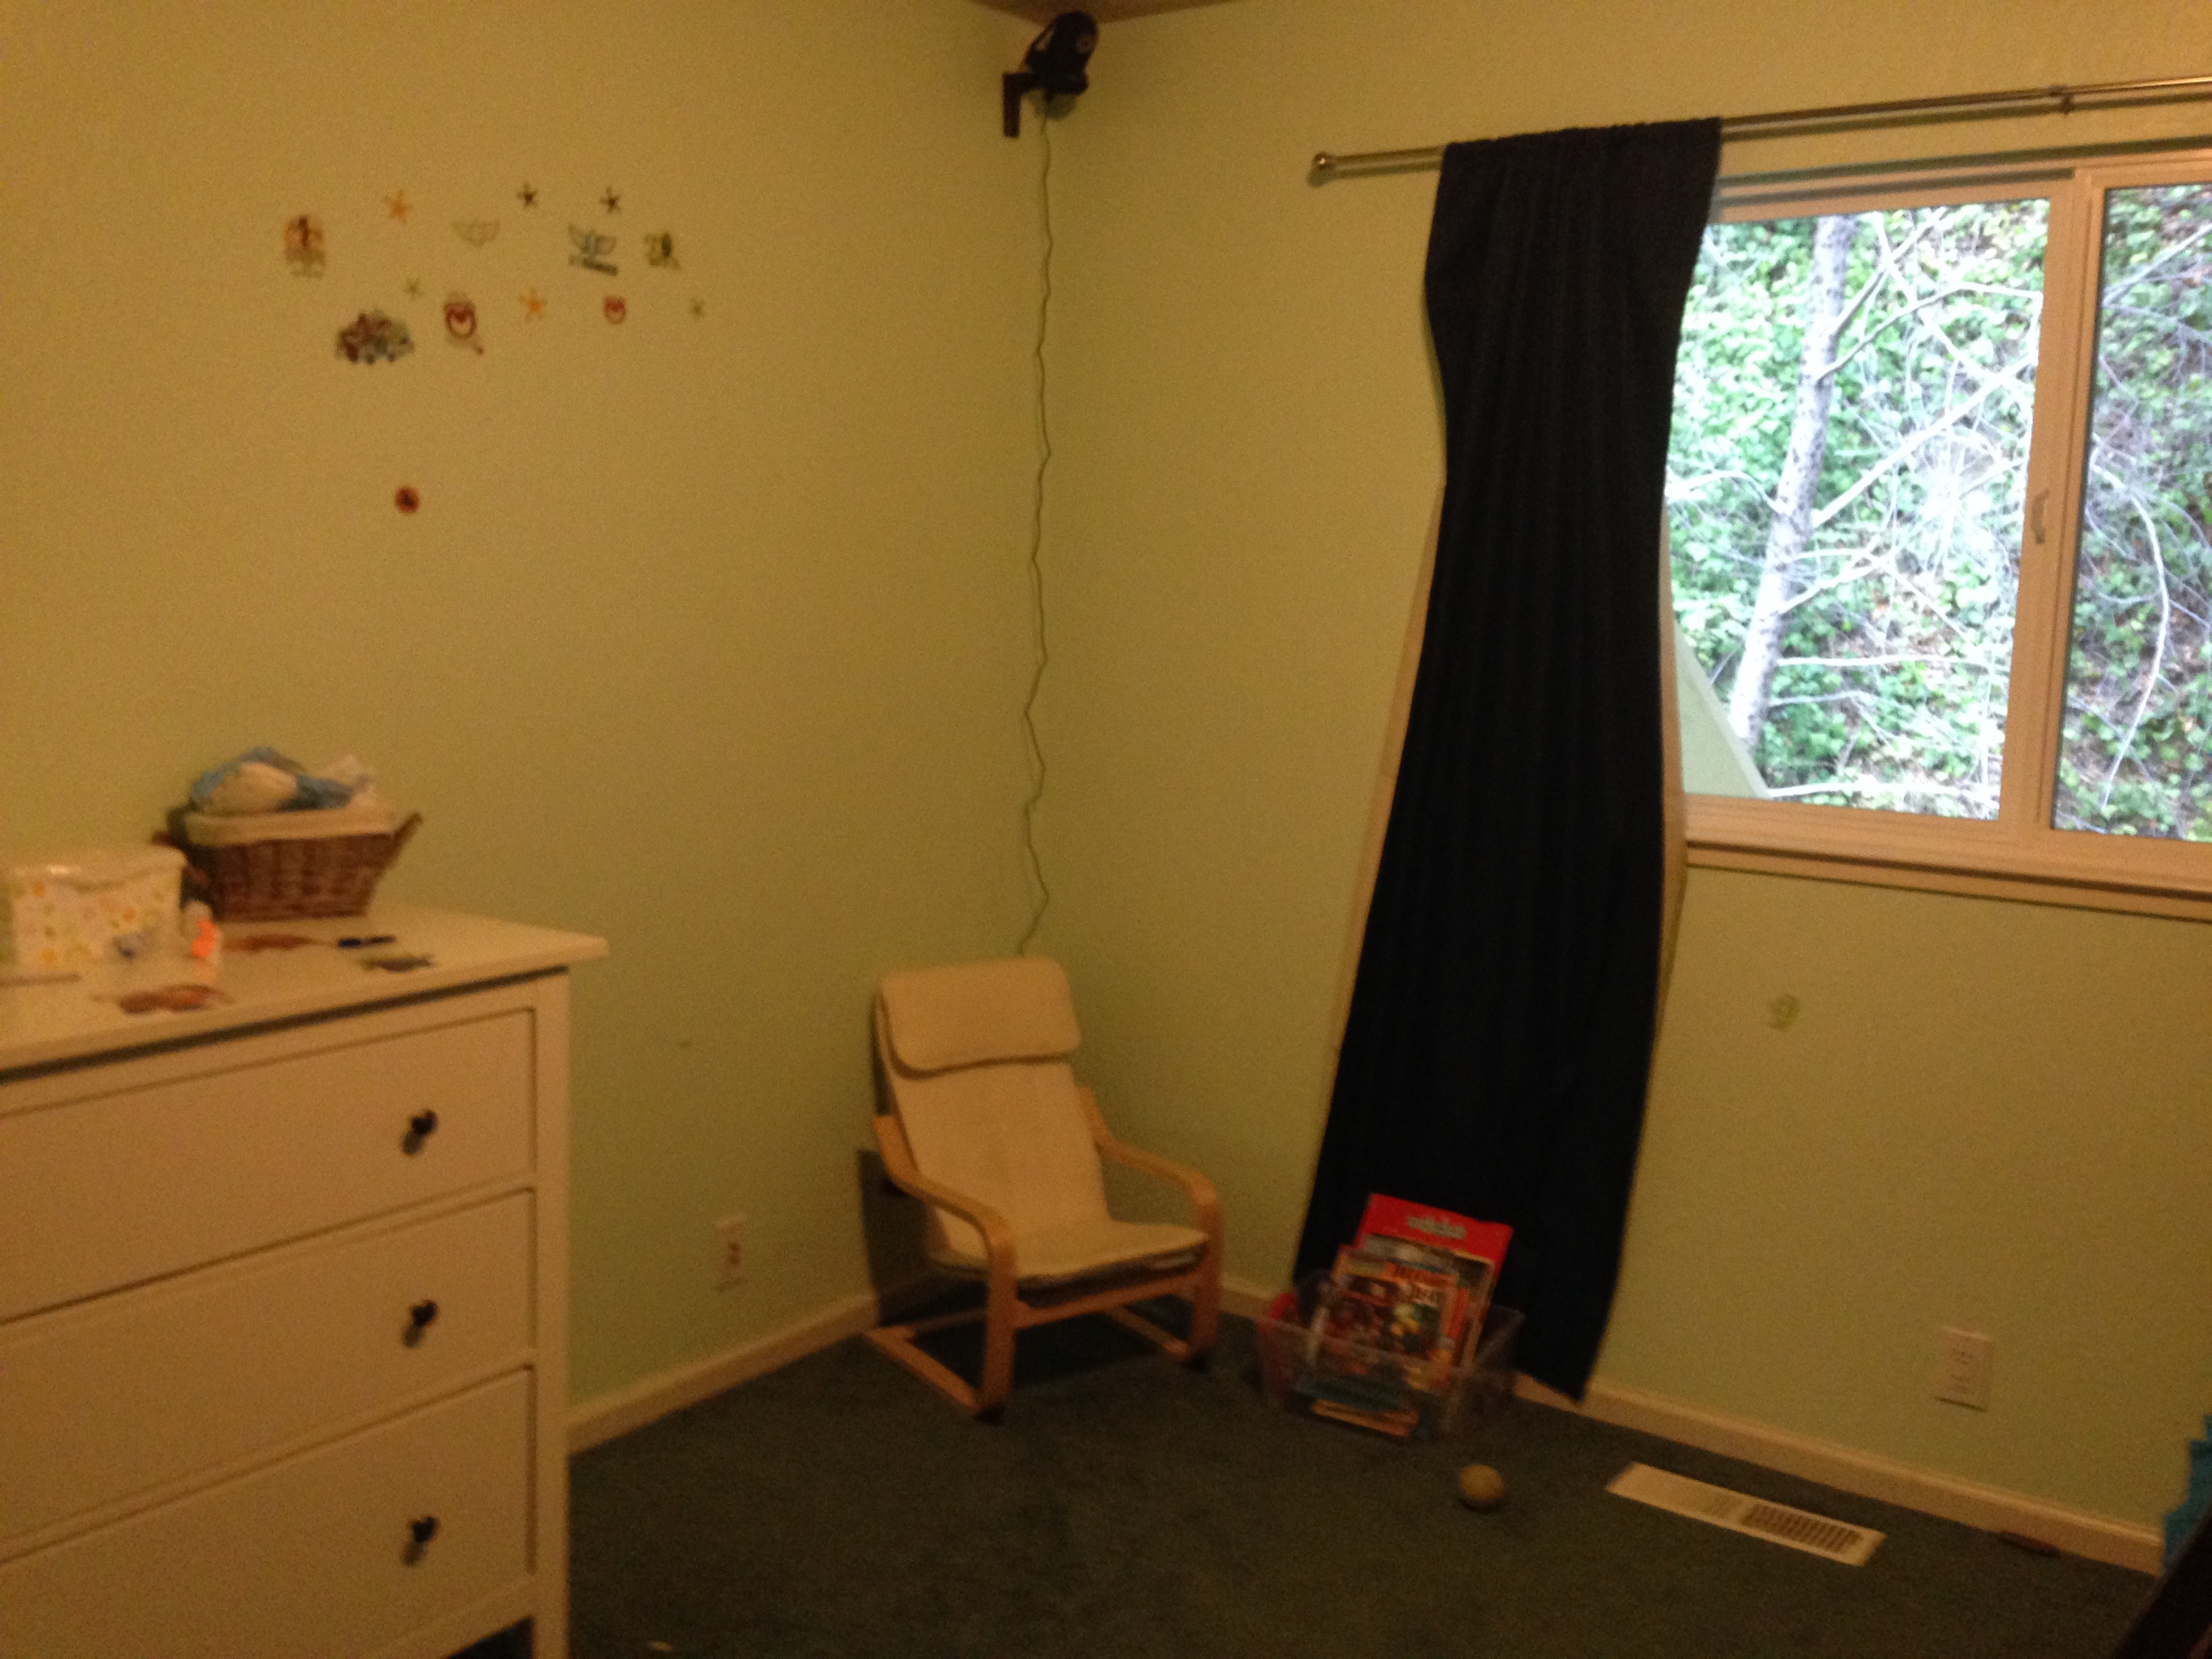
Since the boys are now residing on a different level of the house from the parents, we considered it prudent to install surveillance apparatus. The camera allows us to capture all of the bedtime moments when the boys are anywhere but in their beds.IMG_6425

Next door to the boys’ room is the nursery/storage room/guest room/play room (don’t ever let me be your interior designer). This is the nursery side of the room (Yes, we are 4 months early, but it was just easier to set everything up than store it):IMG_6475

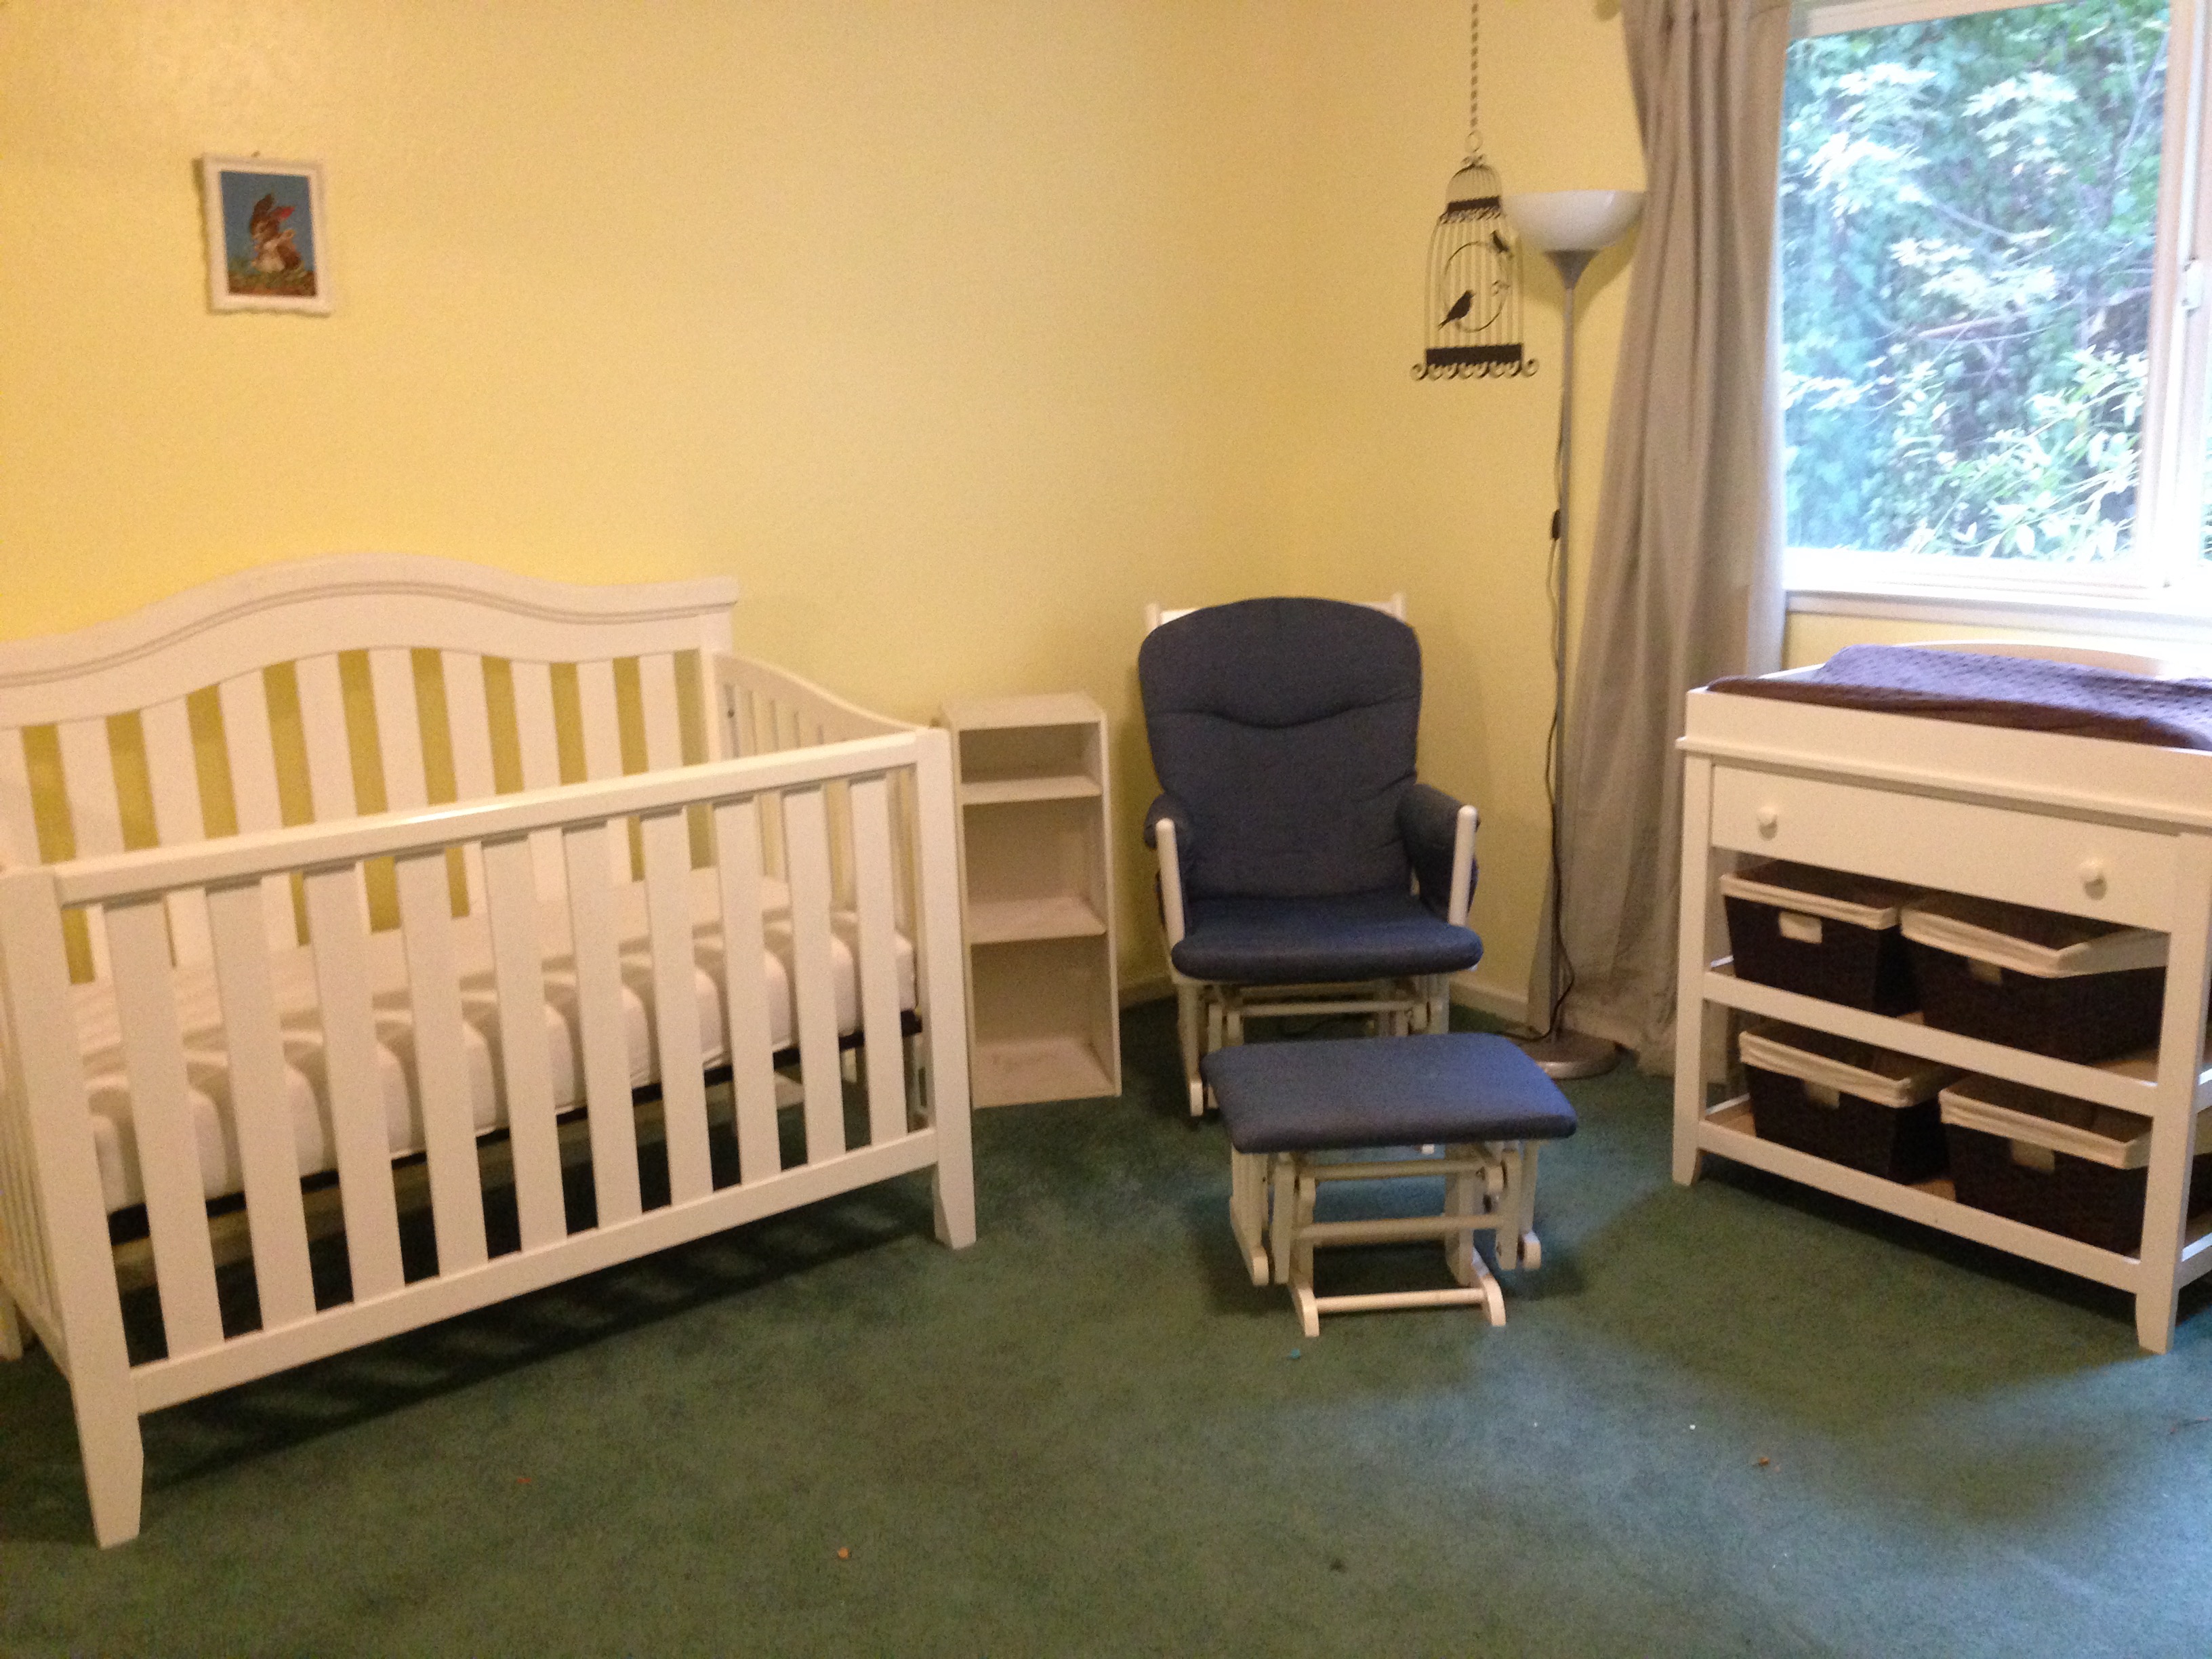
The closet in this room is stacked floor to ceiling with baby paraphernalia: IMG_6477

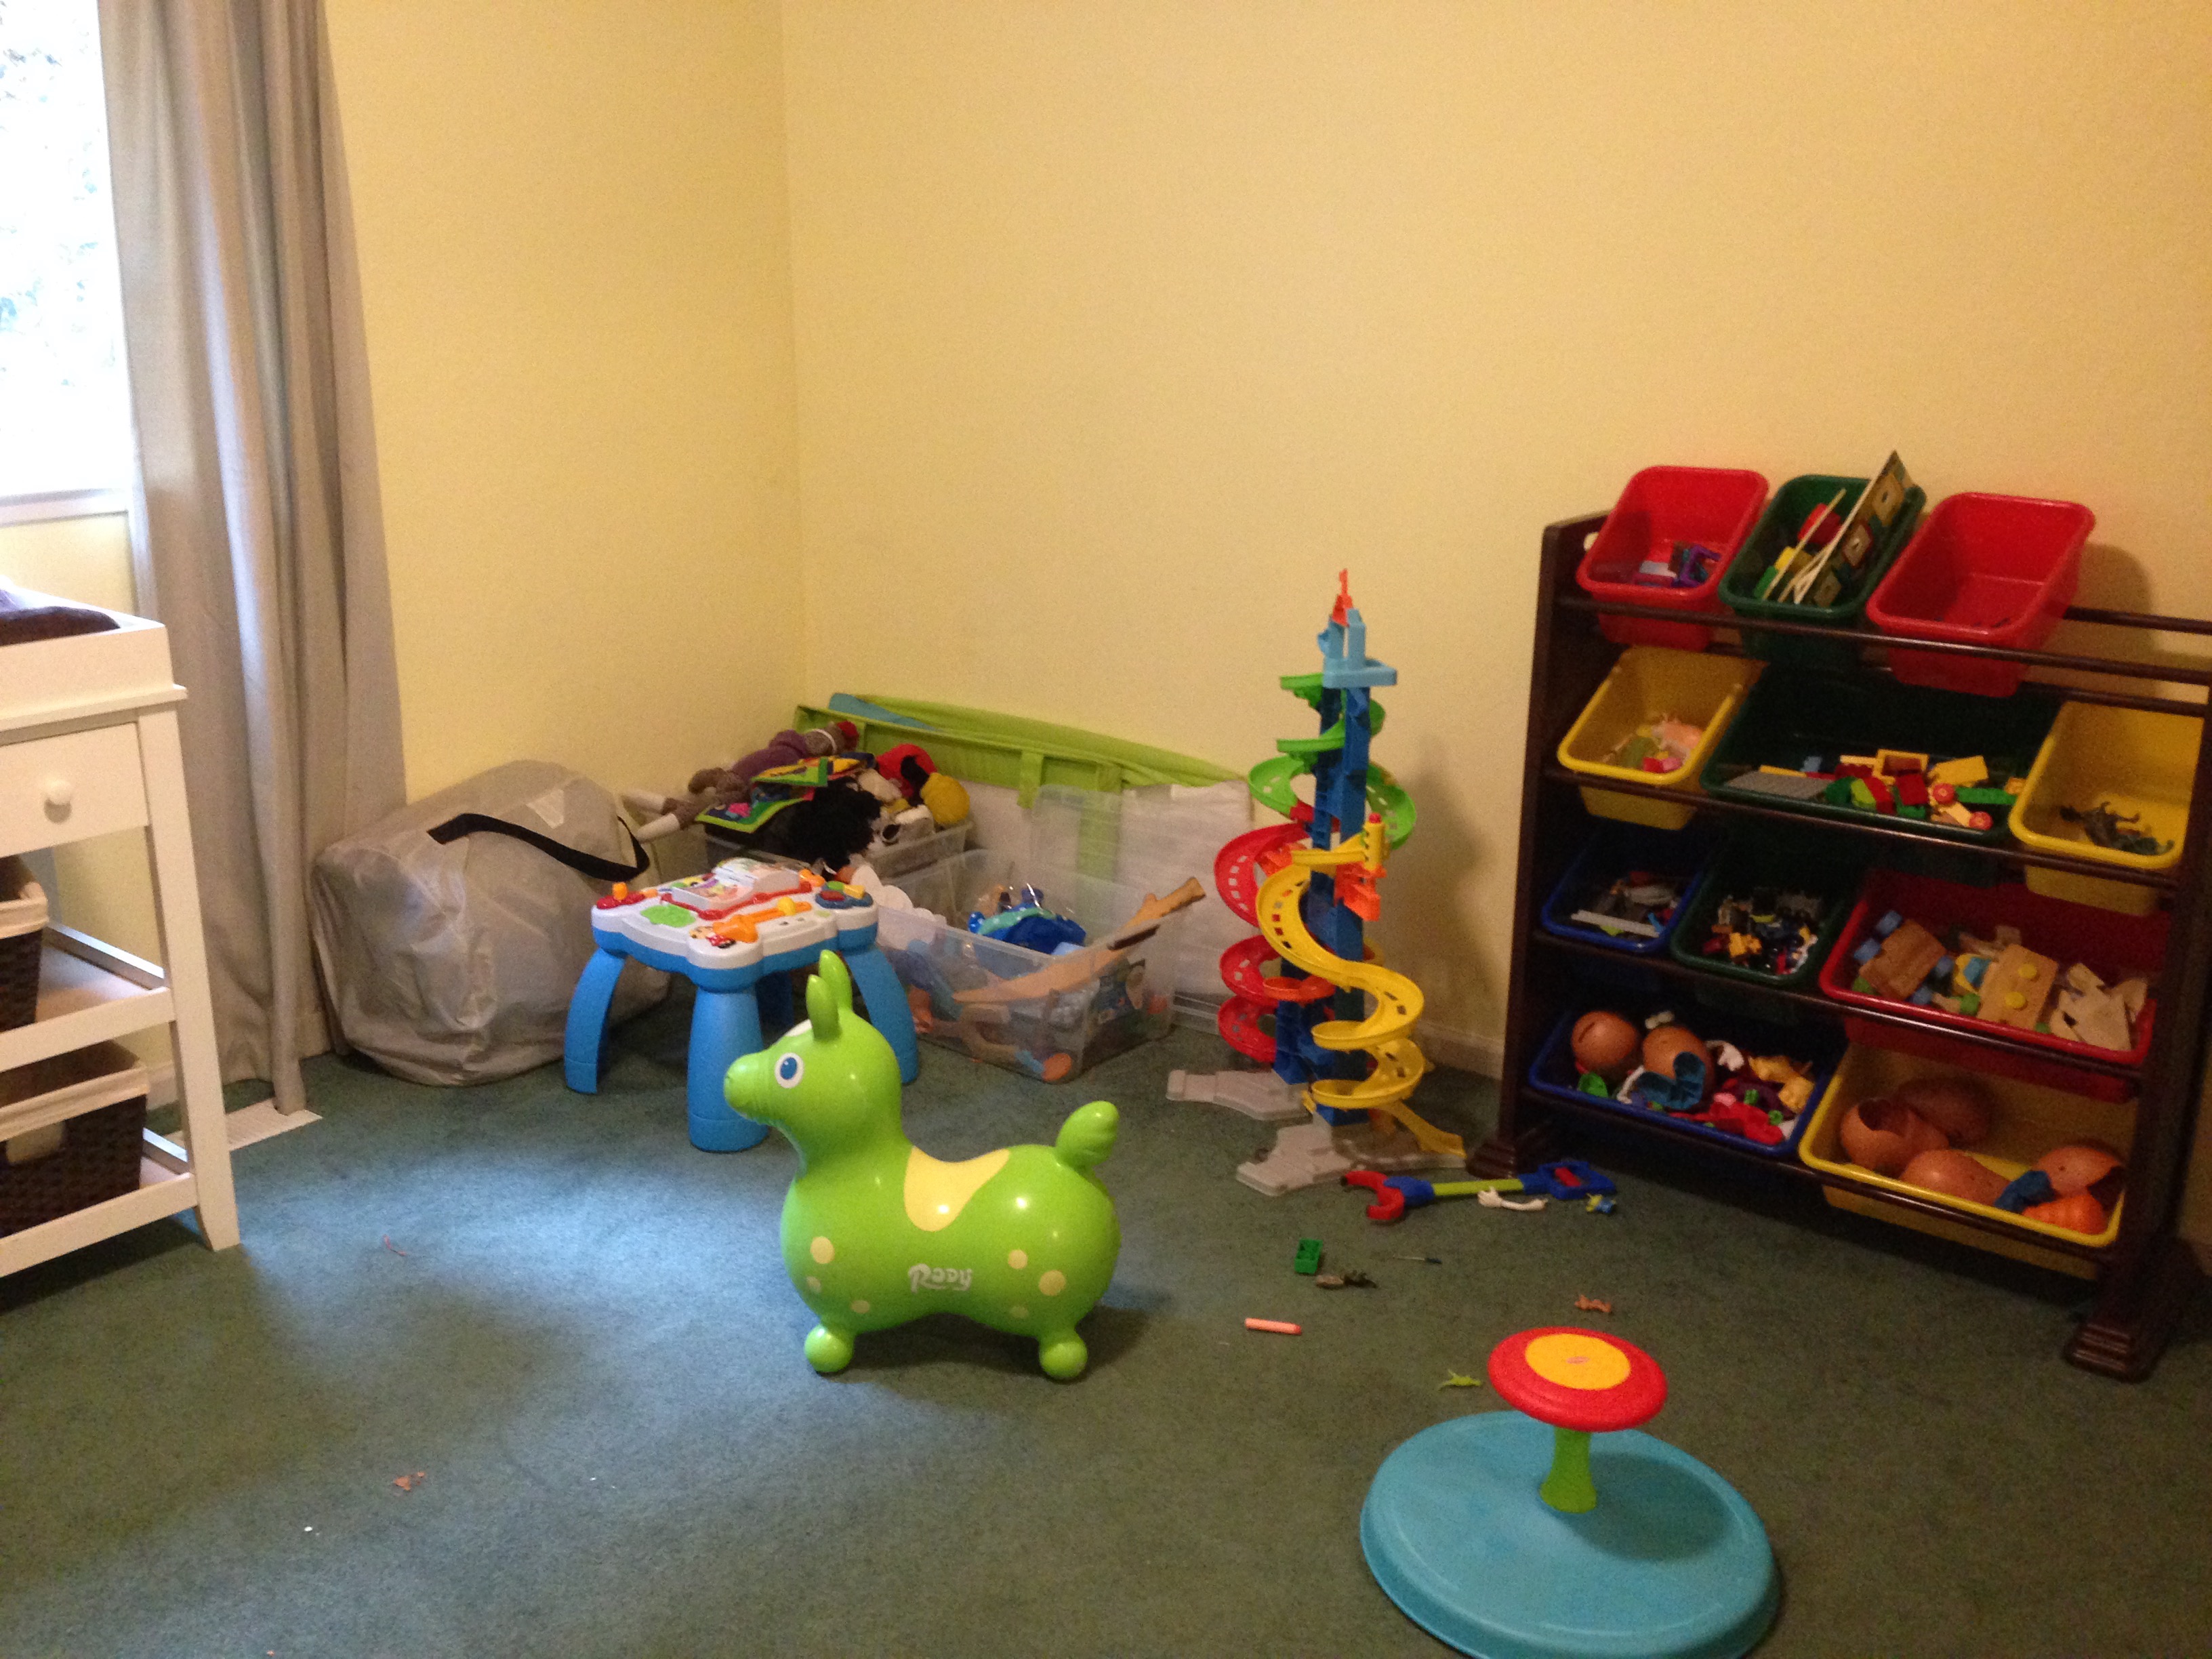
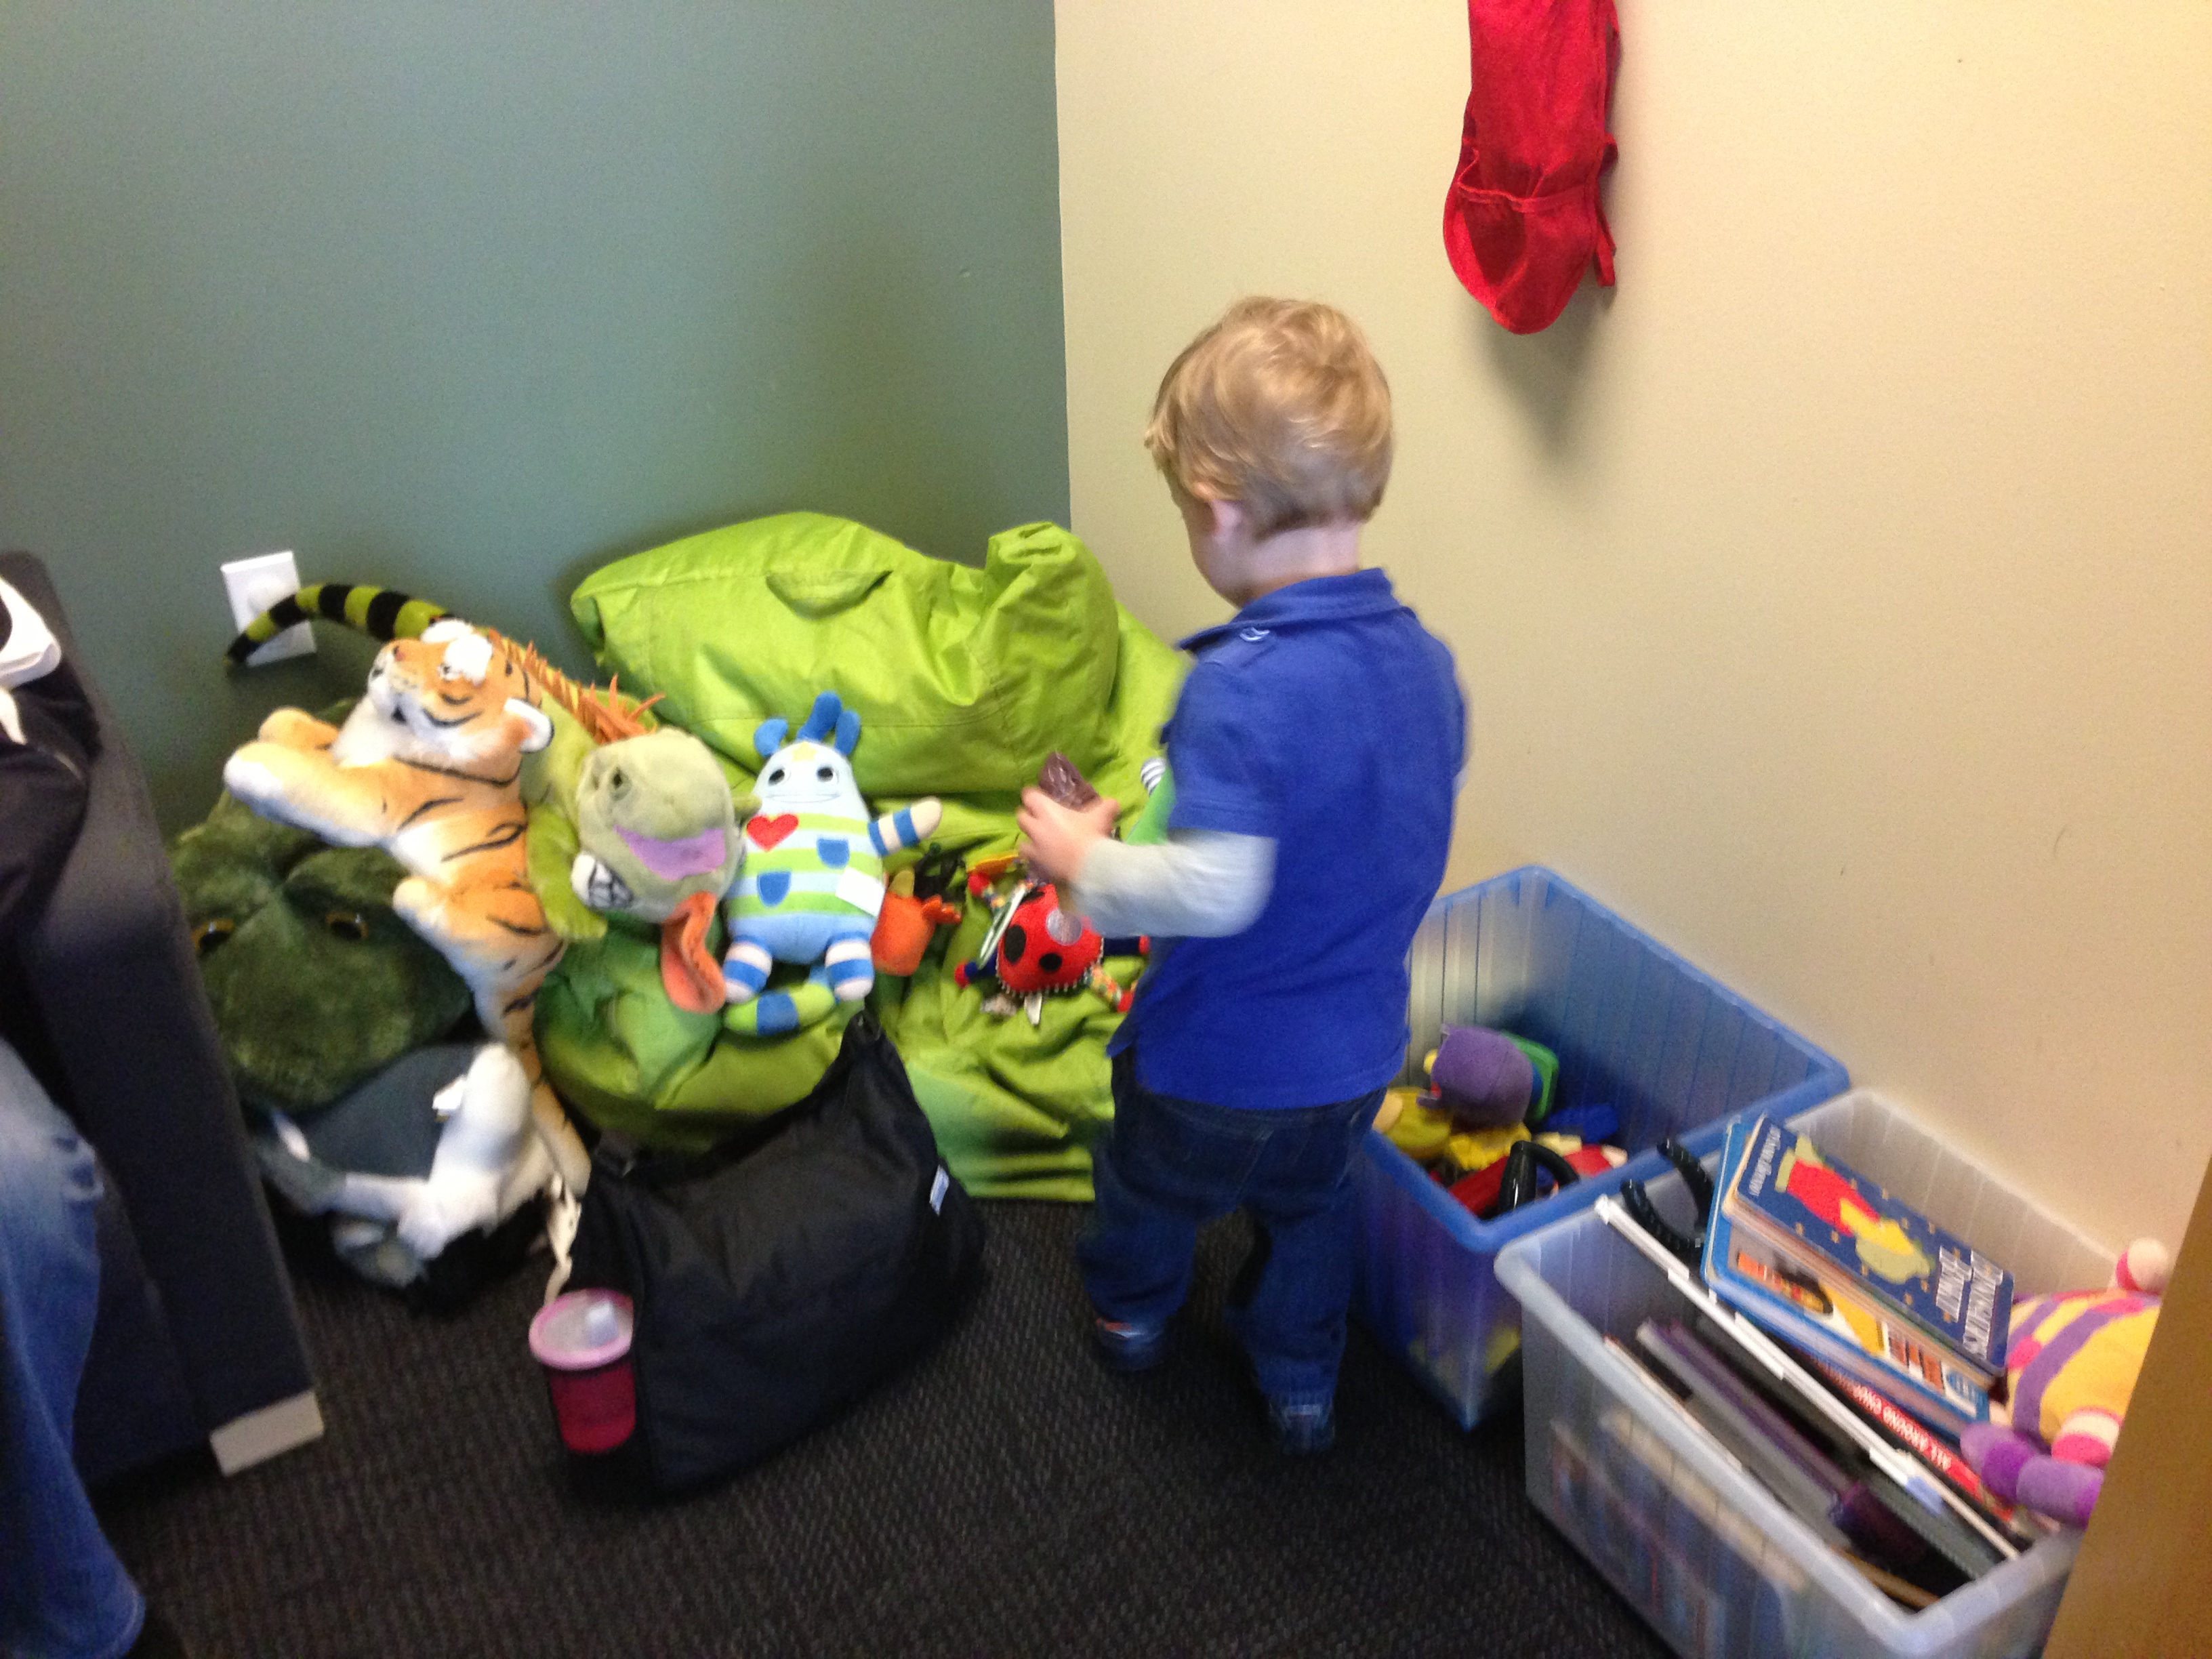
The opposite side of the room is currently acting as the boys’ play room (because this room has a door that locks, thus containing the mess and the temptations).

(Not pictured: the center of the room, the “guest room”, where we will set up our blow-up air mattress for anyone who wants to brave a visit).
IMG_6476

Also downstairs is the boys’ bathroom. It’s cute, but it smells like pee, so I try not to go in there.IMG_6474

We also have a lovely laundry room downstairs with a utility sink (an absolute necessity with children, I’ve decided).IMG_6479

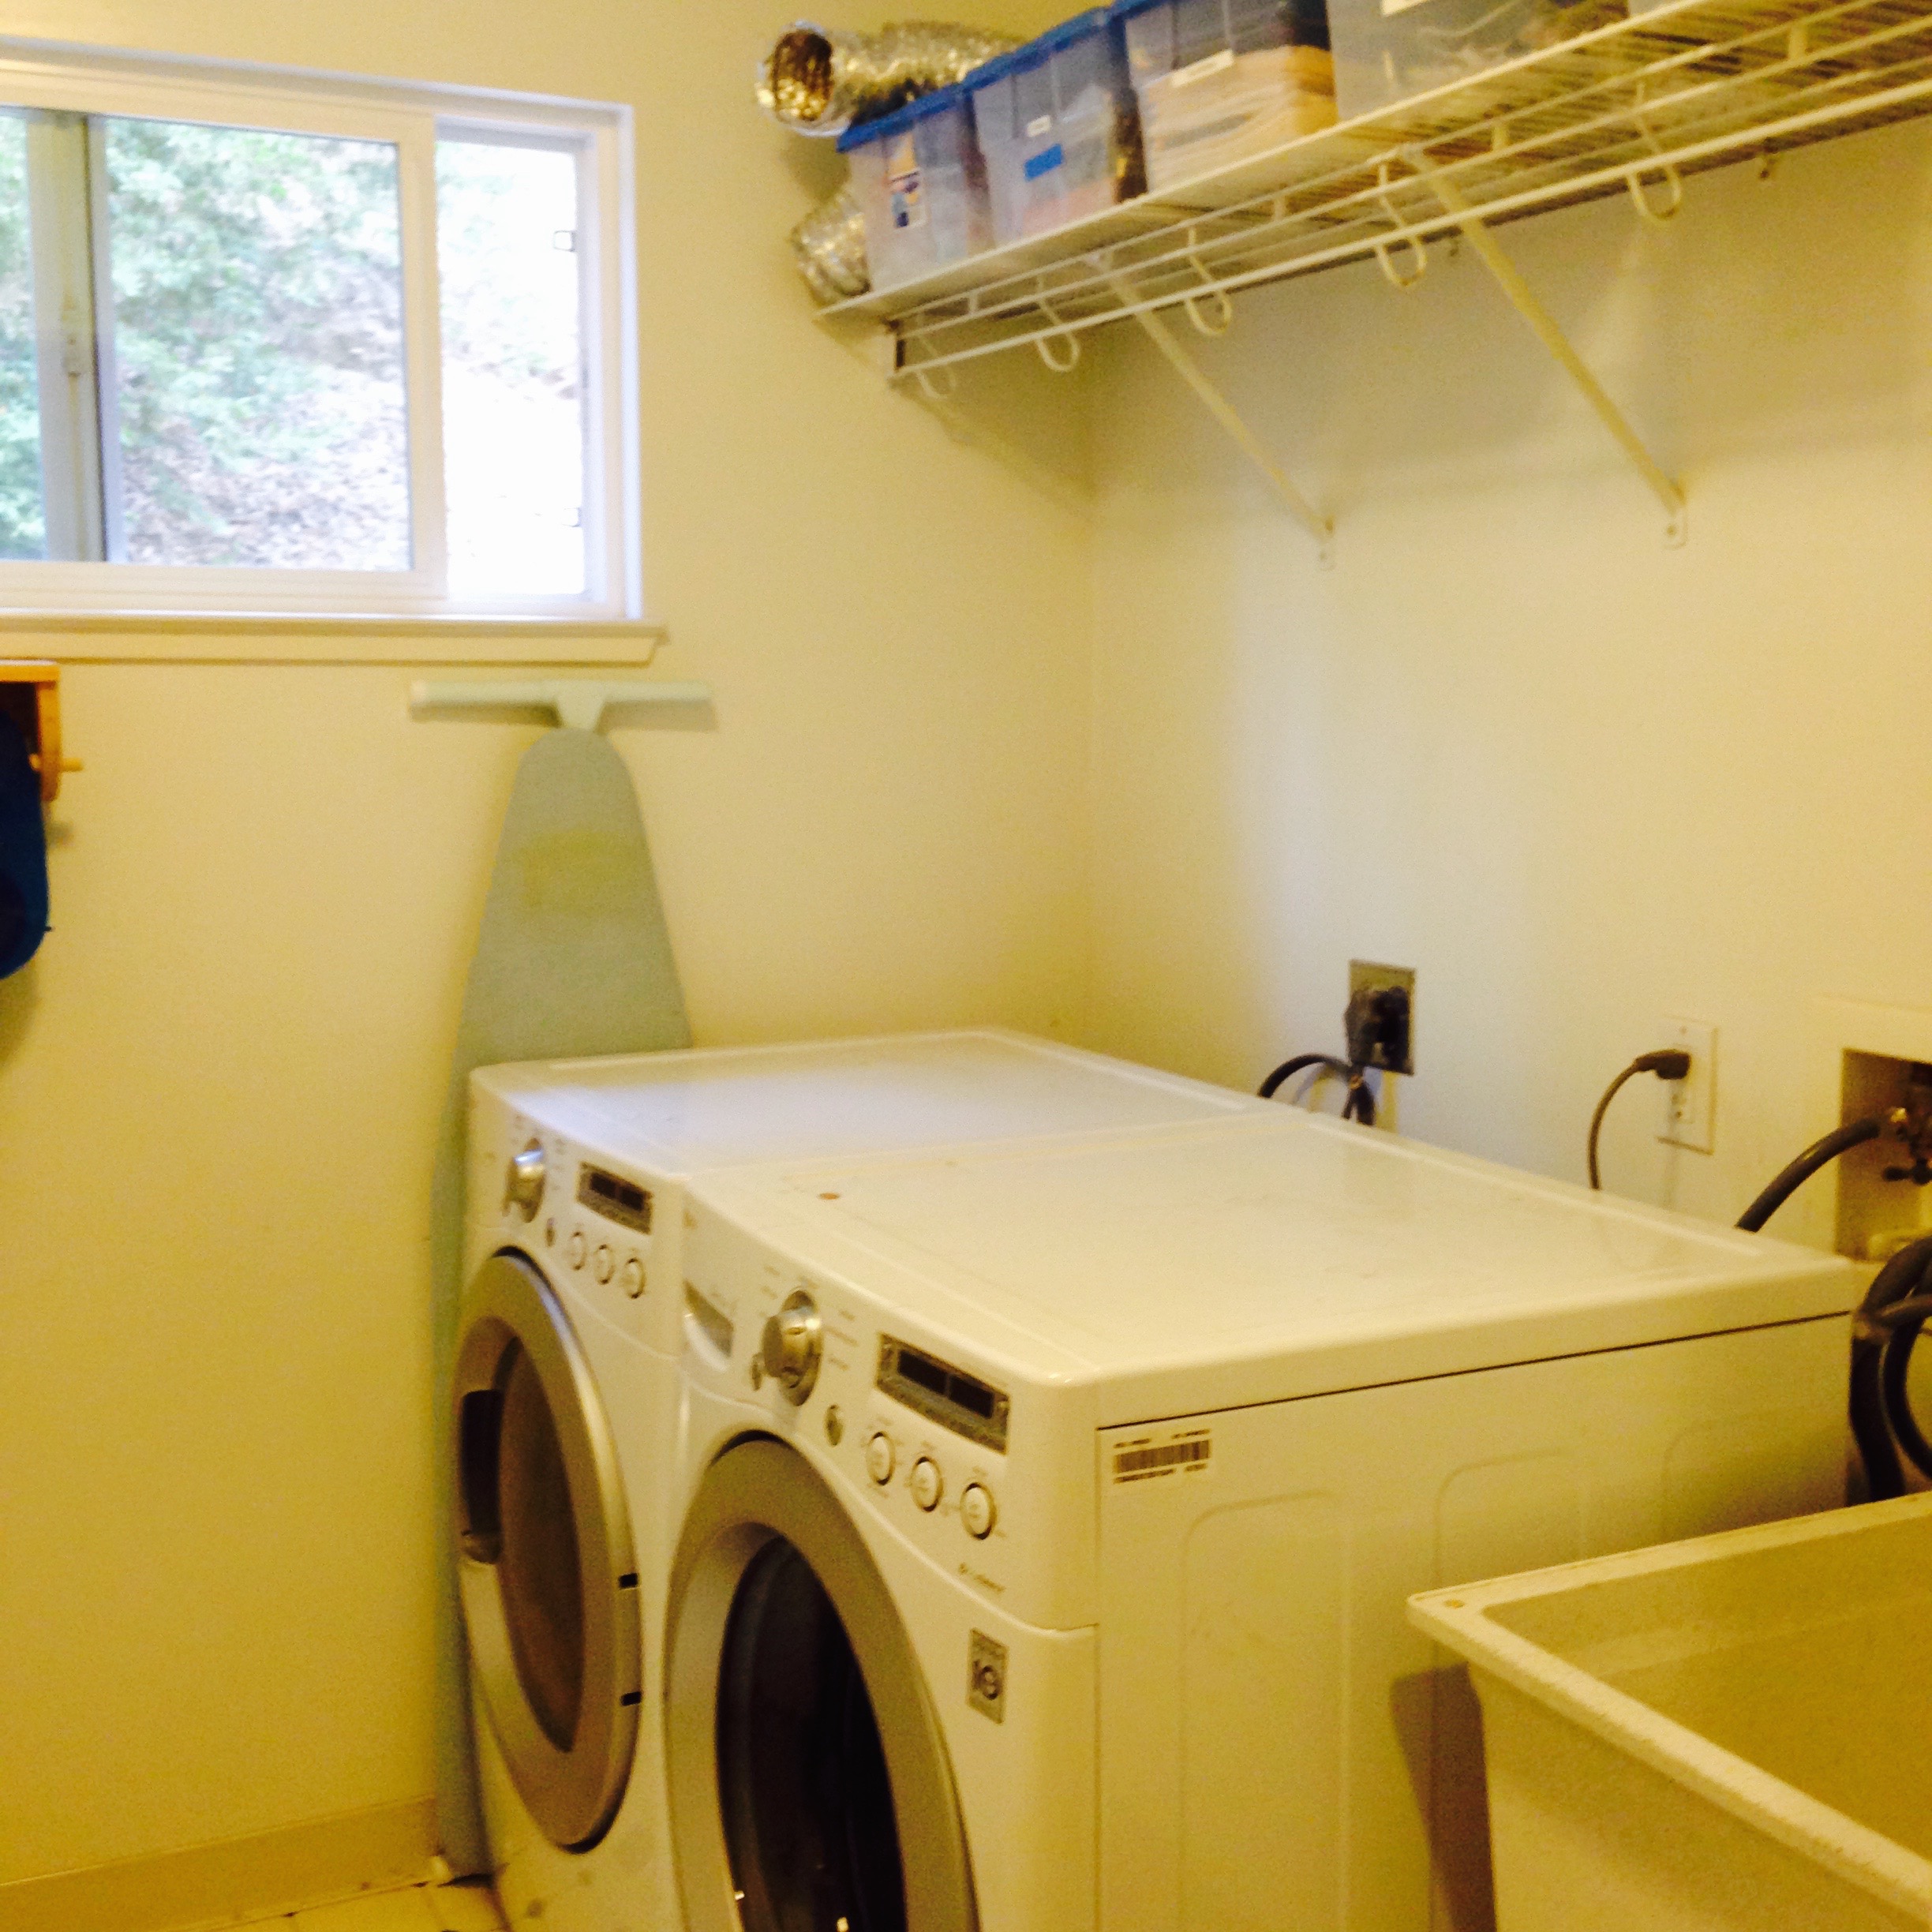
One whole wall of the laundry room is lined with floor-to-ceiling cabinets. The cabinets are chock-full of electronics equipment (What, that’s not what you store in your laundry room?)IMG_6480

Outside of the laundry room is a linen closet and our game closet. We rarely play games, so I find it absurd that we own this many. Anyone want to come over for a game night soon?
IMG_6478

If you go down the hallway past the laundry room you come to our garage. It’s pretty well organized with storage along the walls, infinity toys on one side, and a narrow sliver of empty space down the other side where Jon can maneuver his car inside to park (it’s a very shallow garage, so it’s quite amusing to watch this transaction take place).IMG_6494

Outside the garage we have our yard. Yup, that’s it. Our property line extends 6 feet on either side of the house and is backed by the (dry) creek and a canyon wall, so this is the entirety of our outside space.IMG_6488

You may have noticed a wooden fence in front of the house (see the photo at the top of this post if you need a refresher), and you may have thought that was a nice little fenced-in yard. You would be wrong. What that is, my friends, is the propane tank enclosure. Because we live off the grid in the mountains, our main heat source for the house is propane gas (what?!?!). Since moving here, I have had to endure propane safety lessons with the gas company and join a propane users support group. True story. Thankfully it’s still FREAKING 100 DEGREES EVERY DAY HERE, so we haven’t had to try out the whole propane gas heat thing yet.IMG_6482

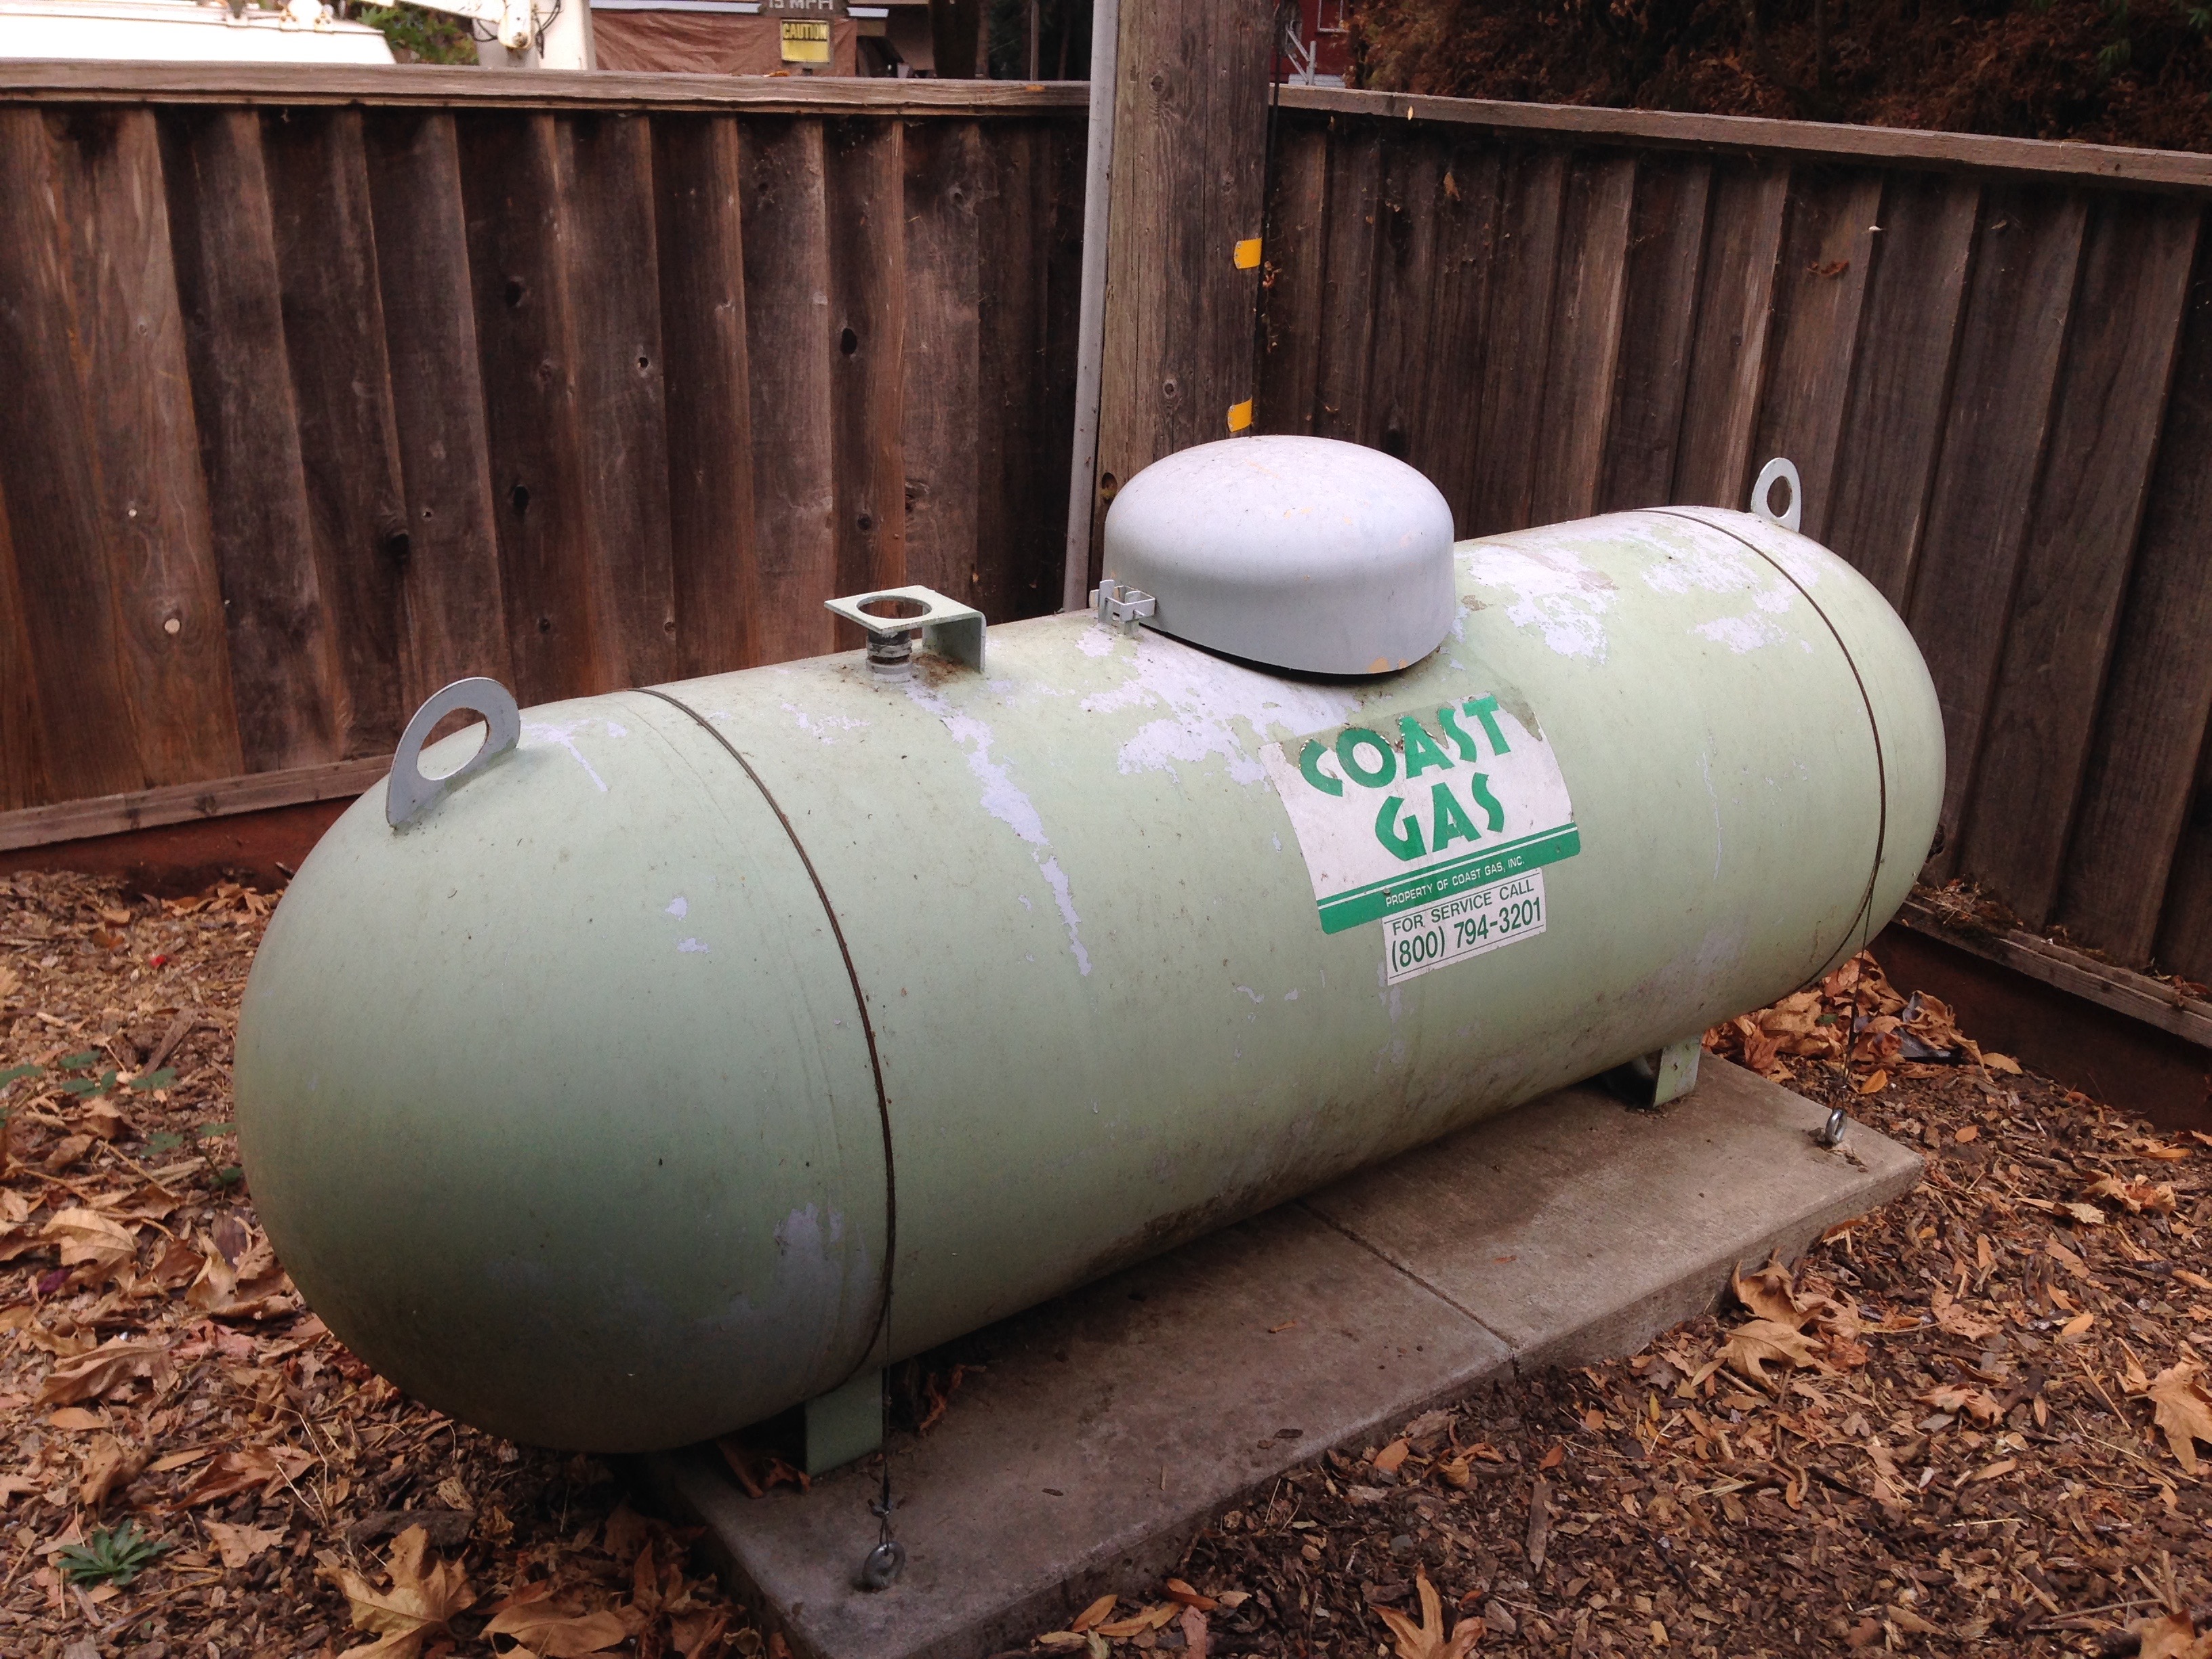
Now, I mentioned earlier that the fireplaces were important, and now you know why. With propane being our main source for heat, and propane being VERY EXPENSIVE, we are told that we will be relying on those fireplaces more and more as the seasons change. As such, we are stockpiling wood scraps and collecting them in aesthetically-pleasing boxes around the outside of our house. You’re welcome, neighbors.IMG_6483

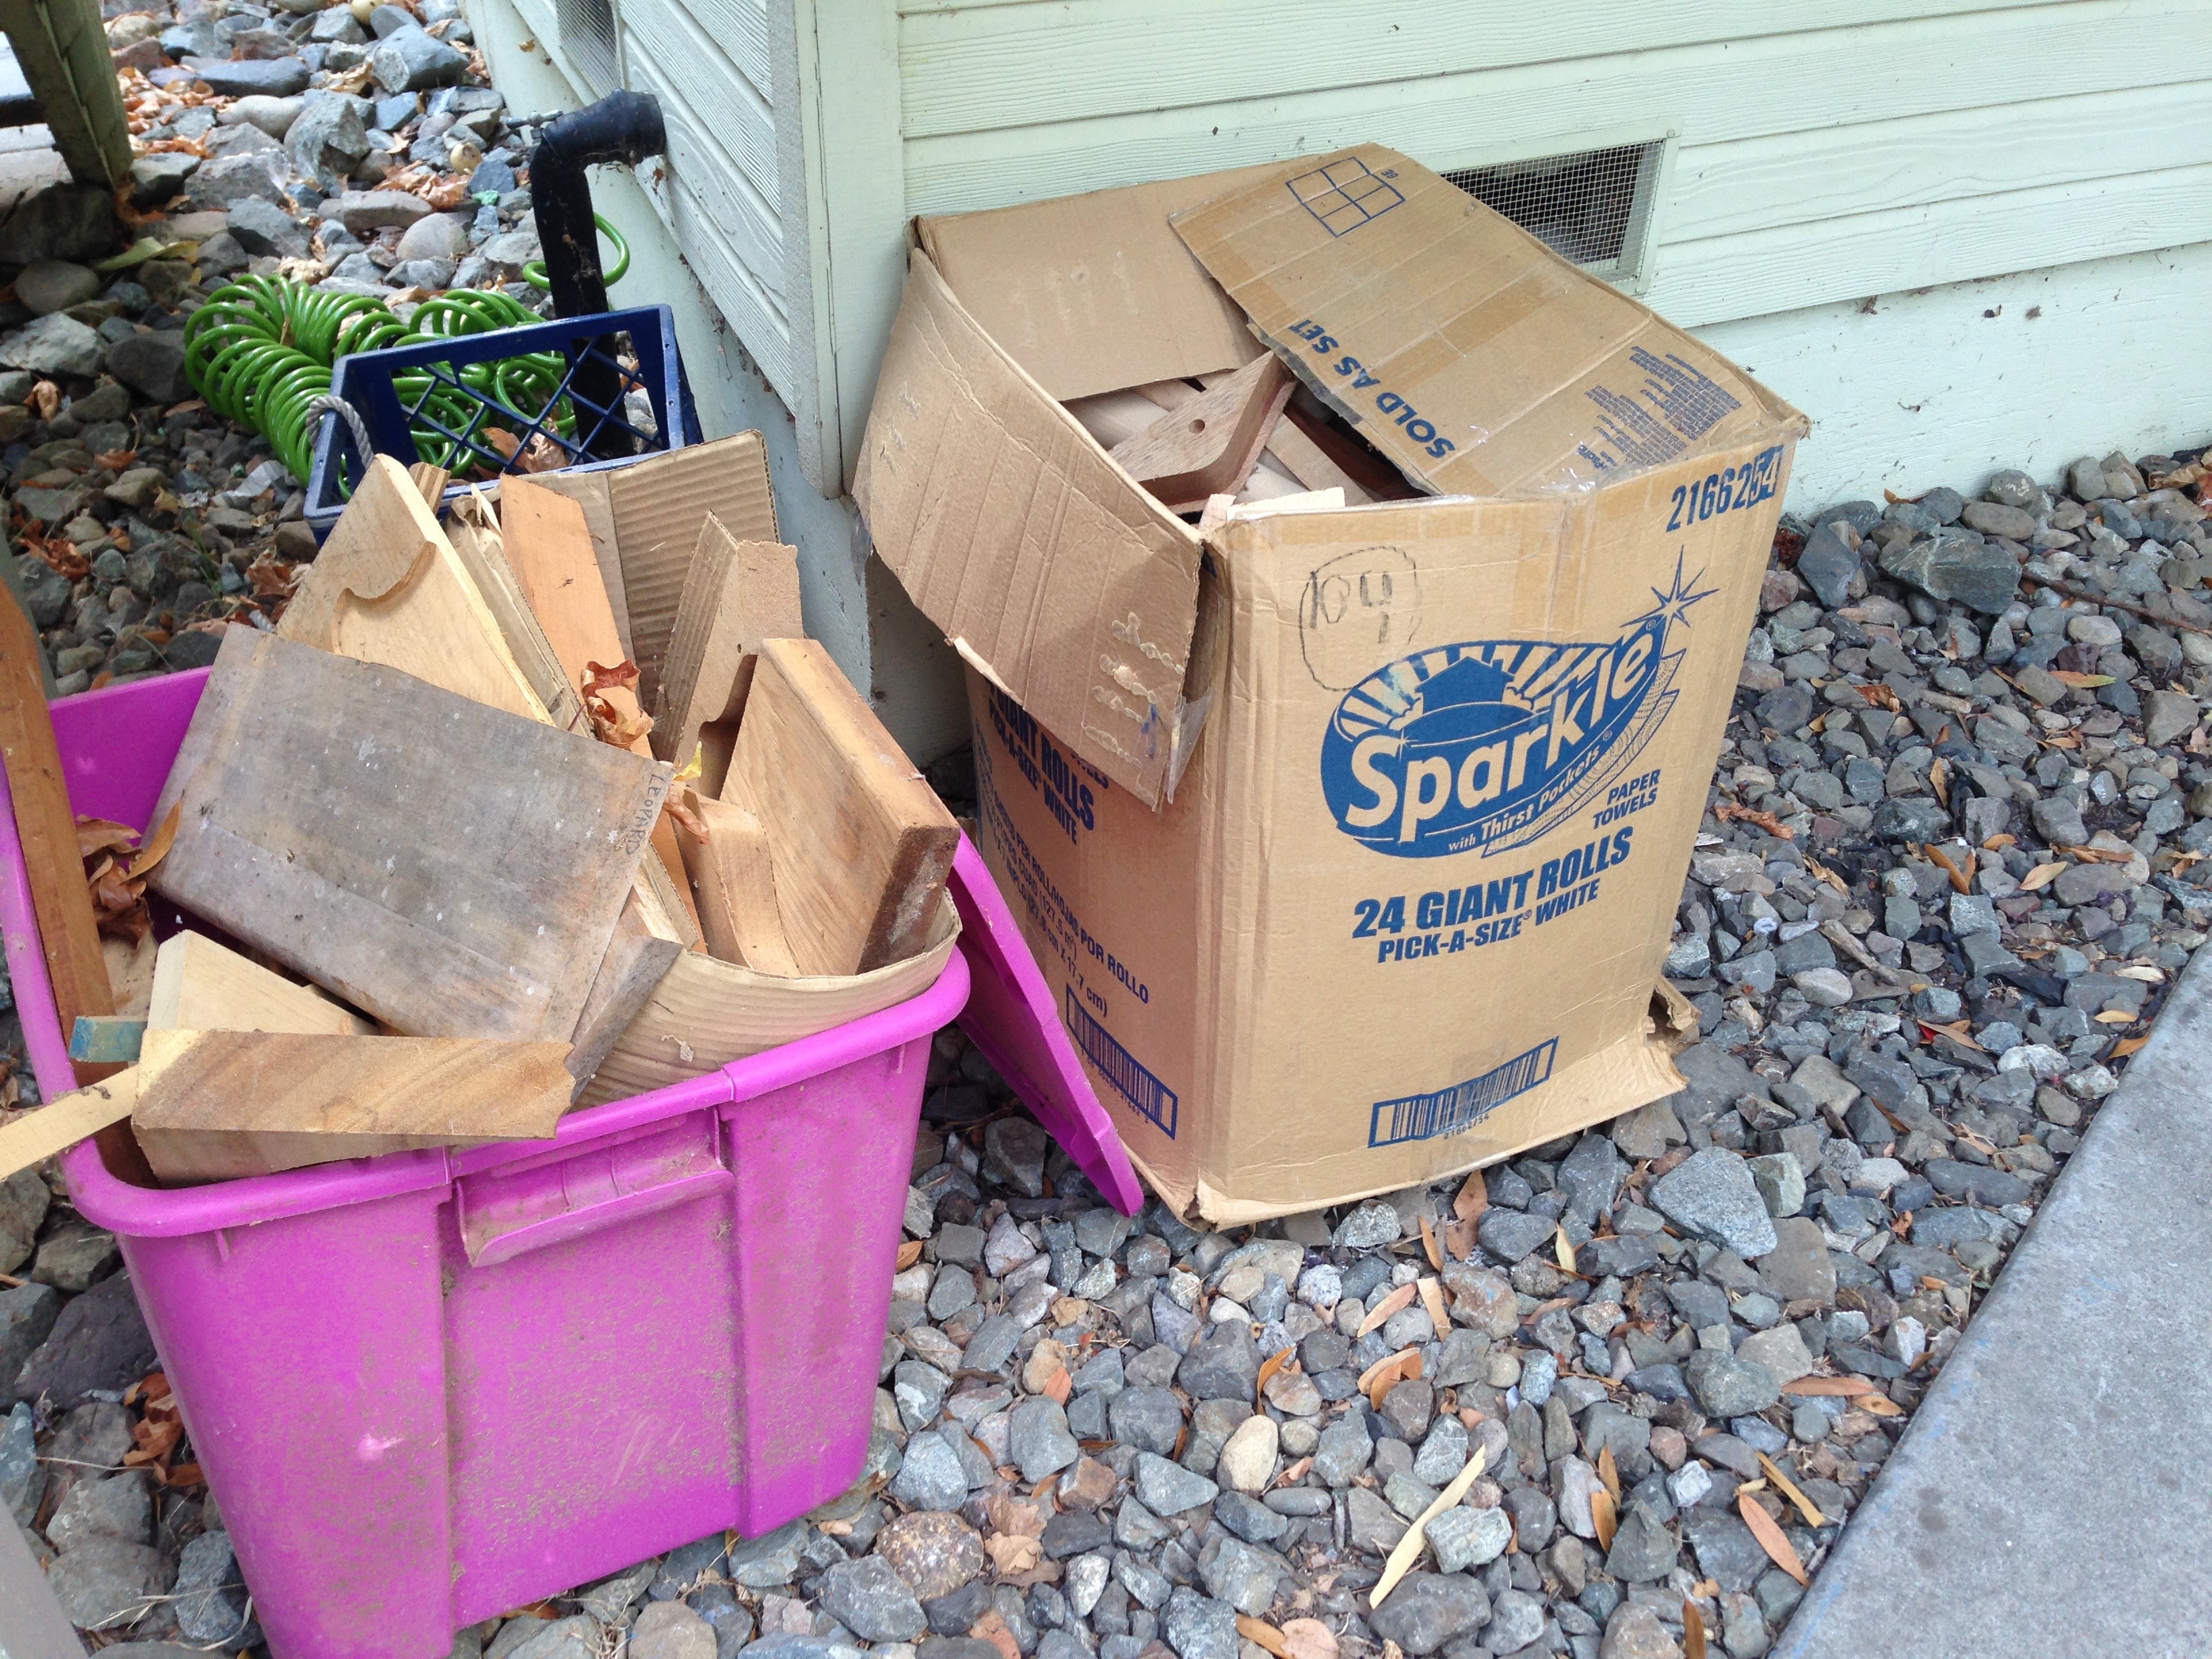
Now, with all drawbacks (bugs, propane, water restrictions, slow internet, no cell service, no yard) aside, River House really does suit us well. Every time we walk out our door we are greeted with nature’s playground:IMG_6493

We have woods and canyons and creeks to explore. It feels very much like the Northwest, and very much like home.IMG_6441

And, though you can’t see the houses or the people very well in this photo, we have incredible neighbors. Neighbors who invite us over for dinner and let us borrow their fridge when our fridge dies and who invite us over for bonfires and s’mores and whose kids have Power Wheels drag races with our kids in the street. The neighborhood is teeming with children the same ages as our boys and we’ve all made fast friends. It’s a wonderful tight-knit community, and we feel lucky to live here.IMG_6486

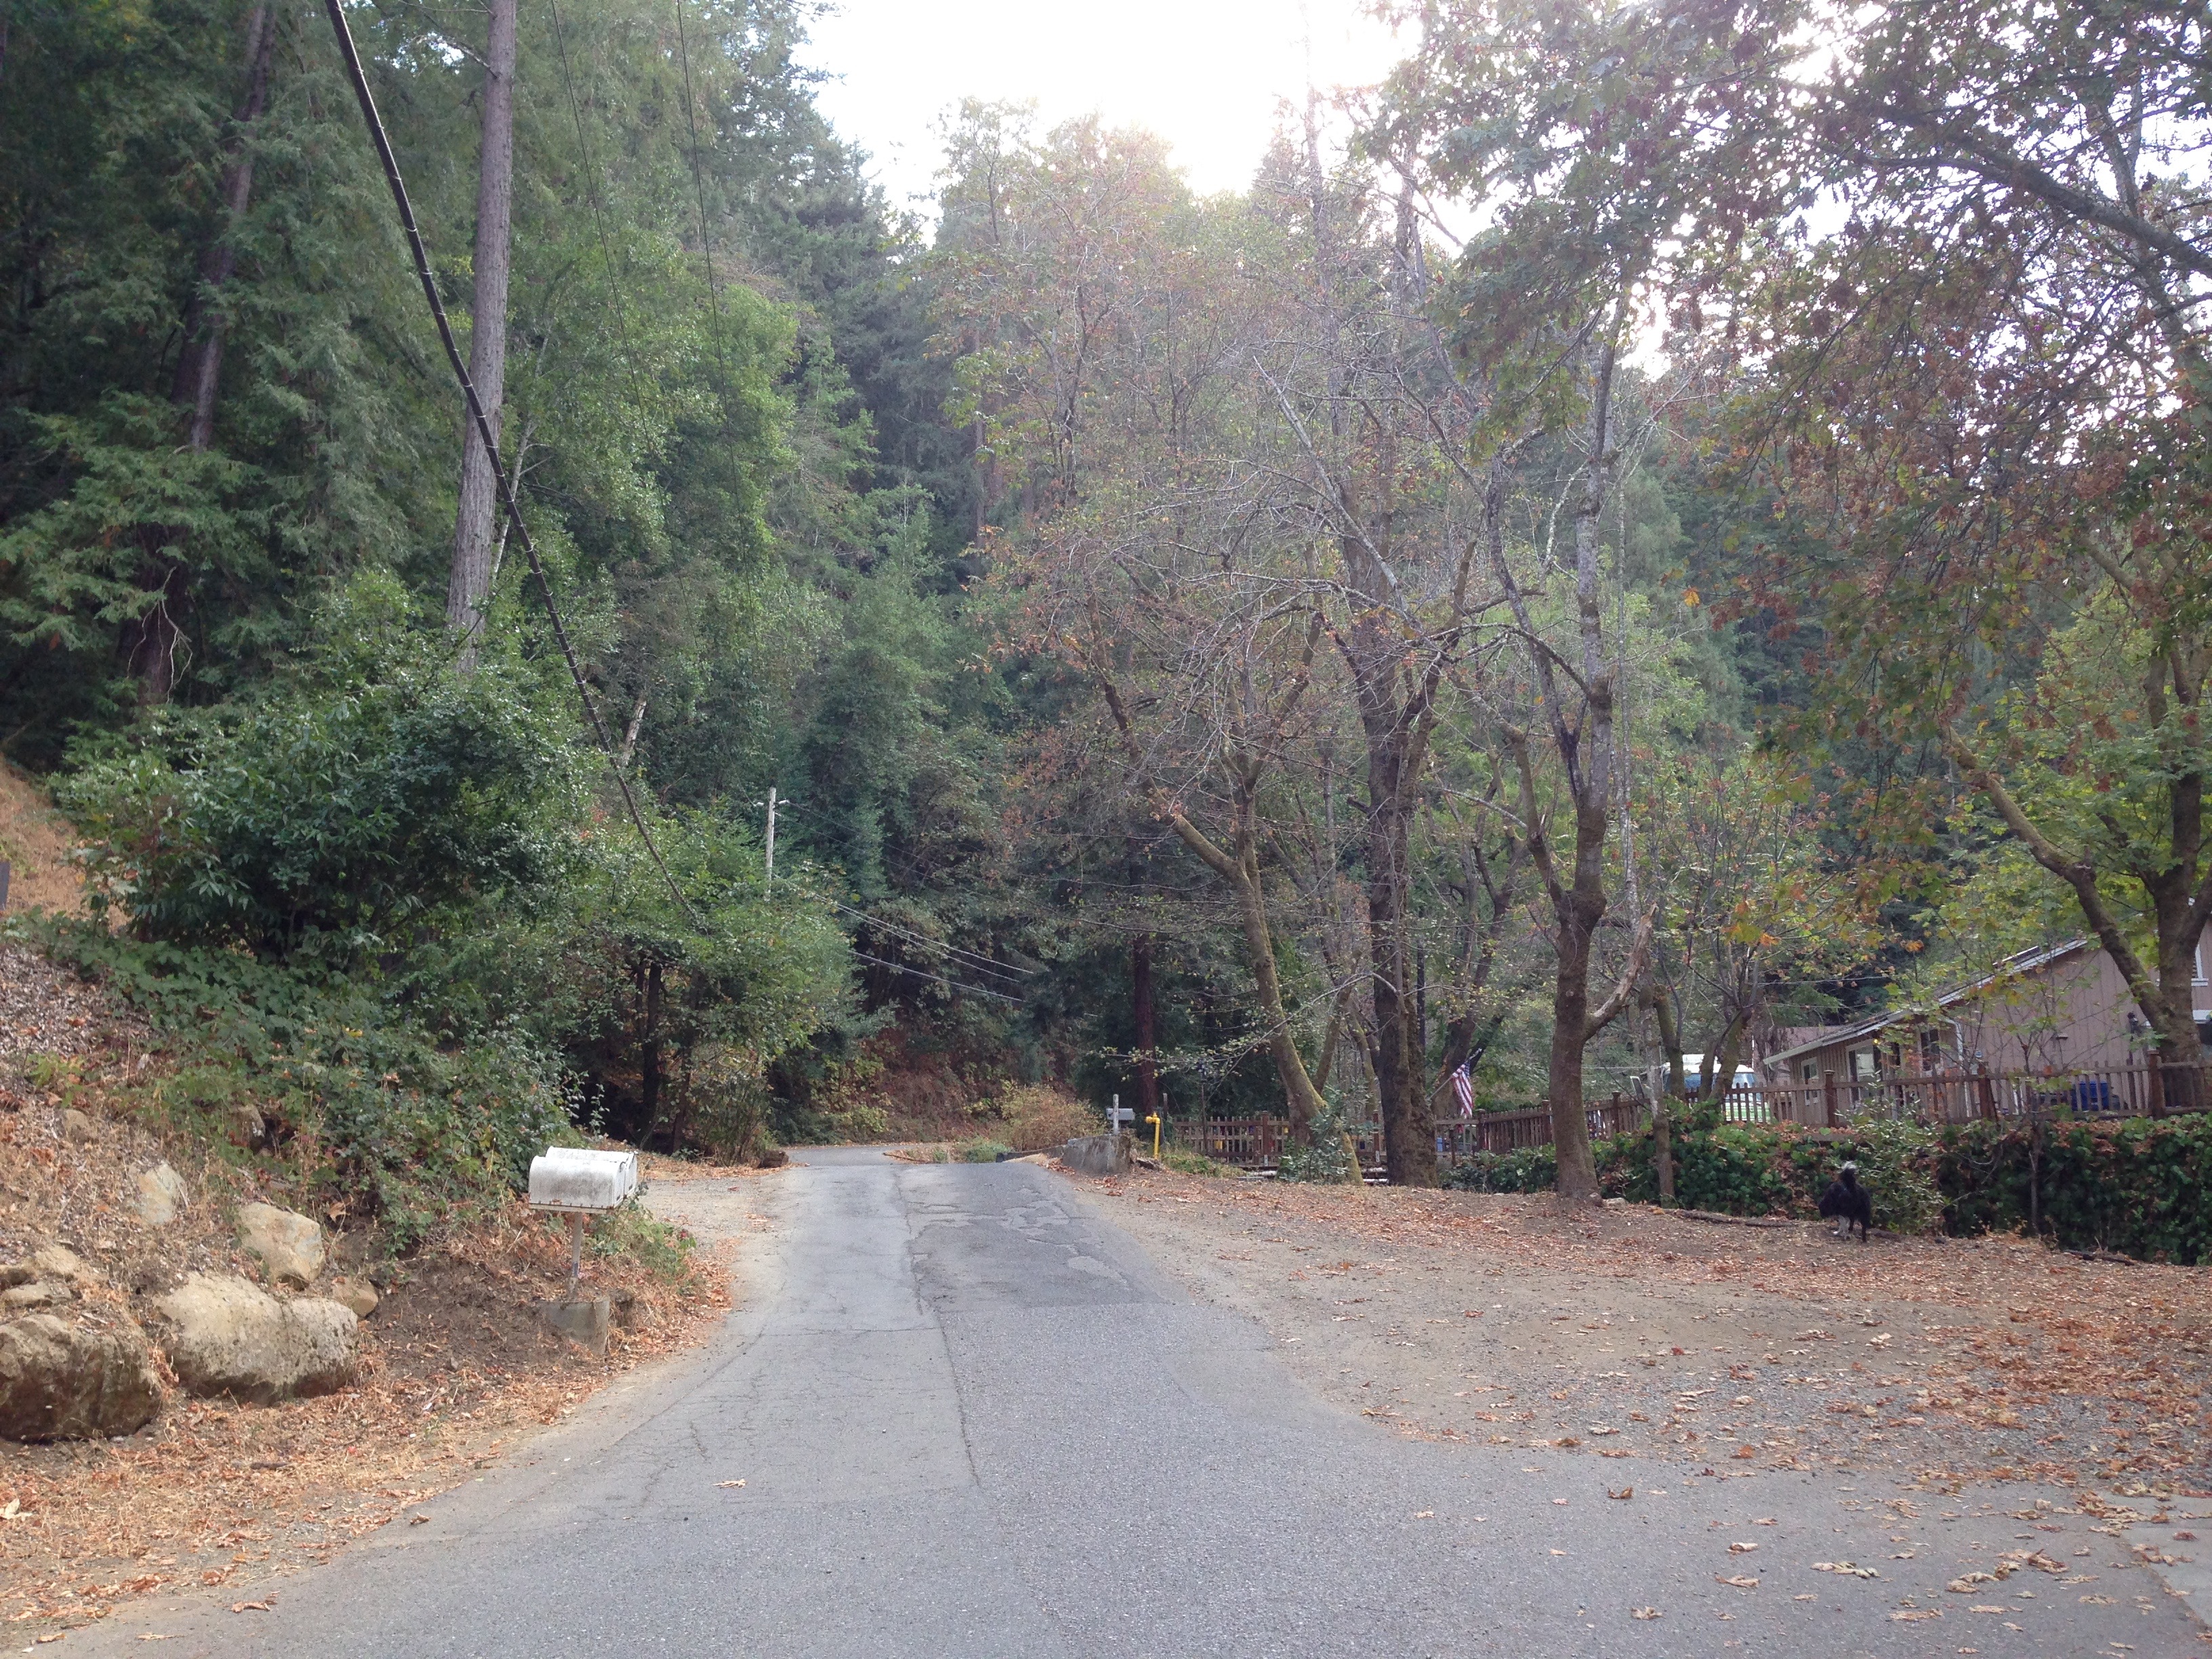
I hope you’ve enjoyed your tour through our mountain home, and let us know when you’re ready for a visit! I’ll even blow up the air mattress for you.

Modeling At Zulily

Yesterday we went down to the Zulily headquarters in Seattle for a fun little photo shoot. Zulily is an online daily deal site that sells items for moms, kids and home. I love the website and shop there frequently, so I was excited to learn that they are actually based right here in the Emerald City. I have several friends whose kids have modeled on the site so I decided to look into it. Turns out, all you have to do is sign up on their website and if they need models in your kids’ size they’ll contact you to come in for a photo shoot. The models get “paid” in juice boxes, toys, copies of their professional photos, and gift certificates to the Zulily website.

This is the second time we’ve gone down to Zulily for photos. David actually had a lot of fun last time and has been talking about it ever since we went a couple of months ago. So, when they asked us to come back again this week, we were happy to return.

We brought along my friend Diana for moral support and extra hands. Since Zulily is literally across the street from Starbucks headquarters we thought it would be fitting to pick up some coffee and cocoa before our photo shoot.

photo

When we got to Zulily we had a few minutes before our stylist (yes, even my baby was assigned his own stylist) was ready to bring us on set. They have a pretty sweet playroom for the model-kids to hang out in while they’re waiting:

photo (2)

Then it was time for “lights, camera, SMILE!”. They ended up doing separate photo shoots for David and Jacob this time. I had to stay with Jacob, so Diana went along with David to help him.

Jacob got to baby-model a baby sling. Here he is posing oh-so-sweetly with his model-mama and his patient photographer:

photo (1)

I didn’t get to see any of David’s shoot because I was in a separate studio with Jacob this time. Since I don’t have any photos of David from this week, here’s a little peek back to his shoot from the last time we went to Zulily:

Good Lad_41015_030_ed

So dapper! If you want to see the boys’ photos “live” on the Zulily website, head on over there today (Tuesday) to see David (he’s modeling “Candyland” kids apparel) and Wednesday to see Jacob (he’ll be modeling for “Slinglings” baby carriers). I have to say, I think they’re the cutest little models I ever have seen!

DIY Photo Collage Wall

IMG_0838

*Note* Sorry about the poor quality of the photos in this post. There’s a lot of glare and weird reflections of me taking the photos in the pictures. Turns out it’s difficult to take pictures of pictures inside glass frames!

A few years ago I saw a kit at Michael’s for making your own wall-size photo collage out of picture frames. I loved the idea, but it was ridiculous how much money they wanted for a few picture frames and directions on how to lay them out. I knew that I could make my own photo collage for pennies on their dollar.

We have a really long white wall in our “Great Room” (not that it’s especially great, I just don’t know what else to call the space) that I thought would be perfect for this project. It definitely needed some sprucing up, and I love the idea of having our photos be the centerpiece of the room where we spend most of our time.

To make my photo collage, I started by finding a bunch of black picture frames of different sizes. I already had several that were sitting unused in a closet and I found a few more at Goodwill. If you want to purchase inexpensive frames, Walmart always seems to have a good selection (there are few things that I will actually set foot in that awful place for, and cheap picture frames is one of them). You could also collect frames in a variety of finishes and spray paint them all the same color.

Then, I got to play picture frame puzzle! I laid out all of my frames on the floor and moved them around in different arrangements until I had a set-up that I thought looked nice. I got some inspiration from websites online, but mostly I just had fun playing around with the frames. Once I had a design that I liked, I snapped a photo of it so I’d remember the layout and I started hanging the frames on my wall.

For those of you who are more precise with lines and angles and such, you could actually trace the frames onto a large sheet of paper once they’re laid out in your desired arrangement. Then transfer the sheet to your wall and hang it up with painters tape so you can see where to place the nails for each frame. I’m more of an eyeball-it-and-take-a-chance do-it-yourselfer, so I skipped this step entirely.

For the actual photos in the frames, I decided to stick with back-and-whites. I like how classic and elegant they look. Plus, I’m really a bit afraid of colors–I never quite know how to use them and I feel like too many colors can make things look too busy and “loud”. I chose photos that are meaningful to our family–they show who we are and where we come from. Every now and then I print off updated photos to replace old photos in the frames. Here are a few of my favorites:

Our wedding– This frame is in the middle of the collage, and it’s a great reminder of the love that started our family.

photo (17)

Awkward family photo– This isn’t a particularly good photo, but I still love it because of the memories I have of taking the photo. This was the first family photo we had with all 4 of us “posing” for the camera. It was at a dinner we had at my parents’ house for my sister before she moved to California for her internship last summer. Jacob was about 8 weeks old and, if you notice, he’s naked in this photo. That’s because he was in his diaper explosion phase where he would ruin about 10 outfits a day. Right before this photo was taken he pooped on the 4th (and last) outfit that I had brought with us. His options were to borrow a dress from our friends’ baby girl or go naked–so, here he is, naked. Both boys are looking off to the side where some commotion more interesting that the camera seems to have been taking place.

IMG_0898

Golden Gate Bridge– We had a 2-year stint living in the Bay Area while Jon was in graduate school. It was right before we had our first baby and it was a magical time in our lives where we both grew and learned so much. This photo of the bridge in San Francisco brings back so may great memories of our early marriage.

IMG_0897

Babies on Bibles– We took newborn photos of both boys laying on Bibles. It’s neat looking at both of them when they were at the same tiny baby stage. I also love the symbolism of the Bible being their firm foundation.

IMG_0899

Family Foursquare- This one has a picture of each family member (clockwise from top left): Jacob, David, our dog Bota (gotta include our first “child”), me and Jon. The photo of Jacob is the first time he smiled. The photo of David is a baby photo that I just loved so much I didn’t want to change it out for an updated one. The photo of me and Jon was taken on a family trip right before we got engaged–sweet, young love!

IMG_0900

Family Rules– I ordered this wooden sign for us off Etsy. I had actually wanted to make my own sign, but then I realized that I have two young children and “want” would probably never actually become “made”. On Etsy I got to choose all of the wording for the sign and they did a beautiful job handcrafting it for us. The sign is made of wood and cost about $25 (making it the most expensive part of this whole project, but still a great deal if you ask me!). I actually ended up liking this sign so much that I bought one for each of our sisters this past Christmas.

IMG_0837

Now I just need to come up with some ideas for the rest of my blank walls!

"It Worked For Me": Peterson Style

I got a lot of good feedback on my last post about baby stuff, so I thought I’d try to do a few follow-up posts on general parenting tips that we’ve picked up or developed in our 2 glorious years with offspring.

Now that I’m a parent, I like reading parenting magazines that give me advice on how to handle the two little tornadoes of energy that are under my care. One of my favorite columns to read is called “It Worked For Me” in Parent’s Magazine. People basically just write in to tell about little tips and tricks that they use with their kids. Some of the ideas are really amazing–simple little things that make life so much easier.

Mostly out of desperation, Jon and I have developed our own little repertoire of “It Worked For Me” solutions to our every day problems. Here are a few:

  • Water Stopper

    David trying--unsuccessfully--to get water out of the fridge

    David trying–unsuccessfully–to get water out of the fridge

    David loves using the water dispenser in our fridge. The problem is that he usually likes using it as a means to create his own slip-n-slide on our kitchen floor. Or to give the dog a shower. Or just to see how much water will come out before an adult notices his exploits. You get the idea.
    Jon, being the clever engineer that he is, came up with a simple solution to our water dispenser woes. Now we just keep a clean, dry sponge wedged between the back of the dispenser and the push-lever. With a little effort, an adult can still press the lever against the sponge and get water out. No matter how hard he tries, though, David can’t get the lever to push in enough to release the water. I don’t know how long this will continue to work for us, but hopefully by the time David develops the strength to push in the lever all the way he’ll also understand the word “no” and all of it’s consequences a bit better!

  • Easier Pancakes
    A "pancake stick" for David

    A “pancake stick” for David

    We like having a lazy family breakfast most Saturday mornings, so that usually means we’re making pancakes. In order to get the pancakes from griddle to plate as quickly as possible we do a couple of things. First, we mix the batter in an 8-cup pyrex measuring cup. It’s easy to pour the pancakes with the pour spout and it means we only have 1 dish to clean at the end of the day. Then, we like to make “pancake sticks” for David (another idea of Jon’s). That way when the pancake is ready to be cut up into little pieces for David we can just snip, snip, snip down the “stick” with our kitchen shears and it’s ready to go. Sometimes we also like to make fun shapes out of the pancake batter for David. To do this, we use a squeeze bottle to just squirt the shapes out onto the griddle (we’ve even used a clean, empty ketchup container as the squeeze bottle and it worked just fine).

  • Video Stories
    Jon has the type of job that, at certain times, requires him to spend a lot of time away from our family. He has to pull some late nights and do some traveling. We always have story time before naptime and bedtime where Jon and I read to the boys. I like the boys to be able to have Jon read them their stories even when he’s away, so before he left for his last work trip we recorded him reading several of David’s favorite stories using my iPhone. I transferred the videos to my computer, and also kept them on my phone for on-the-go viewing. Now we can watch Daddy reading stories no matter where he is in the world. Plus, the stories are a great distraction while we’re driving or waiting for our food to arrive at a restaurant. Just flip on my phone, start the video, and we have a happy toddler!
  • Gift Closet
    I have a lot of friends and family members with kids now. It seems like every other weekend we have a birthday party, baby shower, or holiday to celebrate that requires some sort of gift. Since it takes a long time to go out shopping for each individual gift, and because all of those lovely gifts can start to put a dent in your wallet, I’ve started my own little “gift closet”. It’s not actually a closet, it’s just the top shelf in my own bedroom closet, but saying I have a “gift shelf” just doesn’t have the same ring as the “gift closet”. Anyway, I digress. The gift closet is just a place where I put gifts as I find them. I like to shop online deal sites like Zulily, Kids Woot!, Plum District, Mamasource and Totsy. You can get all kinds of things on the deal sites: clothes (for both baby and mom), toys, shoes, nursery accessories, strollers, even baby food and diapers. When a really good deal comes up (like when free shipping is being offered or there are deep discounts on my favorite items), I’ll buy one or two items to add to my gift closet. I also shop stores like Target during their clearance times (typically January and July) when they’re trying to off-load all of their seasonal toys and clothes for up to 75% off. At any given time I have between 5-10 items in my gift closet that would be suitable gifts for babies or young children. Then, when those baby showers and birthday party invites start arriving I know that I can just “shop” in my gift closet. I save myself a trip to the store and I’ve already saved time and money (now that I have 2 kids to tote along with me everywhere I go, I avoid physical stores like the plague. I hate going into stores. But that’s for another post.).
  • Monthly Baby Photos

    David at 1 week old

    David at 1 week old

    David at 6 months old

    David at 6 months old

    David at 1 year old

    David at 1 year old


One of my favorite things that we did with each of our boys was our monthly photo. Starting at birth, we take a photo of each boy each month until their first birthday. For David, we did all of our photos with a sock monkey. It was incredible to see how he went from a tiny infant smaller than the monkey to a big boy who could hold the monkey up for the photo on his first birthday! Jacob’s photos are a bit different. We’re posing him on top of a large paper calendar each month and circling his monthly “birthdays” on the calendar.

Jacob at 1 week

Jacob at 1 week

Jacob at 5 months

Jacob at 5 months

We have a lot of fun going back through the photos to see how our babies have grown. For David’s photos, I plan on continuing to take a photo of him with the sock monkey each year until he moves out on his own or until he is big enough to fight me off when I thrust the stuffed animal at him for yet another photo session. For Jacob’s calendar photos, I may have him continue holding the calendar for important events as he gets older (birthdays, first days of school, etc.).

  • Custom Books
    I get lots of coupon codes for custom photo books from companies like Shutterly and Mixbook. I love making photo books to document family events, but lately I’ve also been making my own picture books for the boys. I just use our photos and I write a story to place in the text box on each page. The last two books I made were “David’s Busy Day” (based on one of David’s favorite picture books, “Lulu’s Busy Day”) and “My Funny Family’s Feelings” (each page is a different family member expressing some feeling–i.e. excited, surprised, sad, etc.).  I can usually get a custom hard-cover picture book shipped to my door for about $10. These are some of David’s absolute favorite books because, like all of us, he’s a bit narcissistic and loves seeing himself.

    Home-made photo books

    Home-made photo books

  • Clothing boxes
    I keep large plastic bins in my kids’ closets. I have one bin per size (newborn, 3 month, 6 month…and on up to 3T). Whenever they grow out of a piece of clothing, I put it straight into the appropriate bin. Whenever we receive clothing that is not a size the kids are currently wearing I put that right into the size-bin as well. That way, whenever I need clothes for the next size up I just grab the bin and unload it into the kids’ drawers. Yay for hand-me-downs!
  • Toddler Thank-Yous
    David is only 2, so he’s not quite at the age where he can write his own thank-you notes.   I happened to have some of his modernistic crayon drawings and finger paintings lying around, so I decided to turn them into thank-yous. I just wrote a note on top of the artwork with a Sharpie marker and David scribbled his “name” at the bottom. So much more personal than a store-bought card, and a good use for the countless creations David generates.

Parents are ever-resourceful, and I’d love to hear some of your favorite tips and tricks. Feel free to leave a comment with your clever ideas!