Authentic Irish Scone Recipe

We’ve lived in Ireland for the better part of a year now, and in these past few months I have come to some conclusions about Irish culture:

1.  “Type-B” personalities run the roost.

2. You must, MUST, support your local hurling/rugby/football team with the undying love of a mother for her only child.

3. Tea and scones are synonymous with life itself.

It is this final conclusion that has brought me to the point I am at now–that is, the point at which I have become obsessed with tea and scones (trust me, my waistline bears the proof). Of course, it didn’t take much convincing to get me to eat fresh-baked bread smothered in cream and jam. And I doubt it will for you, either. So the next time you want a homemade treat or a tasty tea or a light breakfast, just whip up a batch of Irish scones. I have to warn you, though–you just might get hooked!

photo 1 (2)

Irish Scones
Makes 4-6 delectable treats

Ingredients:

2 cups/225 g self raising flour
1 tsp baking powder
1/2 tsp salt
4 Tablespoons/55 g butter
2 tsp/1 oz fine sugar (optional)
1 cup/150 ml milk
1 handful raisins (optional)
1 egg beaten with a splash of milk

Preparation:

  • Preheat the oven to 400F/205C/Gas 8
  • Grease and flour a baking sheet
  • In a large bowl, whisk together the flour, baking powder and salt. Add the butter and use a pastry cutter or two forks to cut it into the flour mixture until it resembles fine breadcrumbs. Add the sugar (if using) and stir.
  • Make a well in the center of the flour and slowly stir in enough milk to make a soft, pliable dough.
  • Add the raisins (if using) and mix them into the dough.
  • Turn the dough onto a well-floured board and knead very lightly until just smooth, then roll out to about 3/4″ (2 cm) thick.
  • Cut rounds with a 3″ cutter or an overturned glass, or cut into triangles using a sharp knife.
  • Place scones on the prepared baking tray and brush with the beaten egg and milk mixture.
  • Bake near the top of the hot oven for 15 minutes, until golden brown.
  • Cool on a wire rack
  • Serve with butter and lashings of jam and cream. Drink a cup of tea. Feel very Irish.

photo 2

Holy Moly, Guacamole!

With Cinco de Mayo just around the corner, I thought I’d post my new-favorite recipe: Holy Moly, Guacamole! Alright, it’s not actually called “Holy Moly Guacamole”, but it’s so dang good that I can’t help but think to myself, “holy moly–this is INCREDIBLE!” every time I eat it. I got this recipe from a friend and it really is the best guacamole I’ve ever had.

This is your classic guacamole, with a few twists that really set it apart. It has two “secret” ingredients (curry powder and chopped dates) that really highlight the sweet and spicy flavors that I always seem to crave. This recipe makes about 3 cups of guacamole, plenty for sharing. Which is a good thing, because once your friends get a taste of it, you’ll be doing a LOT of sharing!

GuacamoleDip

Guacamole

3 medium avocados, pitted and chopped
1 Tablespoon lime juice
2 teaspoons curry powder
1 teaspoon salt
2 cloves garlic, crushed or pressed through a garlic press
2 Roma tomatoes, seeded and diced
1/4 cup red onion, diced
2 Medjool dates, diced (could use any dates)
2 Tablespoons fresh cilantro

Put the avocados in a bowl and smoosh them around a bit with a spoon until you reach your desired consistency (chunky or smooth–I like mine mostly smooth with a few small chunks). Add the rest of the ingredients to your avocados and stir to combine. Serve with chips (Juanita’s are my favorite brand) or veggie slices for dipping. You may even want a Margarita on the side 🙂

*Tip* Leave one of the avocado pits in your guacamole–it will help keep it from turning brown. Store leftover guacamole (if there IS any left over!) tightly covered in the fridge.

Resurrection Roll Recipe and Bible Story

I love finding creative ways to teach important truths to kids. And I love it even more if I can find a way to tie food into the “lesson”. You can imagine my excitement, then, when I first discovered Resurrection Rolls.

Basically, Resurrection Rolls are a treat that you make where each step of the cooking process represents part of the Easter story. It’s a wonderful way to tell kids the Easter story AND the rolls themselves are sublime. I’ve had people make the rolls for me before, but this was my first time doing the whole project with David. He was able to help out a bit and was pretty engaged the whole time (even if he did keep trying to swipe marshmallows from my stash). I’ll definitely be doing this again next year–a new tradition has been born!
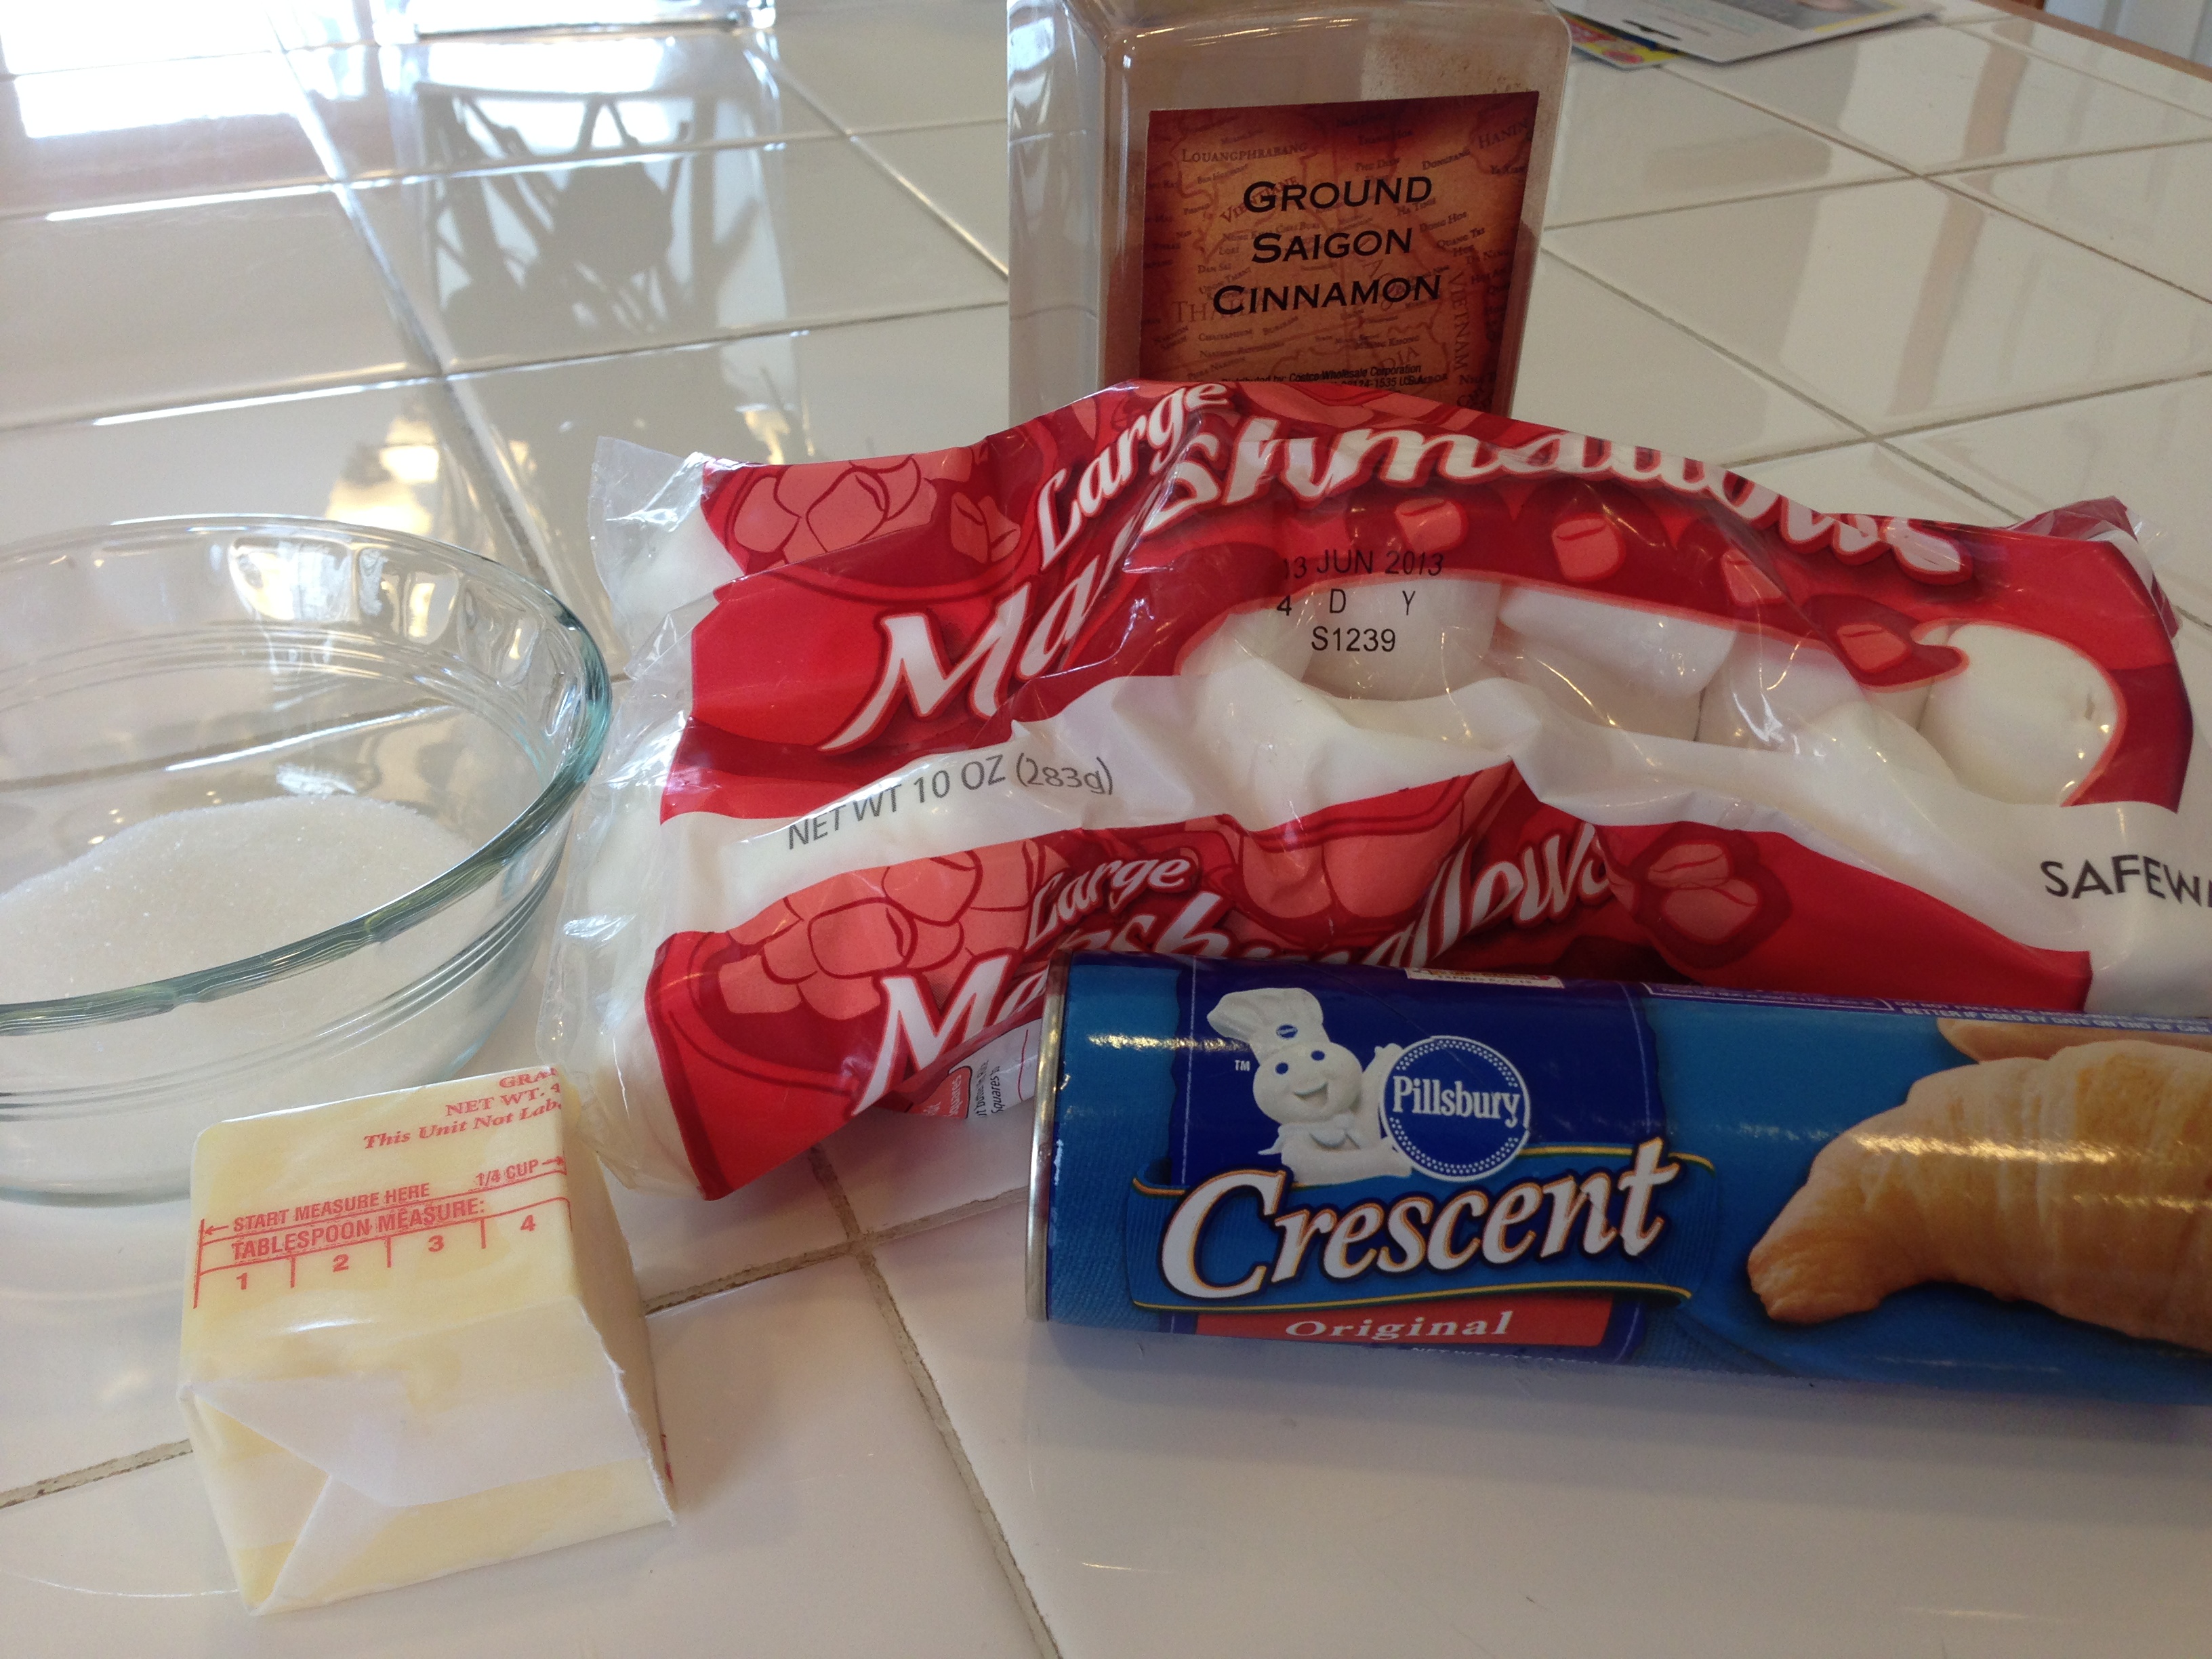
What you’ll need:

IMG_1498

  • 1 package of crescent rolls
  • 8 large marshmallows (plus extras to snack on while you’re waiting for the rolls to bake!)
  • 3 Tablespoons melted butter
  • 3 Tablespoons sugar plus 1 Tablespoon cinnamon
  • Parchment paper
  • Baking sheet
  • Bible (or use the “script” below)

How It’s Done:

IMG_1513Start by preheating your oven to 350 degrees. While the oven is preheating, get out your Bible and open up to John 19 or find the Easter story in a children’s Bible (my favorite is the Jesus Storybook Bible). Below you’ll find the pictures and the “script” for how I told the story to David (he’s only 2 years old, so I kept it simple for him).

IMG_1509

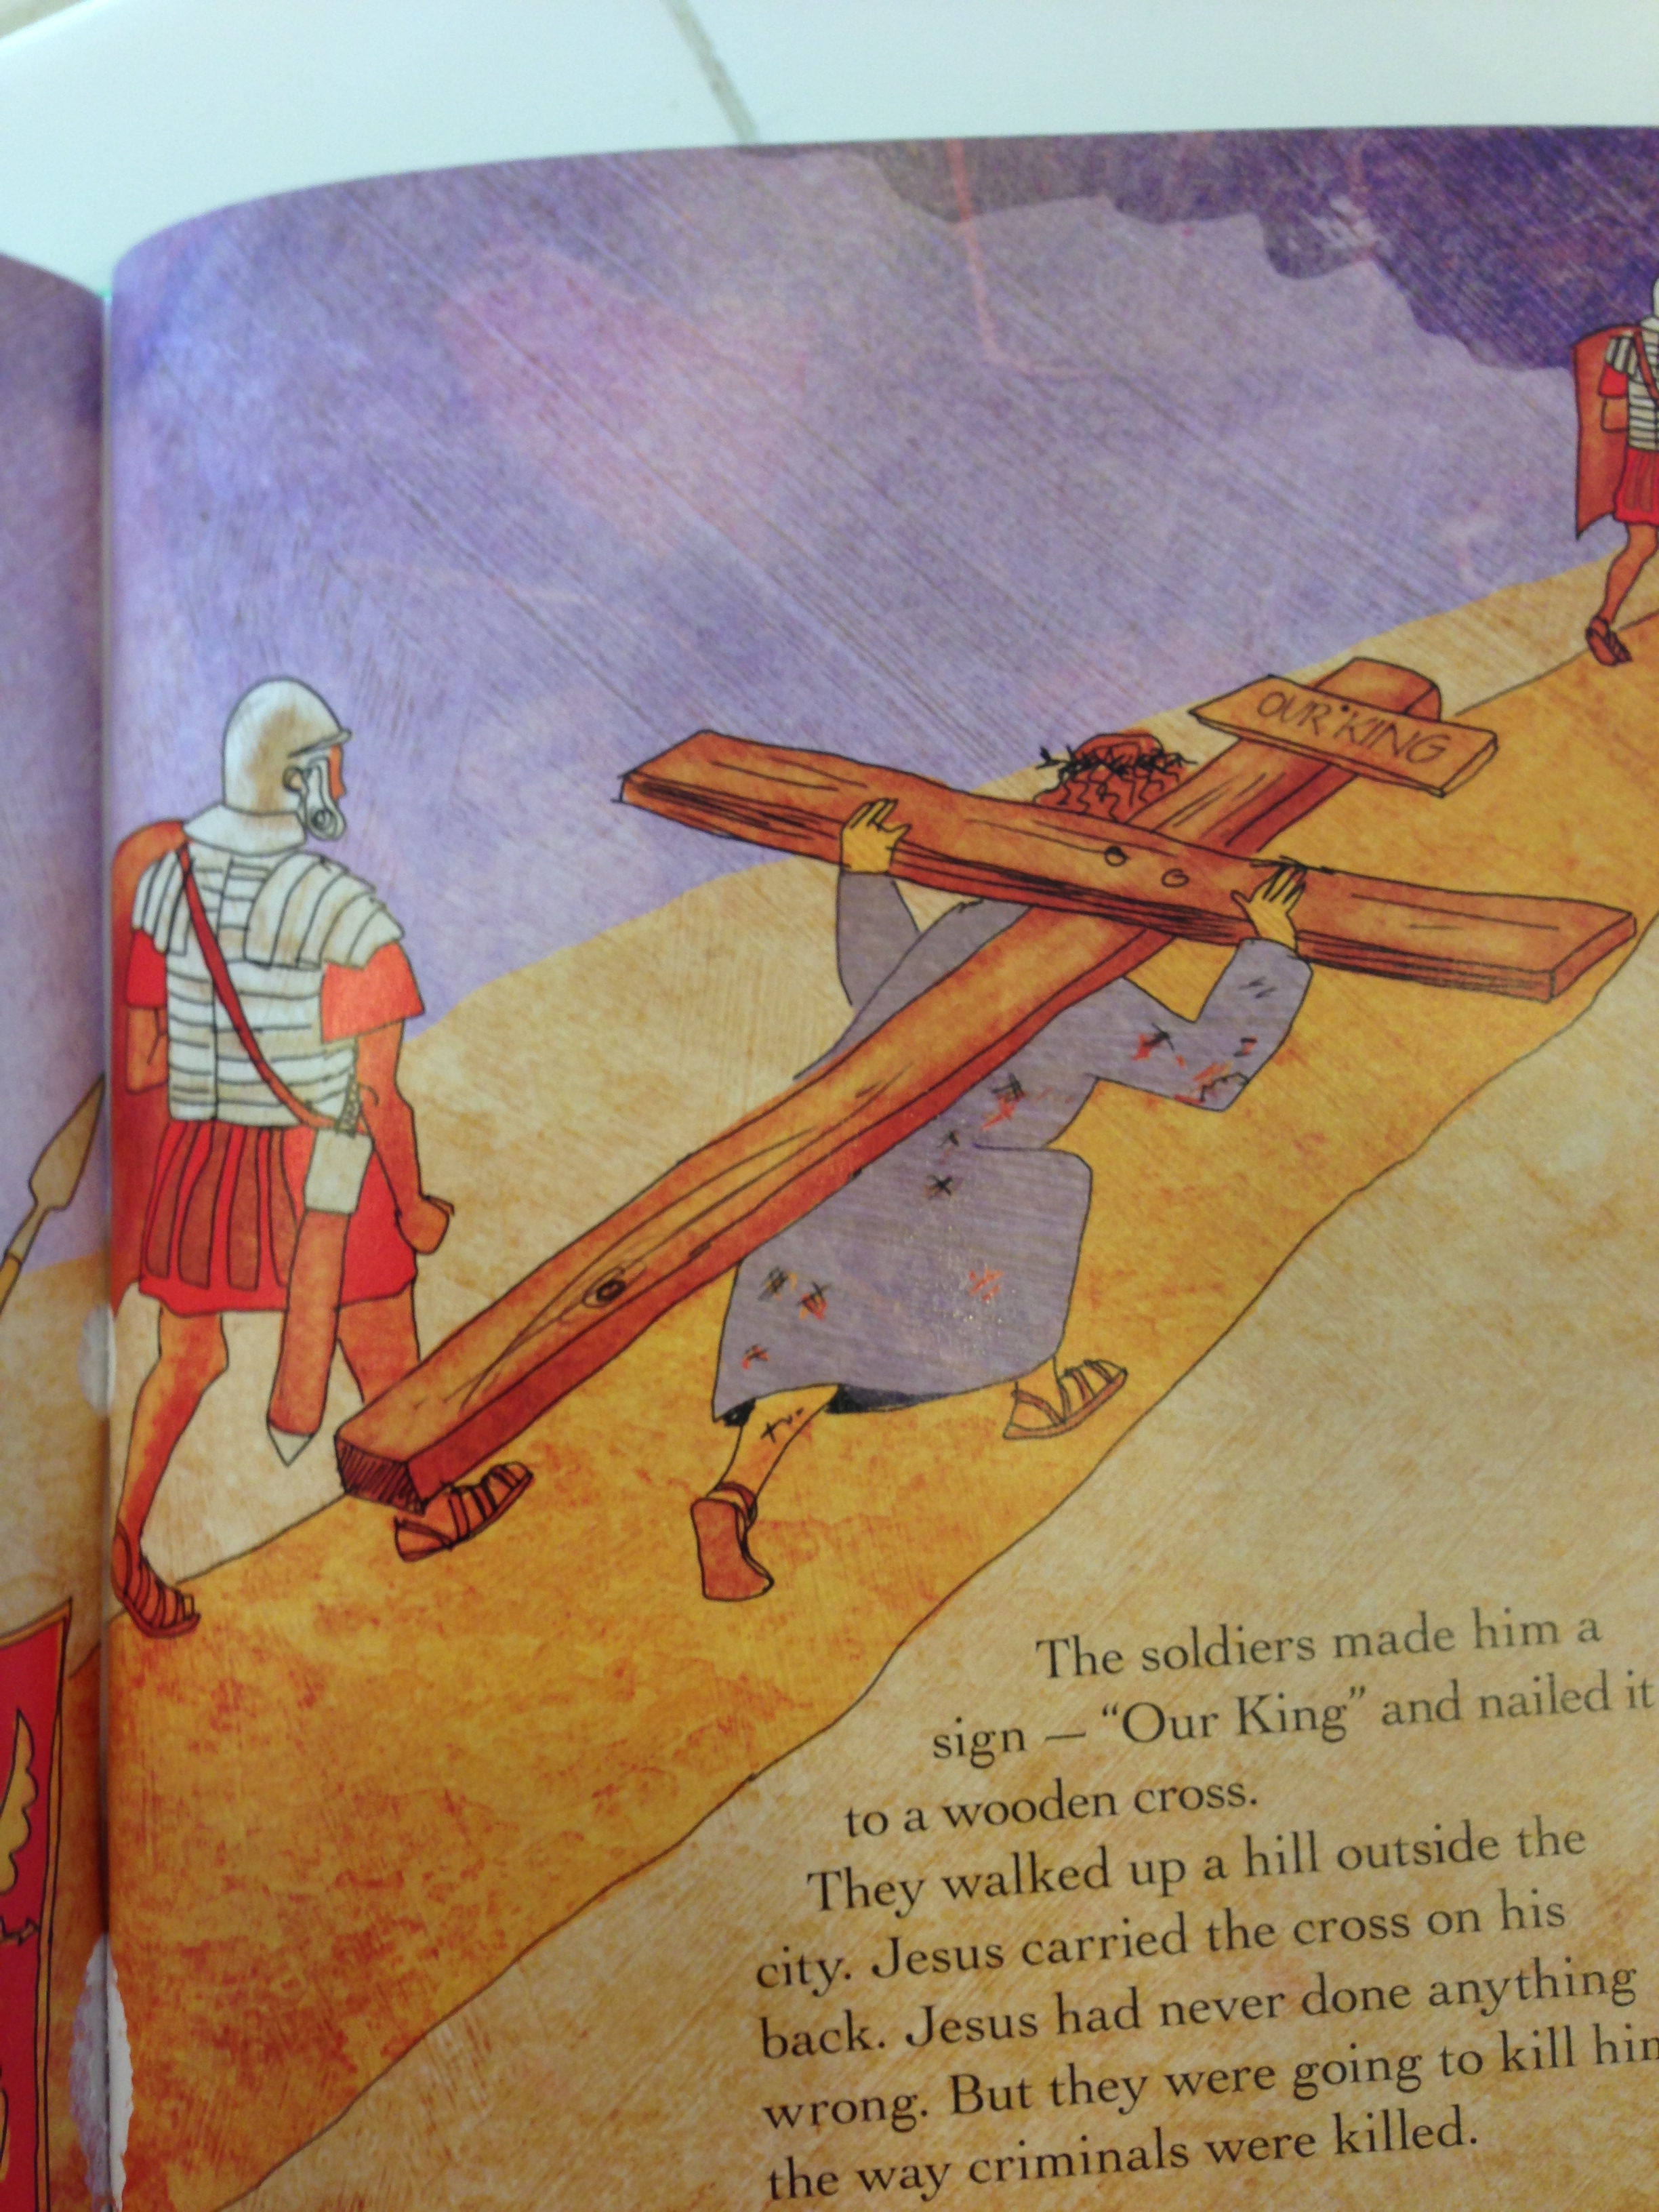
Say: “Even though Jesus was perfect and had never sinned–he had never ever done anything wrong– some people did not like him. They wanted to hurt Jesus because he said he was God. They made Jesus carry a cross and they killed him. This made God very sad, but it was all part of His great rescue plan. When Jesus died, his friends took his body off the cross.”

IMG_1510

Do: Give your child a marshmallow
Say: “This marshmallow represents Jesus’ body. Jesus died for you and for me, because we have sinned and we need to be rescued from our sin.”

IMG_1512

Say: “After Jesus died, his friends came and they put special oil and spices on Jesus’ body to get him ready for burial.”
Do: Roll the marshmallow in melted butter, then in cinnamon sugar

Say: “Next, Jesus’ friends wrapped his body in special cloths–almost like a mummy! Jesus had died, and they were getting his body ready to bury.”
Do: Roll the cinnamon-sugar marshmallow up in a crescent roll (it won’t look like a crescent roll). Press all of the seams firmly. Repeat for each of the crescent rolls. Place the rolls on a parchment paper-lined baking sheet.

IMG_1511

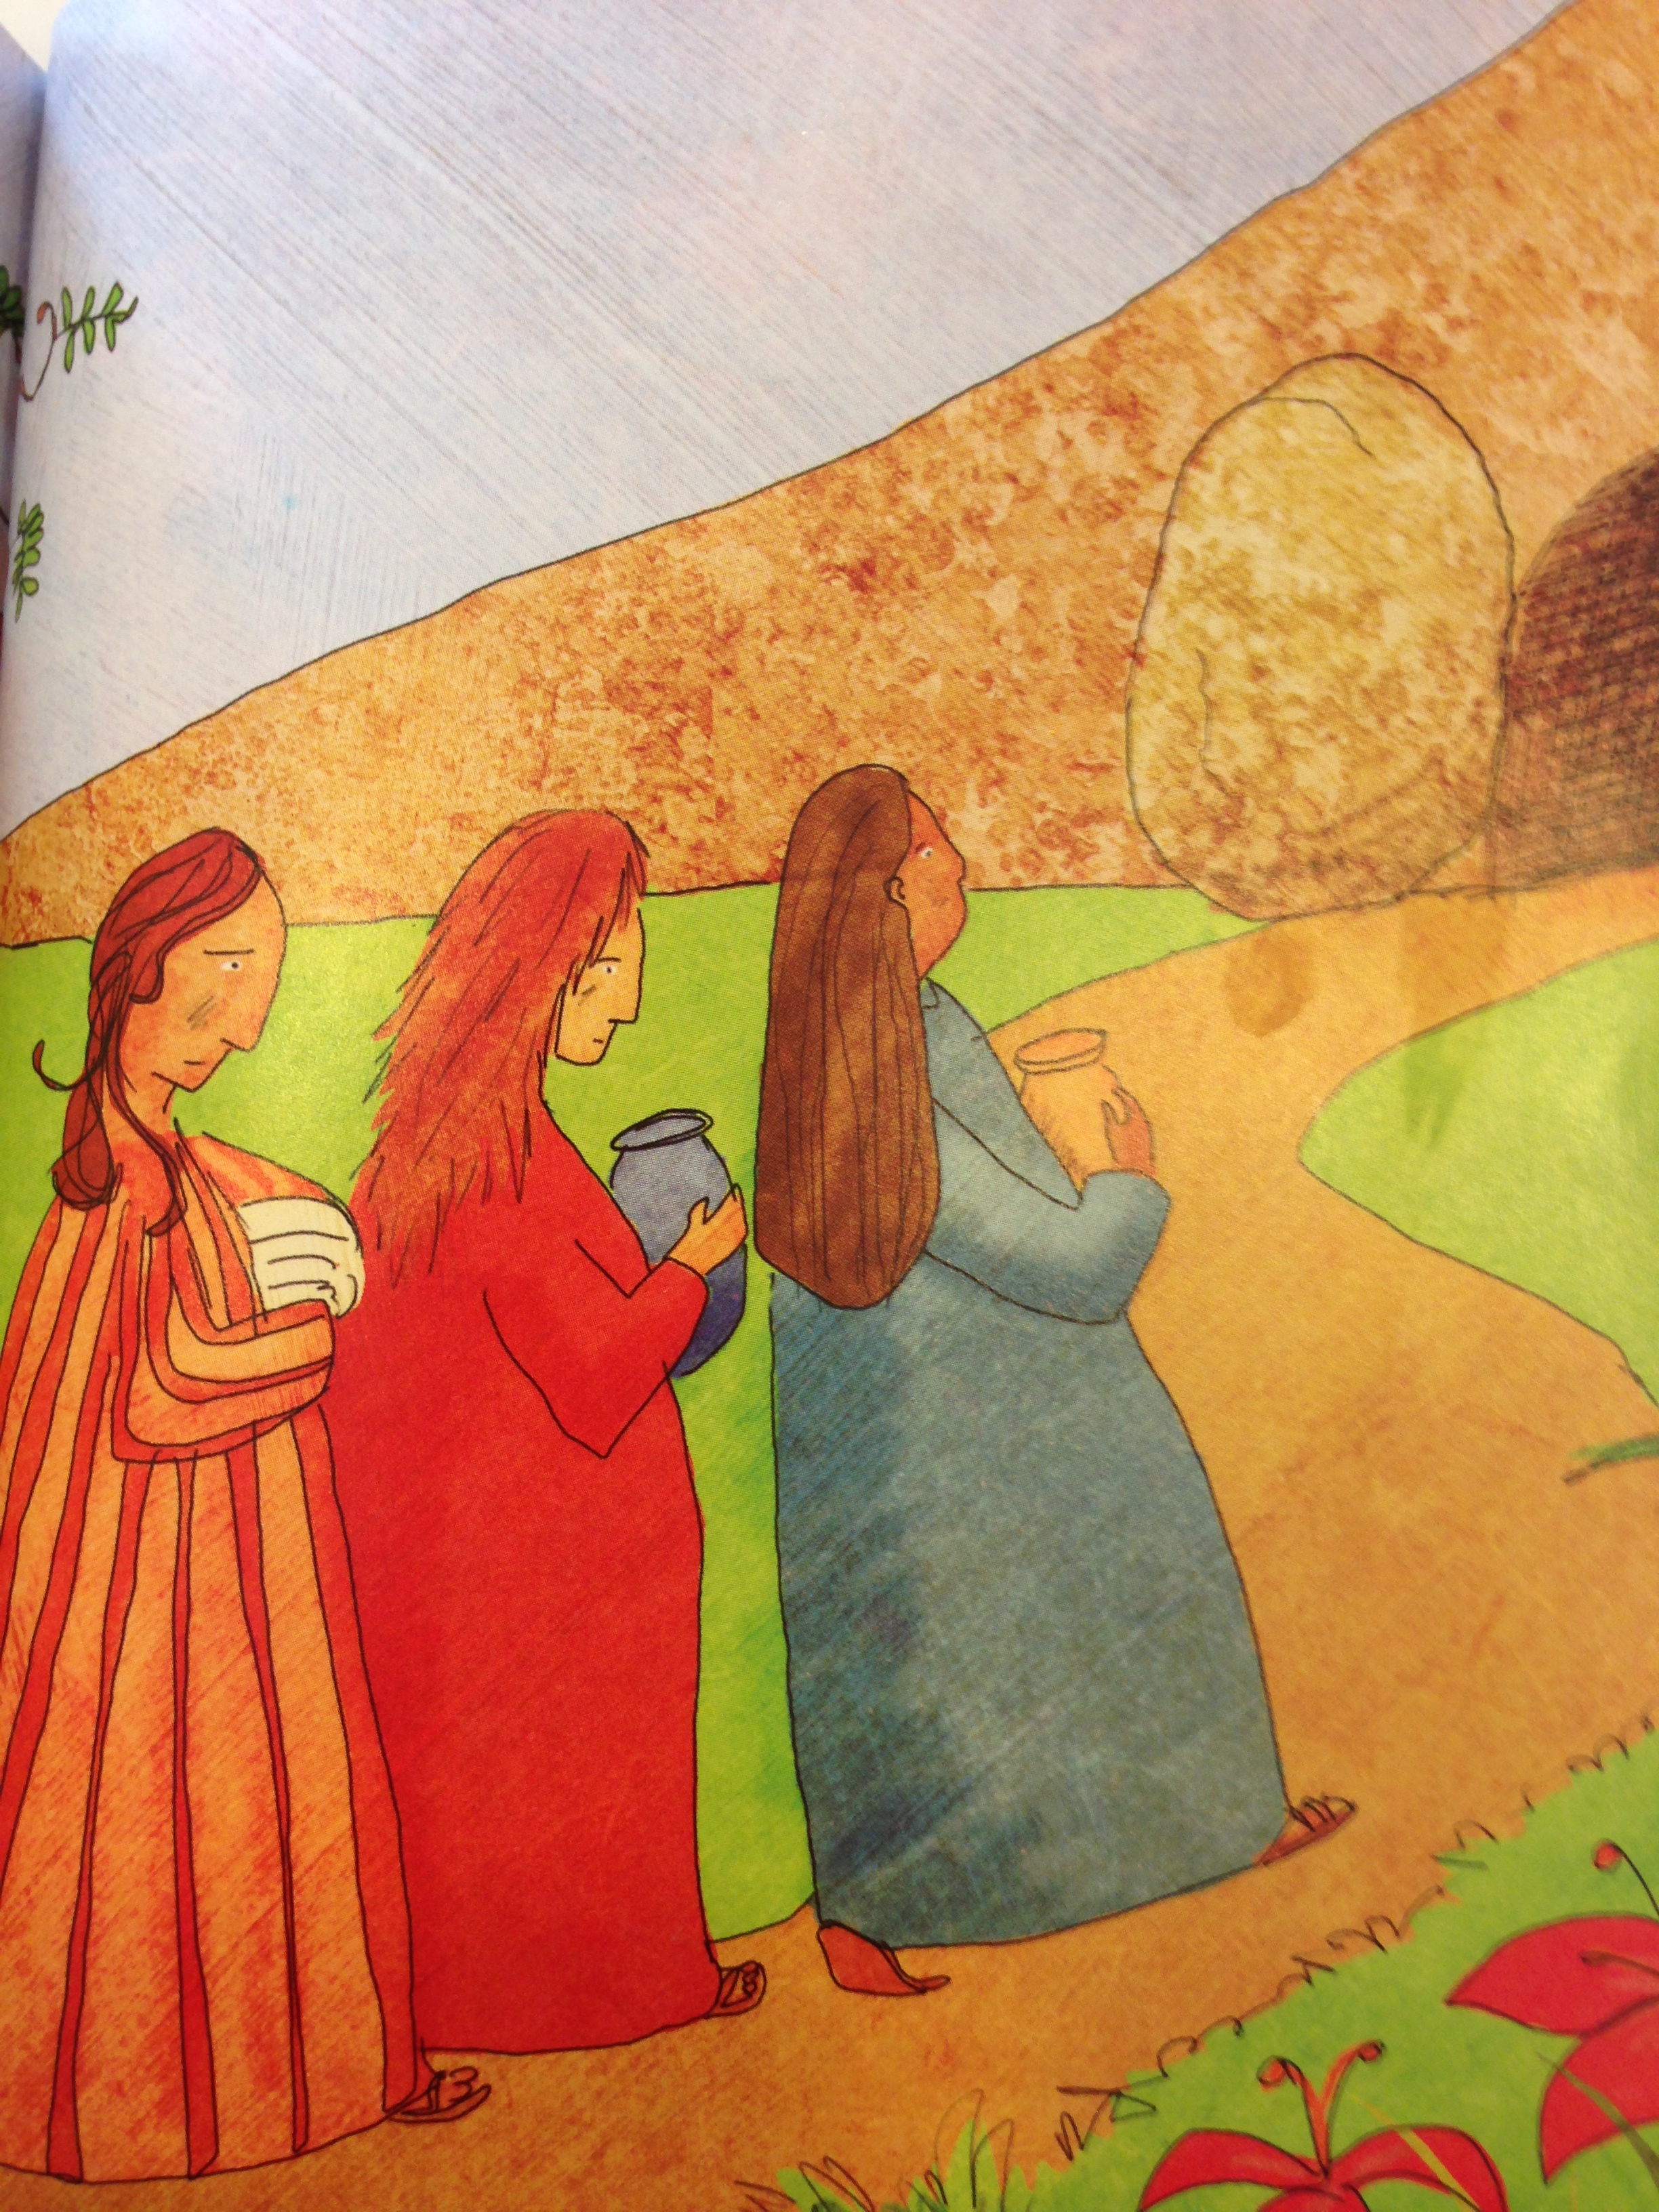
Say: “Next, they laid Jesus’ body in a tomb. A tomb is like a big cave carved out of rock. Then big, strong soldiers rolled a heavy rock in front of the tomb so nobody could get in or out of the tomb. They even put a special seal over the entrance so they would know if anybody tried to move the rock that was in front of the entrance. Soldiers stood in front of the tomb to guard it day and night.”
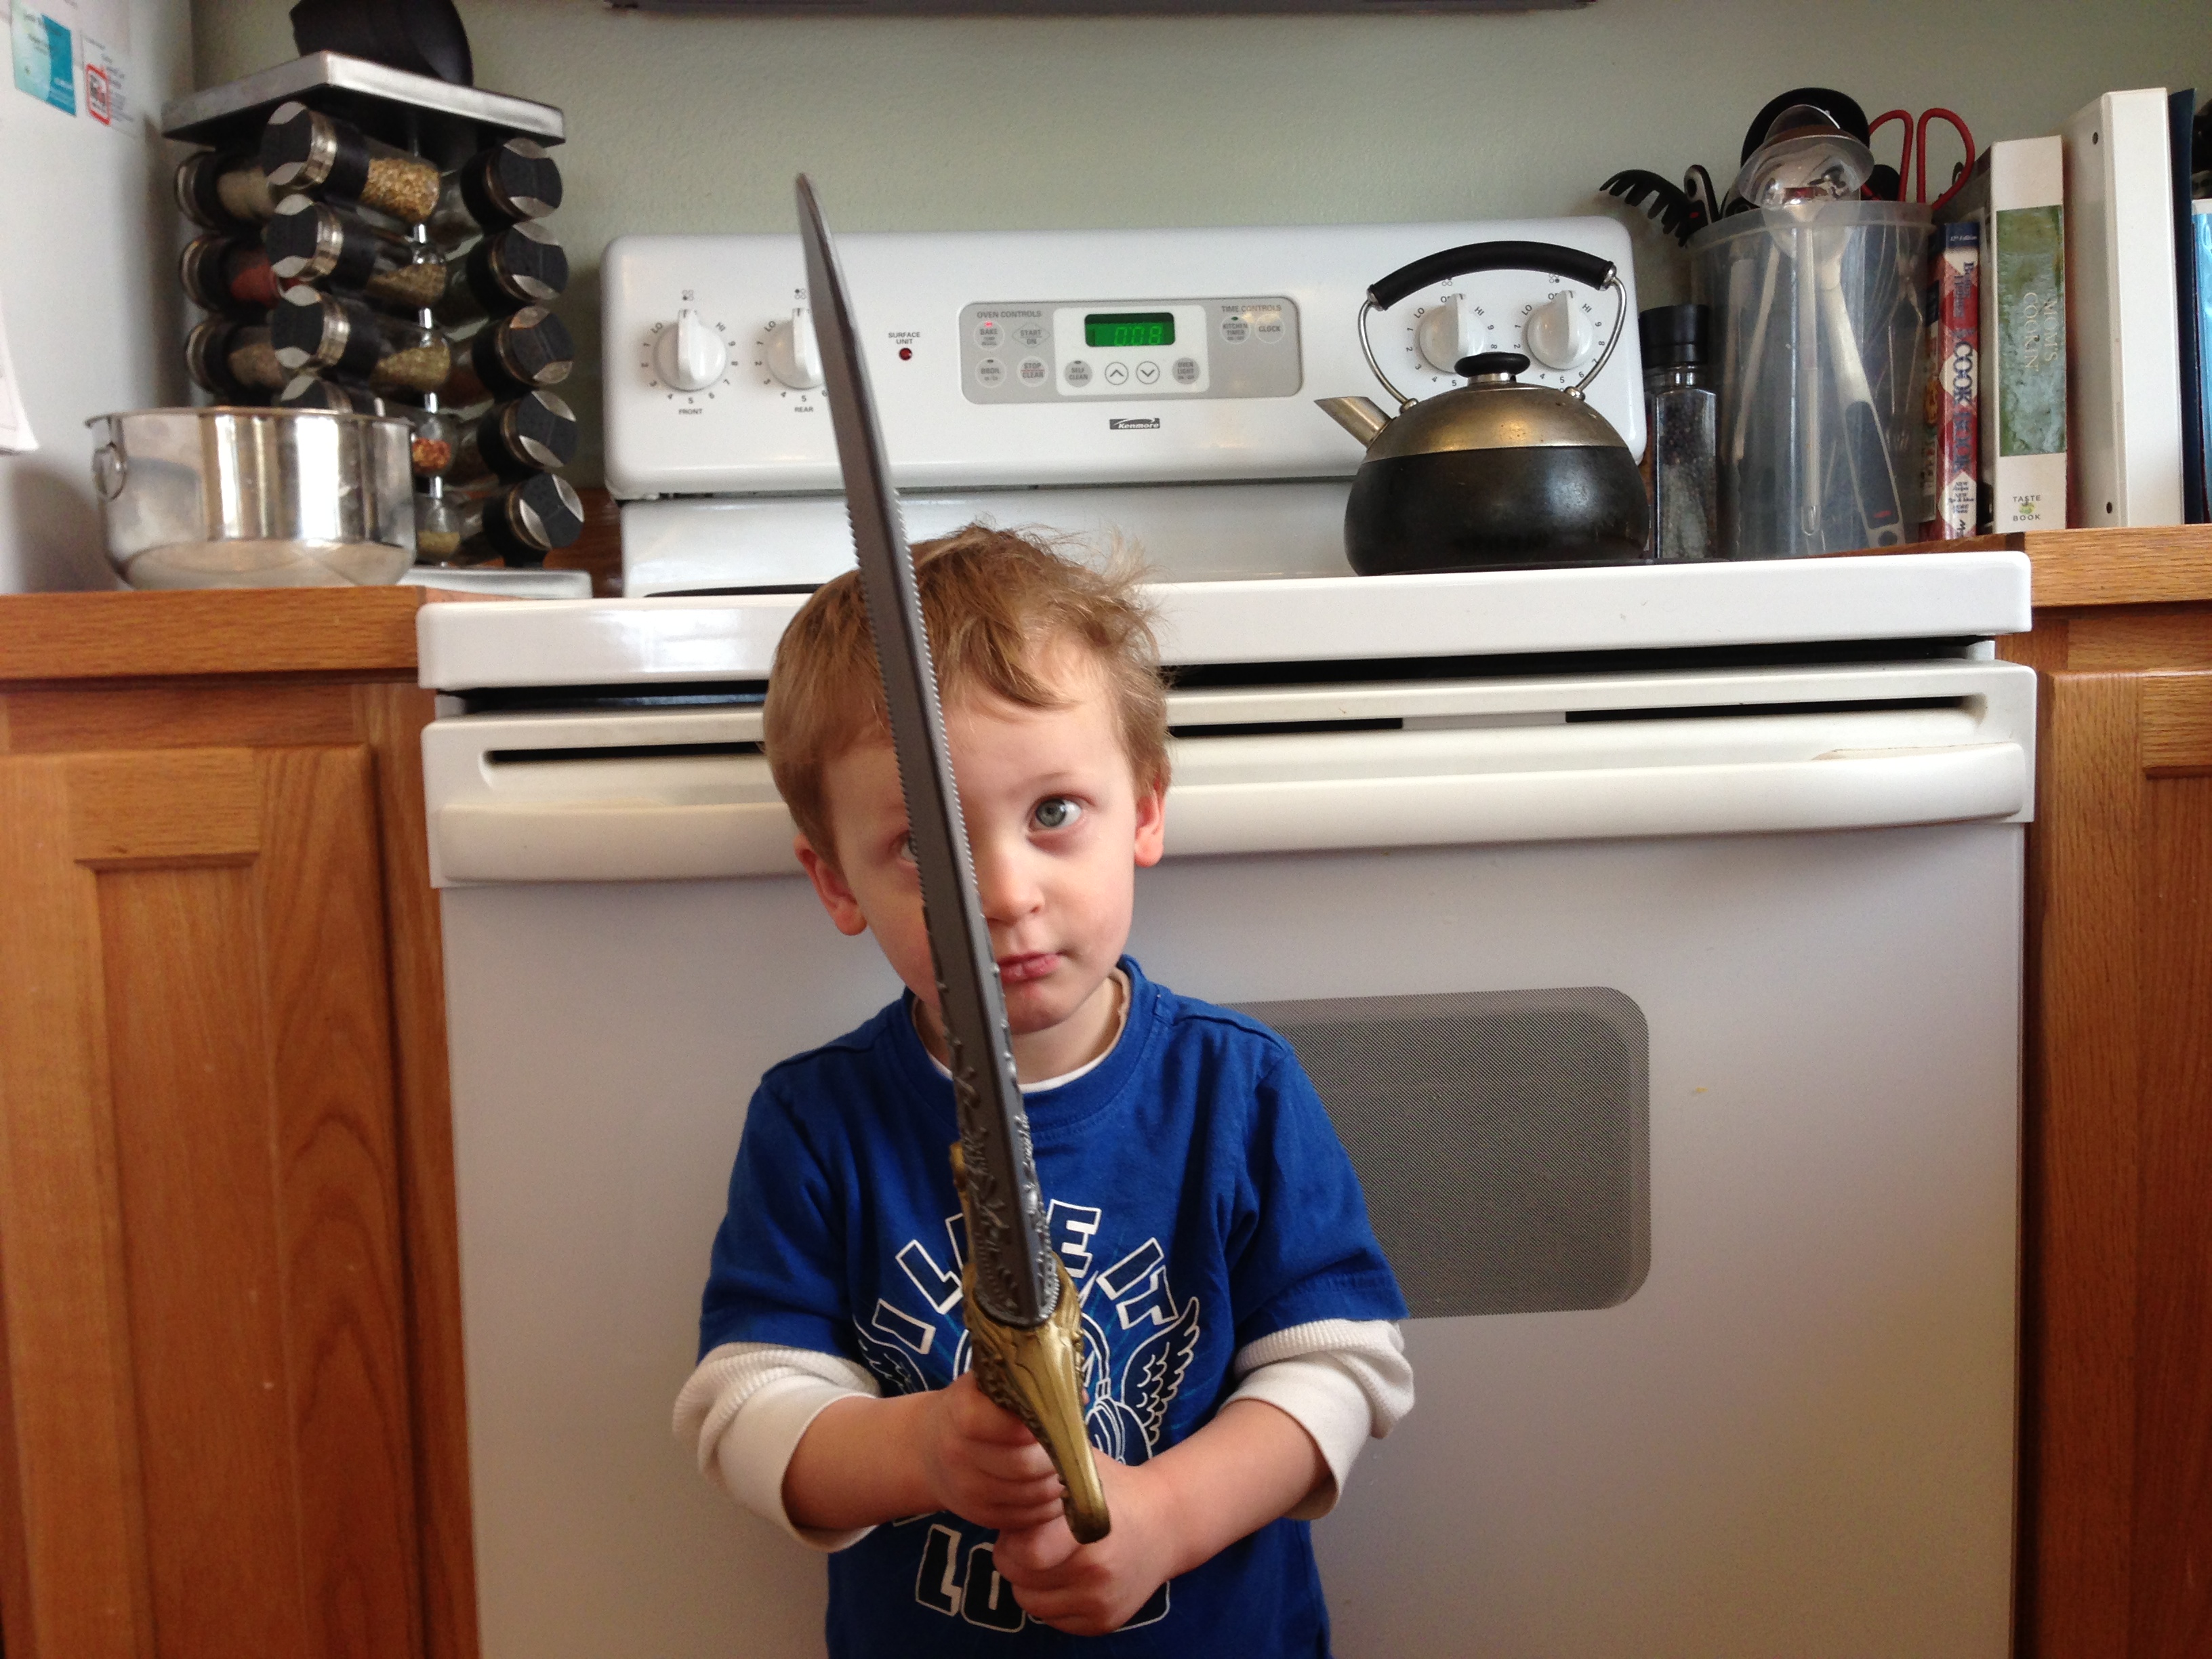
Do: Put the rolls in the oven and set your timer for 10-12 minutes. Let the rolls bake until they are golden-brown. I even let David stand guard in front of our oven “tomb” with his toy sword.

IMG_1506

Say: “Jesus was dead in the tomb for three days. Let’s count to three: one, two, three. How many days was he in the tomb? That’s right, three days.”
(We had some time to wait for the rolls, so I let David play while they were baking. I kept going back to him, though, and we’d repeat this whole conversation about how long Jesus was in the tomb.)

IMG_1514

Do: When the rolls are done baking, take them out of the oven and let them cool (I let mine cool for about 20 minutes, and that was perfect). The marshmallow will probably have exploded out of your rolls, but that’s to be expected (that’s why we put down the parchment paper!). After the rolls have cooled…

IMG_1516

Say: “Three days after Jesus had died, an angel of God appeared to one of Jesus’ friends. He told her that Jesus was alive! Jesus’ friends decided to look in the tomb where they had put Jesus’ body, but when they did, it was empty! Jesus had risen! And still today, Jesus is alive. Today he lives in heaven with God.”
Do: Cut open one of the rolls. The marshmallow has melted, so the “tomb” is now empty.

IMG_1522

Do: Eat your yummy rolls!
Say: “These rolls are sweet, just like the love of God. God made you and he loves you very much. And some day, if you choose to love and follow God, you will be able to spend forever and ever in heaven with him and Jesus. The Bible tells us that Jesus is our Great Rescuer. The Bible tells us that the only way to Heaven is through loving and believing in Jesus. We celebrate Easter, because Jesus died and rose again so that we could have a way to Heaven.”

Our Family Recipe For The Best Darn Cinnamon Rolls You’ll Ever Eat!

Sometimes things just don’t go according to plan. Last week was one of those weeks. Jon and I were both sick with bronchitis and ear infections (not sure how we both got the same two unusual ailments). Between caring for our own illnesses and trying to take care of the boys, we were pretty wiped out. But, what’s that I hear?! Duh-duh-duh-duh! Grandma to the rescue!

Jon’s mom was kind enough to come over last week and help us out a bit. She helped take care of the boys while I took a shower (all by myself, no munchkins at my feet!) and attempted (but failed) to actually take a nap. She also made us dinner before she left–such a welcome treat to this tired mama. One of the things grandma made for us was while she was visiting was our family recipe for dinner rolls. They are one of my absolute favorite foods–there’s nothing better than the smell of warm bread baking in your oven. Well, there’s actually one thing that’s better. Turning those dinner rolls into cinnamon rolls.

A number of years ago my mother-in-law figured out how to use the dinner roll recipe to make cinnamon rolls, and they are the best cinnamon rolls you’ll ever taste. Better than Cinnabon. They’re ooey-gooey, melt-in-your-mouth, close-your-eyes-and-sigh delicious. They take a bit of time and effort but, trust me, they’re worth it. You may gain 10 pounds after making this recipe (because you’ll want to eat the whole batch) but, again, it’s worth it! So, with no further ado, our cinnamon roll recipe.

Attachment-1

Peterson Family Cinnamon Rolls (AKA The Best Darn Cinnamon Rolls You’ll Ever Eat)
Makes about 30 rolls

2 1/4 cups milk
1/2 cup butter, plus an additional 1-2 cups (2-4 sticks) of softened butter
3 cups flour, plus an additional 3-5 cups flour (can be white, wheat, or a combination of flours–this time I used half white and half whole wheat flour)
1/2 cup sugar
2 teaspoons salt
2 packages rapid rise yeast
2 eggs
2 pounds brown sugar
1/2 cup cinnamon
1 recipe for frosting or glaze (we like this one)

  • Heat the milk and butter to 120-130 degrees (use a thermometer to ensure accuracy–too hot and you’ll kill the yeast, too cool and the yeast won’t grow)
  • In a large mixing bowl, combine, 3 cups flour, the sugar, salt, and yeast.
  • Lightly mix the flour mixture (I use a stand mixer with the dough hook attachment, but you could do this by hand), then add the heated milk/butter
  • After slightly blended, add the eggs one at a time, blending well after each egg.
  • Slowly add 3-41/2 cups flour to form a dough that holds together well but does not stick to the mixer. This part you just have to go by feel–not too dry, not too sticky.
  • Turn the dough onto a floured board and knead the dough into a soft smooth ball.
  • Lightly grease a clean mixing bowl, put dough ball in the bowl, cover with a clean dish towel, and let your dough rise (follow the instructions on your yeast packet for how long the first rising should be, usually about an hour if you’re using rapid rise).
  • During the first rising, mix together the brown sugar and cinnamon (use a fork and/or your fingers and make sure there are no lumps in the mix)
  • After the first rising, divide the dough in half. Cover half of the dough. Roll out the other half of the dough to a thickness of about 1/2 inch (it should make about a 12″ x 18″ rectangle).
  • Spread with 1-2 sticks of softened butter
  • Sprinkle with about half of the cinnamon sugar mix; pat the mixture into the dough
  • Roll the dough tightly, then pinch tightly along the seam to keep it sealed
  • Slice into 1 1/2 inch thick rounds and place in a lightly greased pan
  • Repeat the roll out/butter/cinnamon sugar/slicing steps with the second half of the dough
  • Bake at 375 for 15-20 minutes, until lightly browned.
  • After baking, flip rolls upside down onto a cookie sheet covered in wax paper and scrape all of the extra cinnamon goo on top. Then, flip the cinnamon rolls with the wax paper right-side up onto a cooling rack.
  • Let rolls cool, then top with icing. (I usually can’t wait for them to cool before I eat about half the batch, but if you have the self-control to wait, kudos to you)
  • Eat, eat, eat!