A Love Letter To My Daughter On Her Third Birthday

51078369_10103073984926620_4062535618834464768_nDearest Hannah,

Every time I sit down to write one of these birthday letters I am conflicted. On one hand I am  overjoyed at having known you and loved you for one more glorious year. On the other hand, however, a piece of me grieves that yet another year has already passed us by. I know that the time we have together is finite, so I want to treasure each precious year for what it is worth: a priceless, fleeting gift. This was the only year in your life that you will ever be two; and for me, it is the last time I will have a child who is two. Today you turn three–THREE!–and together we will enter a whole new phase of your life.

I have noticed that more significant than the ages you are, you kids go through important stages. It’s easy enough to tell when you are in the throes of a stage, but the endings are somewhat more subtle. There’s Newborn Stage, marked by sleepless nights and endless feedings, and…well, that’s really all I remember because I think one of the defining factors of Newborn Stage is maternal memory loss. When you are in the middle of Newborn Stage it feels long and arduous and incessant, and then suddenly one morning you wake up and realize that you are actually now in Toddler Stage.

This was your last year in Toddler Stage as you learned how walk (and climb and run and jump and dance) and to speak (something you have learned quite WELL, my dear!). Toddler Stage was marked by daily new discoveries and growing into the little girl who we knew was inside that baby. And now, without hardly realizing it, you have shifted into the next stage: Little Girl Stage.

And what a remarkable little girl has emerged! You are perhaps the most persistent child I have ever met–once you set your mind to something you can not, will not let it go. You are kind. You are silly (you’re also the only girl I know who will have full-on “tooting contests” with her brothers while wearing a sparkly pink tutu!). You are incredibly smart and you have an uncanny ability to remember minute details (Thank goodness I have you to help me because I wold be lost without your reminders!). You love ballet and all things pink and your crazy big brothers and singing “Jesus Loves Me” and making espresso with Daddy and cleaning up messes and stroking your worn pink gigi when you want comfort. You are amazing. And you are you. And that is the best.

So now as we enter Little Girl Stage I can not wait to see who else you become. What will be your passions? What will drive you and what will make you stop in your tracks? Who will you choose for friends and what will you play together? What new places and new passions will you discover? The world will open up more and more to you each day, and I can’t wait to see the mark you make on it.

Our family and, indeed, the world has been better these last 3 years because you have been a part of them. Happy third birthday, sweet Hannah–and may this be your best one yet!

I love you always and forever,

Mommy

Too Old For Tutus

ballet3A few weeks ago I turned 35 and, now that I’m officially in my mid-thirties, I’ve noticed a few changes in my life. I’m more experienced, more confident of who I am in my own skin, more driven to achieve personal goals, maybe even a bit more wise. What I am not, this week has proven with certainty, is more athletic.

In my teens and twenties I was at the top of my physical game: I danced, I competed in gymnastics, I ran marathons. There seemed to be no limit to what my body could do with enough training and mental fortitude. But then something happened. I turned 30, popped out 3 babies, and my body decided that it had had enough. D.O.N.E. Done. My glory days are over, and it is time to settle the heck down. Old habits die hard, though, and I continue to think I can still act and do and move like I did a decade or more ago. Which is how I came into my present predicament.

Yesterday I decided to try out a new extreme sport: Mommy and Me Ballet.

ballet4

Mommy and Me waiting for our ballet class to begin

Why, you might ask, is Mommy and Me ballet an extreme sport? Isn’t that just a playful class of tiny dancers and their mommies twirling and hopping around a dance floor? Why, yes. Yes, it is. But somehow–somehow–I managed to turn this most innocent of toddler experiences into a death-defying physical battle and I ended up leaving the class in crutches.

How on earth does this happen? Well, let’s just say I’m too old for tutus.

The ballet class started out about as adorable as 8 little blonde two year olds in pink tutus can be. We twirled around the room to Disney music and practiced hopping on colored dots scattered across the floor. All fun and games so far. When we moved to the ballet barre, however, it all went downhill (for this nearly-over-the-hill mama, at least).

We were asked to raise up to our tippy toes and then plié…up, down, up, down, up, down. Basically we were doing pretty calf raises. As we were doing our pretty calf raises, however, I heard a strong snap in the back of my right leg–almost like a sudden and severe charlie horse that wouldn’t go away. By the time I got down from my tippy toes I realized that this was bad. This was very, very bad.

I spent the remainder of the class hopping around on my good foot since I couldn’t straighten my right foot or put any weight on it. And, because I was too prideful and embarrassed to sit out for such a ridiculous injury, I carried on. After all, I have over 10 years of advanced ballet dancing under my belt and I should be able to finish out one measly toddler ballet class, even if I am too old for this mumbo-jumbo. I managed to struggle through the rest of the class while Hannah had the time of her life twirling with scarves and bopping out to a Frozen medley.

When we got home I knew that I’d messed up my leg in a “not getting over this any time soon” kind of way. I texted Jon and let him know that he should plan on bringing home whatever he needed to work from home the next day if I was still immobile. I also sent out an SOS to my go-to guy in these situations: my Dad.

Lucky for me, my dad is a Physical Therapist with 40 years of experience helping people recover from injuries such as Mommy-and-me-ballet-induced torn calf muscles. Within an hour he was at my door, crutches and an air cast in hand. He taped up the offending calf and gave me instructions for proper icing, and a few hugs for good measure. If anyone ever tells you that you’re too old to need your parents, they are absolutely 100% wrong. I’ll remind my children of this often.

Doctor Dad coming to the rescue!

So, here I am: an invalid in my own home. Jon took the day off of work today so he can help drive the kids to their activities and make sure our family doesn’t fall apart while Mommy is out of commission (I’m sure he had a comical conversation with his boss explaining why he had to miss work today). I’m getting around alright with the crutches my dad left me with, but I’ve discovered that it’s actually easier to crawl than to crutch. I repurposed Ace bandages as knee pads, and I’m good as gold. Now if that’s not ingenuity, then I don’t know what is!

ballet1

Crawling: it’s what the cool kids do

I’ve learned an important lesson about not pushing my (limited) limits, and today is already the “someday we’ll laugh about this” day. Perhaps they’ll write me up in the newspaper for being the first person ever to suffer such a fate from a toddler dance class. At any rate, it’s quite the story! And now if you see me on crutches this week you’ll know where my battle wounds came from.

Tutu or not, I am a warrior!

The Last Last Time

FullSizeRender 5

When I was a new mom and I would think about what the future would hold for me and my babies, I always thought of the firsts. The first time my baby would smile at me. The first time he would say “Mama!”. The first time he would roll over. THE FIRST TIME HE WOULD SLEEP THROUGH THE NIGHT (Can I get an AMEN?!). Even now as we have entered the elementary school years, I can’t help but anticipate the other firsts that await us: Losing their first tooth, reading their first chapter book…and on and on with firsts until they’re even older than I am now.

The firsts are exciting. We look forward to the firsts and the new doors that they open. What I was’t prepared for, though, was the lasts. With most lasts, you don’t realize it’s the last time that particular thing is happening until it’s already over. By the time you realize your baby isn’t crawling any more, he’s already crawled his last crawl. By the time you realize your baby isn’t saying “pas-ketti” for “spaghetti” anymore, it’s too late to capture that adorable mispronounced word on video.

We have three children and our youngest, Hannah, is our last baby. Being our last baby, I am particularly aware of the stages that Hannah leaves behind because the last time she does something is, well, the last last time that I get to experience that particular thing with my own children. For the past 20 months I’ve been experiencing all of the firsts, and the lasts, for the last time with Hannah.

This past week I had one of my most significant last lasts to date: I decided to wean Hannah from nursing. I’d already nursed her longer than either of the boys (With David I quit nursing at 13 months because I found out I was pregnant and I needed a break, and with Jacob I quit nursing at about 15 months because he just decided one day that we were done and that was that.)–but with this last baby I wanted to hold onto that special bond for a bit longer. I told myself that we’d continue nursing until after our trip to Ireland so I could have that “trick in my bag” if she got fussy on the airplane or in the hotel room late at night, but after we got home it was time to cut her off.

This last would be different. It would be my last last. I’d already had my last time nursing each of my boys, but this would be my last time ever nursing a baby. It was significant. I knew that I was weaning her, and I knew when our last time nursing would be. I have spent approximately 4.5 out of the past 7 years nursing a baby and, to be quite honest, I was heartbroken that this stage of life was ending.

The precious, quiet moments alone with my babies, the snuggles, the soft sounds of their rhythmic breathing–the nourishing of their bodies and my soul. This thing that had been such a huge part of my life would soon be just memories, and I could hardly stand the thought of losing it forever.

And yet, it was time. When the day came to experience this last last together, I just took a moment to soak it in. I studied Hannah’s smooth face and her wispy hair and tiny hands resting on my chest. I prayed over her as I often did when I was nursing my children. I thought about the baby she was and the little girl she is becoming. And then, I let her go.

This stage was over for the last last time.

As my children grow there will be beginnings and endings and everything in between. There will be times when it will be easy to push them out (Like two weeks ago when I gave David a proclamation that I was done with the carpool line circus and now he was an official card-carrying school bus rider). And there will be times when no matter how hard I want to hang on to them, I will have to let them go (Like when they decide they want to drive a car or go out on a date or–I don’t know if I can even say it–move away to college.).

Parenting and life, as it turns out, is really just a series of firsts and lasts. How you handle those firsts and lasts, though, is what will define your life. So, I will embrace my lasts as I’ve embraced my firsts–with openness for what lies ahead. Because no matter how many firsts or lasts there are, one thing will remain constant: there is never a last adventure.  So today we embark this new stage of adventures together, another day older and another day bigger. And do you know what? I think this will be our best adventure yet.

Here’s to the firsts and the lasts, friends, and the adventures that lie ahead!

Ireland Adventure

I’ve always been a carpe diem-type person, and if an opportunity presents itself I’m likely to seize it before it has a chance to slip away. It makes perfect sense, then, that when Jon found out this summer that he’d need to travel to Ireland for work in a few weeks’ time that I would see this as an opportunity to seize.

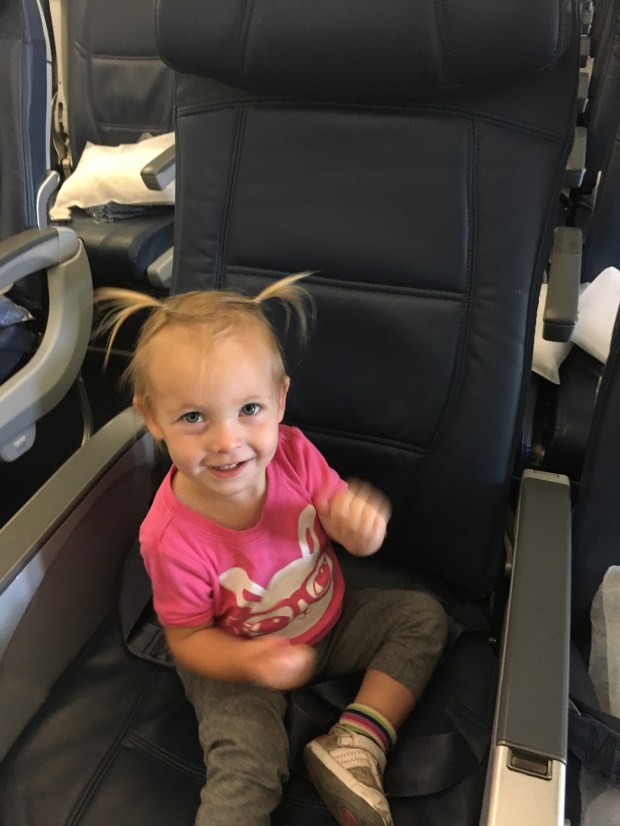
Ever since we left Ireland three years ago I’ve been trying to find a way to get back there. Ireland will always be a second home in my heart, and I’ve been homesick. The timing of Jon’s business trip seemed ideal–I could bring Hannah (who is not quite 2 years old yet, and therefore still able to travel on a plane without having to buy her a ticket)–as our only child who has never been to Ireland I felt like she has been missing out on a big part of our family history. In addition, we could take advantage of the September sweet spot between the busy tourist season and the wet and windy days of…well…the rest of the year in Ireland. So, really, I just had to go.

I begged and pleaded my case with Jon and as soon as he gave me the affirmative “Well, we could look into this and see if it makes sense…” speech, I scheduled an appointment at the passport office so we could make Hannah a legit traveller and I started researching flights. Since Jon was traveling for work, he had to be in Europe a week before me and we had to book our tickets at the last minute after he received his final work schedule. In the end, though, we found a way to get me there at the end of his trip, and he was even able to take a few days of vacation during the time I would be there. I was actually going to carpe my diem after all!

Arranging to leave on a cross-continental journey alone with a toddler, while also preparing everything at home for your two school-aged children who would be staying behind, was a bit of a puzzle. It was a whirlwind of preparations, but finally travel day arrived and I braced myself for the journey ahead.

I don’t know if any of you have ever traveled with young children, but if you have then I’m sure you’ll agree with what I’m about to say: toddlers are the WORST. The worst travel companions, that is. I love my children, but I despise traveling with them when they are toddlers (even if they are really stinkin’ cute).

Babies: no problem. They nurse and sleep and snuggle and they’re easy-peasy. Big kids–even preschoolers–fine. They can entertain themselves with coloring books or movies or snack time. Some of them can even reason or understand the reward that awaits them on the other end of the travel. No problem.

But toddlers? Toddlers are a nightmare to travel with. They are set on their schedule and routine and their own cozy bed, and when they don’t have those things they scream. They are tired all the time but they refuse to sleep, so instead they scream. They can’t communicate their needs, and when they try to do so but you don’t understand, they scream. They are always hungry but if you feed them the wrong food or food in the wrong way or, God forbid, request that they not dump the entire juice box down the front of their shirt, they scream. They don’t have the attention span to watch a tv show or play with an app or read a book or color a picture, and when you suggest that they do any of these things they scream. They want to walk and explore, and when you make them sit they scream. Basically, they do a lot of screaming and the parents do a lot of hair-pulling.

You can see, then, why I was not-so-excited to be traveling alone on a 10-hour flight with a toddler.

Our travel day to Ireland went something like this:

6:00 Wake up, make breakfast, get the kids ready for school
8:00 Drop David off at school
8:45  Go to the grocery store and stock up on food that my kids might actually eat so their grandparents have a reasonable chance of success in feeding them for the next week.
9:30  Go to the gas station and fill the car up with gas so the grandparents can cart the children around all week
10:00 Get the last load of laundry out of the dryer and finish packing
11:00 Make lunch for the two children who are still home with me
12:00 Grandparent helpers arrive! Review with them the 38-page Childcare Manual that I compiled to ensure they know the who/what/where/when/why of the offspring I’m leaving in their care.
12:30 Drop off Jacob at preschool
1:00  Drive grandparent chauffeurs around to the kids’ schools and activity locations and explain the overly-complicated drop-off and pick-up procedures
2:00 Meet my brother in law (who is driving us to the airport) at home. Load my bags, car seat, stroller, baby carrier, backpack, and baby into his car. Drive to the airport
3:00 Schlep my 5,000 essential travel items through the airport to the baggage check-in area. Get shuffled to 3 different locations before an actual human is willing to help me check in (the computers don’t like checking in babies, by the way).
4:00 Finally get through airport security! Buy a burrito for linner (lunch-dinner) because who knows if/when I will get another chance to use my own two hands to eat again.
4:30 Settle at the airport playground to eat my linner burrito while Hannah runs around screaming in a place where it is socially acceptable for a toddler to scream.
5:00 Call the boys to FaceTime with them before we board the plane. David is sick. He has a headache and is throwing up (As it would turn out, David would be sick the entire duration of our travel and wouldn’t go back to school until after our return. His grandparents who stayed home and cared for him now have infinity crowns in Heaven.).
6:00 Board the plane an hour before take-off because that is how much time is required for 200 people to find their seats, argue over who gets which overhead storage bin, and browse the SkyMall magazine.
7:00 Takeoff!

So, you see, by the time our plane even left the runway I was exhausted. I’d already had a full day of running around and chasing children, and yet there were miles to go before I’d sleep.

Hannah actually did great on the flight. She was in a good mood and I was able to get her to fall asleep in my Ergo baby carrier after just a few hours of flight time. Unfortunately, my joy over the well-traveled toddler was about to end.

I was standing in a hallway in the middle of the plane bouncing Hannah to keep her happy and asleep when we hit turbulence. The flight attendants asked me to return to my seat and buckle my seatbelt for the time being. Normally this would not be an outlandish request, after all, the seatbelt is there for my safety, but I knew the real consequences of this request. A sleeping toddler who is in an upright position sleeping in a carrier will almost certainly awake once they are squished into a narrow airplane seat and restrained with a seatbelt. I didn’t really have a choice in the matter, though, so I went back to my seat.

As soon as I sat down Hannah woke up. And she was angry. She wanted to keep standing and bouncing, and she was going to let me–and everyone else on the plane–know how she felt about this situation. So she did what toddlers do best: she screamed. And screamed. And screamed. I tried to comfort her but until I could stand up and resume the mommy rock-bounce, there was nothing I could do.

As if the stress of having a tired, angry toddler screaming in my arms wasn’t enough, some gentleman sitting a few rows behind me thought it would be prudent to also let me know how he felt about the situation. I’m sure my crying baby was quite the personal insult on him because he started yelling across the plane, “Won’t someone shut that thing up!” and other helpful, encouraging words. He was so helpful, in fact, that the flight attendants requested him to stop lest he be escorted right off the plane.

After 10 minutes that felt like 10 years, we were past the turbulence and allowed to get out of our seats again. The flight attendants were super helpful after the whole guy yelling incident and they moved me to another seat that had more room…and that was as far away from the yelling guy as I could get. Hannah fell back asleep right away (as I knew she would), but I was so angry and stressed out that I just sat in my seat brooding for the rest of the flight.

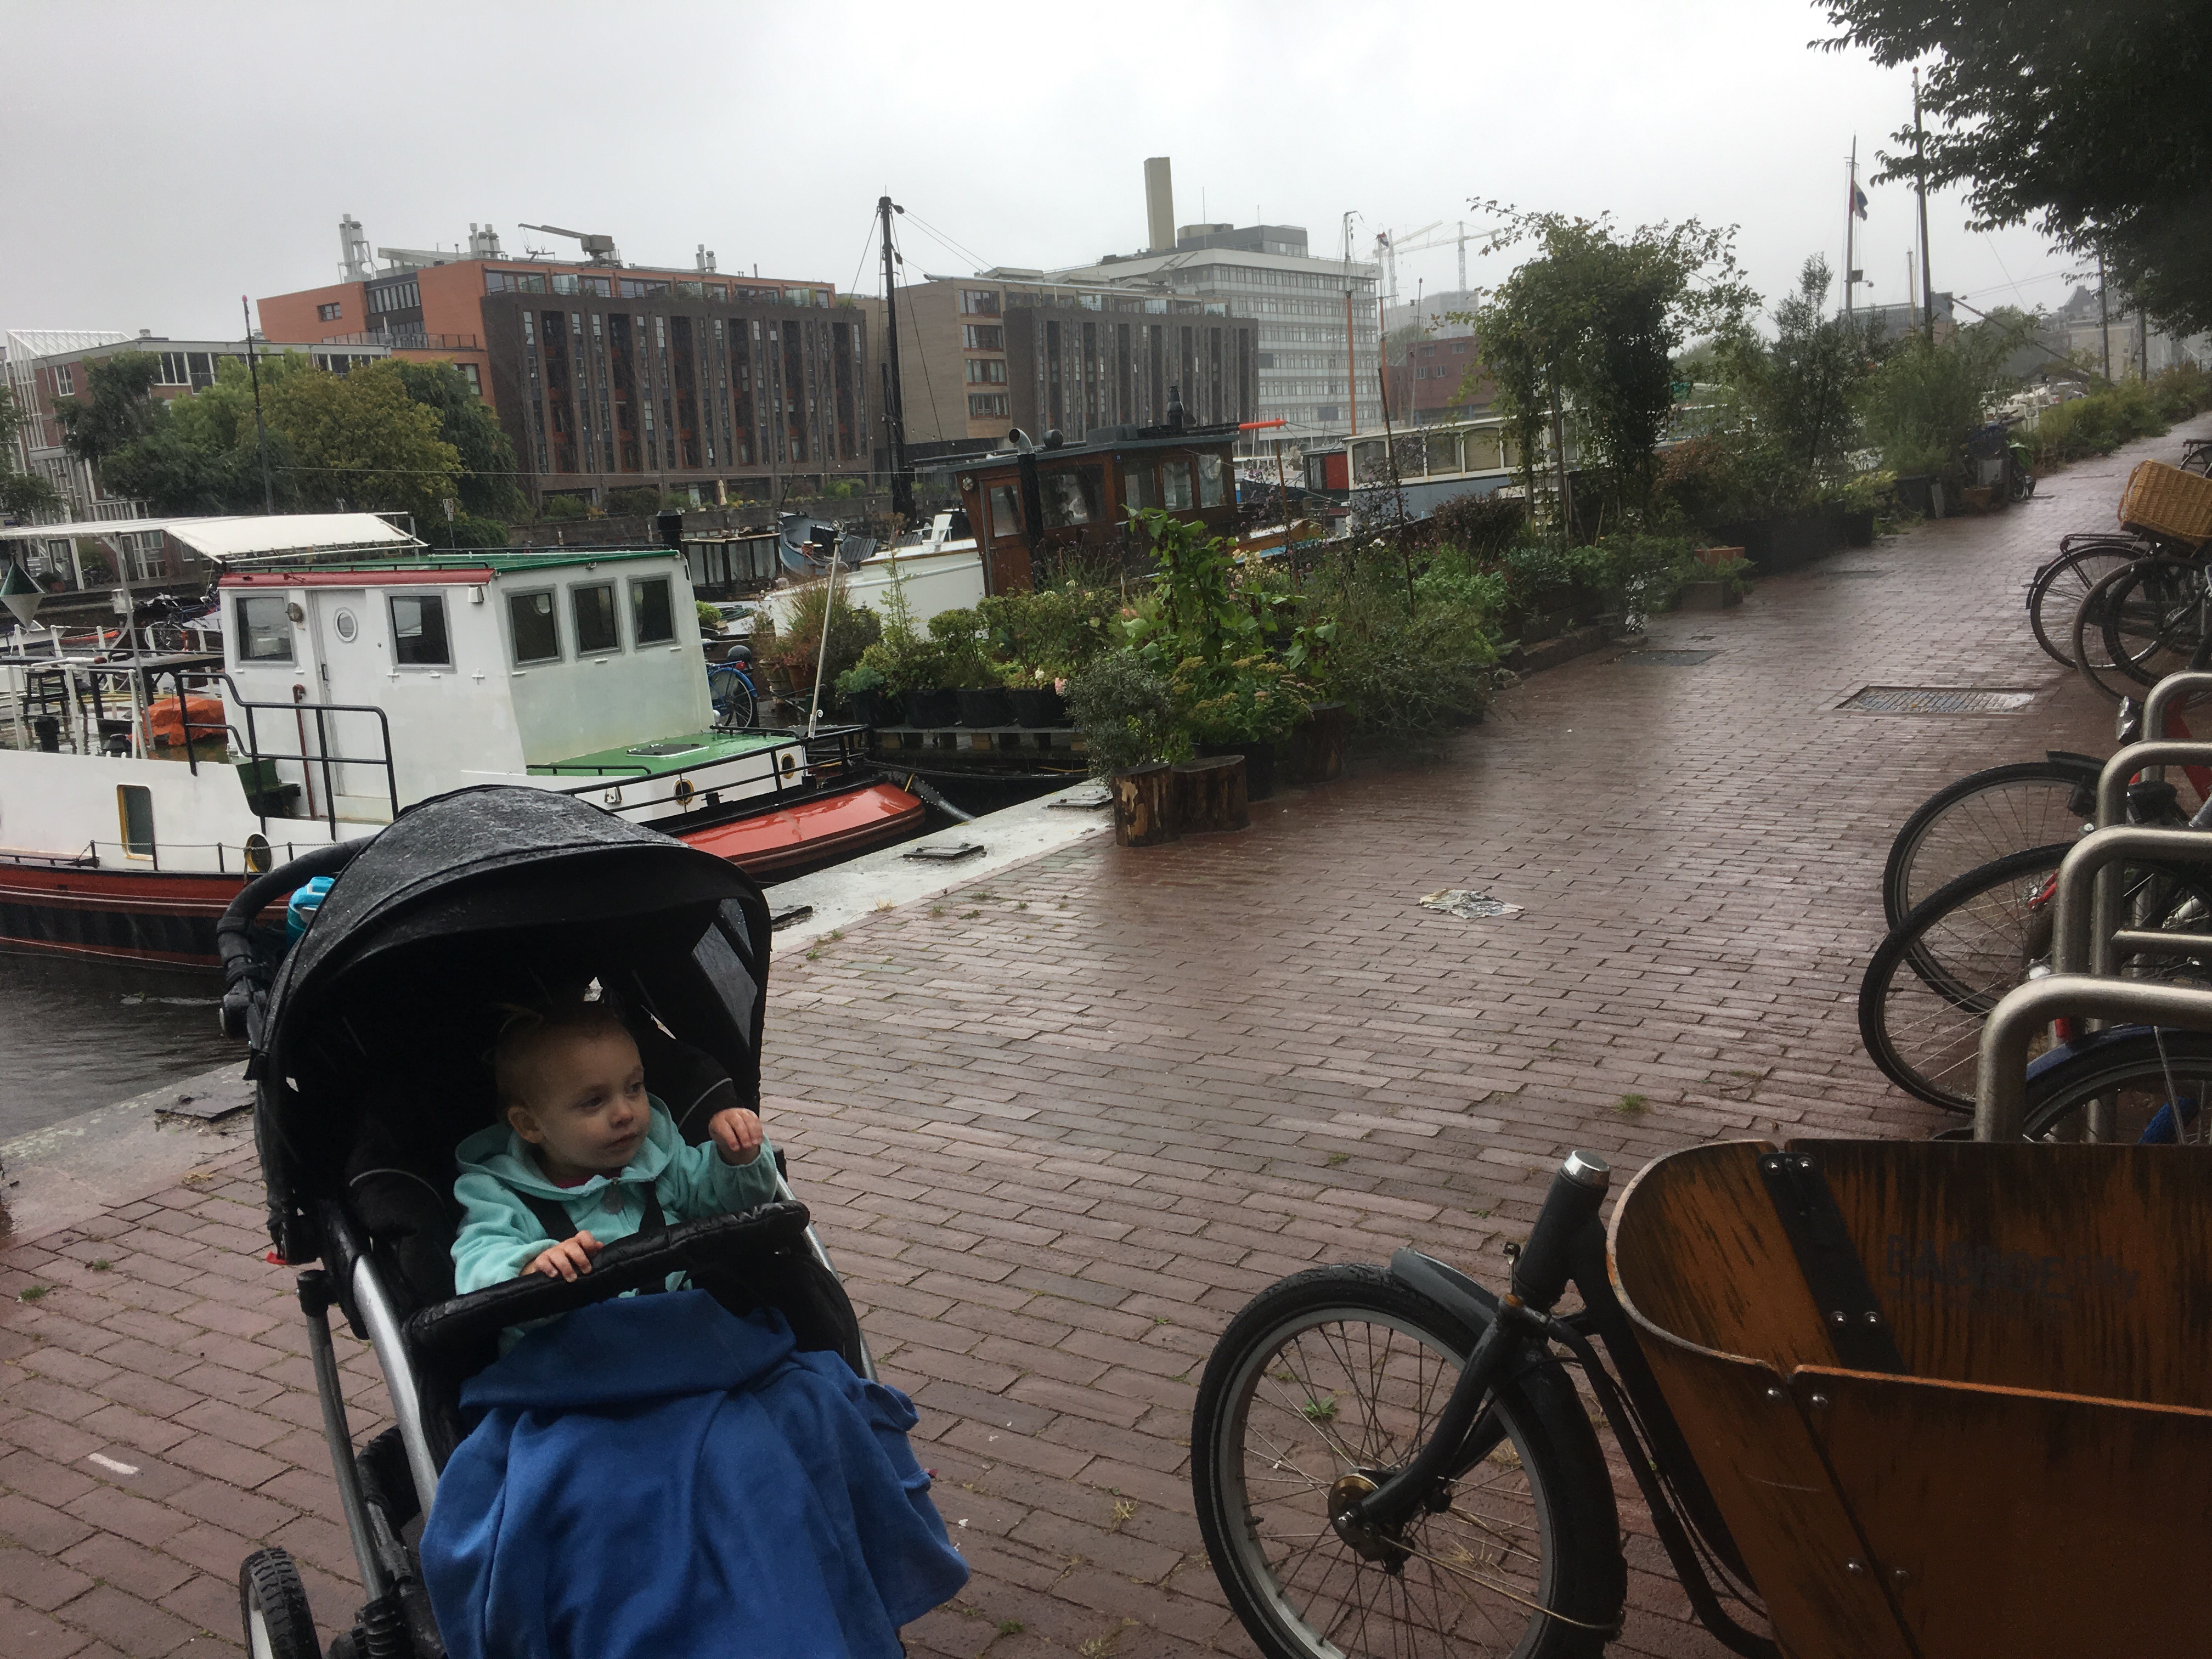
Our first flight ended in Amsterdam, and I had an 8 hour layover before our final flight into Ireland. I had found out that it’s very convenient to take the train from the Amsterdam airport into the city center and, since I had time to kill, I decided to give it a try. When we disembarked from the train in Amsterdam, however, I realized that I was grossly unprepared for the weather. The city was in the midst of a tempest and the only thing we had to keep us warm and dry was our airplane travel clothes (pajamas), plus a blanket I stole off the plane. I was already there, though, so I decided to walk around the city for a  bit before heading back to the airport.

We managed to find some yummy pancakes to eat, but I didn’t have the energy or the rain gear to do much else.

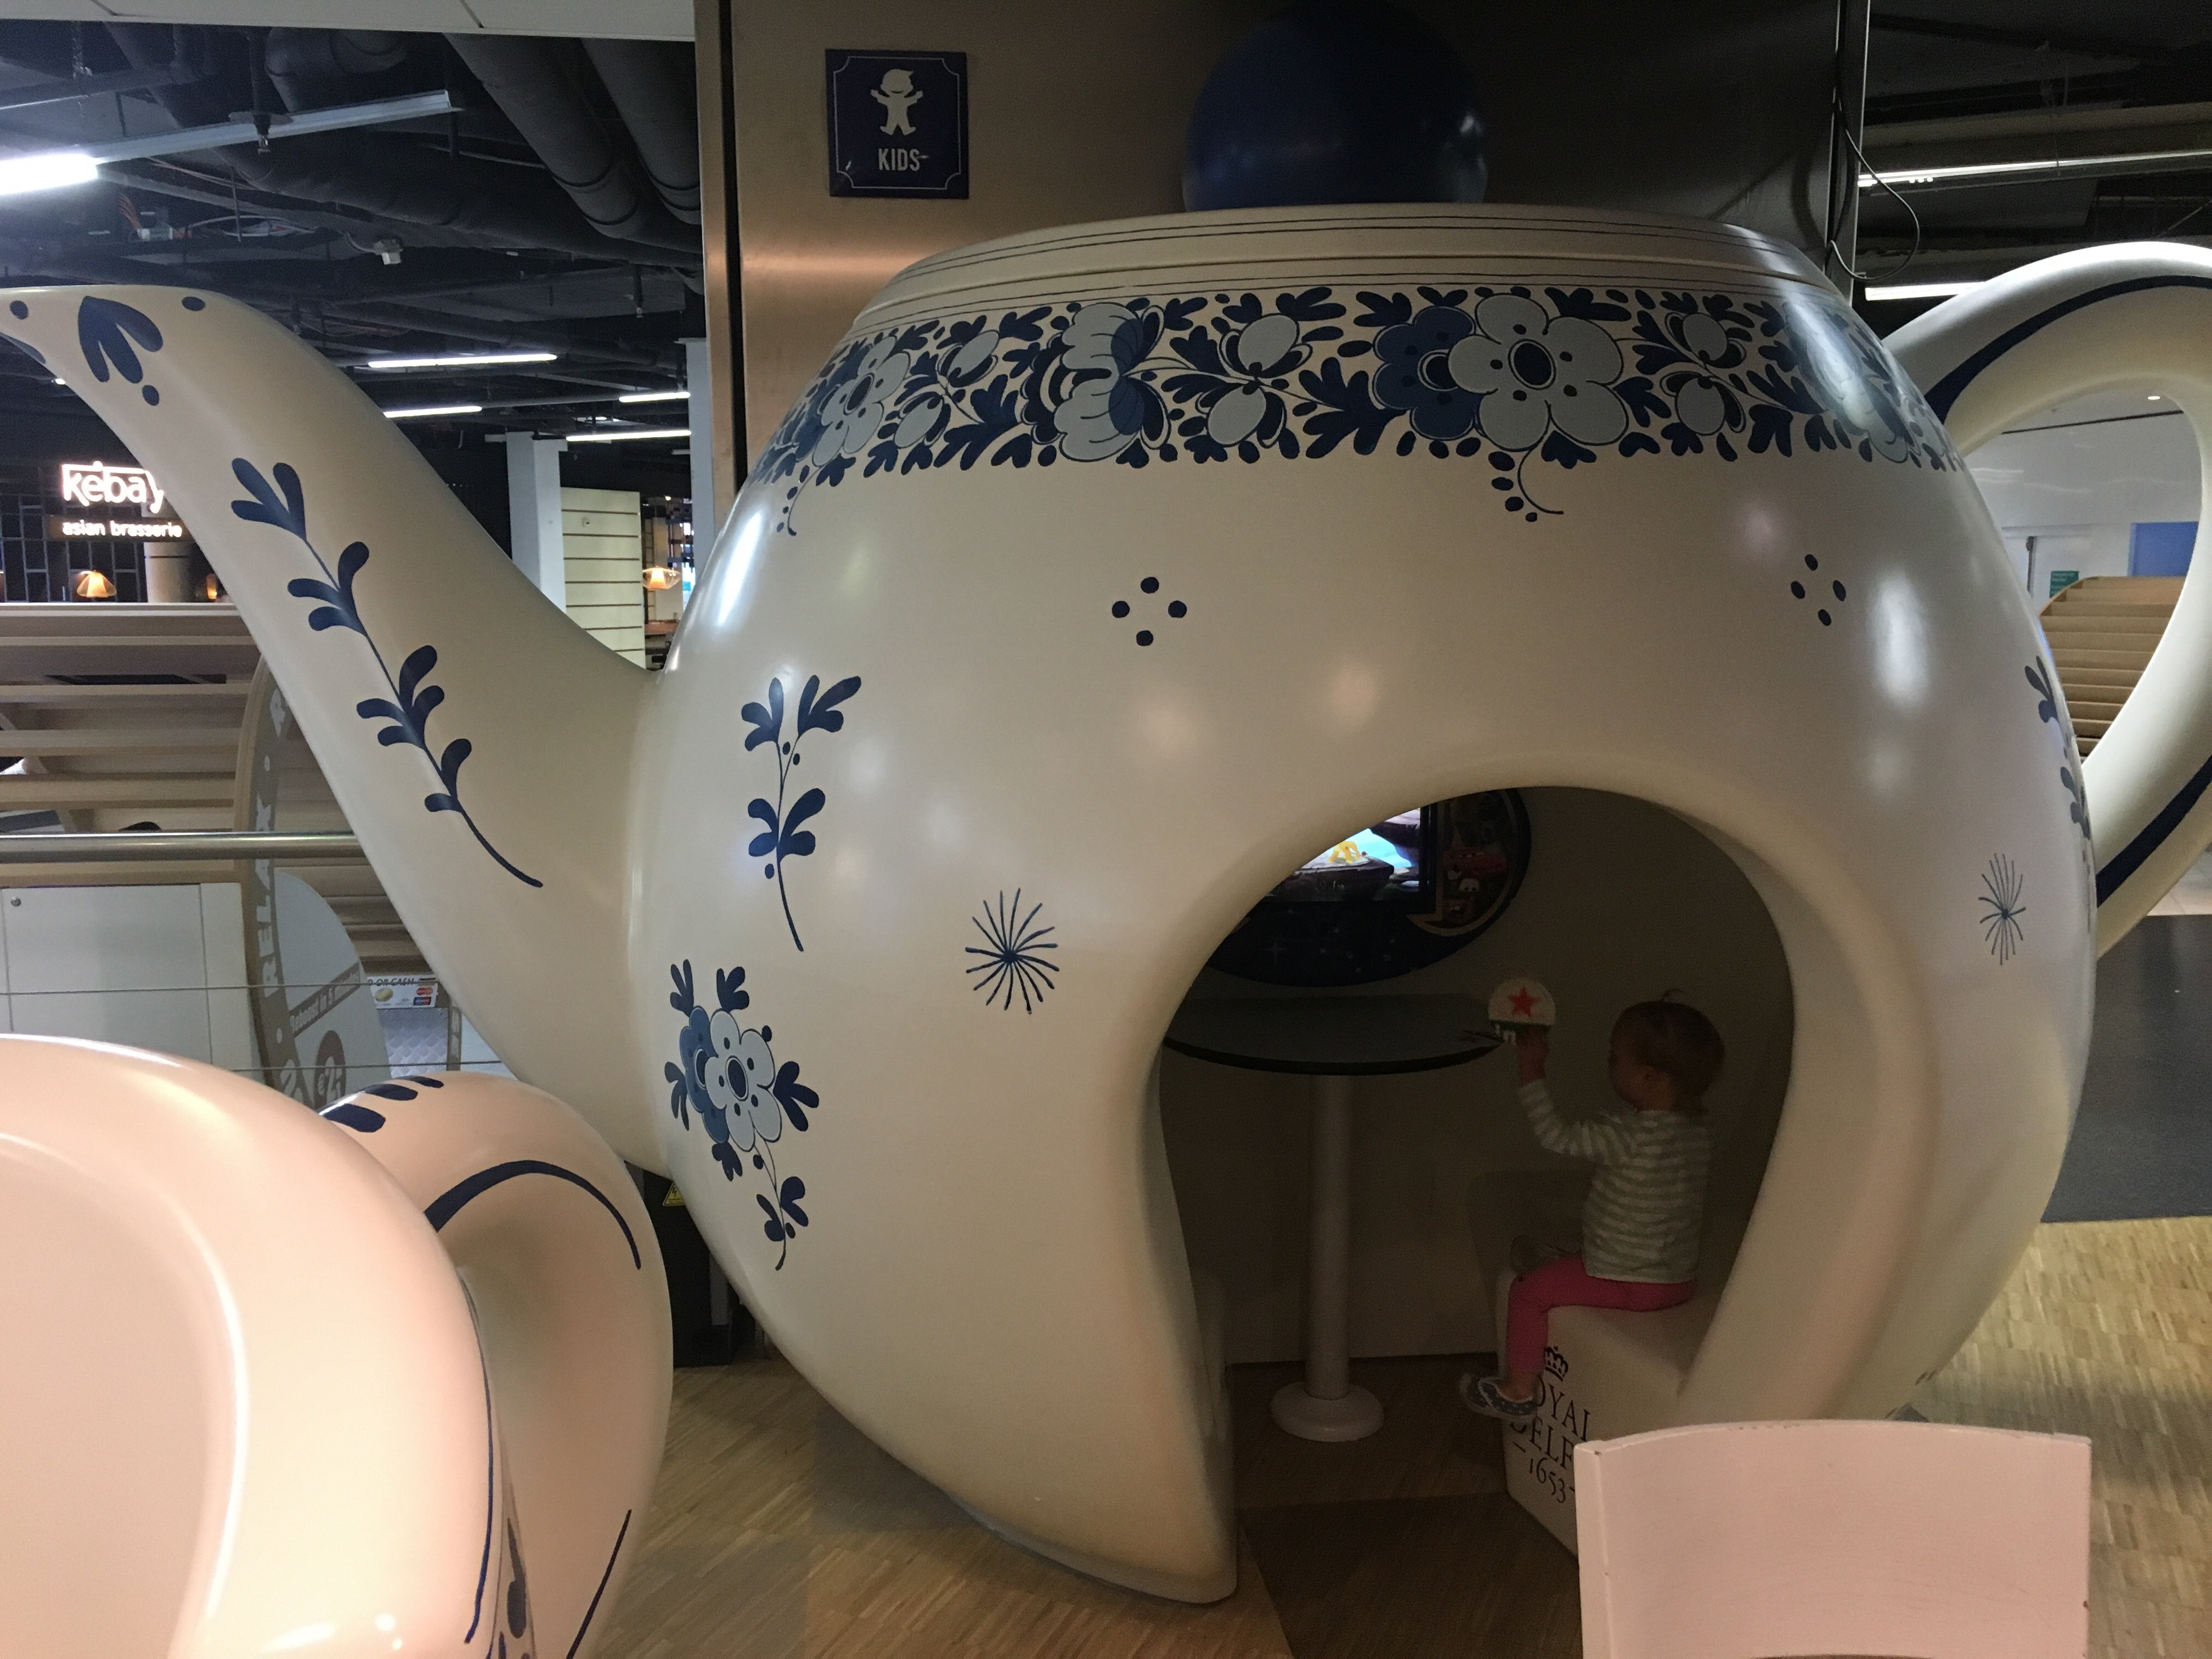
We returned to the airport, changed into the clean set of clothes that I thankfully had in my backpack, and spent the rest of the day exploring inside where it was warm and dry. The day is mostly a blur because I’d already pulled an all-nighter with a toddler. I was in survival mode. As a consolation, at least they had these giant tea cups to sit in.

Finally it was time to board our last flight, we made the short journey from Amsterdam to Cork, we arrived, a taxi took us to our hotel, Jon met us at the door, he carried us into bed, and then I didn’t wake up for 14 hours.

And that, my friends, was the longest day of my life.

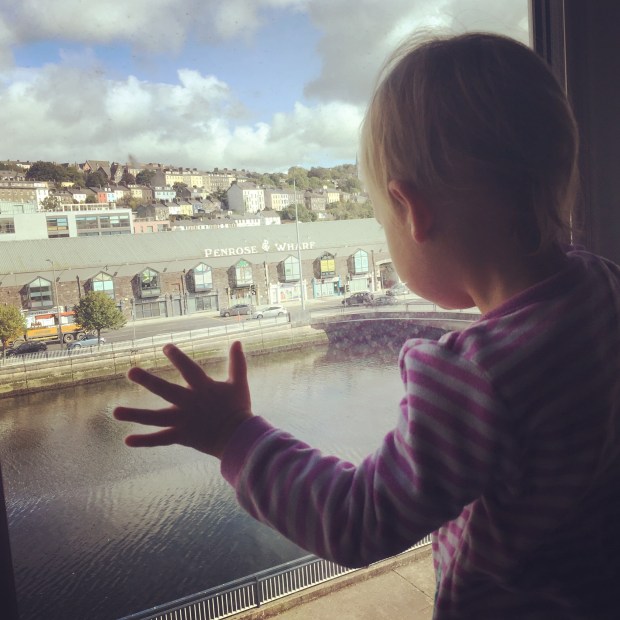
The next afternoon I woke up totally refreshed and ready to go. We looked out our window and we’re greeted with the most spectacular view of Cork city.

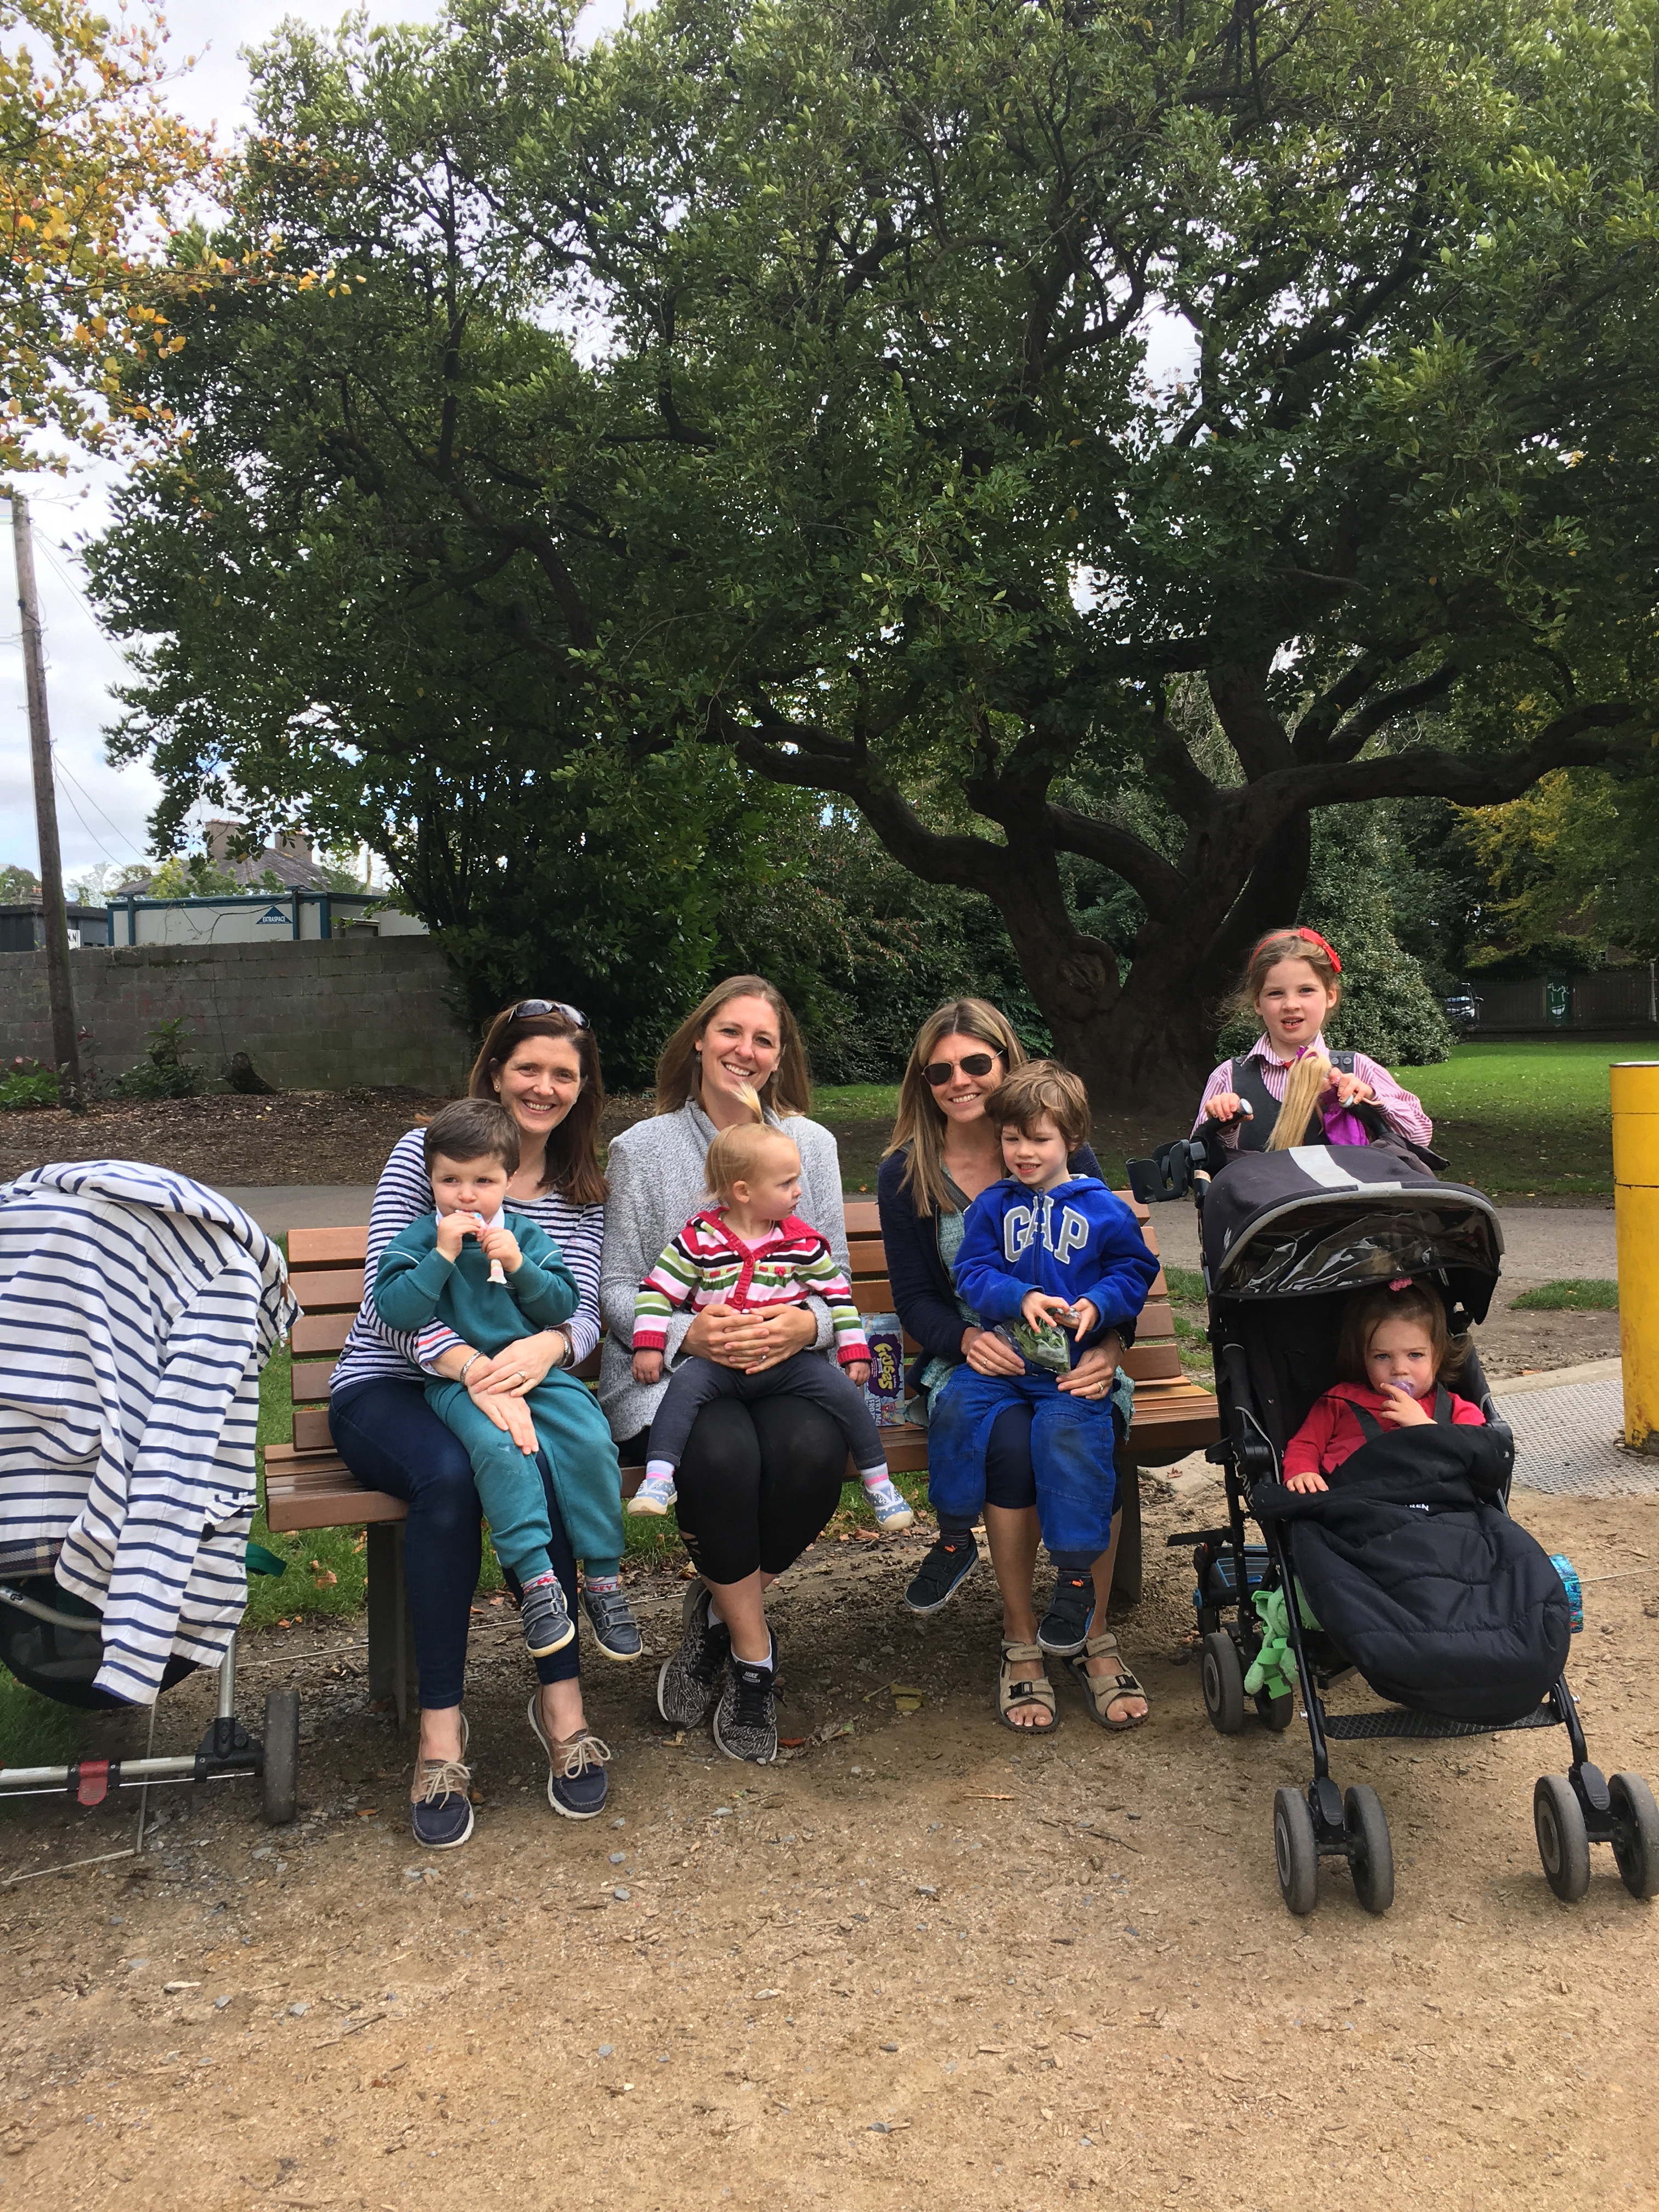
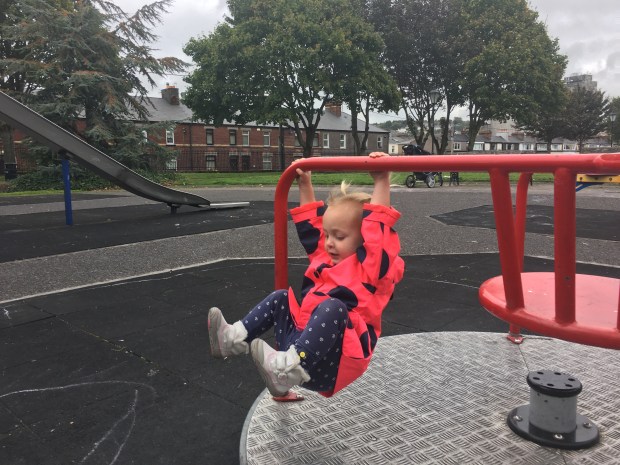
Jon was finishing up his last day of work in Cork, so I met up with some friends at a park down the road.


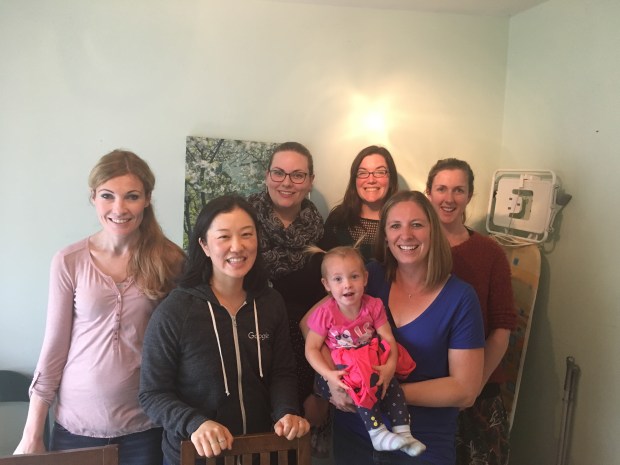
Joanne had been my neighbor when we lived in Cork, and her two children were two of our boys’ best friends. Joanne had a friend from growing up, Leah, who lived the next neighborhood over. Leah’s son was in David’s preschool class, and so us 3 moms had spent many days together with our children. When we lived in Ireland our kids had played together on “the green” in the middle of our neighborhood nearly every day and us moms had spent endless hours getting to know each other over cups of tea. Reconnecting with Joanne and Leah (and their new children who had not yet been born when we left Ireland) was the perfect start to my little Irish adventure.

Over the next few days we did exactly what I had set out to do in Ireland: we visited the people and the places that we missed.

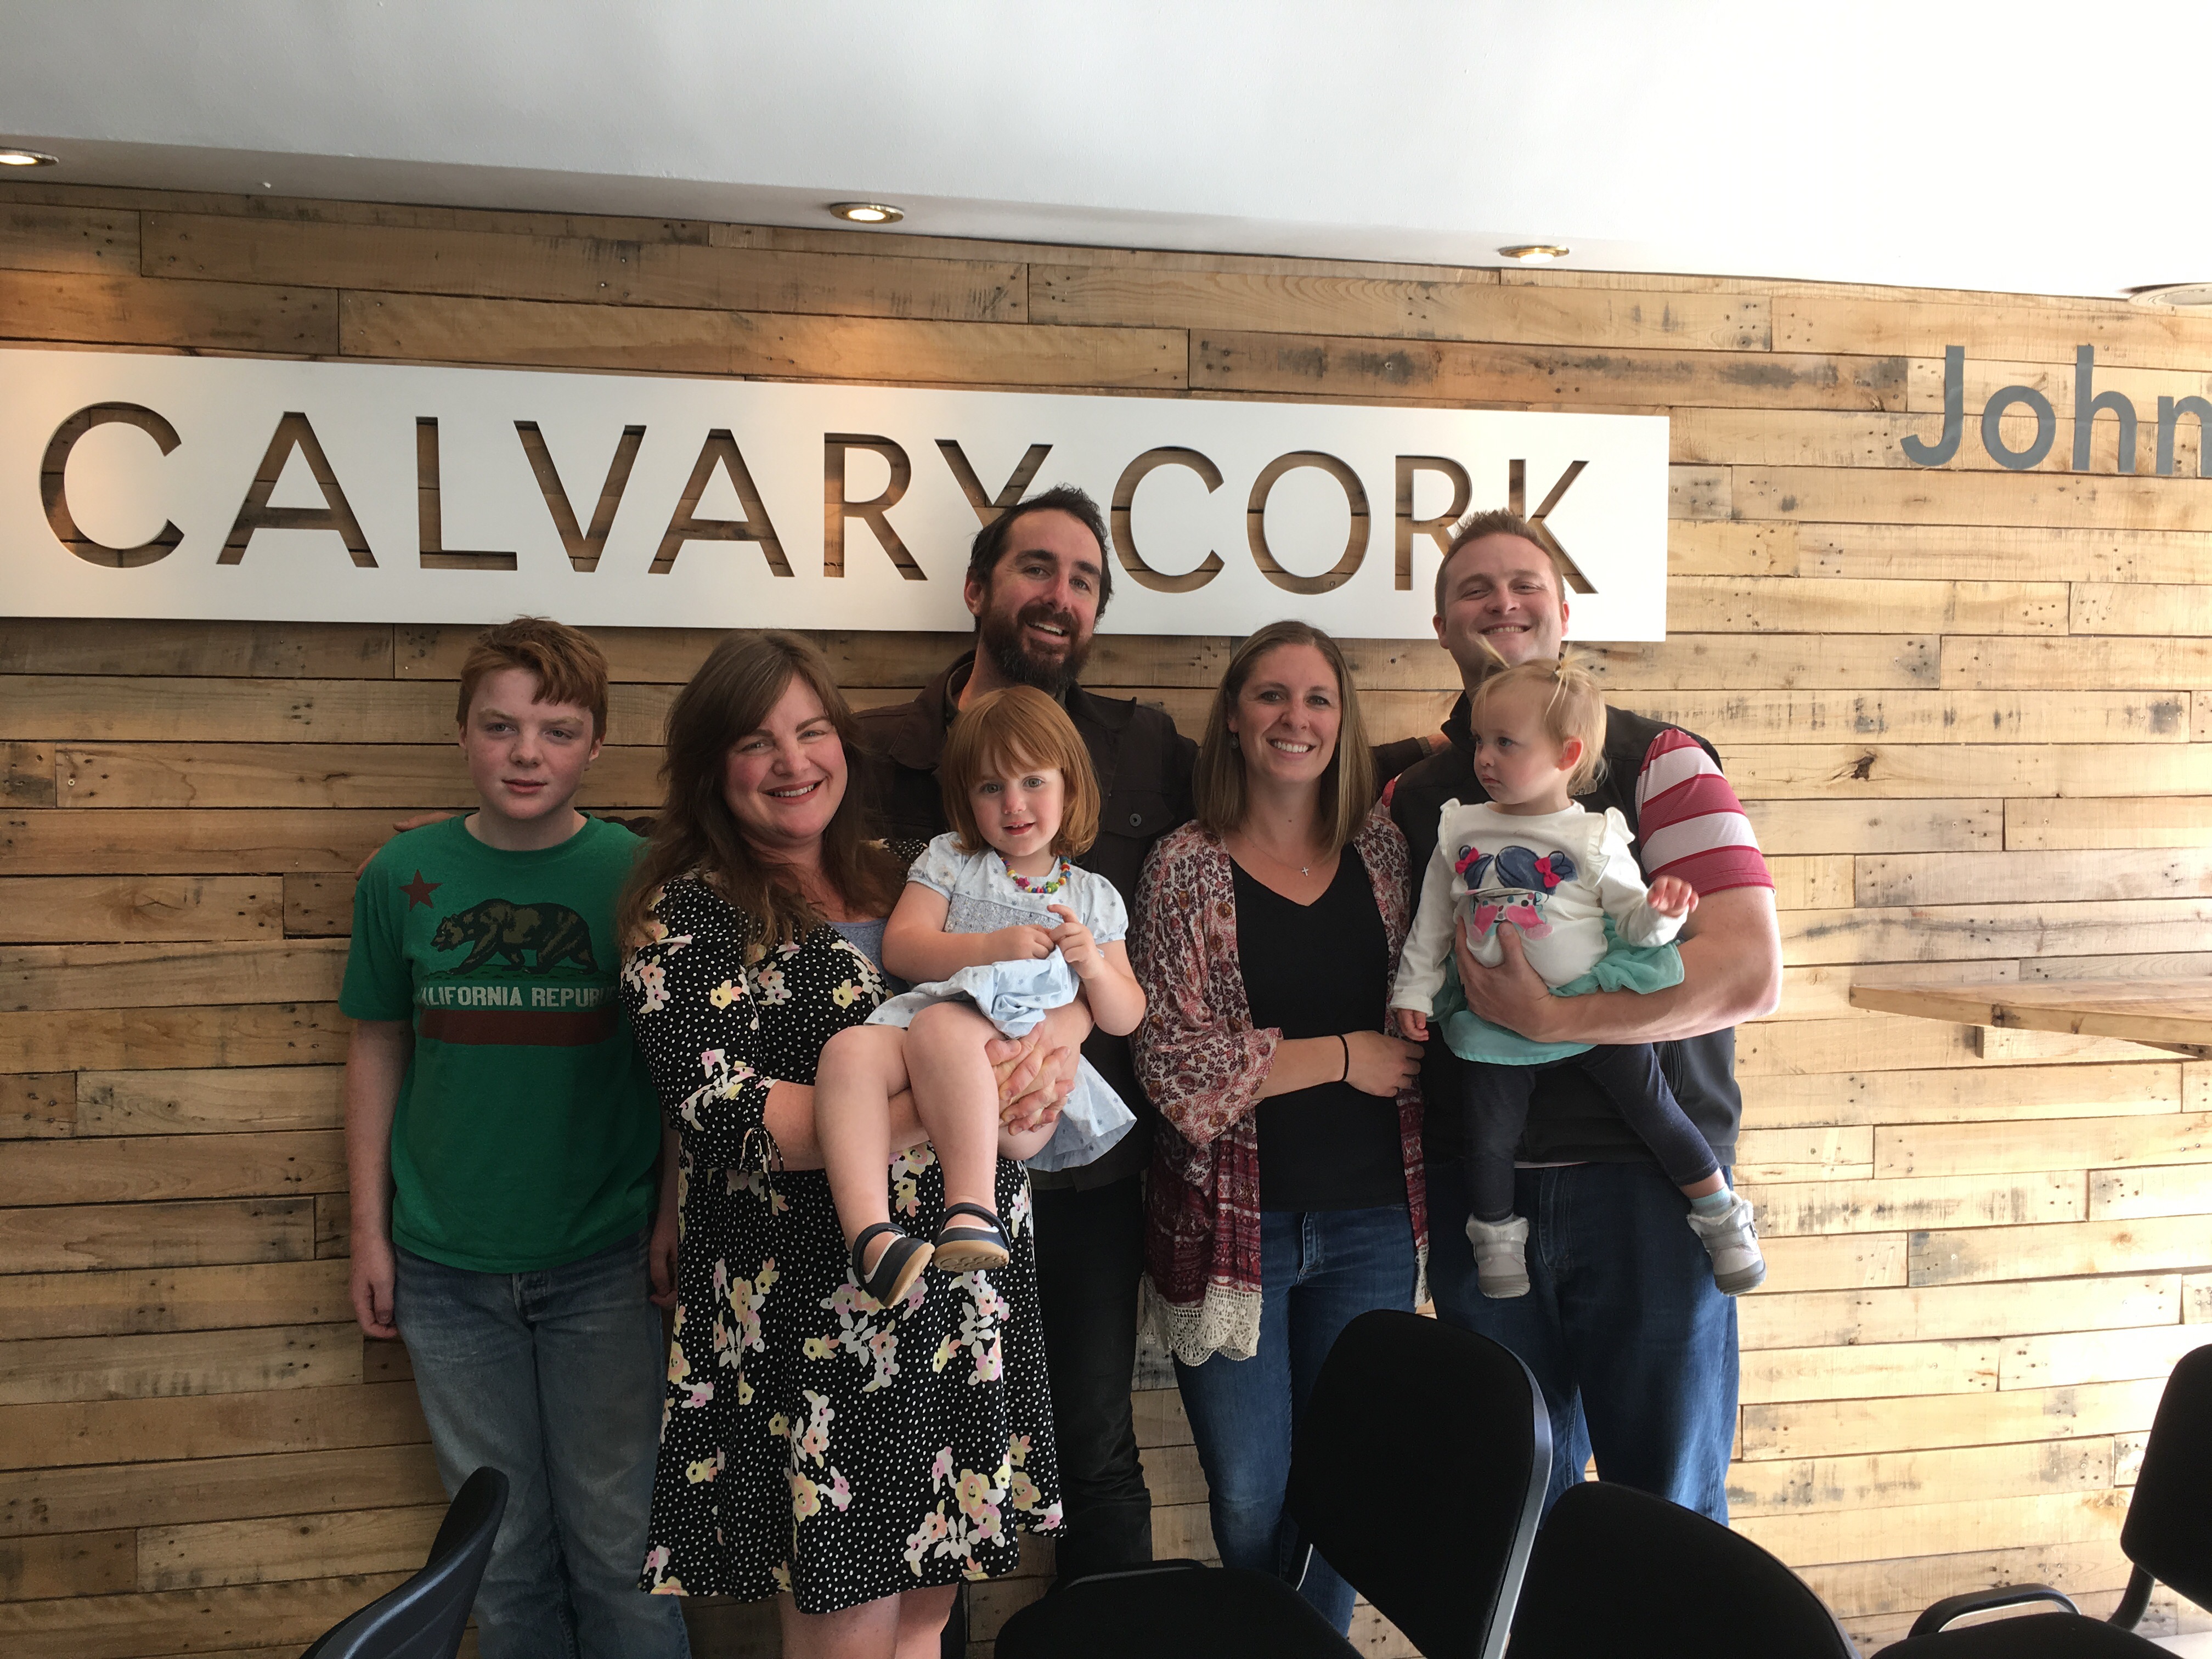
We went to our old church and caught up with our “family” there.


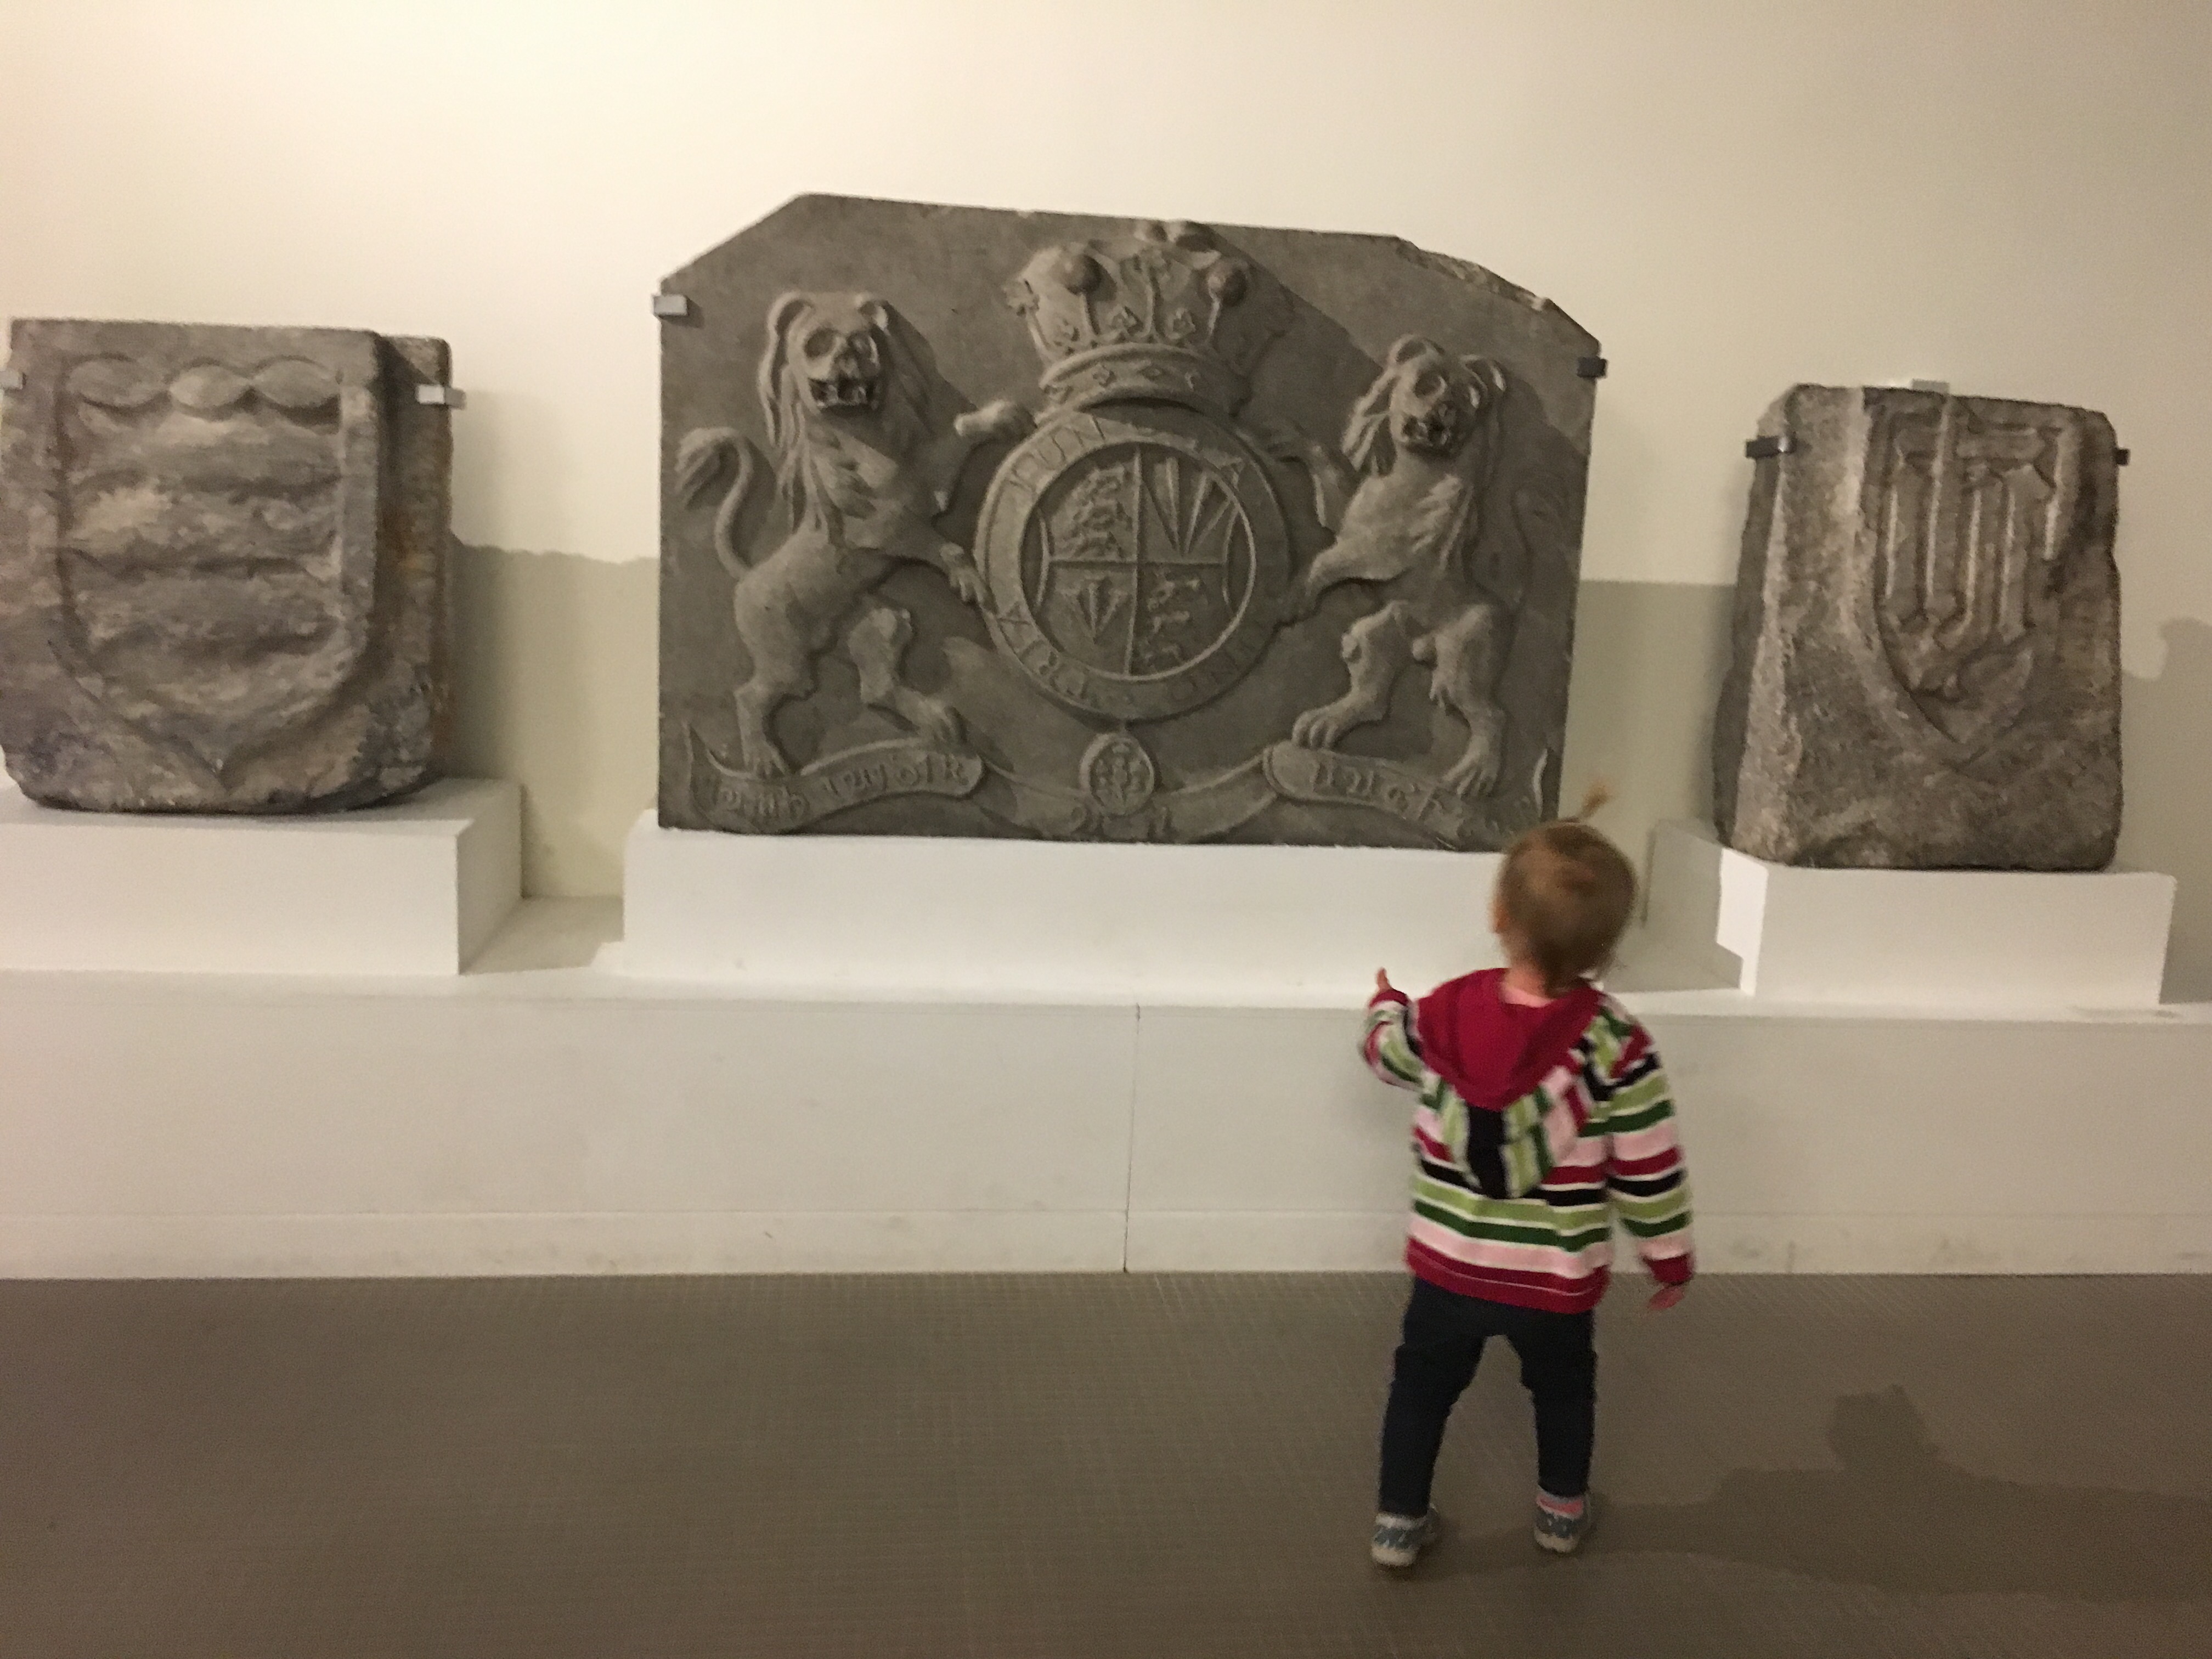
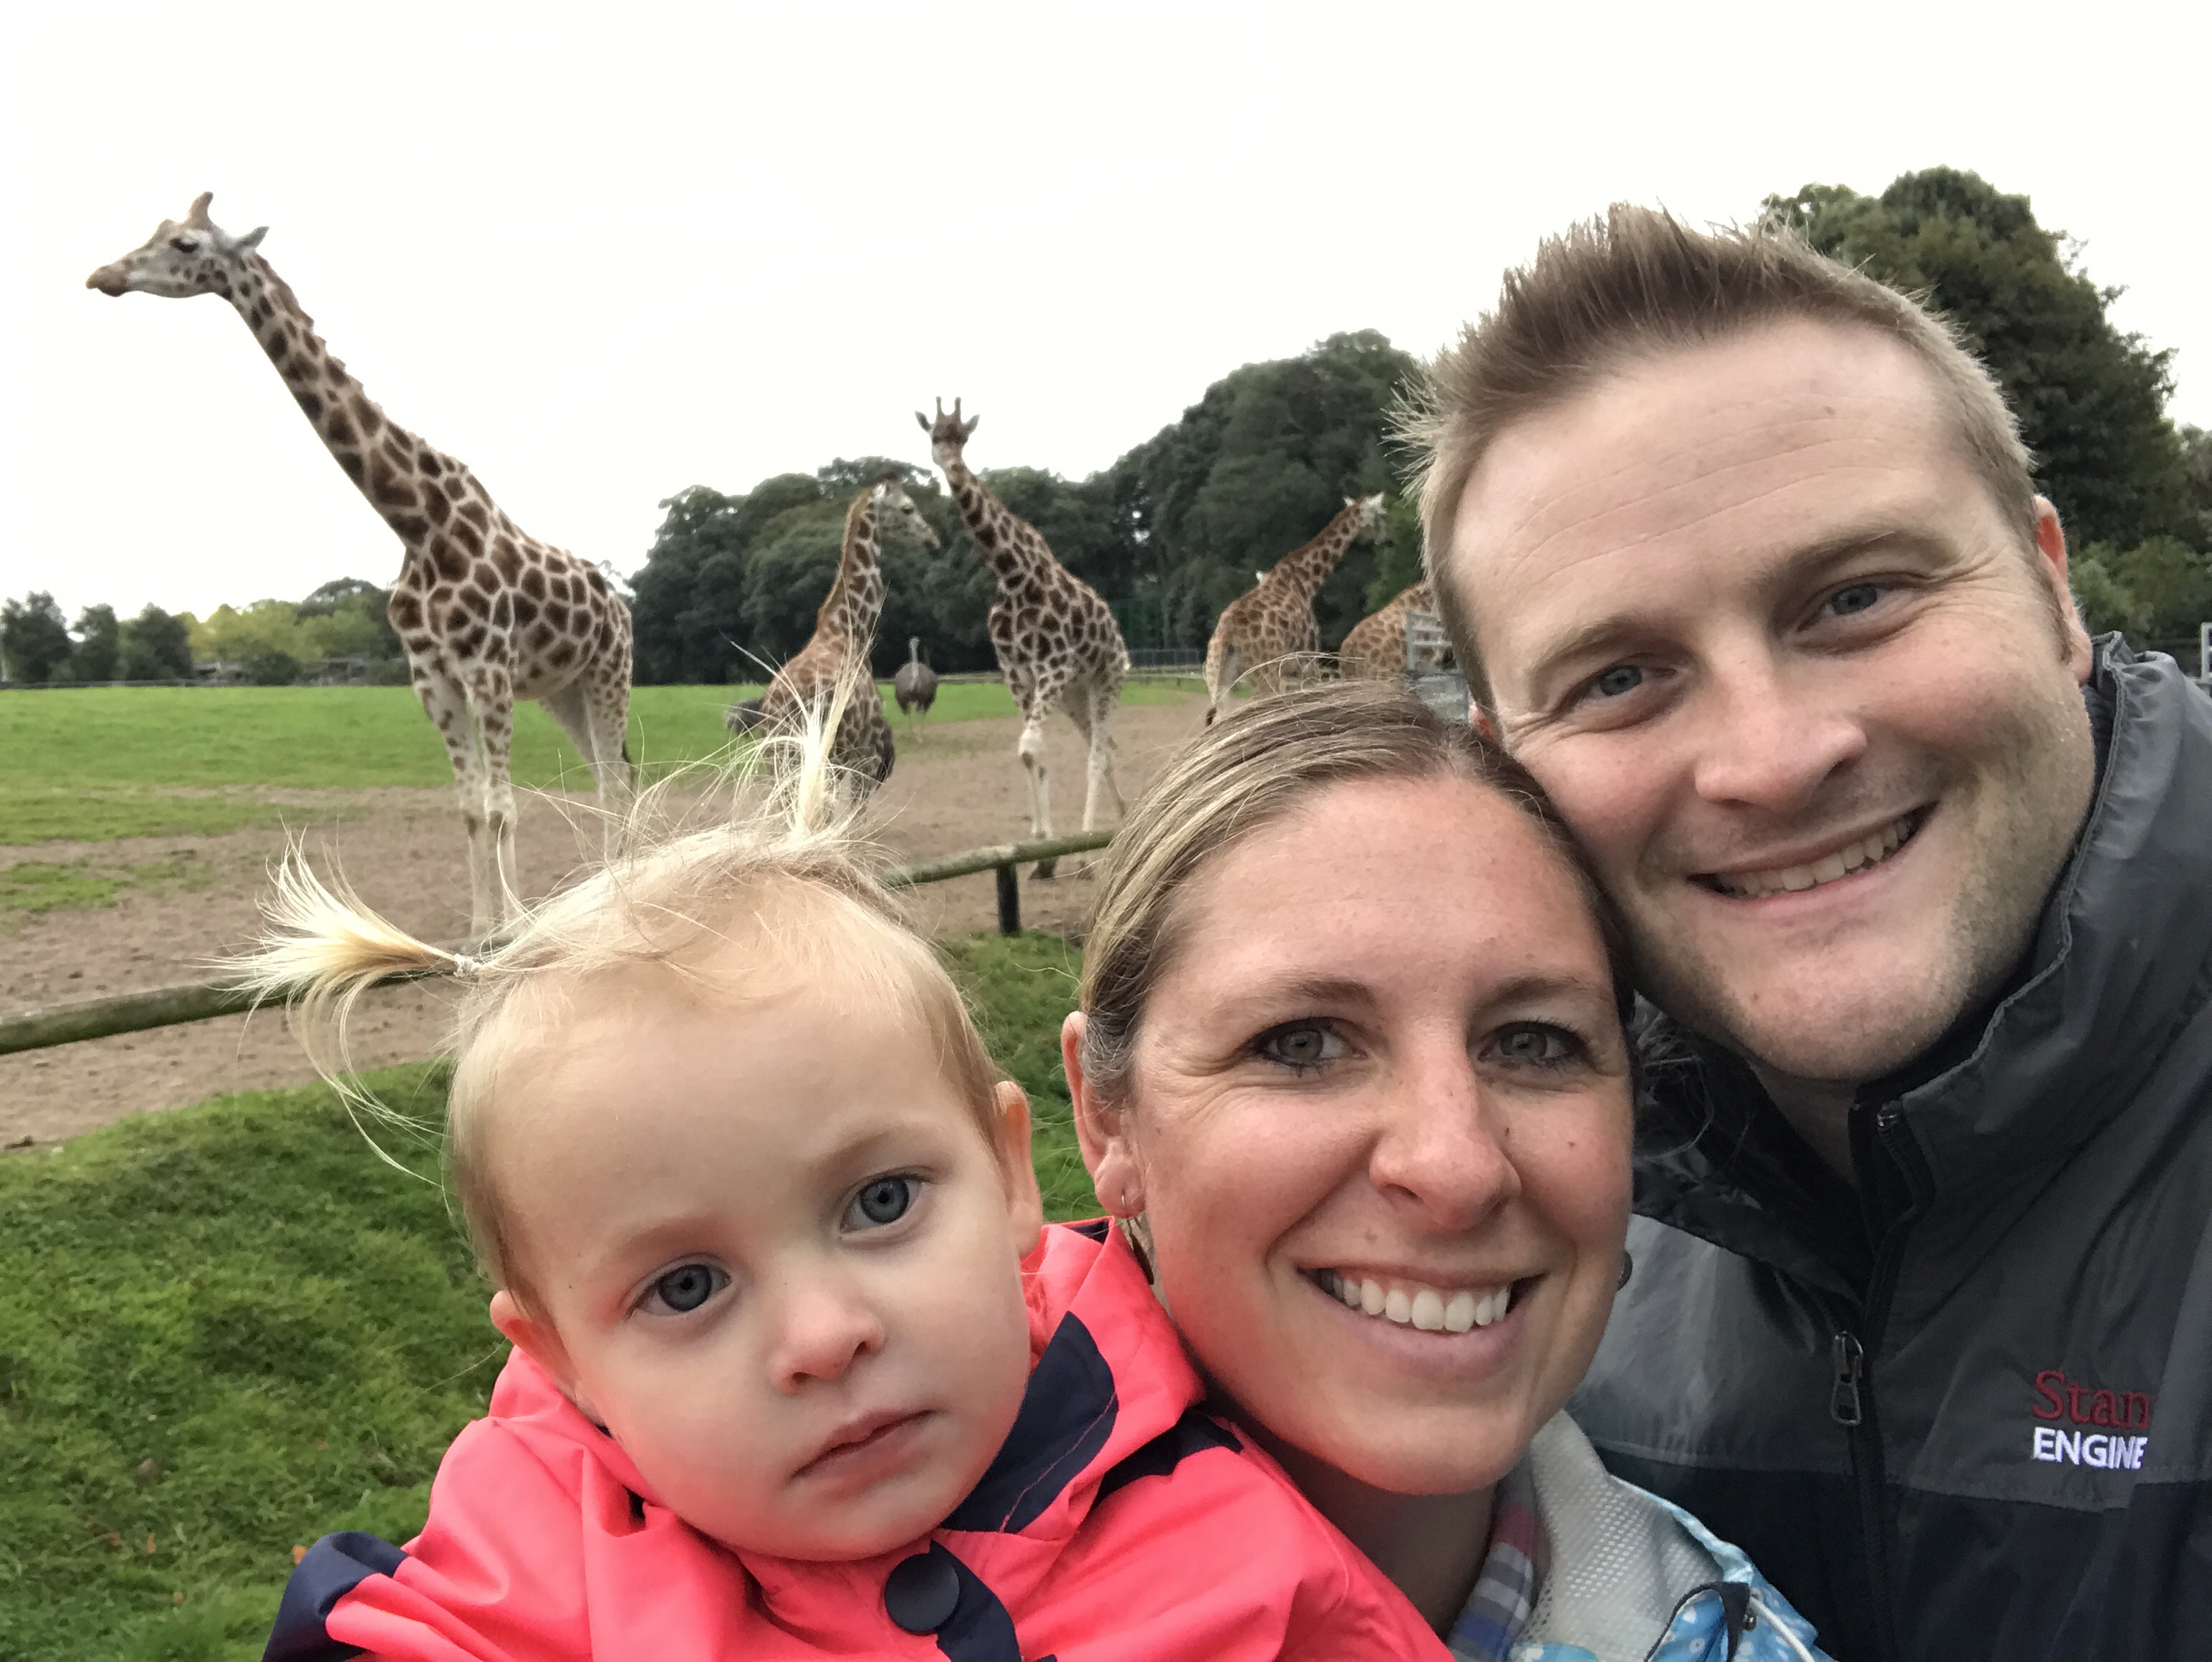
We went to museums and the zoo and parks.


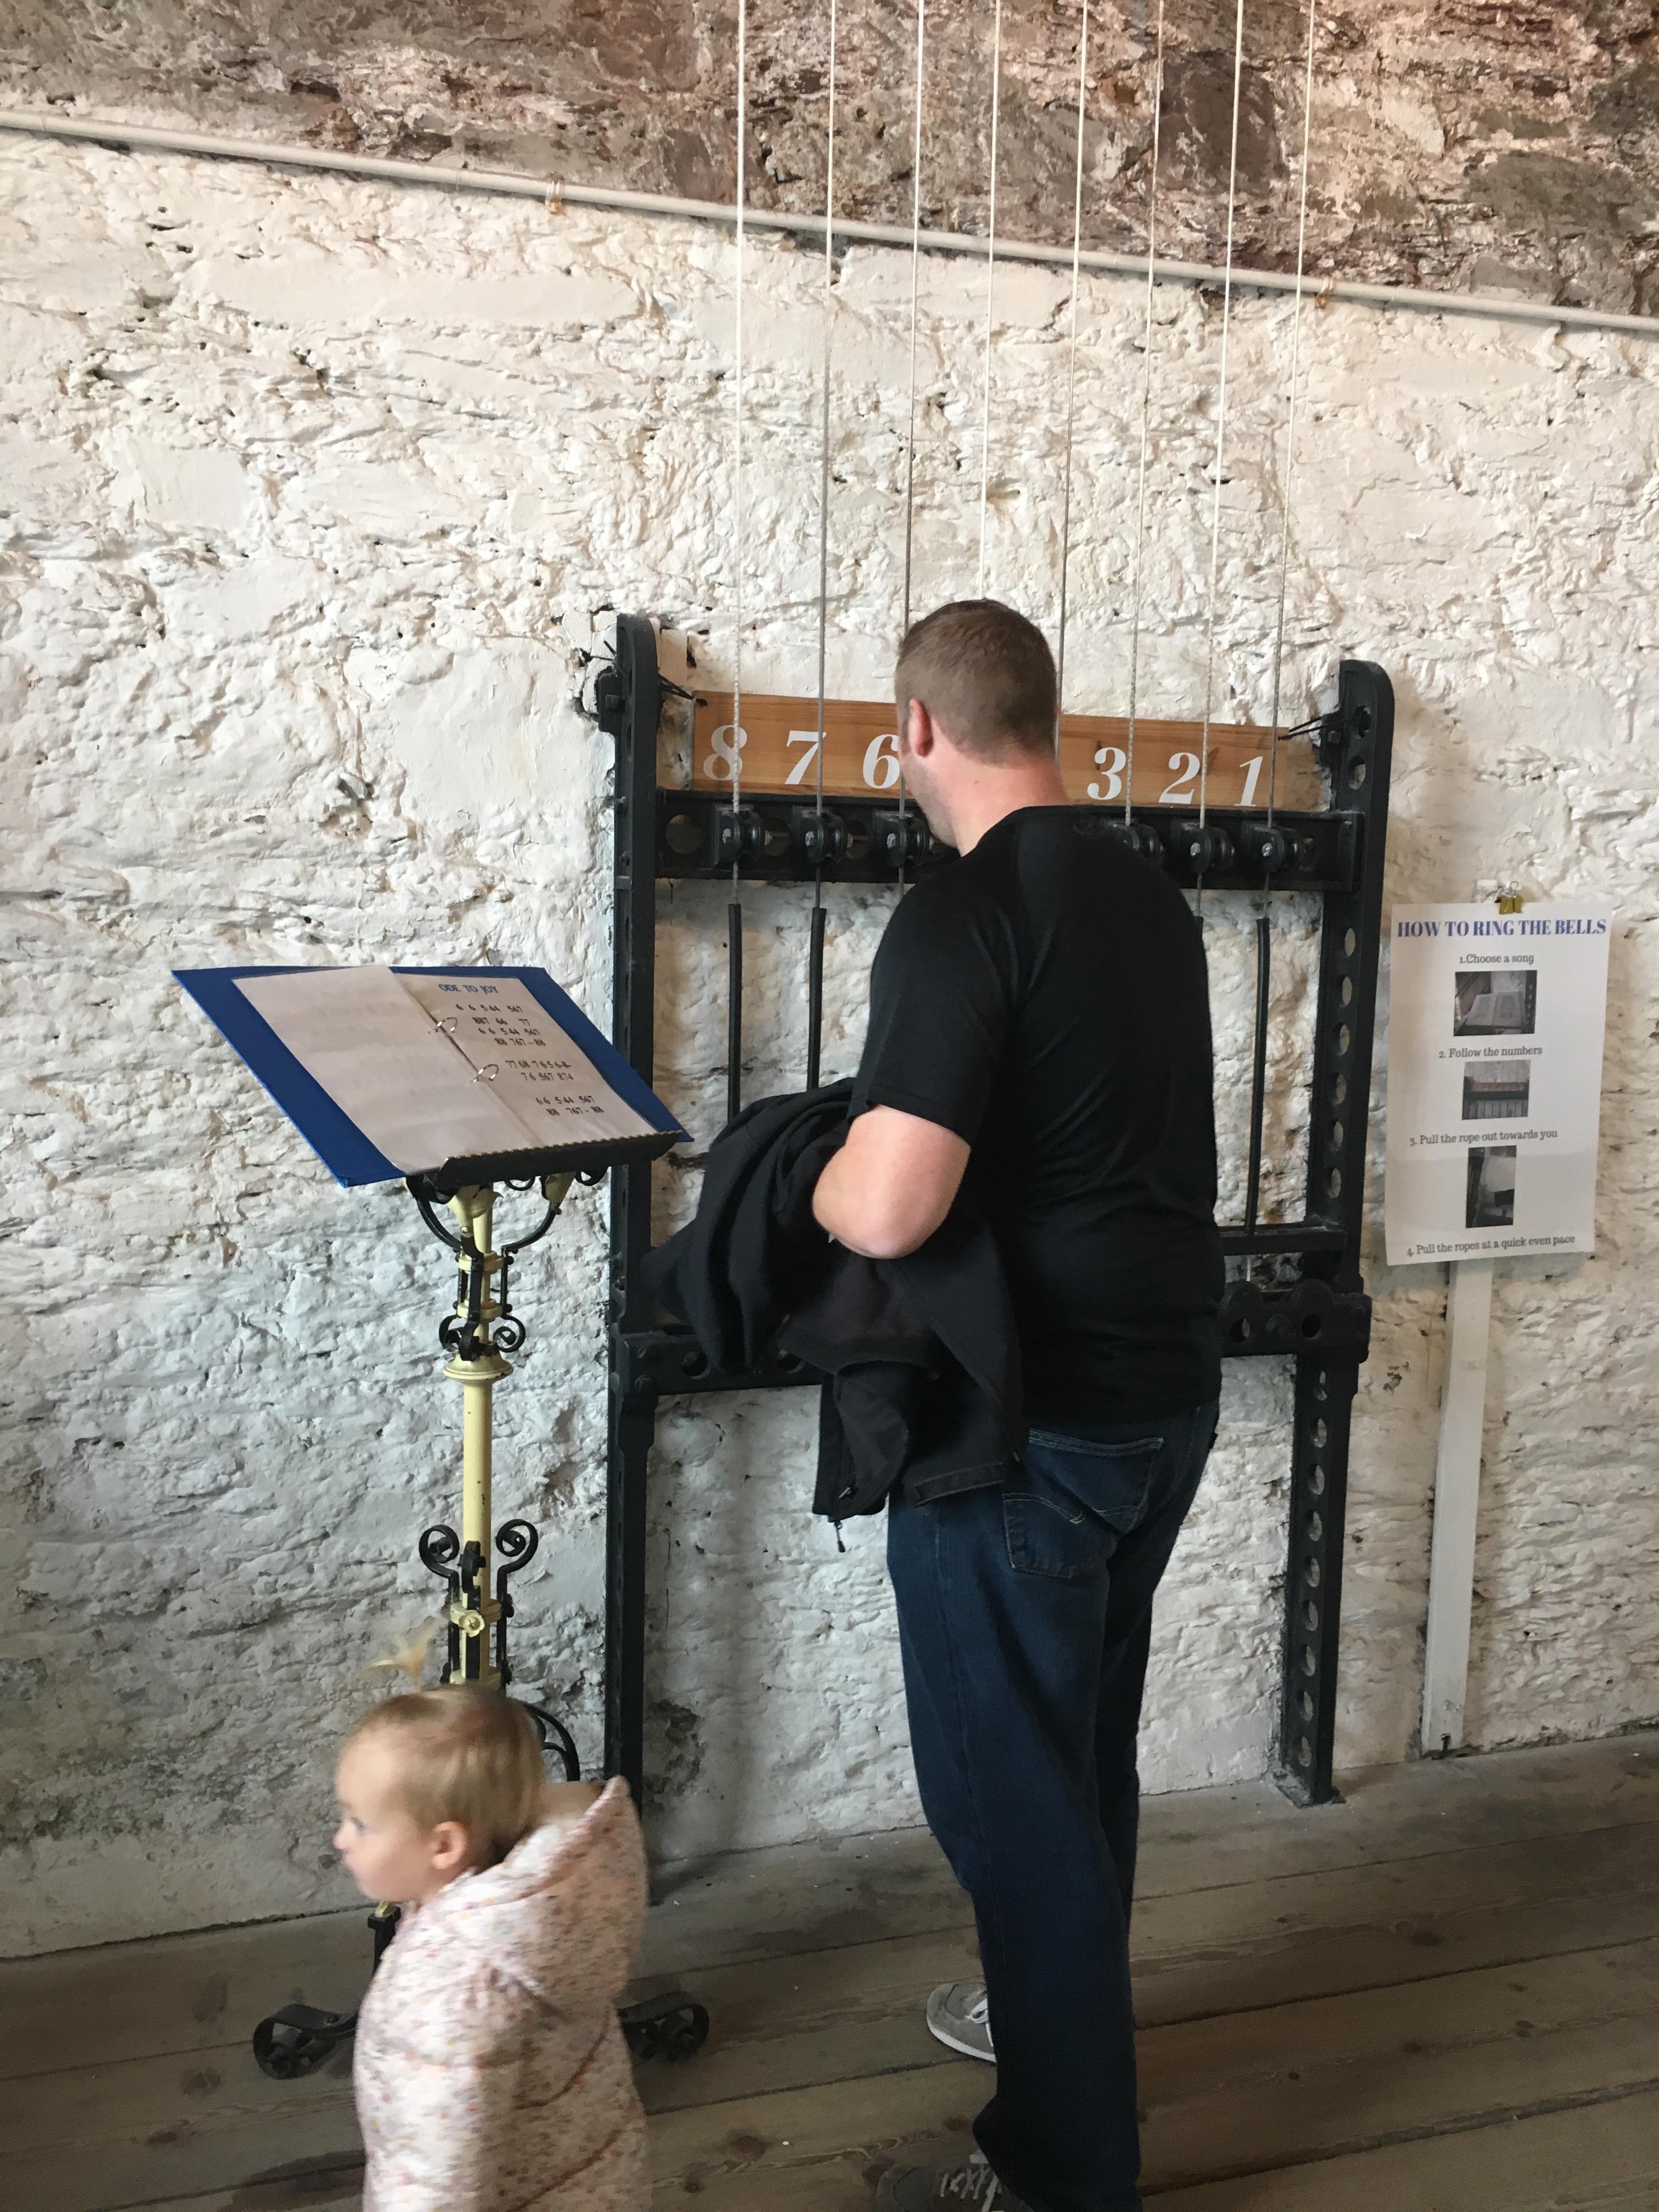
We visited historic churches and rang the bells in their bell towers.


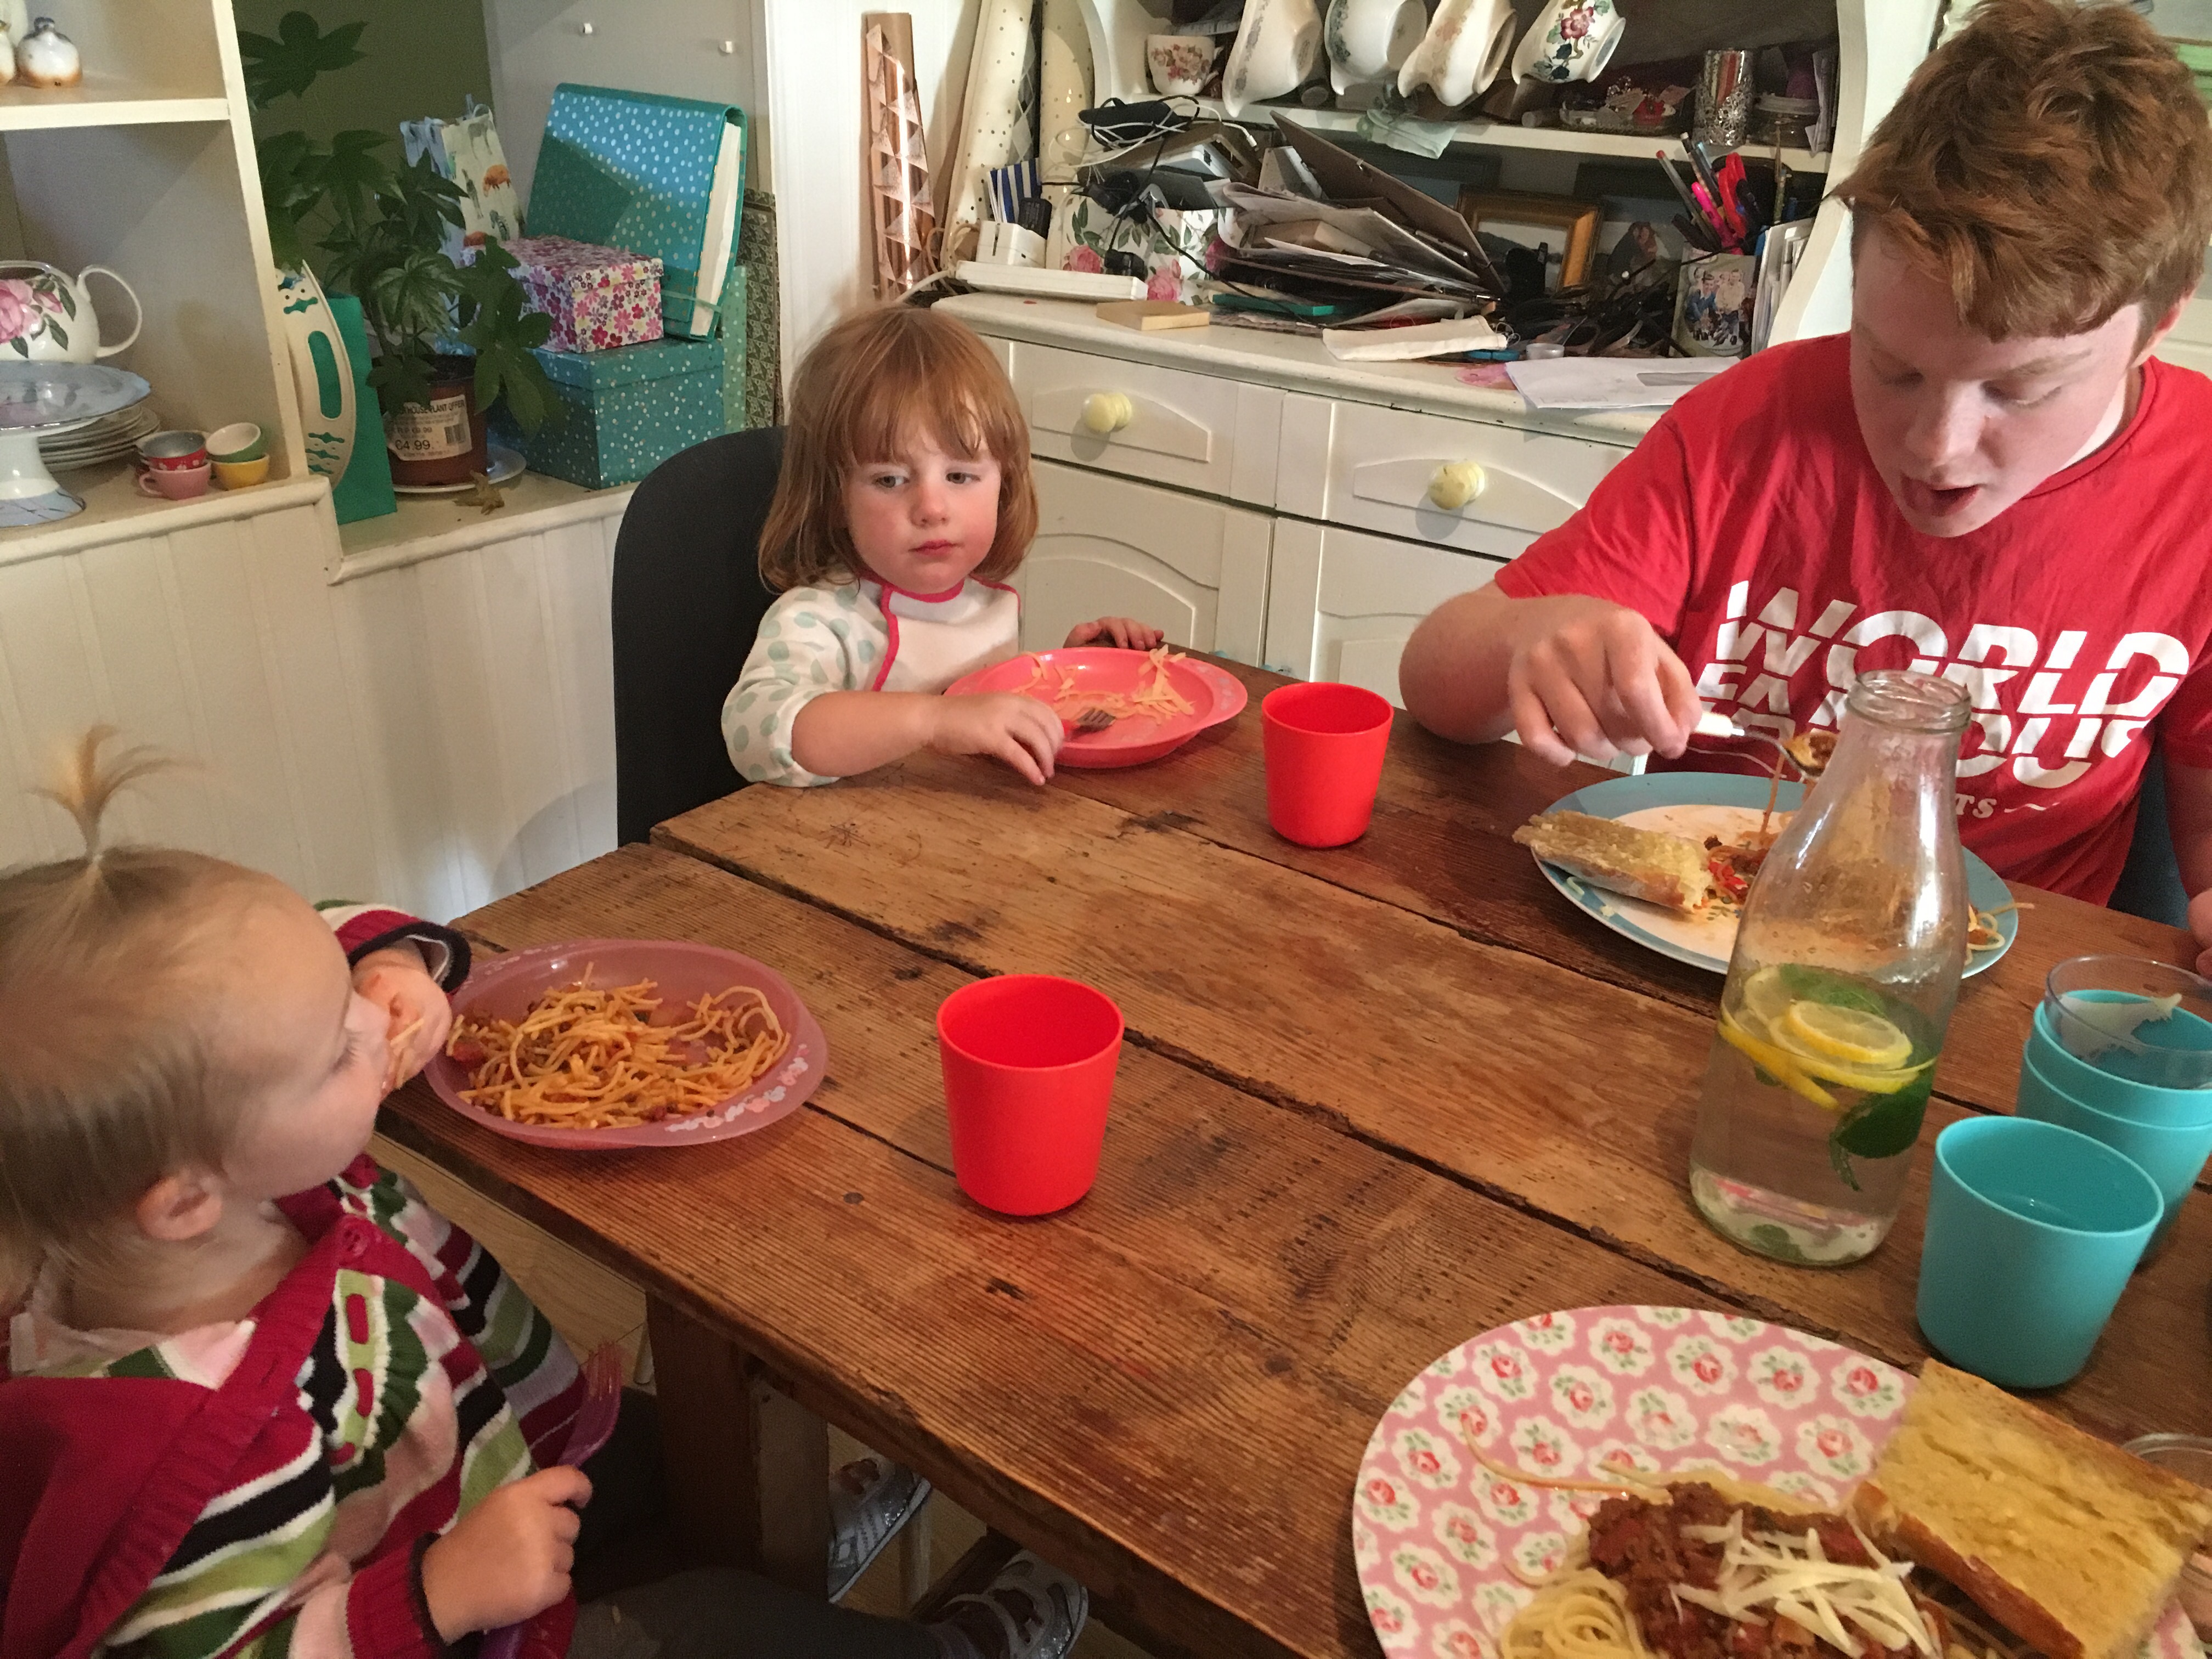
We attended playdates and birthday parties.


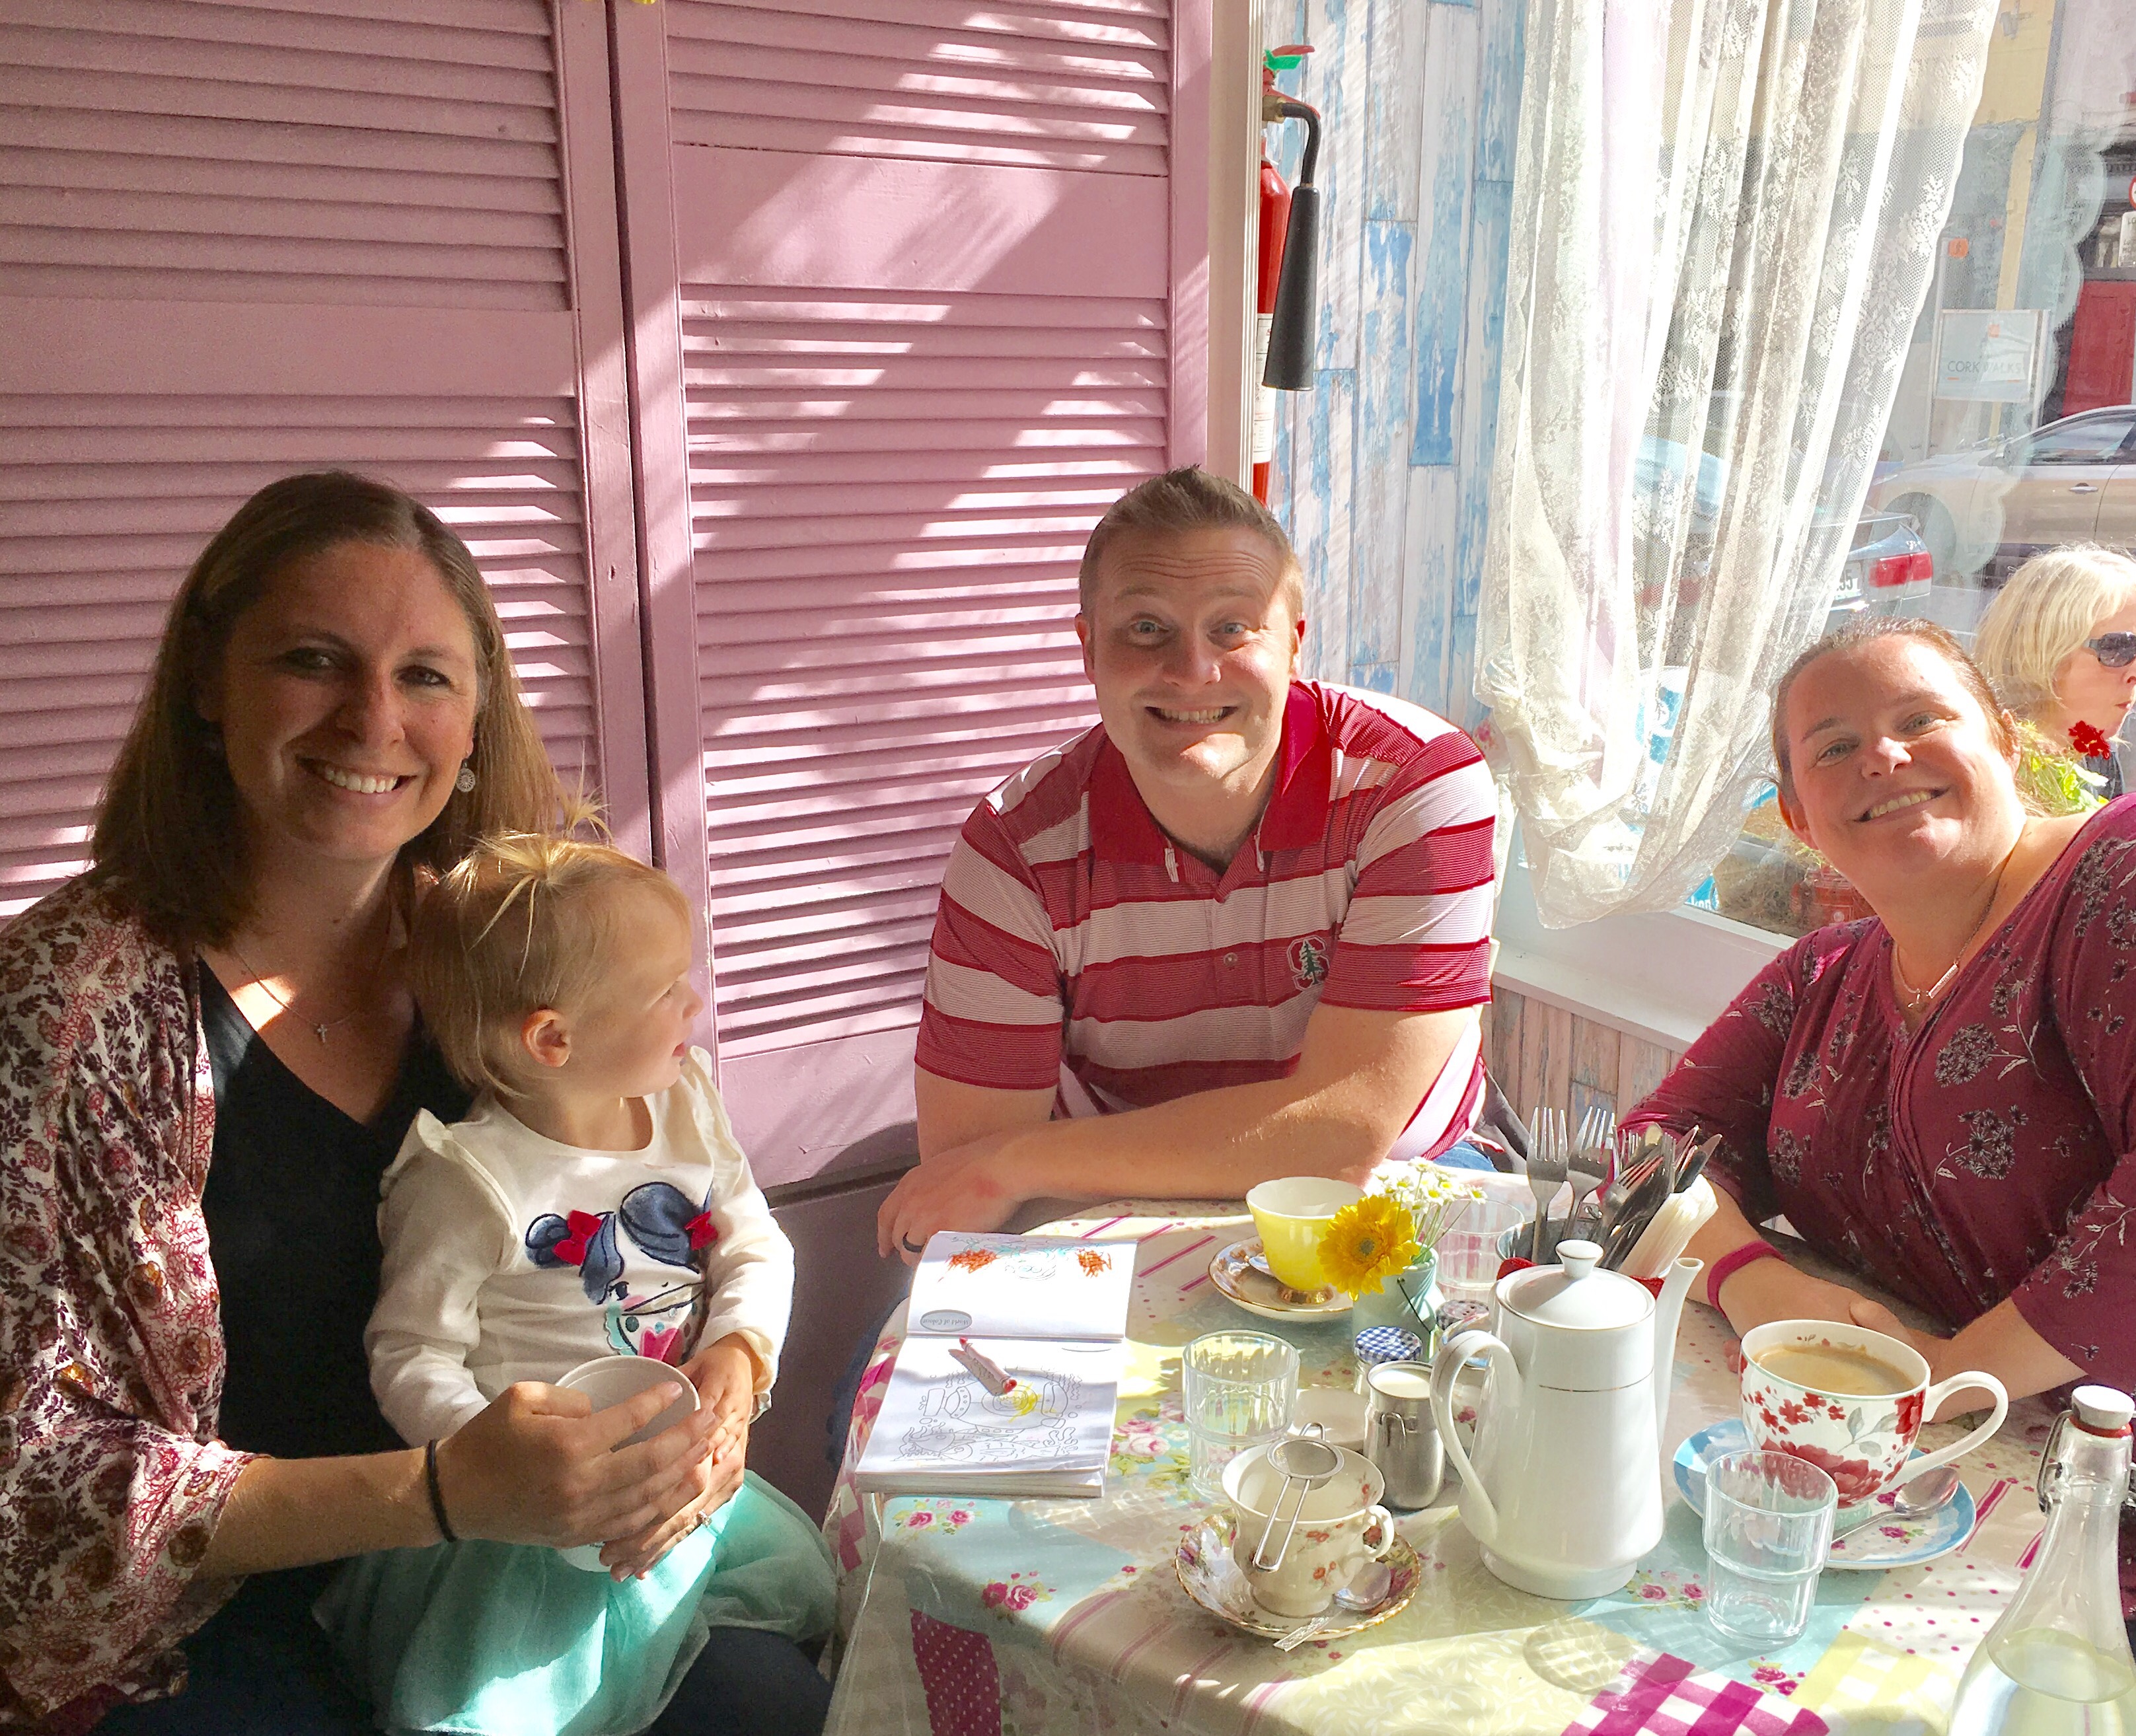
We had afternoon tea and dinners with our friends.


We visited dear friends of ours from California who had recently moved to Cork.


We walked on the sea cliffs and breathed in the fresh, salty air.


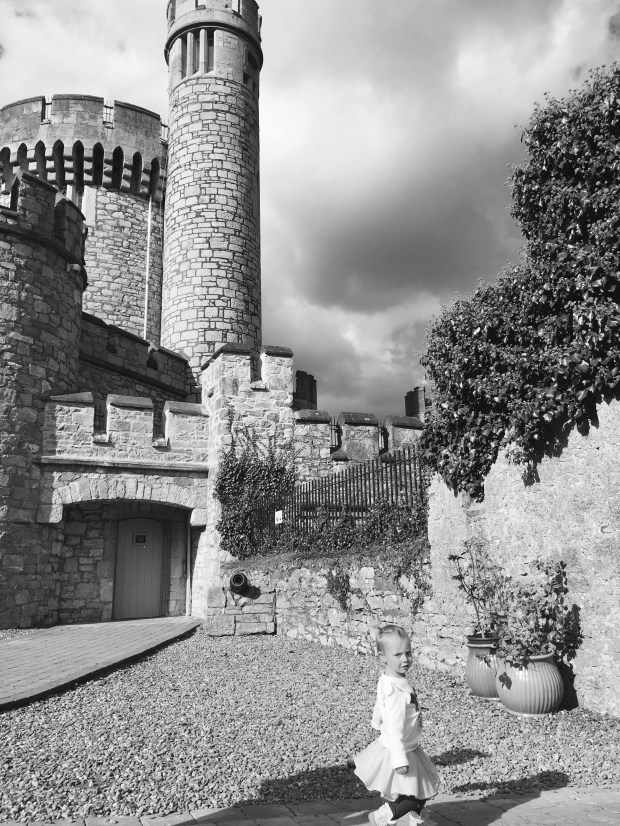
We went to a castle.


We listened to trad in a pub.


We drank tea and had a pint in our local.


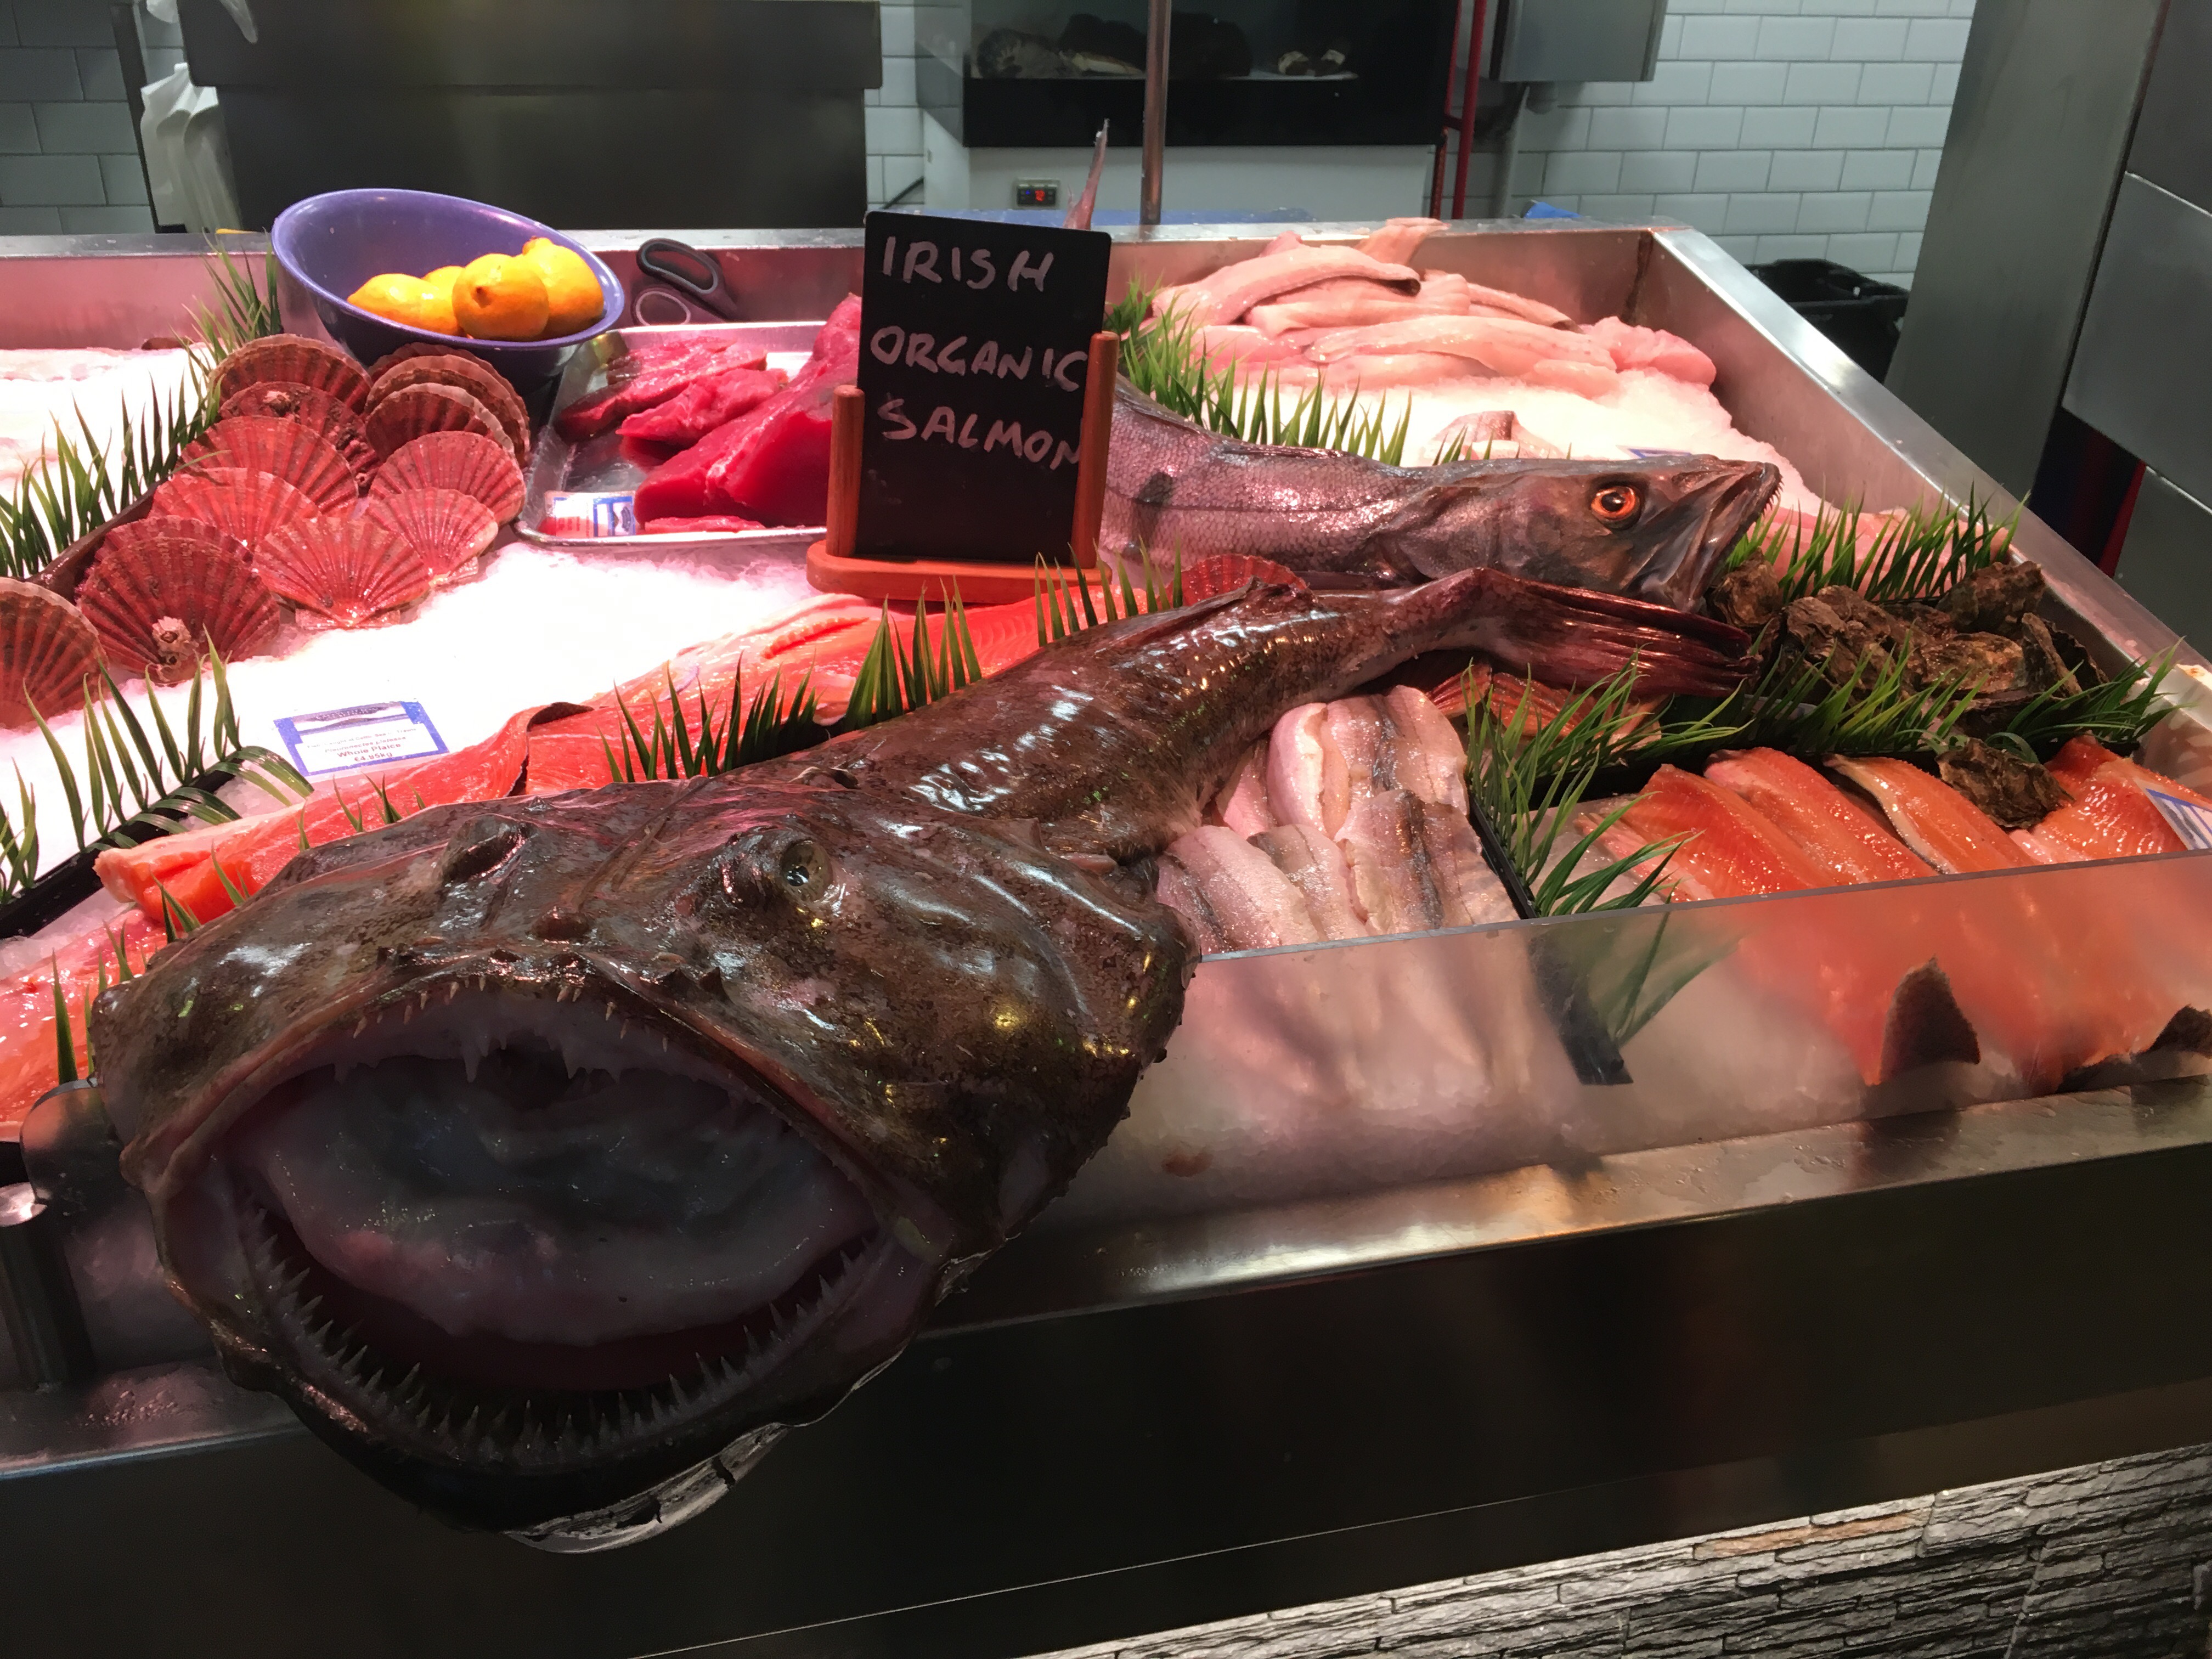
We ate the local delicacies.

(No, not that.)

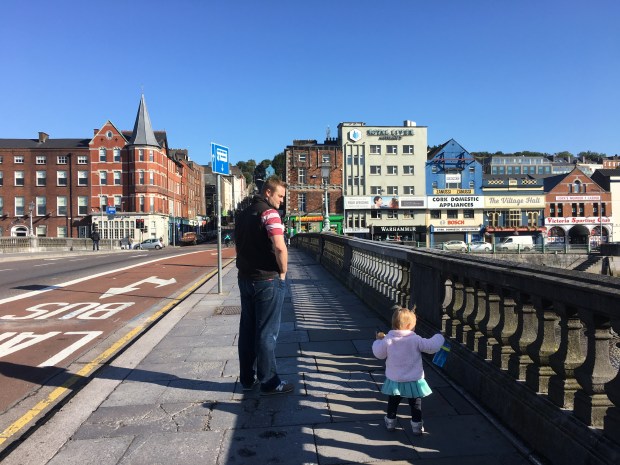
We walked the streets that we used to call home.

We spent a whole week living out all of our favorite things with all of our favorite people, and it was perfect.

But, as with all good things, eventually it came to an end. At the end of our week I was sad-happy–sad, because I knew that I wouldn’t be back again for a long time, but happy for the experiences this week that would never leave me.

Thank you, Ireland, for a lifetime of memories squeezed into a single week. I love you so much that it was even worth traveling to you with a toddler–and that’s saying a lot!

Until next time, Ireland–I miss you already!

DIY Rice-Dyed Easter Eggs

IMG_1461

I’m always on the lookout for creative takes on old favorites. So, when my friend over at Silicon Valley Toddler posted this idea for coloring Easter eggs with rice, I was intrigued! We decided to try it out and–WOW!–what a fun activity with absolutely gorgeous results. This method is a relatively mess-free way for toddlers and preschoolers to get in on the Easter egg-dying action (no spilled cups of egg dye #ftw). Read on for the how-to.

What you need:

– Hard boiled eggs (Easy-peasy directions: arrange eggs in the bottom of a large pot so they have a little room to dance around–old eggs that have been sitting in your fridge for a week or two are best. Finding old things in my fridge is never a problem, so this works quite well for me. Cover the eggs with about an inch of cold water and spalsh some vinegar in the pot for a bit of Voodoo magic (actually, it will just help keep the yolks sunshiney-yellow instead of that nasty gray center you get sometimes). Put the pot on the stove and bring just to a boil. Turn off the stove, cover the pot, and keep the pot on the warm burner for 12 minutes. Remove the eggs with a slotted spoon into a bowl of ice water to stop the cooking. Transfer the cooled eggs back to their egg carton and store in the fridge until you’re ready to use them. Done and done.)
– Dry rice–a few cups of cheap rice will do
– Liquid food coloring (we went through one whole box of food coloring when we dyed 1-dozen eggs)
– Plastic containers with lids (My mama taught me to never throw away a used margarine or lunch meat container. If your mama taught you the same, use a few of these instead of your fancy Tupperware.)

What you do:

Place a handful of rice in each container (make sure the container is deep enough for the egg to move around with the lid on).  Add a hard boiled egg to the container and several drops of food coloring.


Put the lid on your container and shake it to your little heart’s content!

IMG_1443

If you want a mulit-colored marble-ized effect, go for it. This is your egg, no judging here. Just move the egg to a second rice container with another color of food coloring.

Once you’re satisfied with your creation, remove the egg, brush off the rice, and leave ’em to dry completely.

IMG_1448


What gorgeous little speckled creations!

IMG_1464

A few notes:
*This project is best done outside. Or inside, over a drop cloth with an extra dose of patience.
*If the color starts to wear out, just add a few more drops of food coloring to the rice.
* Your fingers will get a little (and by a little, I mean a LOT) messy when you touch the wet eggs. If you don’t like rainbow hands, just wear disposable gloves. Keep wet wipes or a hose nearby for your kids, because we all know they’ll be little balls of tie-dye magic by the end of this project despite your best efforts for cleanliness.
* Have some extra plastic Easter eggs lying around your house? Make your own noise makers (as if your children don’t already fit the bill): Fill a few plastic eggs with a bit of the dry rice and tape or hot-glue the egg shut. Shake, shake, shake–you have your own little maracas!
* Save the rice! After you’re done dyeing eggs, spread out the colored rice on cookie sheets to air dry. Store the dyed and dried rice in an airtight container (that’s fancy language for a Ziploc baggie) for future art projects. We’re going to make these cactus next week in preparation for our upcoming vacation to the desert.
IMG_1465

DIY Easter Resurrection Garden

IMG_2816

Easter is coming! Easter is coming! Easter is coming!

Easter is the holiday I look forward to all year, and I can hardly contain my excitement. The time of preparation and waiting is coming to an end, and soon we will celebrate the greatest joy in our faith: Jesus is alive! I want to be really intentional with my kids during this season–I want to teach them and include them in as many activities as I can so that they will experience the joy of Easter for themselves.

Awhile back I came across this idea for making an Easter garden. The idea behind the Easter garden is to have a concrete illustration of the events of Easter. It is also a “talking point” to spur on further discussion with your kids about the meaning of Easter. Plus, it involves digging in dirt–so of course we had to make it. Here’s the how-to:

What you need:
IMG_2805
-Bible (we like the Jesus Storybook Bible for kids) or a printed version of the Easter story
-Large pot
-Small pot
-Dirt or potting soil
-Small, smooth stones (you’ll need as many stones as there are days left until Easter)
-1 large stone
-Permanent marker
-Plants or flowers (real or artificial) or seeds

*Note* I bought all of my supplies at the dollar store and spent a whopping $5 on everything I’d need for about 5 gardens. Gotta love the dollar store!

What you do:
Start by reading the Easter story to your kids so they will have some background on the story. As you’re reading, ask lots of questions and encourage your kids to share their thoughts with you.

After you read the story, it’s time to build your garden! First, fill the large pot up with soil to within 2 inches of the top. Place the small pot in the dirt and bury it partway down so that the opening of the small pot is still open and accessible (this will be the “tomb”). If you want to, you can now cover the soil with moss or ground covering plants.
IMG_2806Now for the rocks. I had the boys collect rocks from our yard and then we counted them to make sure we had enough (1 rock per day leading up to Easter). On each rock we used a permanent marker to write one word relating to the Easter story. I started by letting them come up with words on their own that stood out to them from our recent reading of the Easter story (cross, friend, tomb, 3 days). Once they ran out of words, I suggested my own (grace, hope, resurrection).
IMG_2810
We placed our rocks upside down in a pathway leading to the “tomb” (the small empty pot). Each day leading up to Easter we will turn over one rock in the path and discuss how it relates to the Easter story and to us personally.

Next, we placed our final two rocks. Inside the tomb we put a stone with the word “Jesus” on it. Then we rolled a large stone across the entrance to the tomb to seal it off until Easter.
IMG_2812

Finally, the boys decorated our garden with flowers (I was using artificial flowers because, let’s be honest, the real ones wouldn’t fare too well under my care. If you decide to use seeds or real flowers, however, you’d want to plant them way back in step 1 right after you put the dirt in the pot.).

We placed our Resurrection Garden on our dining room table as a center piece. Each night at dinner we can turn over our stone and have some conversation over our meal.
IMG_2818On Easter morning we will roll away the stone to the entrance of the tomb, but–surprise!–it will be empty (so long as I remember to empty it the night before…). This will be a visual for the boys that Jesus is no longer in the tomb. He is alive! And now the real party can begin 🙂

DIY Paper Heart Animal Valentines

FullSizeRenderIf you’ve been following my posts lately, then you know I was SO over January. When February 1 rolled around last weekend, I seized the opportunity to start something new. I “took down January” (recycled all of the paper snowflakes we had hanging around the house) and decided it was time to “put up February” (cover my house in hearts). Plus, since Jon was off for the day starring in his first major Hollywood blockbuster (OK, he was just an extra in a new Steve Jobs movie, but I’m sure he rocked it!) I took advantage of the quiet morning at home with the kids to do a little Valentine project.

We had gone to the library earlier in the week and checked out this cute little book, My Heart Is Like a Zoo:

41HglsWdxEL._SY344_BO1,204,203,200_

It’s a rhyming book with timely similes about the many ways our heart can love. What makes the book really unique, though are the illustrations–every picture is an animal constructed entirely of hearts. There are silly seals and a rugged moose:

Hall-3

Eager beavers and a steady yak:Hall-2

And even happy hippos sipping their juice:

Hall-4Each page features a different heart animal, and my boys couldn’t get enough of them. After reading the book for about the 5,000th time that week, David suggested that we make some heart animals of our own. And, since I’m never one to shy away from a cheesy craft, I obliged. We (and by we, I mean I) set to work making our little love zoo.

Here’s a brief how-to if you want to join in the heart-animal fun:

What you need
~Paper–any paper will work, but I used a combination of construction paper and scrapbook paper. If you want more sturdy animals, use colored cardstock.
~Scissors
~Glue–glue sticks work best for this project
~Black marker
~(if you’re the perfectionist-type) Heart-shaped stencils, paper punches or die cuts

What you do
~Decide what animal you want to make. After making about a dozen of these critters, I’m convinced that you can make any animal imaginable out of hearts. If you need some inspiration, see my creations below or search Google or Pinterest for “paper heart animals” and you’ll find more animals than were on Noah’s Ark.

For instance, did you know that you could make a penguin, a blue jay, or a bear out of hearts?
IMG_1859Or a beaver and a fox?IMG_1858 What about a caterpillar and a butterfly?IMG_1857You see, the possibilities are endless…
~Next, choose what papers you want to use for each part of the animal, and just go to town cutting out hearts! I did the good ‘ol fold-your-paper-in-half freehand method for my hearts, but you could certainly use some other more-precise technique if you have the patience for that sort of thing. Cut out hearts in many sizes and colors to use for the different parts of your animal.
~Start puzzling together your animal. Cut hearts in half to make oval shapes, turn the hearts in different directions, or cut the points off the bottom of the hearts to make triangles–it’s amazing the different shapes you can form from simple hearts! If there’s a part of your animal that doesn’t lend itself to a heart-shape, I also give you permission to just cut out whatever random shape of paper you need. You’re welcome.
~After you’ve laid out your design, glue it all together. Use a black marker to add details like a nose, mouth, or whiskers.

And that’s it! Each animal only took me a few minutes to make, so I had a whole Valentine menagerie by the time my boys had finished watching Veggie Tales (yes, I also give you permission to enchant your children with television while you get lost in kids’ crafts that they should be helping you with).

Happy Heart Day, friend!


Fortunately I Know I Will Laugh About This Some Day

IMG_4485

There are many fears that we have as parents. Fears over safety, health, and our child’s general well-being. I would have to say, though, that one of my worst fears as a mom is over something that I encounter nearly every day of my life: that my child will have to go to the bathroom at an inconvenient time or place. Seriously. The panic that sets in when you hear the words “Mommy, I have to go“–and you know there’s nowhere to go–is unparalleled. This happens to me all. the. time. Somehow they just seem to know the single most inconvenient place to declare a need for relief and I somehow have to magically find a solution. As a matter of example, here is a brief excerpt from our trip to the park today:

Fortunately I had about an hour to kill this morning before we were meeting up with some friends for lunch, so I thought we would stop by a new park for some fun play time.

Unfortunately as soon as we pulled into the parking lot David grabbed his crotch and said he had to go potty.

Fortunately a woman in the parking lot told me there were toilets in a cafe in the park.

Unfortunately the cafe was about 1/4  mile away from the parking lot on the opposite side of the park.

Fortunately I’m a strong momma so I picked up my toddler and ran with David all the way across the park to the cafe.

Unfortunately the restrooms were for cafe customers only.

Fortunately I had a coin in my pocket, so I bought a fruit snack before we rushed into the bathroom to do our business.

Unfortunately we were not at the park to spend all day in the bathroom and a little cafe.

Fortunately there was a fantastic playground back on the other side of the park near the parking lot. The boys had a blast swinging and sliding and spinning and climbing.

Unfortunately our time in the playground eventually came to an end and we had to get ready to leave for our lunch.

Fortunately David said he didn’t have to go potty again before we left, so we started to walk out to our car.

Unfortunately he was lying.

Fortunately I knew where the bathroom was this time, and when he started doing his little potty dance I grabbed him by the hand and started leading him back across the park.

Unfortunately we only got halfway across the park toward the cafe toilets when David stopped in his tracks, looked up to me and said he didn’t have to go potty any more.

Fortunately the front of his pants were still dry.

Unfortunately, the back of his pants were quite brown and stinky.

Fortunately I had a change of clothes for him in the diaper bag that was back in our car.

Unfortunately, the car was now on the opposite side of the park again.

Fortunately I’m a strong momma and I was able to, for the third time this morning, run across the park while schlepping a flailing toddler in my arms and chasing a distracted preschooler all the way back to the car.

Unfortunately by the time we got back to the car to retrieve the diaper bag I really didn’t want to walk all the way back across the park to the cafe again.

Fortunately I spotted a public toilet right across from the playground.

Unfortunately it was one of those super-sketchy public toilets that is a single pod and you have to pay to go inside and then a metal door slides shut behind you and I’m pretty sure meth addicts hang out in them and they are always disgusting and smell like the inside of a sewage treatment plant.

Fortunately I’m a strong momma who’d already had been through enough crazy this morning that the sketchy public toilet didn’t bother me as much as it should have so we went in anyway.

Unfortunately it was just as disgusting as I’d imagined it would be and I had to cover the entire room with toilet paper before I would allow my children to step foot inside.

Fortunately David finished his business on the toilet instead of in his pants.

Unfortunately I’d used up all of our allotted toilet paper making a semi-sanitary environment for my children and there wasn’t enough left to clean up David (remember, it’s a sketchy pay-by-the-minute public toilet with a toilet paper allowance).

Fortunately I had baby wipes in the diaper bag. They did the trick.

Unfortunately while I was cleaning David up with the baby wipes Jacob saw the giant flashing red button that was right at his eye level: the SOS button. He pushed it. Sirens went off. Lights started flashing. The metal door that had been shielding us and our poop-covered selves from the rest of the decent world crashed open.

Fortunately David didn’t even notice that he was stark naked and covered in poop in the middle of a public park. We finished getting him cleaned up, dressed him in clean pants, and walked out of the toilet as if nothing had ever happened.

Unfortunately I lost the last bit of dignity that I had been holding onto since I was in labor with my babies.

Fortunately I’m still alive to tell you this story. I didn’t die of embarrassment or a heart attack or a staph infection from the disgusting public toilet. And in the end, I guess that’s all that really matters.

Unfortunately this is a true story.

Fortunately I know I will laugh about this some day.

The End

IMG_4482

Repost: Easter “Resurrection Roll” Bible Story and Recipe

Easter is just a few weeks away, which means it’s time to bring back all of my favorite lent activities. Easter is such a special time to share with children, and I’m always looking for fun and creative ways to share the truth of this season with my boys. This week we will begin using our resurrection eggs and we’ll also be doing one of my all-time favorite cooking projects: resurrection rolls. Resurrection rolls are a simple (and, might I add, delicious) way to share the gospel with children, a truly memorable experience. I thought I’d repost the recipe and story here for you if you’d like to join in the fun–enjoy!

Original Post: Resurrection Roll Recipe and Bible Story

I love finding creative ways to teach important truths to kids. And I love it even more if I can find a way to tie food into the “lesson”. You can imagine my excitement, then, when I first discovered Resurrection Rolls.

Basically, Resurrection Rolls are a treat that you make where each step of the cooking process represents part of the Easter story. It’s a wonderful way to tell kids the Easter story AND the rolls themselves are sublime. I’ve had people make the rolls for me before, but this was my first time doing the whole project with David. He was able to help out a bit and was pretty engaged the whole time (even if he did keep trying to swipe marshmallows from my stash). I’ll definitely be doing this again next year–a new tradition has been born!

What you’ll need:

IMG_1498

  • 1 package of crescent rolls
  • 8 large marshmallows (plus extras to snack on while you’re waiting for the rolls to bake!)
  • 3 Tablespoons melted butter
  • 3 Tablespoons sugar plus 1 Tablespoon cinnamon
  • Parchment paper
  • Baking sheet
  • Bible (or use the “script” below)

How It’s Done:

IMG_1513Start by preheating your oven to 350 degrees. While the oven is preheating, get out your Bible and open up to John 19 or find the Easter story in a children’s Bible (my favorite is the Jesus Storybook Bible). Below you’ll find the pictures and the “script” for how I told the story to David (he’s only 2 years old, so I kept it simple for him).

IMG_1509

Say: “Even though Jesus was perfect and had never sinned–he had never ever done anything wrong– some people did not like him. They wanted to hurt Jesus because he said he was God. They made Jesus carry a cross and they killed him. This made God very sad, but it was all part of His great rescue plan. When Jesus died, his friends took his body off the cross.”

IMG_1510

Do: Give your child a marshmallow
Say: “This marshmallow represents Jesus’ body. Jesus died for you and for me, because we have sinned and we need to be rescued from our sin.”

IMG_1512

Say: “After Jesus died, his friends came and they put special oil and spices on Jesus’ body to get him ready for burial.”
Do: Roll the marshmallow in melted butter, then in cinnamon sugar

Say: “Next, Jesus’ friends wrapped his body in special cloths–almost like a mummy! Jesus had died, and they were getting his body ready to bury.”
Do: Roll the cinnamon-sugar marshmallow up in a crescent roll (it won’t look like a crescent roll). Press all of the seams firmly. Repeat for each of the crescent rolls. Place the rolls on a parchment paper-lined baking sheet.

IMG_1511

Say: “Next, they laid Jesus’ body in a tomb. A tomb is like a big cave carved out of rock. Then big, strong soldiers rolled a heavy rock in front of the tomb so nobody could get in or out of the tomb. They even put a special seal over the entrance so they would know if anybody tried to move the rock that was in front of the entrance. Soldiers stood in front of the tomb to guard it day and night.”
Do: Put the rolls in the oven and set your timer for 10-12 minutes. Let the rolls bake until they are golden-brown. I even let David stand guard in front of our oven “tomb” with his toy sword.

IMG_1506

Say: “Jesus was dead in the tomb for three days. Let’s count to three: one, two, three. How many days was he in the tomb? That’s right, three days.”
(We had some time to wait for the rolls, so I let David play while they were baking. I kept going back to him, though, and we’d repeat this whole conversation about how long Jesus was in the tomb.)

IMG_1514

Do: When the rolls are done baking, take them out of the oven and let them cool (I let mine cool for about 20 minutes, and that was perfect). The marshmallow will probably have exploded out of your rolls, but that’s to be expected (that’s why we put down the parchment paper!). After the rolls have cooled…

IMG_1516

Say: “Three days after Jesus had died, an angel of God appeared to one of Jesus’ friends. He told her that Jesus was alive! Jesus’ friends decided to look in the tomb where they had put Jesus’ body, but when they did, it was empty! Jesus had risen! And still today, Jesus is alive. Today he lives in heaven with God.”
Do: Cut open one of the rolls. The marshmallow has melted, so the “tomb” is now empty.

IMG_1522

Do: Eat your yummy rolls!
Say: “These rolls are sweet, just like the love of God. God made you and he loves you very much. And some day, if you choose to love and follow God, you will be able to spend forever and ever in heaven with him and Jesus. The Bible tells us that Jesus is our Great Rescuer. The Bible tells us that the only way to Heaven is through loving and believing in Jesus. We celebrate Easter, because Jesus died and rose again so that we could have a way to Heaven.”

DIY Lacing Cards Activity

The other day I was working on a little sewing project while David was playing. He kept coming over to me wanting to “help” me sew. As any parent knows, a child’s help is anything but that–plus, I didn’t think that a 3-year old boy who is prone to throwing every item in sight should necessarily be “helping” with a pile of sharp pins and needles. I made him a deal, though: I would make him his own sewing project if he would just leave mine well-enough alone.

After a quick look around our house I found some supplies to make David his own set of lacing cards. Lacing is a great fine-motor activity for toddlers and preschoolers and something they actually enjoy doing (now if only I could train my preschooler to do all of my mending…). Here’s the how-to:

DIY Lacing Cards

What you need:
-Cardboard (I used a cereal box)
-Scissors
-Tracing templates (I used cookie cutters)
-Hole-punch
-Yarn or ribbon
-Tape

What you do:

1. Start with a flat piece of cardboard. I cut apart a cereal box into pieces that lay flat.

IMG_1461 2. Trace the shapes that you want to use onto the cardboard. I used large children’s cookie cutters, but you could use just about any found object to trace around. Or, if you are the artistic type, you could even free-draw the shapes. It’s up to you. I ended up tracing six shapes onto one cereal box. IMG_1462 3. Cut out the shapes. Then, use a hole-punch to punch holes around the perimeter of each shape. Make sure the holes are not too close to the edge so the cardboard will not tear when your enthusiastic child begins lacing. IMG_1463 4. Tie one end of a piece of yarn or ribbon onto one of the holes with a double-knot. Cut the piece of yarn just long enough so that it can be laced through all of the holes without running out of string. Wrap a small piece of tape around the “open” end of the yarn to make a durable tip. I just used plain white yarn because that’s what I had on hand, but using a variety of colors would be much more exciting! IMG_1464 5. Start lacing! IMG_1474