Easter Bunny Thumbprint Craft

IMG_3254

This week has been all Easter up in our house: we dyed eggs, acted out the Easter story, made Resurrection Rolls, and played with Resurrection Eggs. And, since we weren’t Eastered-out yet, we decided to go on ahead and make Easter cards for David’s teachers here and some special far-away relatives. I saw a cute idea for making thumbprint bunnies on Pinterest and I thought they’d make adorable Easter cards. Here’s the how-to:

What you need:
– stamp pad or finger paint (we used this great stamp pad from Melissa and Doug)
– plain white paper (printer paper or construction paper)
– scrapbook paper or construction paper for the backing
– glue
– candy (optional, but highly recommended)

What you do:
Use paint or stamping ink to make a thumbprint on the paper. If you’re doing this with a young child, you will have to place their thumb on the ink pad (or paint it) and then set it on the paper for them right where you want it. Unless you want a modernist approach to thumbprint art, you’re going to have to do all of the “stamping” yourself.

IMG_3250

Using the child’s index finger or pinky (whatever you can wrangle them into using), make two intersecting “ears” on top of the thumbprint “head”:

IMG_3252

If you want to get creative, you can also make a carrot: use the thumb for the top part of the carrot and then each finger right on down to the pinky for the rest of the carrot. Wipe off the paint and then use green paint on their pinky to make all of the “leaves”. After you have made your thumbprint creations, use a fine-tipped pen (I used a super-fine Sharpie) to draw on the face and ear centers (what do you call that middle part of the rabbit’s ear, anyway?):

IMG_3249

We made three or four rabbits/carrots per card, and then glued them to some colorful scrapbook paper for backing. And, for good measure, I wrote the words “Hoppy Easter” (get it?) on the front each card:

IMG_3257

We wrote little notes to the recipients on the back of each card and then attached some bunny chocolates with a bit of tape (because who doesn’t love getting chocolates at Easter!):

IMG_3263

And, ta-da! Now we have some simple handmade Easter cards sure to brighten anybody’s day.


Repost: Easter “Resurrection Roll” Bible Story and Recipe

Easter is just a few weeks away, which means it’s time to bring back all of my favorite lent activities. Easter is such a special time to share with children, and I’m always looking for fun and creative ways to share the truth of this season with my boys. This week we will begin using our resurrection eggs and we’ll also be doing one of my all-time favorite cooking projects: resurrection rolls. Resurrection rolls are a simple (and, might I add, delicious) way to share the gospel with children, a truly memorable experience. I thought I’d repost the recipe and story here for you if you’d like to join in the fun–enjoy!

Original Post: Resurrection Roll Recipe and Bible Story

I love finding creative ways to teach important truths to kids. And I love it even more if I can find a way to tie food into the “lesson”. You can imagine my excitement, then, when I first discovered Resurrection Rolls.

Basically, Resurrection Rolls are a treat that you make where each step of the cooking process represents part of the Easter story. It’s a wonderful way to tell kids the Easter story AND the rolls themselves are sublime. I’ve had people make the rolls for me before, but this was my first time doing the whole project with David. He was able to help out a bit and was pretty engaged the whole time (even if he did keep trying to swipe marshmallows from my stash). I’ll definitely be doing this again next year–a new tradition has been born!

What you’ll need:

IMG_1498

  • 1 package of crescent rolls
  • 8 large marshmallows (plus extras to snack on while you’re waiting for the rolls to bake!)
  • 3 Tablespoons melted butter
  • 3 Tablespoons sugar plus 1 Tablespoon cinnamon
  • Parchment paper
  • Baking sheet
  • Bible (or use the “script” below)

How It’s Done:

IMG_1513Start by preheating your oven to 350 degrees. While the oven is preheating, get out your Bible and open up to John 19 or find the Easter story in a children’s Bible (my favorite is the Jesus Storybook Bible). Below you’ll find the pictures and the “script” for how I told the story to David (he’s only 2 years old, so I kept it simple for him).

IMG_1509

Say: “Even though Jesus was perfect and had never sinned–he had never ever done anything wrong– some people did not like him. They wanted to hurt Jesus because he said he was God. They made Jesus carry a cross and they killed him. This made God very sad, but it was all part of His great rescue plan. When Jesus died, his friends took his body off the cross.”

IMG_1510

Do: Give your child a marshmallow
Say: “This marshmallow represents Jesus’ body. Jesus died for you and for me, because we have sinned and we need to be rescued from our sin.”

IMG_1512

Say: “After Jesus died, his friends came and they put special oil and spices on Jesus’ body to get him ready for burial.”
Do: Roll the marshmallow in melted butter, then in cinnamon sugar

Say: “Next, Jesus’ friends wrapped his body in special cloths–almost like a mummy! Jesus had died, and they were getting his body ready to bury.”
Do: Roll the cinnamon-sugar marshmallow up in a crescent roll (it won’t look like a crescent roll). Press all of the seams firmly. Repeat for each of the crescent rolls. Place the rolls on a parchment paper-lined baking sheet.

IMG_1511

Say: “Next, they laid Jesus’ body in a tomb. A tomb is like a big cave carved out of rock. Then big, strong soldiers rolled a heavy rock in front of the tomb so nobody could get in or out of the tomb. They even put a special seal over the entrance so they would know if anybody tried to move the rock that was in front of the entrance. Soldiers stood in front of the tomb to guard it day and night.”
Do: Put the rolls in the oven and set your timer for 10-12 minutes. Let the rolls bake until they are golden-brown. I even let David stand guard in front of our oven “tomb” with his toy sword.

IMG_1506

Say: “Jesus was dead in the tomb for three days. Let’s count to three: one, two, three. How many days was he in the tomb? That’s right, three days.”
(We had some time to wait for the rolls, so I let David play while they were baking. I kept going back to him, though, and we’d repeat this whole conversation about how long Jesus was in the tomb.)

IMG_1514

Do: When the rolls are done baking, take them out of the oven and let them cool (I let mine cool for about 20 minutes, and that was perfect). The marshmallow will probably have exploded out of your rolls, but that’s to be expected (that’s why we put down the parchment paper!). After the rolls have cooled…

IMG_1516

Say: “Three days after Jesus had died, an angel of God appeared to one of Jesus’ friends. He told her that Jesus was alive! Jesus’ friends decided to look in the tomb where they had put Jesus’ body, but when they did, it was empty! Jesus had risen! And still today, Jesus is alive. Today he lives in heaven with God.”
Do: Cut open one of the rolls. The marshmallow has melted, so the “tomb” is now empty.

IMG_1522

Do: Eat your yummy rolls!
Say: “These rolls are sweet, just like the love of God. God made you and he loves you very much. And some day, if you choose to love and follow God, you will be able to spend forever and ever in heaven with him and Jesus. The Bible tells us that Jesus is our Great Rescuer. The Bible tells us that the only way to Heaven is through loving and believing in Jesus. We celebrate Easter, because Jesus died and rose again so that we could have a way to Heaven.”

Repost: Redeeming St. Patrick’s Day

I posted this entry last year shortly after returning from our first visit to Ireland. Now that we are actually living in Ireland and about to celebrate our first St. Patrick’s Day here, I thought it would be fitting to repost it. Although the drinking and the leprechauns still seem to steal the show here in Ireland, I am reminded that St. Patrick was a real man who really stood for something. So, on Monday as we join thousands of spectators lining St. Patrick’s Street and Grand Parade for (what I’m hoping will be) the most memorable St. Patrick’s Day parade I’ve ever witnessed, I’ll keep good ‘ol Patrick in mind. And hopefully he won’t mind if I have a pint in his memory.


Original Post: Redeeming St. Patrick’s Day and a Shamrock Craft

I’ve never really liked St. Patrick’s Day. People seem to just use it as an excuse to drink too much beer and pinch unsuspecting bystanders who made the unfortunate choice to not wear green on March 17th. This year, however, I’m seeing things a bit differently. You see, I just got back from my first trip to Ireland where I learned a lot about Irish history and who St. Patrick really was (yes, he was a real person). So this year, instead of eating green eggs in a drunken stupor, I am going to try and redeem St. Patrick’s Day for my kids.

Who Was St. Patrick?
First of all, Patrick is not really a Saint (you know, the capital “s” type canonized by the Catholic church). And he’s not even Irish. Patrick was born in Scotland and, when he was about 16 years old, he was captured in a raid and brought to Ireland as a slave (this was in about the year 405–a really long time ago). At the time, Ireland was a radically pagan place– considered to be about as far away from God as any place on the planet. Patrick’s grandfather, however, had been a priest. While Patrick remained in bondage in Ireland he clung to his faith and relied on prayer. Then, after 6 years, he managed to escape and return home.

When Patrick was in his 40’s, God brought him back to Ireland–this time as a missionary (I love God’s sense of irony!). Patrick had become intimately connected with the Irish people during his years in slavery and history tells us that one of his first converts was the very man who had held Patrick in captivity. Patrick went on to spend the next several years of his life preaching and spreading the gospel throughout Ireland. He was so successful in his missionary work that he turned the once-pagan island into one of the early centers of the Christian faith.

Legend has it that on one of Patrick’s missionary journeys through Ireland he came to a castle at the top of a rocky crag called the Rock of Cashel. I had the great honor of visiting the Rock of Cashel a few weeks ago when I was in Ireland:

Ireland Allisons iPhone - 0132

It was here at the Rock of Cashel that Patrick (reputedly) used a shamrock to tell the story of the trinity and then baptized King Aengus. Basically, the illustration of the shamrock trinity is that each of the leaves represents one of God’s persons: Father, Son and Holy Spirit. While they are each separate and unique, they are all part of one whole.

As you look out from the Rock of Cashel to the Irish countryside, it’s easy to imagine what that day must have been like:

Ireland Allisons iPhone - 0136

For The Kids: Shamrock Collages
This week I told my 2 year old about St. Patrick. I told him how he was a man who lived a long, long time ago and that God used him to help other people learn about Jesus. We looked at pictures of shamrocks and I explained the trinity to little David using Patrick’s illustration. It was awesome!

Then the former-kindergarten teacher in me had to get crafty. We decided to commemorate our little shamrock “lesson” with a simple project.

I started by gathering an assortment of green things: scrapbooking paper, pom-poms, foam shapes, tissue paper and a large piece of green cardstock. I also put a dime-sized squirt of glue into a bowl with a Q-tip to use as a paintbrush:

IMG_1348

I used a pencil to draw a shamrock shape onto the cardstock (heavy construction paper or cardboard painted green would also work), then I cut out the shamrock:

IMG_1349

I sat David down at the table and gave him all of the green things I’d collected. He helped me tear the tissue paper into small pieces (this is great fine-motor practice, by the way!). Then I showed David how to use the Q-tip to “paint” glue onto the shamrock where he wanted to stick his green things. Whenever we’re using glue we use the mantra “just a dot, not a lot!”. David had a lot of fun picking out the decorations for his shamrock and sticking them on.

IMG_1355

He required quite a bit of supervision and direction (put the glue here…ok, now pick out another piece of paper..ok, now put the paper on top of the glue…please don’t lick the glue…). In the end, though, his little shamrock turned out pretty darn cute! And the best part of all: we’ll have something meaningful to think about this St. Patricks day.

IMG_1356

DIY “Long Distance Hug” Valentines

IMG_1232

It’s February, which means Valentine’s Day is just around the corner. I’ve always enjoyed Valentine’s Day–a whole day to shower our loved ones with affection (and chocolate. Lots and lots of chocolate).

Every year for Valentine’s Day we make cards for our family members. Usually this involves coloring hearts or painting a picture. Since we recently moved thousands of miles away from all of our family, though, I wanted to do something extra-special for them this Valentine’s Day. Something to show them that we were still thinking of them even though we are far away. And that’s when I remembered the “long distance hug”.

Inspired by this idea, I came up with this unique valentine to send to our far-away loves. Here’s the how-to if you’d like to send your own virtual hugs!

DIY Long Distance Hugs

I was making a large batch of these valentines, so the first thing I did was trace each boy’s hand onto cardstock to make a tracing template for the handprint cutouts.

IMG_1203

Then I used my handprint templates to trace several hands on colored paper. I used cardstock, but construction paper or scrapbook paper would also work well. I folded each piece of cardstock in half so that every time I cut out a handprint I got 2 cutouts. For each valentine I used one “David handprint” and one “Jacob handprint”. I used red paper for the David handprints and Orange paper for the Jacob handprints. You could just as easily make a separate valentine from each child and use two of the same handprint for each “hug”.

IMG_1206

Here’s our collection of handprint cutouts:
IMG_1209

Next, I folded each handprint into the ASL sign for “I love you” (just fold down the two fingers between the pinky and pointer finger). I glued the fingers in this position so they would stay in place.

IMG_1217

To make the “arms” for the hug I decided to do an accordion fold using two colors of scrapbook paper. I cut out 1-inch strips of the paper and then taped three strips end-to-end so I would have pieces long enough to fold (the taped-together strips ended up being about 30 inches long).

IMG_1213

Then I taped together two of the long strips of paper at right angles and began folding the strips together like an accordion.

IMG_1215

When the folding was done, it looked like this:

IMG_1216

*Note* If you are planning on mailing your “hugs” you may have to pay for extra postage if you make the accordion “arms” as they make for a bulky envelope. If you want something that will stay flat in an envelope you can use ribbon or string instead of the accordion arms.

The finished product was just as cute as the boys who made them!

IMG_1222

For one final touch I also wrote each boy’s name and the year on the back of their handprint. Here’s what the valentines look like all stretched out:

IMG_1229

Finally, I came up with a little poem to include with the hugs and glued the poems to some little note cards that I already had. The poem reads:

I send to you this special day
My hugs from very far away.
Wrap these hands around you tight
And feel my love for you, day and night.
My hands are folded just to show
How much I LOVE YOU as I grow.
Even though we are far apart
I carry you close to me in my heart.

Happy Valentine’s Day!

IMG_1243

Happy crafting, and happy Valentine’s Day!

If you like this project, you may also enjoy the apple stamp valentines that we made last year.

DIY Advent Tree

Advent, the season of preparation for Jesus’ birth, is officially upon us. I’ve been wanting to do something special with the boys to celebrate advent, but I wasn’t quite sure what to do. Since we recently moved and downsized, we don’t have any of our Christmas decorations or usual Christmas activities with us. Plus, we’re going “home” to Seattle in 2 weeks so it’s hardly worth the effort or the expense of a full Christmas set-up at hour house here.

It seems like everyone I know went out and got their Christmas tree last weekend, so I decided that we needed a tree of our own. And that’s where I came up with the idea for our advent tree:

unnamed

I basically put together all of the ideas that I had floating around in my head and this is what I came up with: a simple, Jesus-focused project that will get my kids thinking about the true meaning of Christmas every day.

I started by painting a large tree on the back of some wrapping paper (the only paper I had that was big enough for the size of tree I wanted to make).

Then I went online and printed off some color-your-own Christmas tree ornaments and cut them out. On each ornament I wrote three things: Read, Pray, Do. For the “Read” part of the ornament I wrote a scripture verse relating to Jesus’ birth or why He was born; “Pray” has someone or something for us to pray for that day; and “Do” is a project or act of service that we will do together on that day to share Jesus’ love with others (just Google or search Pinterest for “acts of kindness” to generate a good list of ideas).

unnamed (1)

Each day David will choose an ornament from the basket, decorate it, and hang it on our advent tree. Then we will complete the “Read, Pray, Do” items that are on the ornament.

unnamed (2)

By the end of advent (or, in our case, the first 2 weeks of advent!) we will have a beautifully decorated tree. More importantly, though, we will have learned more about God’s great Love sent to us. And that, of course, is the most beautiful thing of all.

Angry Birds Birthday Party

One of the gifts we received at David’s baby shower was a classic red sock monkey. When David was born I thought it was pretty cute that he and the sock monkey were roughly the same size, so I snapped this photo of him with his little monkey friend when David was 1 week old:

1 week birthday 20

From there, I just couldn’t stop. Every month during his first year of life we took a photo of David with the sock monkey until, after one whole year, the friends looked like this. Oh, the difference a year can make!

1-year-old_Sock_Monkey_0015And, now, a tradition has been born. Every year on David’s birthday we have him pose with his sock monkey. Here he is at age two:

2 year sock monkey - 0012

Then, last week, he turned 3. THREE! I can hardly believe it. My little baby is now a big boy with his own personality and interests and quirks and thoughts and sense of humor. I love him to pieces.

IMG_2283 - Copy

Three is certainly a special birthday–probably the first birthday he’ll actually remember when he’s older–so we had to have a very special birthday party. David is a bit obsessed with the computer game “Angry Birds” right now, so we decided to have an Angry Birds-themed party.

Since I’ve never actually played Angry Birds myself, the internet became my party-planning partner. I found this great website called angrybirds365 that had tons of great party ideas and free downloads. I found this invitation on their website, printed it off on cardstock, and filled in all of the party details for our little guests. Free, simple, and a bit more personal than a Facebook invite 🙂

While I was on the site, I also printed off some Angry Bird faces that we attached to balloons for decoration, some small angry bird pictures that I attached to toothpicks for cupcake toppers, and a slingshot that we used for one of the party games.

This is the first birthday that Aunt Stefanie hasn’t been able to make David’s birthday cake–and I’m no baking brainchild (as in, I’m not patient enough to make those beautiful detailed cakes that I oggle on Pinterest). As a consolation, I told David we could make whatever kind of cupcake he wanted.  David wanted red, blue and yellow cupcakes (because those are the colors of his favorite Angry Birds). Done. We took one box of white cake mix, divided the batter into 3 bowls, added a different color of food coloring to each bowl, and baked the cupcakes. After licking out all 3 bowls of cupcake batter it was time for David’s next job: decorating. I frosted all of the cupcakes, set out bowls of sprinkles, and invited David  to unleash his artistic side. I can’t remember the last time I saw him this concentrated on a single task.

IMG_4189

After the cupcakes were decorated we inserted some homemade cake toppers and–TA-DA!–red, yellow and blue Angry Bird cupcakes.

IMG_4212

I had a lot of fun planning the menu for the party. The party was at 4:30, so we had snacks and “light dinner” fare.  Our menu included:

– “Angry Bird BBQ” (Pulled BBQ chicken sandwiches)
– “Angry Eggs” (Deviled eggs)
– “Smashed Piggies” (fruit salad made with green grapes, strawberries and raspberries)
– “Broken Towers” (veggie sticks and dip)
– “Twigs” (pretzel sticks)
– “Nests” (chips)
– “Bird Nectar” (juice)

IMG_4218

After dinner we brought out the cupcakes for a little “Happy Birthday” time. David stared blankly at us while we sang but he still performed expertly in the candle-blowing-out department:

IMG_2296

And, before he got too covered in frosting, we managed to snap a family photo (thank you to Rachel for stopping everyone and insisting we do this. Somehow I always forget stuff like this!). We were so blessed to have my parents visiting us all the way from Seattle this week to share in David’s special day!

IMG_4235

After we all filled our tummies, it was time for some fun and games. I found a book that had about a dozen make-your-own Angry Bird masks in it, so before the party David and I put them all together for the kids to wear. Everyone looks relatively happy in this photo, but that’s only because you can’t actually see their faces. The kids were TERRIFIED of the masks. As soon as we started putting them on, the babies started crying and kids were hiding behind their moms. Note to self: the preschool crowd is NOT entertained by face-hiding, person-shifting deception devices like masks. Moving on.

IMG_4239

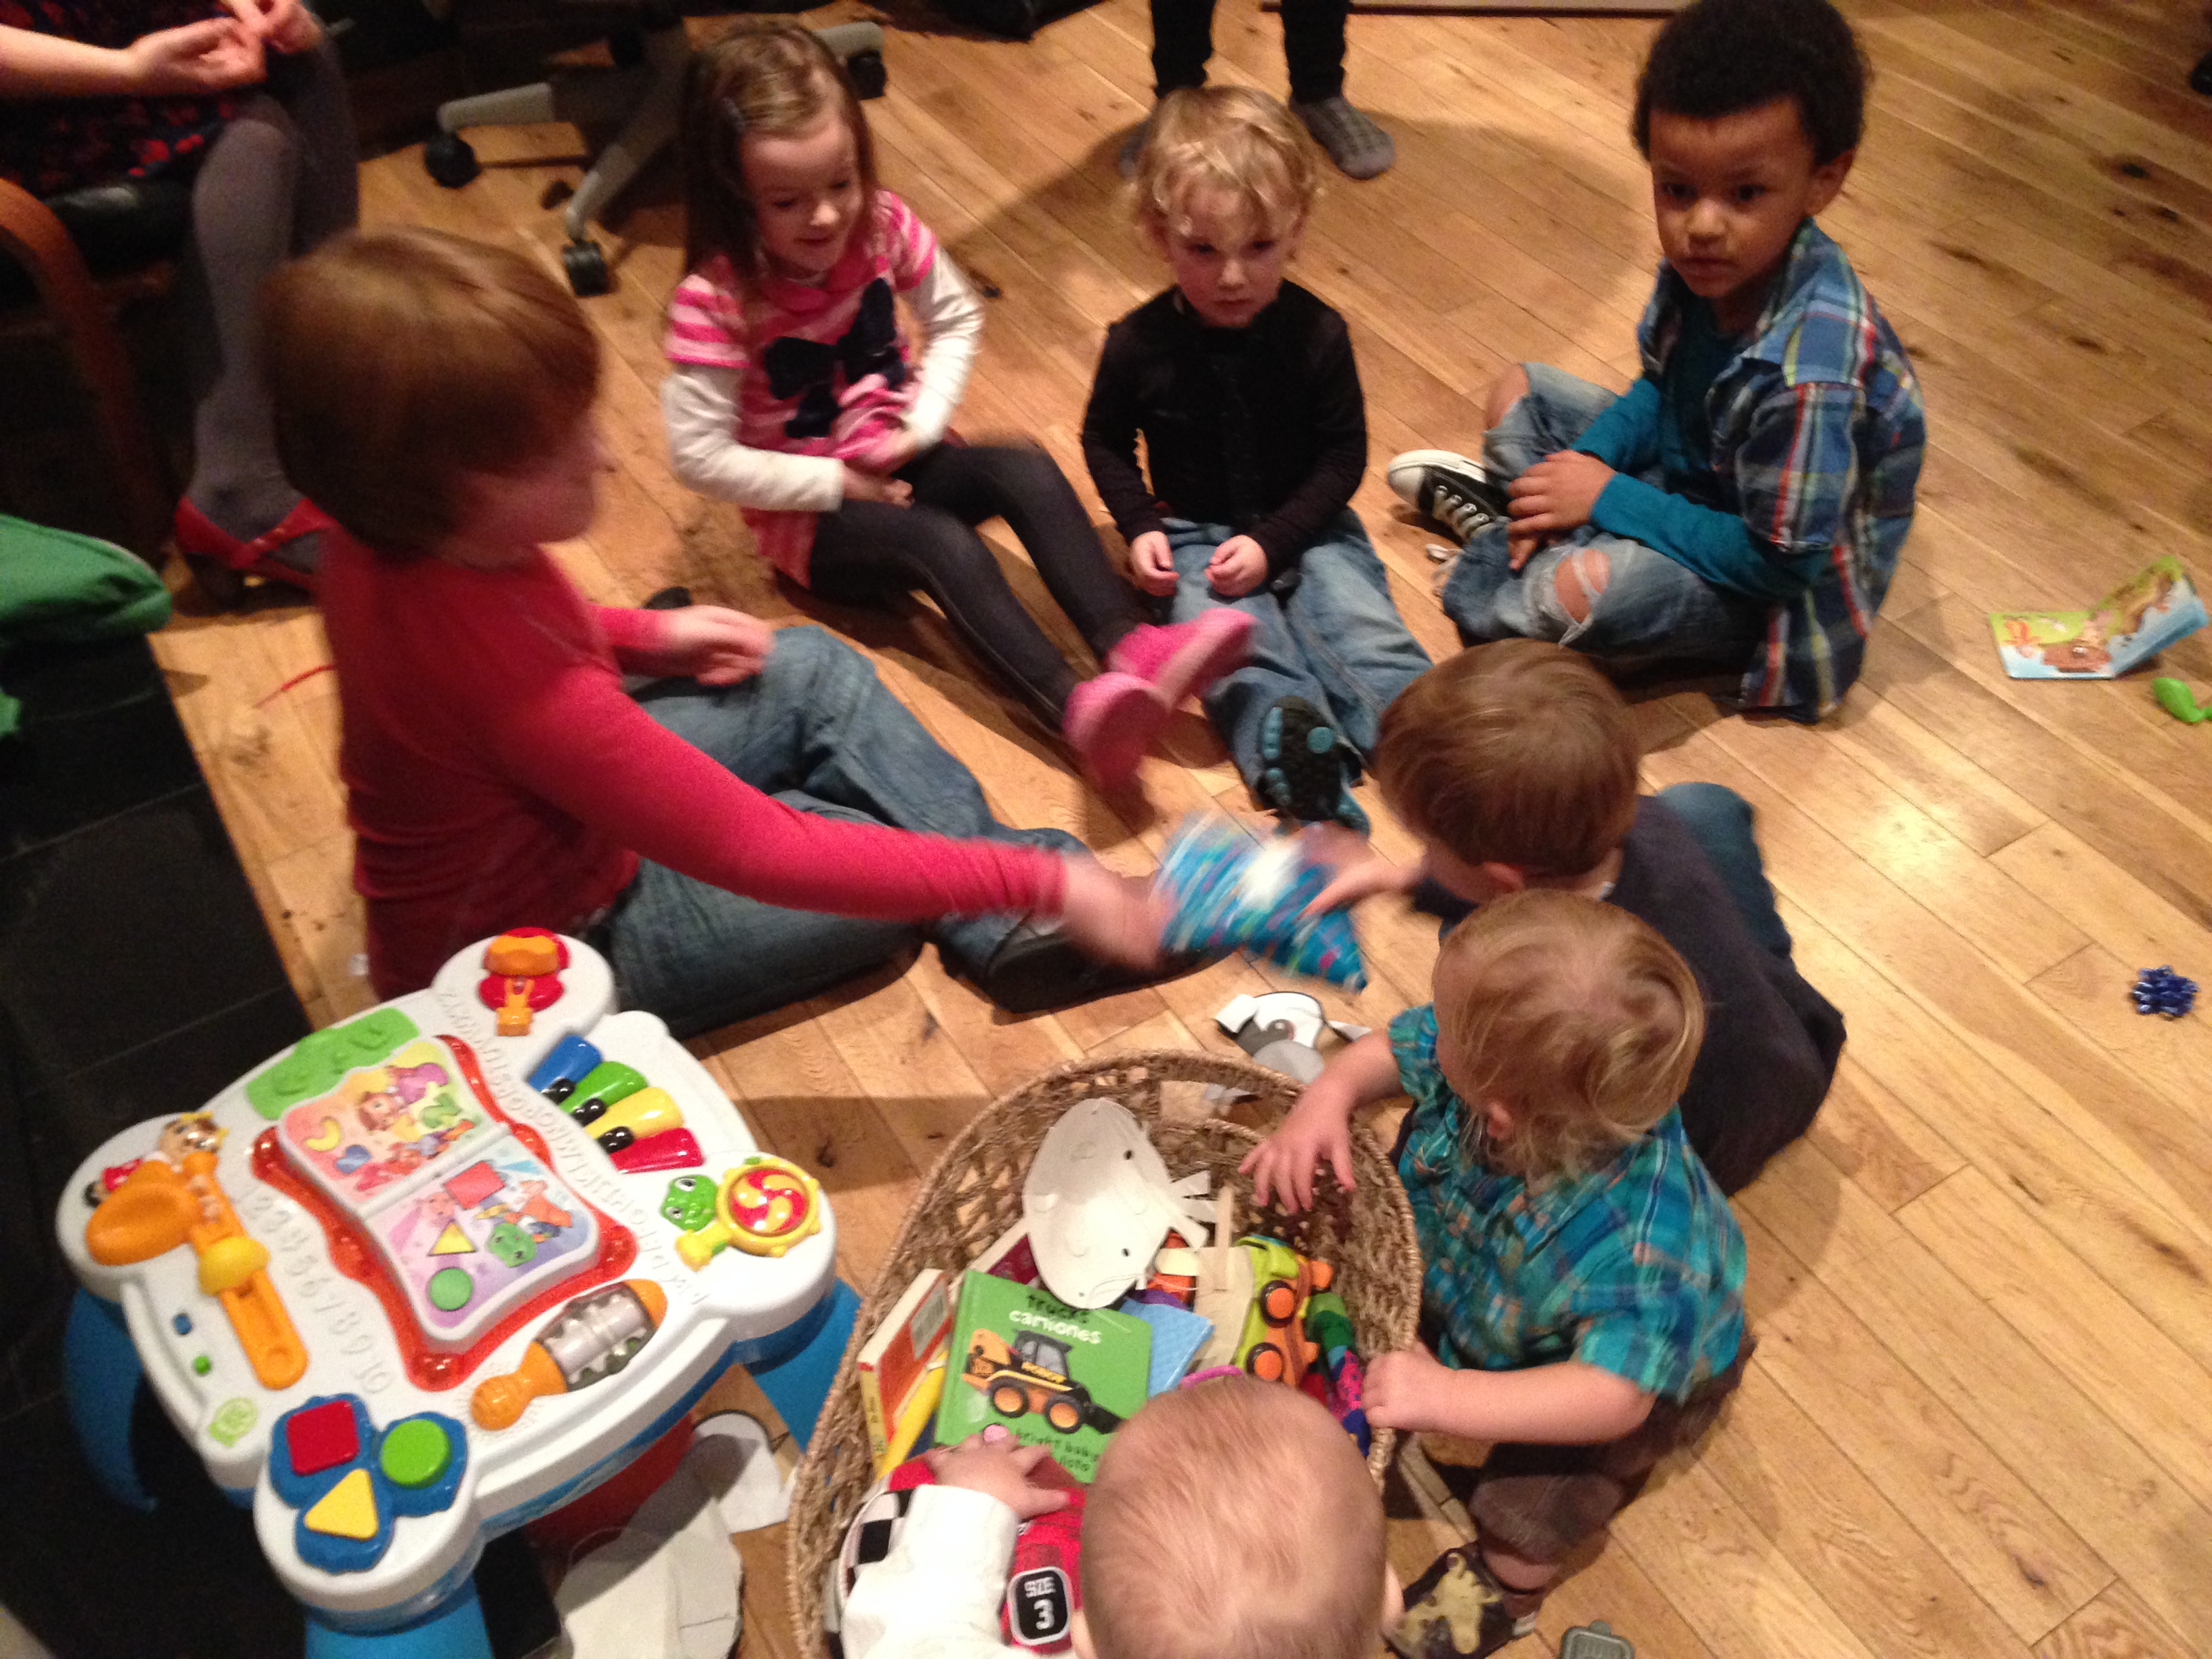
One of the kids’ favorite party games is called “Pass the Parcel”. To play, you just wrap a small gift (packets of candy in our case) with wrapping paper, then you wrap that package and another small gift inside another layer of paper, and then that package along with another small gift inside another layer, and so on. At the party, the kids pass the parcel around a circle while music is playing (kind of like musical chairs)–then, when the music stops, whoever has the parcel gets to open it and keep the gift that’s inside. The game continues until all of the layers of the parcel has been unwrapped (and, if your planning is good, every child walks away with a treat).

IMG_4227

We also played “Pin the Angry Bird on the Slingshot”. I just printed off a picture of the Angry Birds slingshot and several angry bird pictures, cut them out, and put tape balls on the back of the Angry Birds. Each child got a different Angry Bird and had a turn to try to get their bird in the center of the slingshot (the older kids were blindfolded, but we let the babies cheat a bit).

IMG_4229

By the time games were over, it was already starting to get late and we moved on to presents. David received so many generous gifts from his friends and family! Toys and games and clothes and movies–incredible. And he really did appreciate them–it was awesome to see David go up to each friend and thank them for their gift after it was opened.

IMG_4237

It was a truly memorable birthday. I am so grateful we could celebrate this milestone with so many loved ones, near and far.

David: you are my sunshine and, no matter how big you get, you will always be my baby. Happy 3rd birthday, little David!

A Love Letter To My Baby On His First Birthday

photo (24)

Today is my baby’s first birthday. How did that happen? I really can’t believe that it’s already been a year–turns out, time moves forward in warp speed when you have two young children. Each day is a balancing act of making memories and basic survival. I’ve mostly got the survival part down now, and I feel like we’ve done a pretty good job in the “making memories” department this year, as well.

When I was pregnant with my first child I started writing him letters. I didn’t know who this baby would be yet, but I already knew that I loved him. I wrote my first “baby love letter” the day I found out I was pregnant–and I continued writing to him throughout my pregnancy. I did the same thing with my second child, and I still write my boys letters periodically. Whenever something important happens I will write my son a letter to let him know what I was thinking and feeling in that moment. I want to capture the memories.

Maybe some day when my boys are much older and I give them these letters, they’ll enjoy seeing what was going on in their crazy mom’s mind as they were growing up. And, even if they don’t appreciate them, I know that I’ll be glad I wrote down my thoughts during this busy time in our life where I usually can’t even remember what I had for breakfast.

I always hand-write the letters–there’s something so much more personal and intimate about a hand-written letter. It shows that I took the time and the care to pull out some nice paper and get sore fingers from gripping the pen. I start by writing the date, location, and age of my son at the top of the page. The rest is just my un-edited thoughts–whatever first comes to my mind get’s put on the page.

So, on this most momentous of days, I had to write a letter to my dear little Jacob (transcription below). Happy birthday, little snuggle bear!

July 26, 2013
Cork, Ireland
You are 1 year old!

Dear Jacob,

Wow–I can’t believe you are already ONE! Where did this year go?! It seems like just yesterday that I met you and held your sweet, tiny body next to mine for the first time. And, yet, here we are a whole year later.

Jacob week 1 - 0084

This has been a truly remarkable year. You have grown and changed so much from that tiny bundle we brought home last July. Now you are crawling all over the place– gotta keep up with your big brother David! you pull up on furniture and even try to climb the stairs. For most of this year you’ve been content to stay where I put you, but now your adventurous side is starting to come out! I hope that as you grow older you are bold to take new risks–and that you learn from your journeys, no matter the outcome.

Ireland Allisons iPhone - 0251Speaking of journeys, this has been quite the year of journeys for you! At 12 months old you’ve already seen more of the world than many people get to see in their lives. We’ve taken you all around the great state of Washington, to Arizona, to California, and even 2 trips to Europe!

About 2 weeks ago we moved to Cork, Ireland. Your dad and I were just talking about how your first memories in life will take place here in Ireland. Your first steps, first conversations, and first friends will all begin in this beautiful place. We know that as you get older you probably won’t remember a lot about our years here in Ireland, but I hope that our time here will lay a strong foundation for your life.

On this very special day, Jacob, I am praying for you and your foundation. My greatest hope and prayer for you is that with each passing day and each passing year you will grow closer to our Lord Jesus Christ. If you’ve got Jesus, you will be set for life. Don’t ever forget that!

I pray that you will always draw close to God–the same way that you draw close to me now whenever you are tired or scared or needing some extra love. God will give you rest, He will protect you, and–most importantly–He will always love you. He is the only one who could ever possible love you more than I do–and that’s a big, big love!

I love you, Jacob Daniel. I love your cuddles, I love your giggles, I love your little snarl nose, I love your laid-back approach to life (I’m learning a bit of this from you already!). I love the way you trill your tongue when you’re upset and the way you bubble your lips when you’re happy. I love your curly hair, your bright blue eyes and your chubby little thighs. I love the way you play with my hair ALL THE TIME (thanks to you, my new–and only–hairstyle is a tight bun). I love the way you watch to learn, the way you imitate those around you, and the way you tolerate–even enjoy–your brother’s antics. You are a very special boy, Jacob, and I love you very much.

Happy first birthday to my sweet little son. May this be just the beginning of many wonderful years to come! Thank you for letting me be your mommy!

Love,
Mama

IMG_0037

Note: If you enjoyed reading this post, check out my most recent letter to Jacob for his second birthday! Read the letter here.

Our Anniversary Weekend Getaway In Seattle

largest

Last week Jon and I got to do something that all parents dream of: we left our children. Overnight. For two whole days. It was…amazing. We had a lot to celebrate last week: my birthday, our anniversary–and the fact that we are about to move 5,000 miles away from grandparents who willingly take in our offspring when we need to get away for some Mommy-Daddy time.

So where did we go for our thrilling weekend “away”? Our own hometown of Seattle! This was our first time leaving baby Jacob overnight, so we decided to stay close to home in case he started freaking out and we needed to go back and rescue him (or if I started freaking out and needed to go back and see him). Plus, Jon and I were both feeling a bit nostalgic now that we know we’re actually leaving this place for the next 2 years. It ended up being a wonderful weekend getaway that we will always remember. Here’s our itinerary if you want to check out some of our favorite local spots for yourself!

Where We Stayed:
Since there were lots of things we wanted to do in the downtown area, we chose a hotel right in the middle of all the action. We stayed at the Sheraton Seattle, located at 6th and Pike. I’ve always wanted to stay there because at Christmas time every year they host a fancy gingerbread house showcase in the hotel lobby–I have many fond memories of wandering through the hotel looking at those gingerbread houses (and wondering if anybody would notice if I sneaked a bite off one!). The hotel was every bit as beautiful and comfortable as I imagined it would be. The staff was helpful and friendly–they even sent a complimentary bottle of wine up to our room when they found out we were there celebrating our anniversary.

Where We Played:
Our first afternoon was spent shopping downtown. We went to all of our (and by our, I mean my) favorite stores. I’d gotten a few gift cards and some cash for my birthday, so it was fun for me to be able to shop to my little heart’s content with no little voices whining at me from a stroller. After my shopping spree we dropped off our bags at the hotel then started walking toward Lake Union for dinner. It was a gorgeous day–and I knew we were about to stuff ourselves silly at dinner–so the mile walk was quite welcome.

photo

After dinner we flagged down a cab to get us back to the hotel (the walk to dinner was great–however, my choice in cute yet inappropriate-for-walking shoes was not the best idea). Then, after a quick shoe change, we were ready to go again. Time for a movie! We love going to movies but rarely have the opportunity to get out to an actual theater. The Meridian 16 movie theater was across the street from our hotel so we just walked over a few minutes before show time. We saw the new bank-heist movie Now You See Me–it was pretty entertaining, and such a treat to see it before it hit Red Box.

On Day 2 we slept in. Late. Really, that’s all either of us wanted to do for the whole weekend away from our kids. We even got a late check-out so we could sleep uninterrupted for as long as we wanted. It was glorious. I’d be happy if the whole weekend just ended there, but we did actually have more exciting things planned for later in the day.

After our late start, we headed down to Pioneer Square so we could go on the Seattle Underground Tour. Back in the 1800’s Seattle basically burnt to the ground and the residents decided to rebuild on top of the old city. There are still about 36 blocks of underground passage ways and old store entrances that you can visit on the tour.

seattle-underground-tour

We used a brand new tour company called “Beneath The Streets”. They started about a week ago so they don’t have a website yet, but it was a great tour. I’ve been on the main underground tour before, but this one went to the same places and was half the price. Their office is located less than a block away from the other Underground Tour location on 1st and Cherry.

After our tour we headed back up the hill for our favorite treat: massages! There’s a great urban spa across the street from Westlake Center called Ummelina. They start every treatment with a foot bath, tea and relaxation in their “sanctuary”. I’ve been there probably half a dozen times, and they never disappoint. We were feeling great after our afternoon of pampering, so we decided to top off the day with a delicious pizza dinner down the street.

Then, it was time to go back to reality. We picked up fancy cupcakes (for us) and a coconut cream pie (for the babysitting-grandparents) at Dahlia Bakery–then we left our dreamy “vacation” to drive back to our children. It was an incredible two days away, but somehow we still missed those two little munchkins like crazy!

Where We Ate:
Pasta Freska
A great Italian restaurant recommended to us by my sister-in-law. There are no menus: the chef comes out and personally greets each customer to discover their food preferences. Then he goes back to his kitchen and prepares you a custom 7-course meal. Everything we ate was delicious and we’ll definitely be going back!

Specialty’s Bakery– We stopped by to pick up a late-morning breakfast on our way down to Pioneer Square. We both ordered warm ham and cheese stuffed croissants. I also bought a peanut butter chocolate chunk cookie to munch on after our tour.

Serious-Pie-in-SeattleSerious Pie-Tom Douglas’s iconic pizza kitchen in downtown Seattle. They had a great happy hour until 5:00 with personal-sized pizzas for only $6 (there were also drink and appetizer specials). We ended up getting three wood-fired pizzas and a ham terrine–all were fantastic.

Dahlia-Bakery-2Dahlia Bakery– Another Tom Douglas institution. They’re known for their coconut cream pies and fresh sandwiches. The “fancy cupcakes” weren’t half-bad either.

Wedding Shortbread Cookie Recipe

This is a big week for me: Monday was my 30th birthday and today is my wedding anniversary! I am so very blessed to have spent the last 8 years married to this handsome man:

Our Wedding 0593

Our wedding was a simple affair–it kind of had to be since we were broke and young and Pinterest hadn’t been invented yet. We held the ceremony and reception in a waterfront park in our college town (again, we kind of had to–we graduated 2 days before our wedding and didn’t have time to get out of town). Our family and friends did all of the grunt work and hard labor when it came time for us to walk down the aisle–and that, of course, meant that they handled the food. If you know me at all, you know that food is, shall we say, a dominant force in my life. So the food had to be good. REALLY good.

Now, good doesn’t have to mean elaborate or fussy or over the top (because our wedding was none of those things). It really just has to taste amazing. One of my favorite treats that we had at our wedding was an arrangement of shortbread cookies made by my dear friend Vickie. They are similar to sugar cookies, but a bit smoother and flakier than your traditional Christmas sugar cookie. These cookies only have 5 ingredients, and they come together in minutes–super simple. What could be better than a simple, delicious, elegant cookie? Not much, really. So, in honor of our anniversary today, I hope you enjoy this little treat from our wedding. Cheers!

Wedding Shortbread Cookies

1 pound butter
1 Cup powdered sugar
3 Cups flour
3/4 Cups corn starch
sugar for topping (plain or colored decorating sugar work equally well)

1. Stir powdered sugar, flour and corn starch together in a large bowl.
2. In a separate mixing bowl, cream the butter. Slowly add the flour mixture to the creamed butter. Keep mixing until a soft dough forms.
3. Divide the dough into 4 parts and roll each part into a ball. Wrap each ball in plastic wrap and refrigerate for at least 30 minutes.
4. Take out one ball dough at a time. Flatten the dough on a lightly floured surface and use cookie cutters or an upside down cup to cut out shapes (our cookies were heart-shaped).
5. Bake cookies at 300 degrees for about 20 minutes, until the edges of cookies turn golden.

Happy (30th) Birthday To Me!

images

Whelp. It’s here. Today I turn 30–THE BIG 3-0! This seems like quite the milestone, so I felt like I should devote a post here to my thoughts on entering a new decade of life. I’ve had a lot of people asking me if I’m nervous about turning 30. Contrary to what some people may expect, I’m actually quite excited about it. The truth is, I’ve been waiting a long time for this birthday!

This will just go to show what a precocious child I was, but I have dreamed of this day since I was a little girl. I remember driving somewhere with my mom–I was about 5 years old–and I was frustrated about something that I couldn’t do yet (I don’t remember exactly what it was–maybe it was being able to drive a car, or getting to choose the radio station or, most likely, having the authority to tell someone younger than me what they should or should not do). At any rate, I was feeling rather remorse and I asked my mom how old she was. “33,” she told me. That’s it, I decided–once I reach that age, I will have it made. And from that moment on I have dreamed of being in my 30’s.

Some people associate this magic age with being “old”–it seems like every woman just wants to remain in her 20’s forever (like a certain friend of mine who, on every birthday, says “I’m 29 for the __th time”). I remember seeing an episode of Friends where Rachel turned 30 and it was such a big deal–they acted like she was dying or something! For me, though, it’s just the opposite. Gone are my 20’s when I had to worry about passing college exams, getting that cute boy in the front row to notice me, and start a career. I am moving on now to bigger and better things.

I feel like I have finally hit my prime. My body is strong–I’m even running a half-marathon this weekend to prove to myself that I’ve still got “it”. I have everything I could possibly want at this point in my life–a loving husband, two beautiful babies, wonderful friends, and a comfortable home to share life with my loved ones. And life just keeps getting more exciting–with our Big Move coming up shortly I don’t even know what my life will look like a year from now. And I think that’s amazing–that at 30 years old I can have both stability and adventure, the known paired with the unknown.

So, happy 30th birthday to me. Little 5-year old Allison, you can stop waiting for better days. They have arrived. Carpe diem.