 Our church has this beautiful piece of artwork that I have been admiring for weeks. It’s a huge mural of a tree, probably 10 feet long by 6 feet high. The entire piece is made with strings zig-zagging across a wooden background. The negative space, the shape of the tree, is the only open part on the giant mural. It’s gorgeous and I want it. So I decided to make it. Well, sort of…
I would love to make a huge statement piece similar to the tree art some day, but for my first go I thought I would start with something a bit simpler (read: smaller). Since the boys are sharing a new room, I decided to make some monogrammed initials to put on display. The project was quite simple and only required three materials that we already had at home. Read on for the how-to:
DIY String Board Art
What You Need:
-Piece of wood (we used scraps from another project that are about 4″ x 6″)
-Hammer and small finishing nails (each of my art boards used about 60-75 nails)
-Thread, string, embroidery floss, or yarn (I used standard sewing thread, but thicker embroidery floss would have looked a bit nicer)
-Pencil and scissors
What You Do:
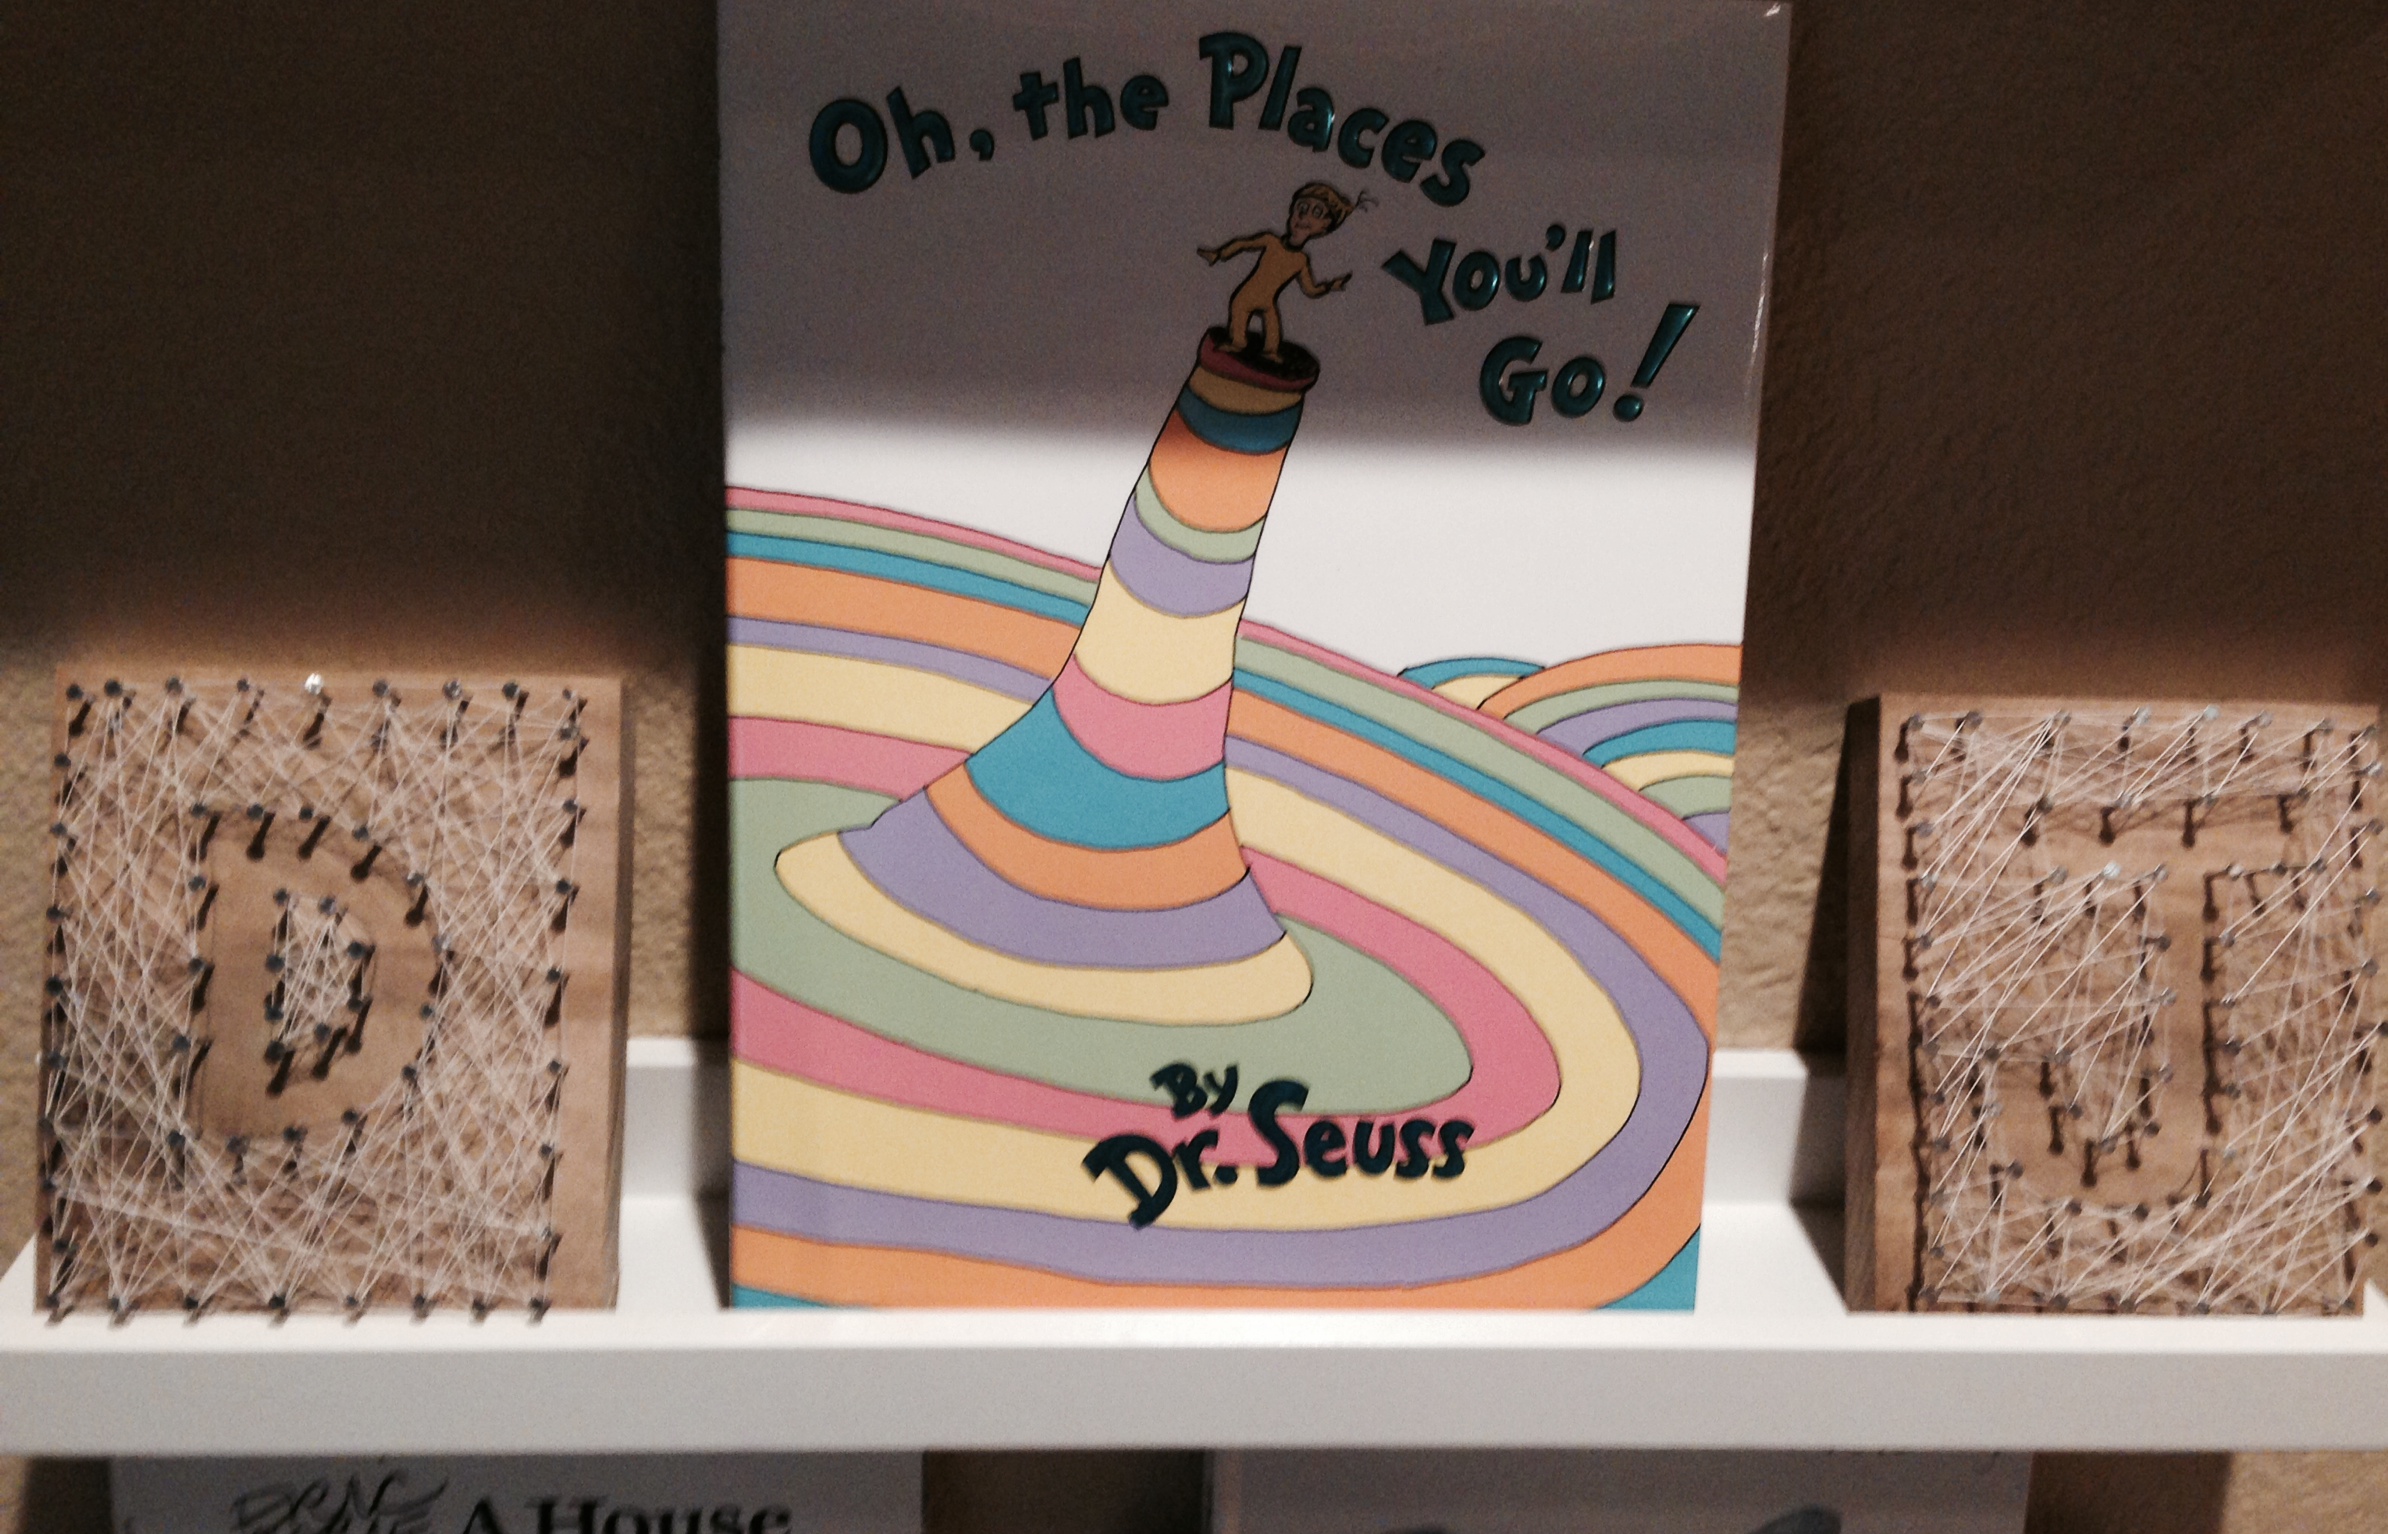
1. Use a pencil to draw a silhouette of the shape you want to create. I made a letter on each board, but you could just as easily do any other shape (number, tree, bird, flower, sailboat, train, etc.). My letters were drawn freehand, but if you want to be more precise you can use a stencil from an image and trace it onto your board.
2. Hammer nails along the borders of the board and your shape outline. The closer together you place the nails, the more detailed your artwork will be. Jon, my ever-industrious husband, offered to help me with the wood-and-nails portion of this project. My clumsy thumbs thank him.

3. Erase your pencil marks from around the nails as best you can.
4. Tie your string around one of the nails with a few strong knots, leaving the string attached to the spool. Trim the “tail” of the string so it won’t get in your way when you begin wrapping the board.
5. Start by tracing the border of the board with your string. Go from nail to nail around the edge of the board. At each nail, wrap the string one or two times around the nail to help anchor it to the board, then go on to the next nail and do the same thing. After you outline the border of the board, criss-cross the string across the board and do the same thing to outline the shape.

6. Now is the fun part! Start criss-crossing the string across the board, wrapping the string around each nail that you come to. Go crazy here, but be careful not to cross the string into your shape outline. Criss-cross and wrap to your little heart’s content–the more criss-crosses you do, the more defined your shape outline will become. My little boards took me about 20 minutes each to adequately cover in string cobwebs (now I’m glad I didn’t opt for a board the size of my big screen!).
7. Ta-da! A new piece of art, completed from start to finish in about half an hour.
This was a simple, mindless project for me to work on while The Boy watched Toy Story for the 50-gazillionth time, but I could see so many other potential applications. Rainy day art project: if you have older kids, they would enjoy helping with this project from start to finish. Seasonal decorations: how about pumpkins, leaves, stars, hearts, or Christmas trees? New baby gift: every baby needs some cute decorations for their nursery. Whatever you decide to create, I’m sure it will turn out beautifully.
Happy crafting!