We just got back from an AMAZING week in Ireland! I seriously feel like I spent the whole week walking around with my jaw hanging open–I was just in such awe of the beauty and the history surrounding me in that magical place. And, lucky for you, dear reader, this blog is about to get a whole lot better. You see, while we were there we made a trek to the Blarney Stone–the fabled stone that gives the “gift of gab” to whoever kisses it. I managed to kiss the dang thing (see Day 6, below, for more details), so we’ll see how witty and wry my writing has become since that fateful day.
If you’ve been to Ireland before, you know what an incredible place it is. If you haven’t been, I’m sure you’ll be booking your flight by the time you’re done reading this post. I hope I can do it justice here!
Day 1: Traveling To Ireland With A Baby
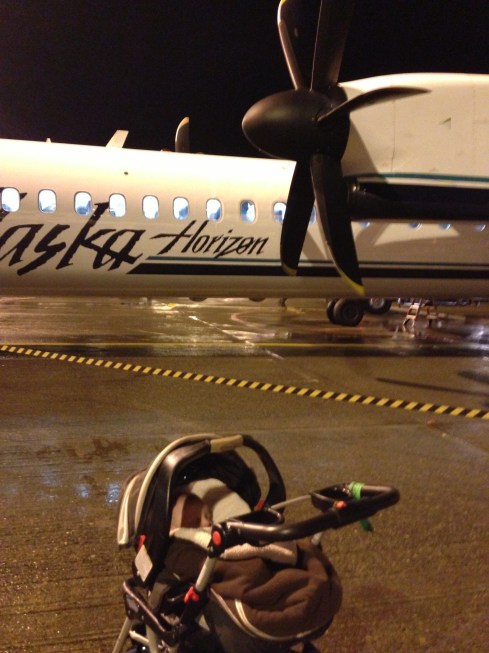
Jacob did amazingly well traveling. We were fortunate to get a row with an extra seat for the long flight across the Atlantic, so we were able to bring his car seat on the plane with us. He fell asleep during take-off and took enough naps during the flight that I was able to watch a couple of movies and read my “airplane magazines” (the high-caliber celebrity magazines that I really only ever read above 10,000 feet). Our route to Ireland was a bit of the hop-hop-hop variety: we went from Seattle to Minneapolis to Amsterdam to Cork, Ireland. Our 2 hour layover in Amsterdam turned into 5 hours because they had just gotten some unexpected snow and had to clear the runways. While we were waiting, I treated myself to healthy breakfast at the airport Starbucks (those Dutch sure know how to properly use whipped cream!).
 Jacob had fun looking out the windows with me. We watched huge snow plows blow past us clearing the way for all of the pretty blue Dutch airplanes.

After about 22 hours of travel we made it to our hotel room. It was a nice, spacious room in a 250 year old hotel. They had even set up a “by cot” (a crib) for us before we arrived.

After a quick nap we went out to get some dinner. We found a great pub with delicious steaks and boisterous “trad” music (traditional Irish music). Then it was time for bed. Jacob was a thoughtful baby and let me sleep for almost 13 hours (with a few wake-ups for feedings, of course).
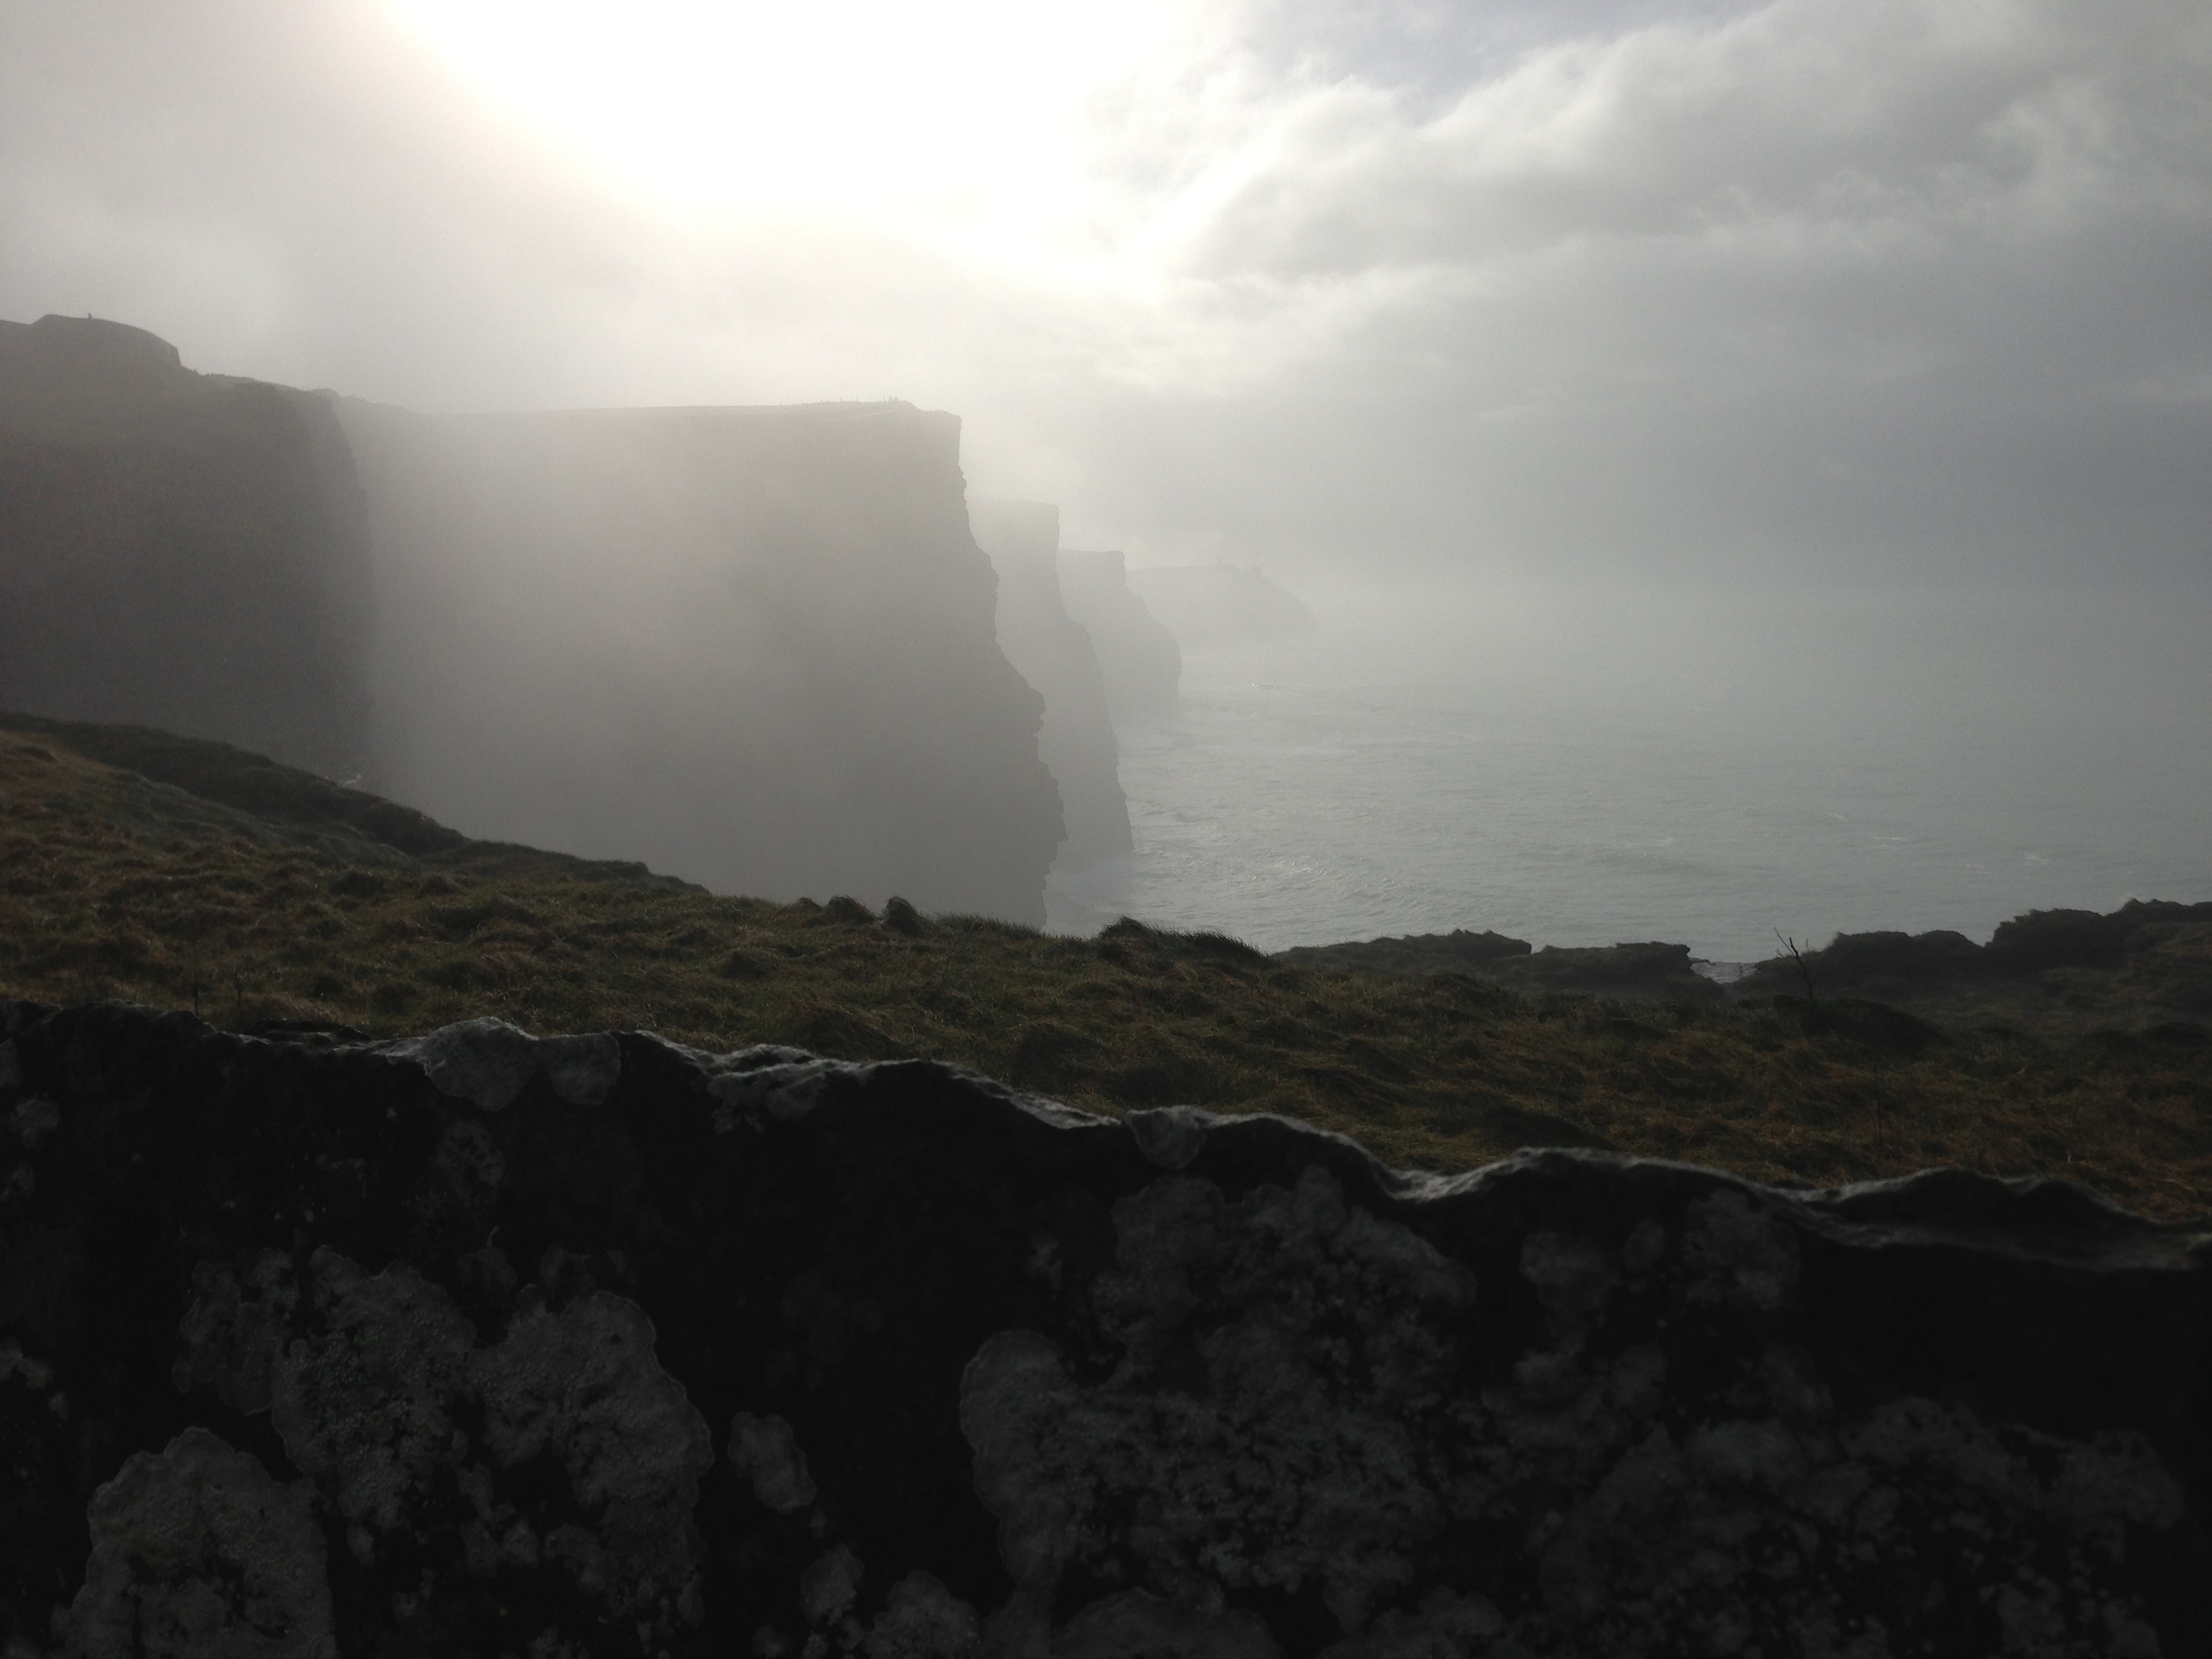
Day 2: The Cliffs of Moher
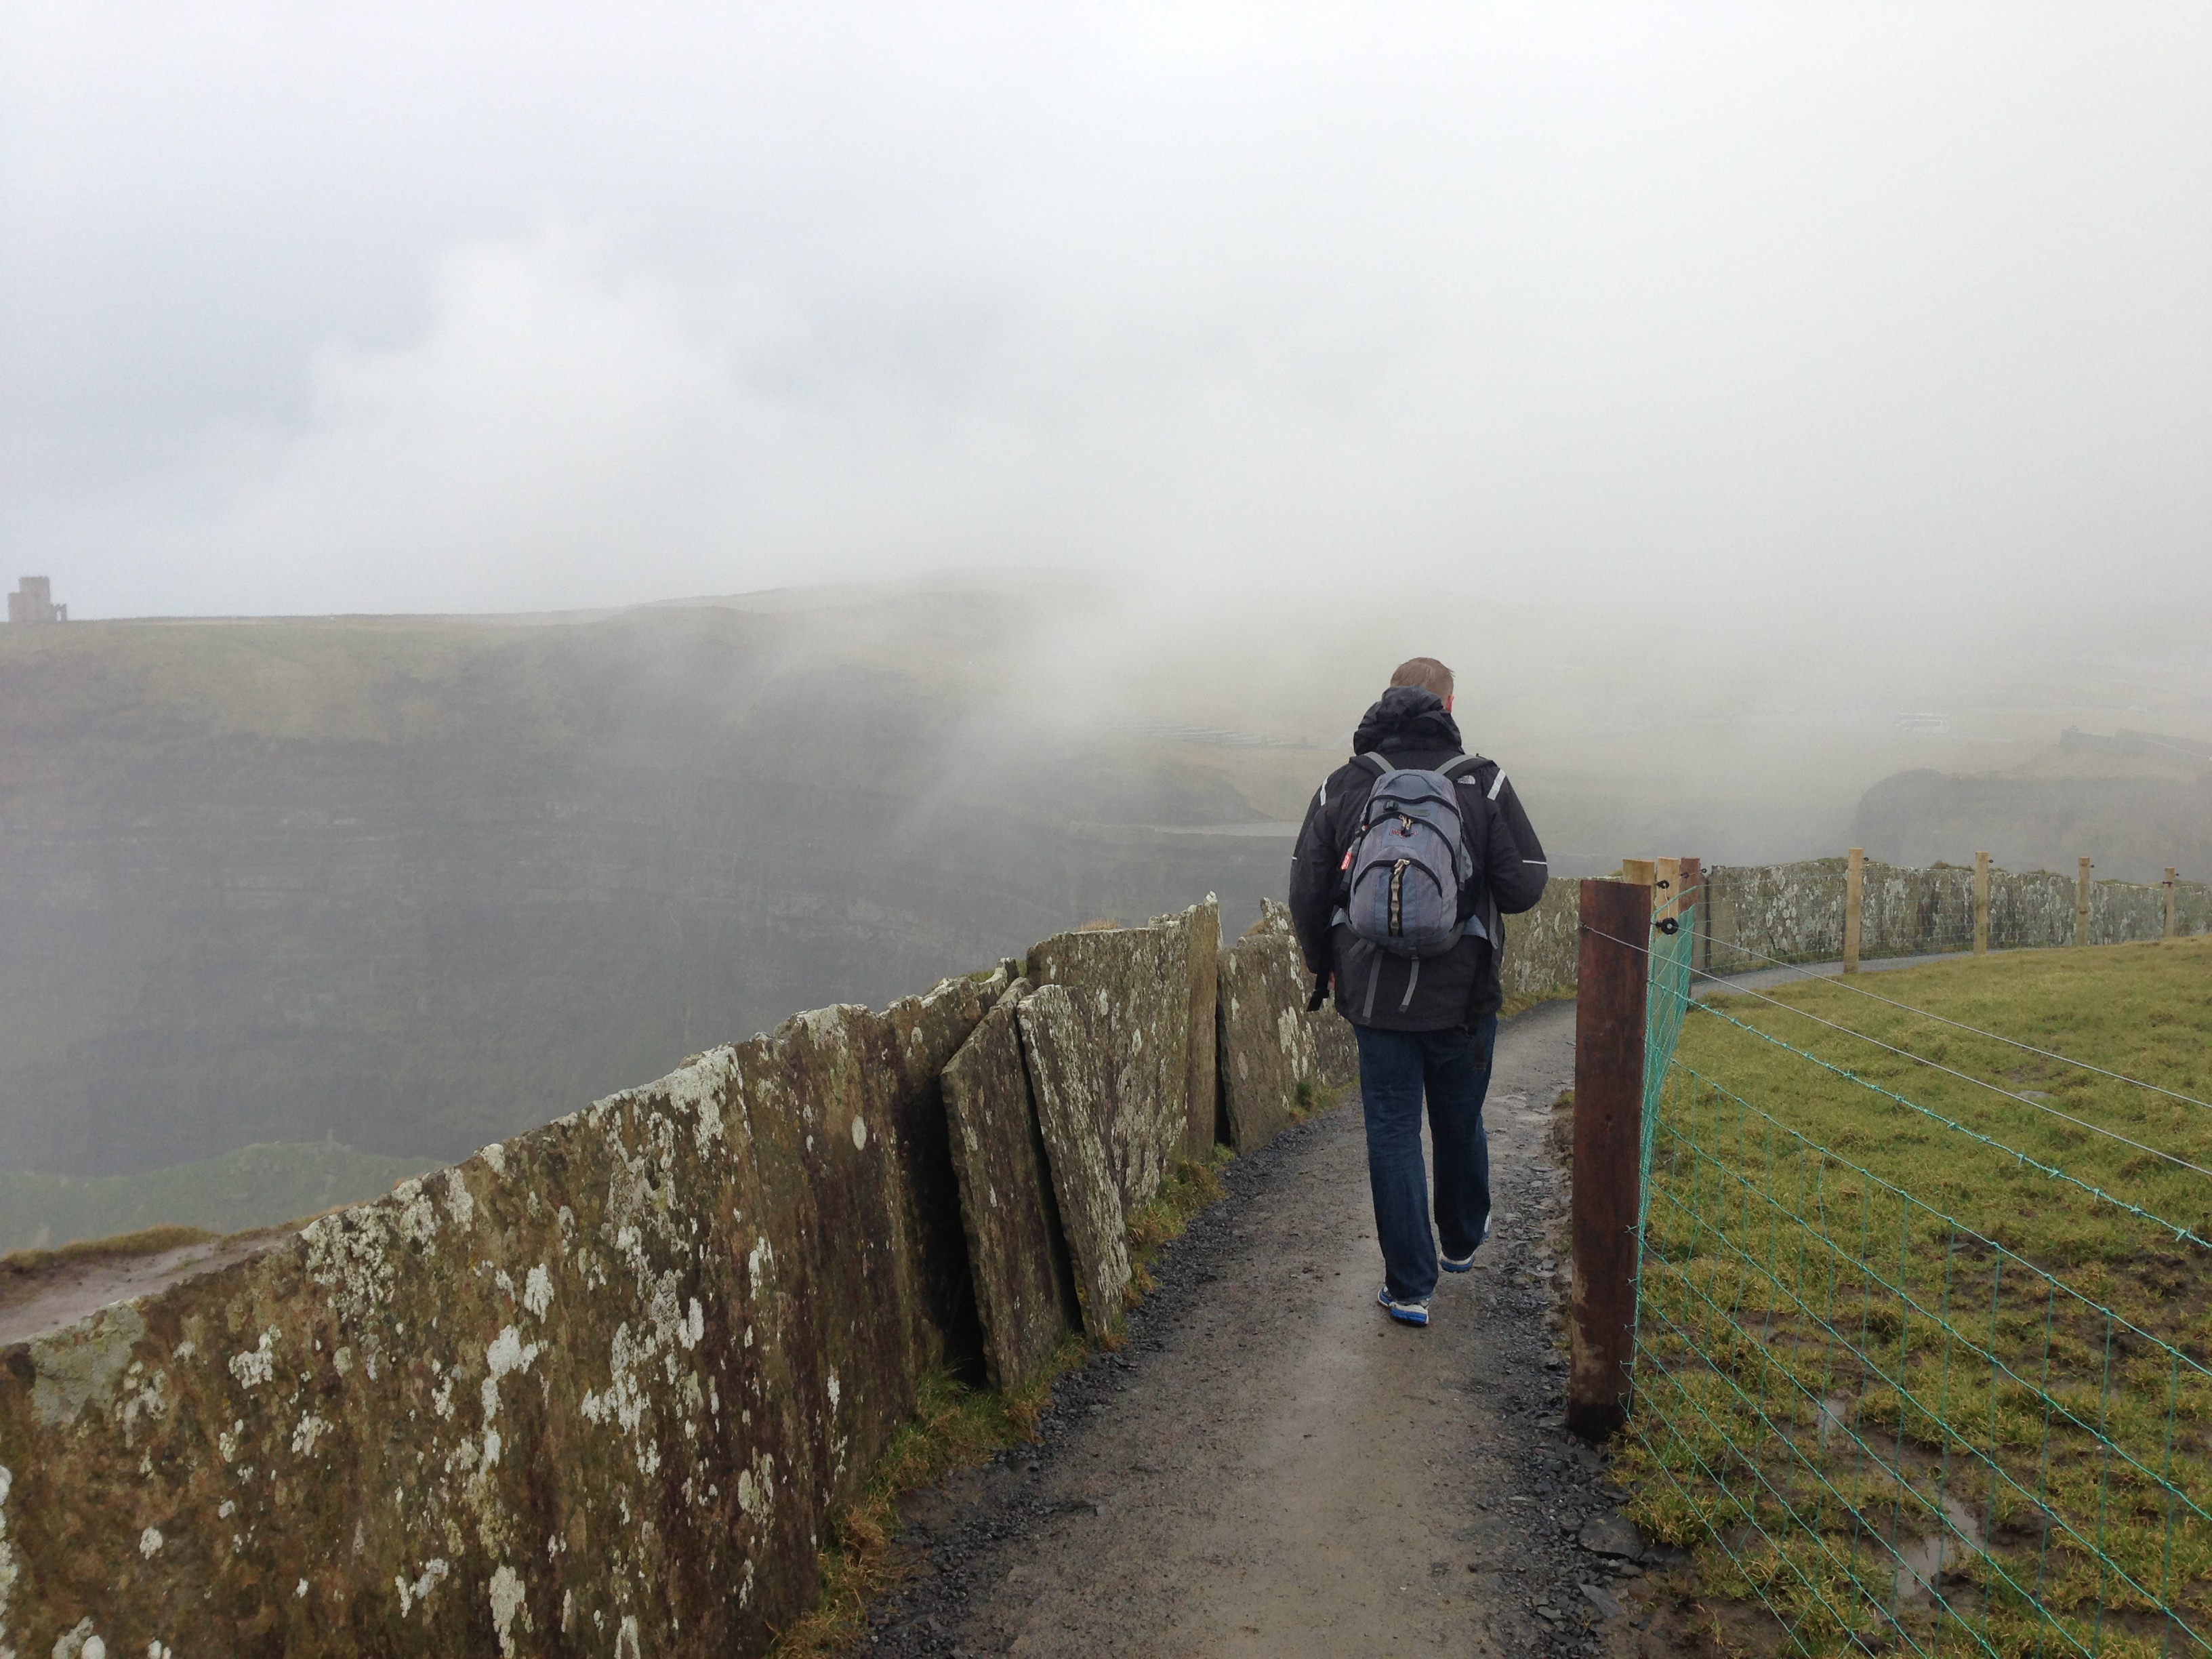
Every person we know who’s been to Ireland and every guidebook that’s ever been written insisted that we visit the Cliffs of Moher on the western coast of Ireland. We decided to take a clue and used our first full day there to drive out and see what all the fuss was about. The cliffs are–well–cliffs. Really big, tall, intimidating cliffs that jut right out of the ocean. They really are incredible.

We spent a few hours walking the paths that line the cliffs so we could see every incredible angle.

From what I hear, the weather at the Cliffs of Moher can be pretty treacherous, even in the middle of the summer. We lucked out with a relatively mild day, rolling fog, and even a few sunbreaks. The cliffs truly were as beautiful as all the hype made them out to be.

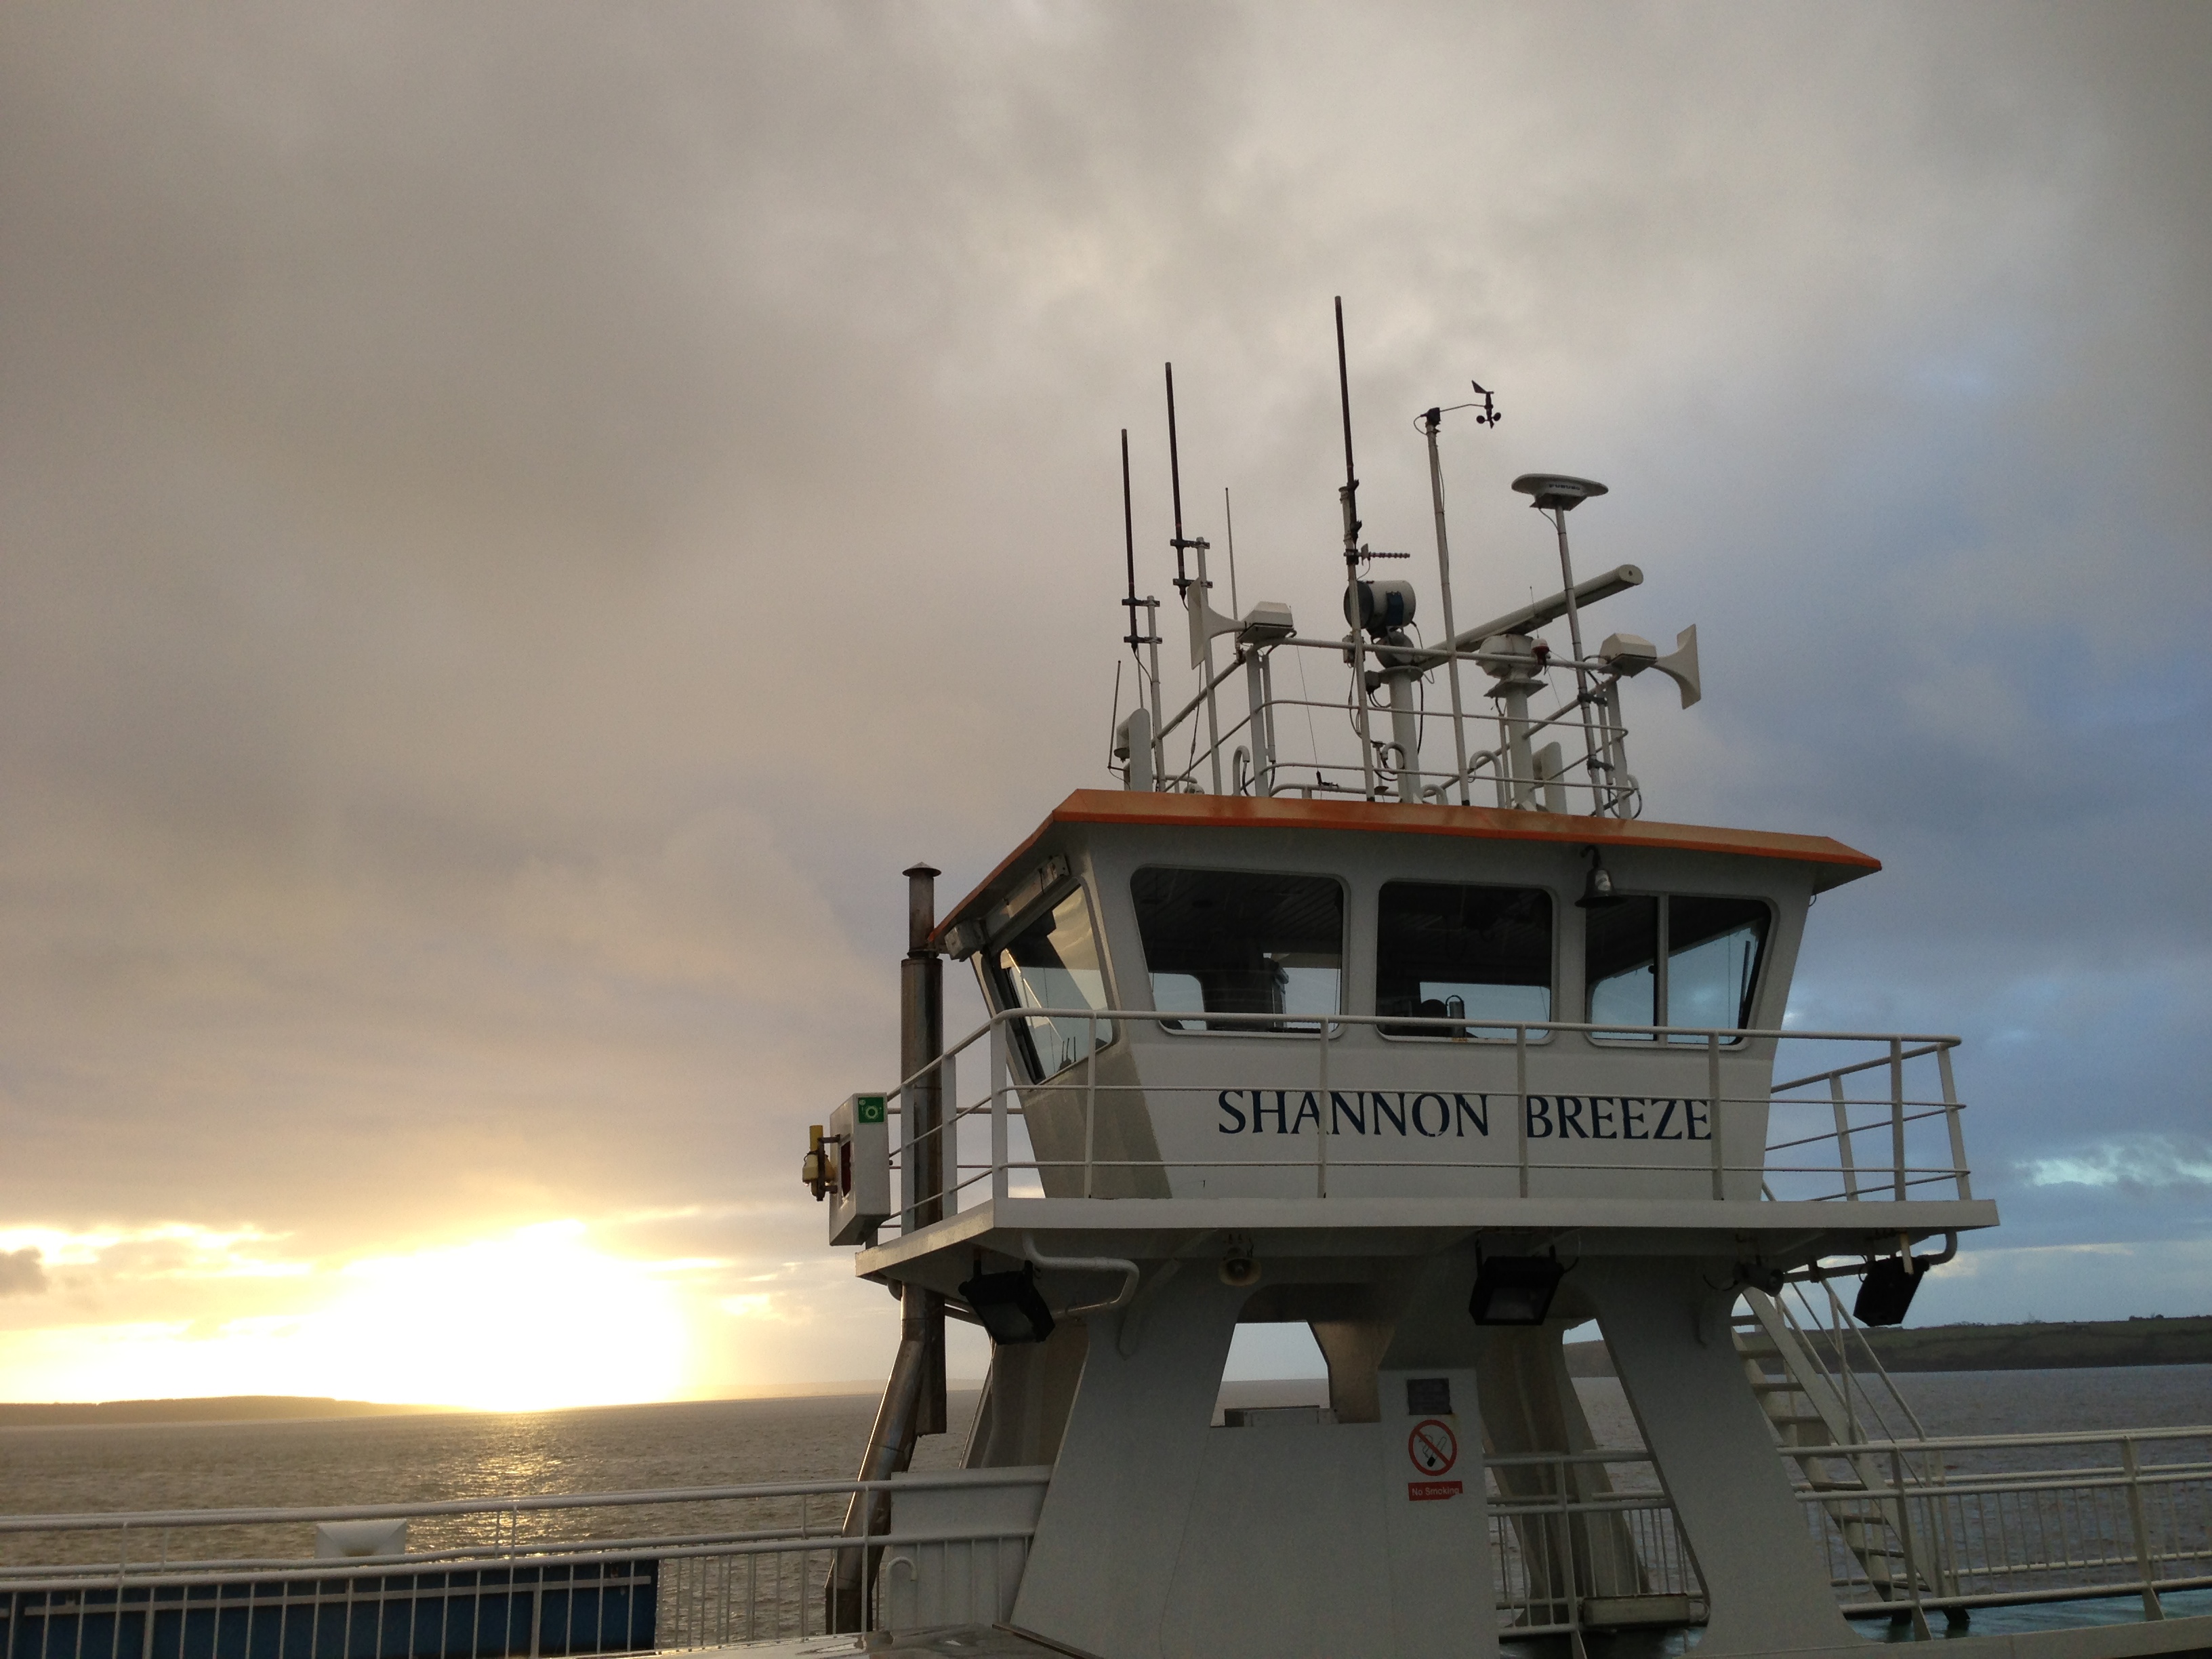
After our glorious afternoon at the cliffs, we were feeling adventurous. Perhaps a bit too adventurous for sleep-deprived, jet-lagged, over-zealous tourists. We decided that we weren’t done exploring yet and wanted to take a scenic route home. So, instead of driving straight back to our hotel (which was still two and a half hours away by the most direct route, mind you) we hopped on a ferry.

By the time we had crossed the water and started looking for our scenic drive home, the sun was setting. We decided to ditch our plans for the 4 hour scenic drive along the water (what WERE we thinking?!) and find a quick route back to the city. This is when we learned that there are no quick drives back to the city when you are in the middle of the Irish countryside. It’s also when we learned that Irish country roads are actually small dirt paths that were built for horses, not Toyotas, and that on-coming traffic will barrel you off the path-road if you don’t scoot yourself out of the way quick enough. We also learned that it gets very, very dark in the middle of nowhere with no streetlights, stars, or settlements to help guide you. Did I mention that you also drive on the left in Ireland and that none of the street signs actually match up with the road names on a map? Let’s just leave this story here: it was a long drive, a terrifying drive, and one that we will never, ever do again. Lesson learned.
Day 3: Exploring City Cork
Jon was in Ireland for work, so he had to spend the next several days in meetings. I decided to spend my first solo-day exploring the city we were in. Cork is the second largest city in Ireland, but that’s a bit deceiving. It’s only 1/10th the size of the largest city, Dublin, and has a population of roughly 100,000 Corkians (Corkites? Corkies?). Jacob was my little travel buddy, and he was a great little companion to take along on all of my adventures. We started by walking through downtown to look at all of the cute shops.

While we were walking around we found the English Market, an indoor public market that began in 1788. They had lots of traditional Irish foods, including the largest selection of butchers that I’ve ever seen in one spot.

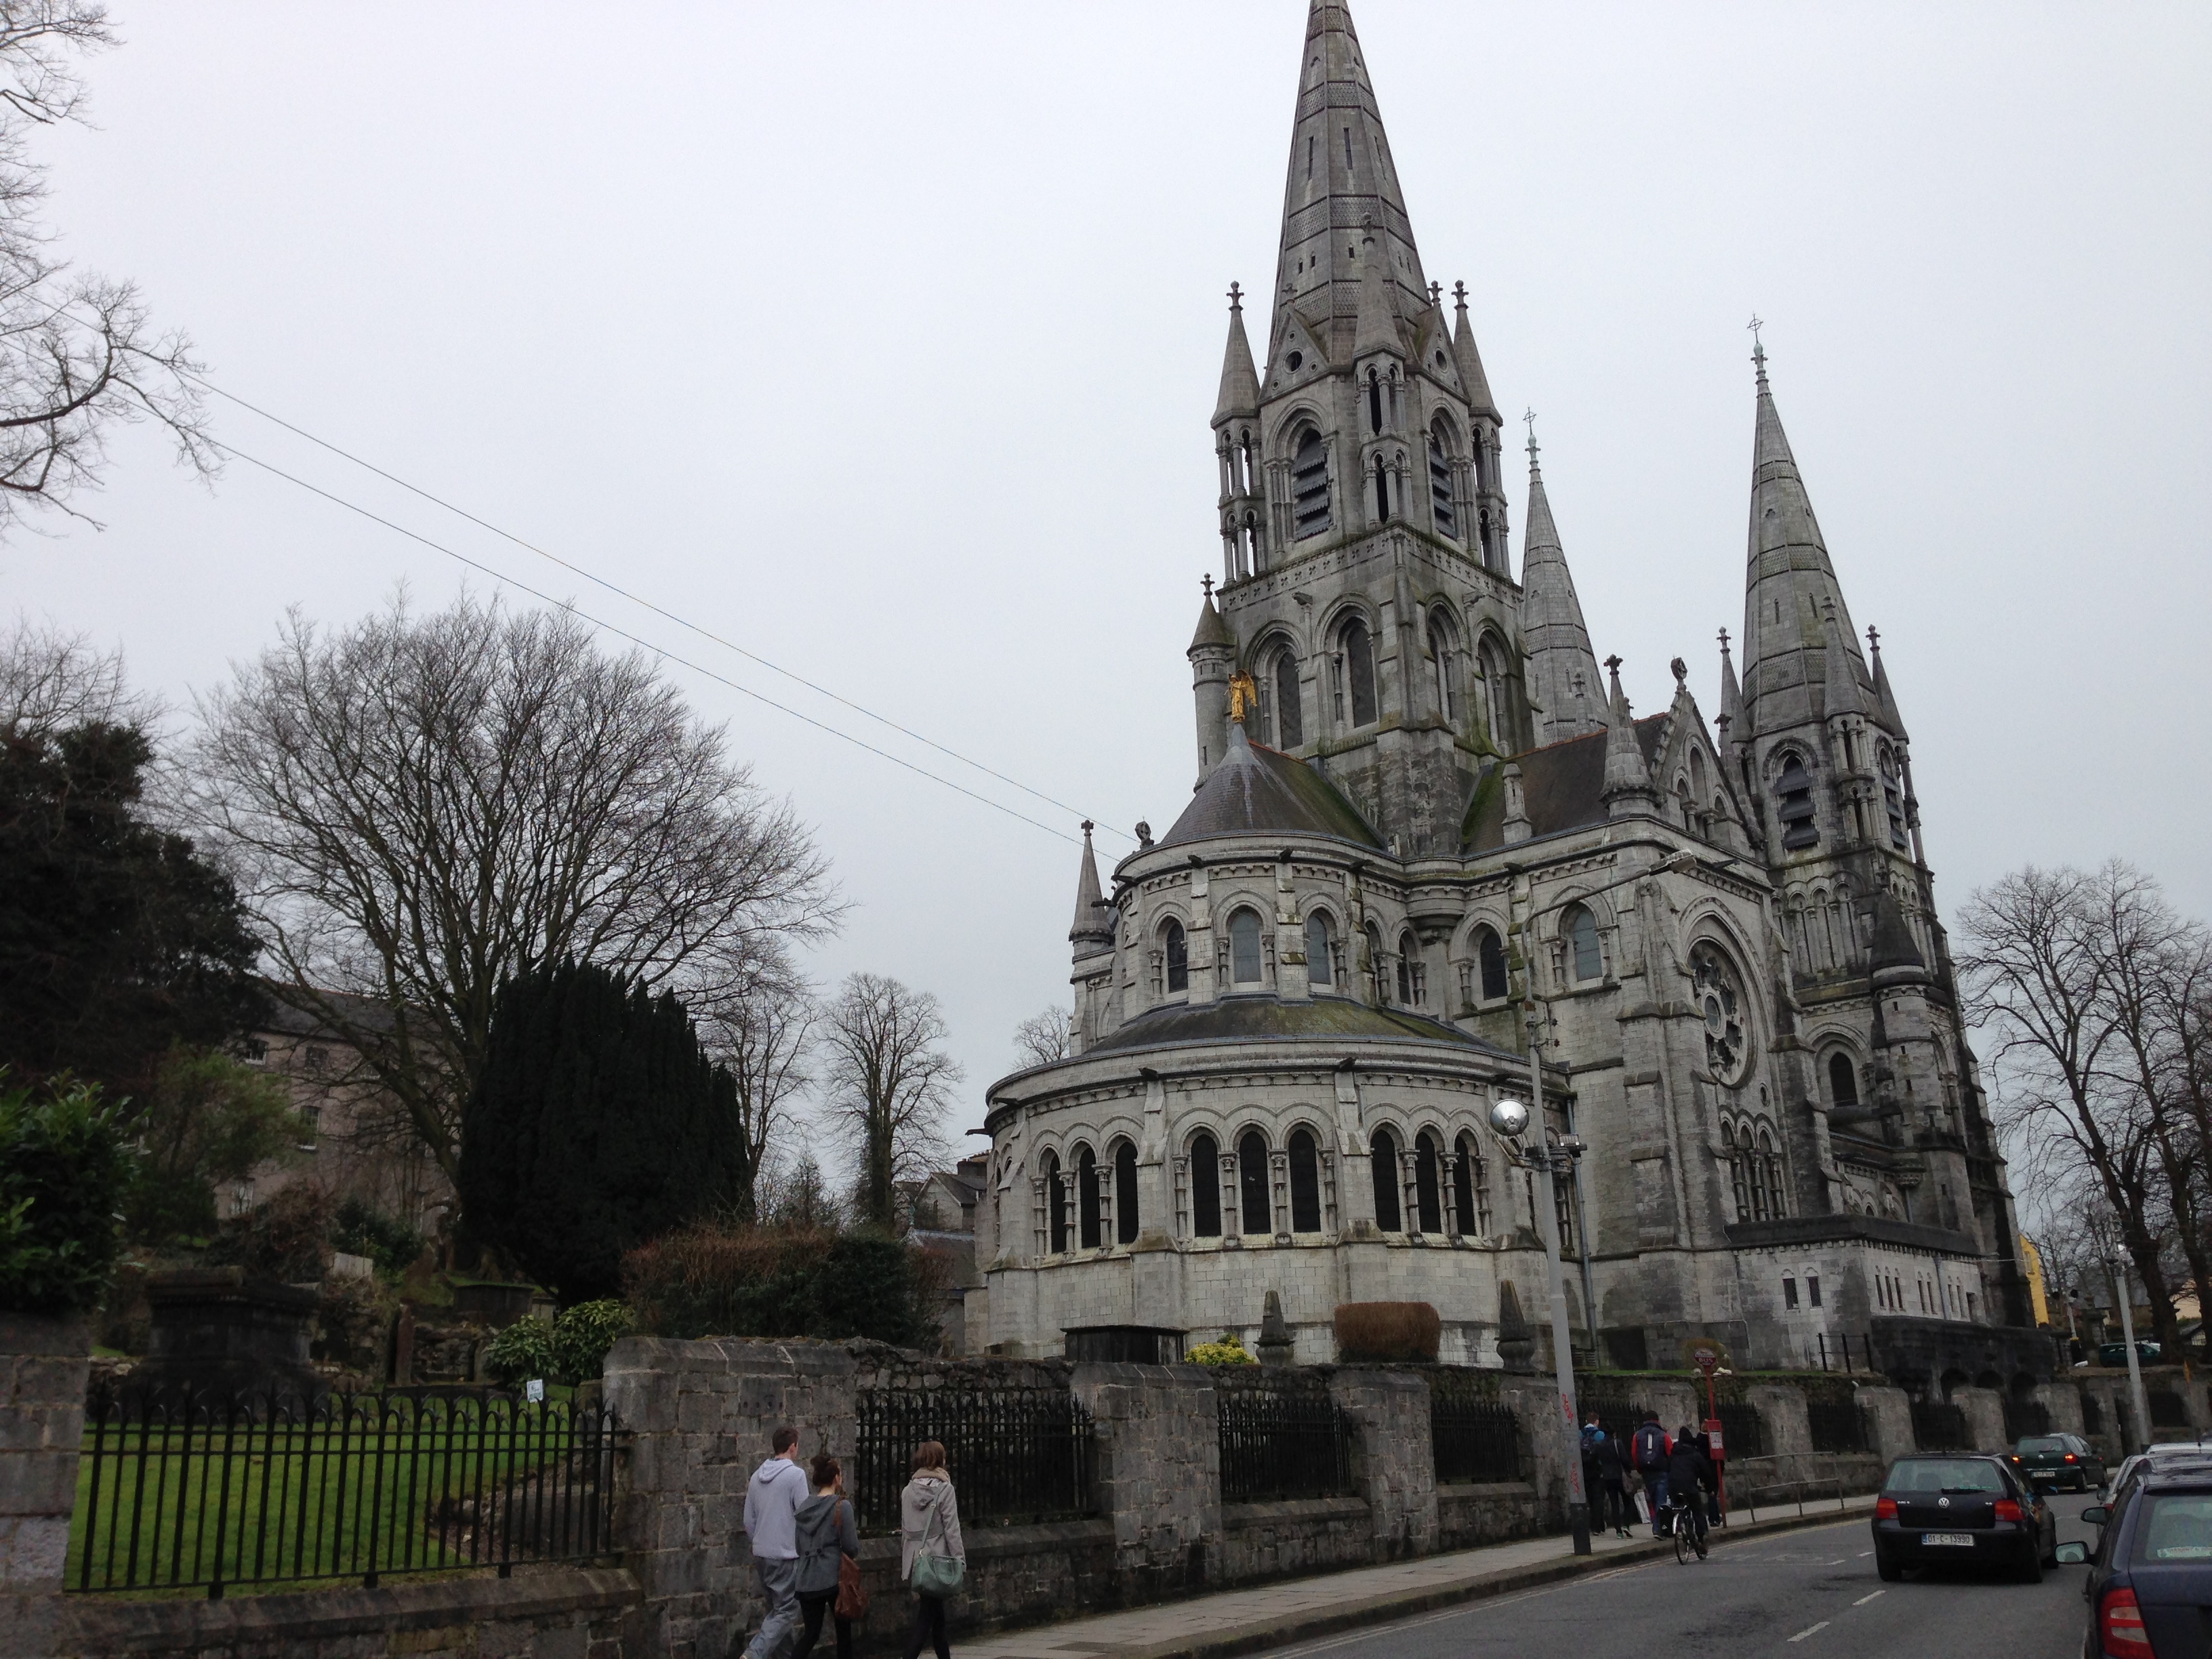
Next, we crossed the river and climbed a hill to St. Anne’s Cathedral. You can see St. Anne’s Cathedral from anywhere in the city, and she is famous for her bells and her clocks. There are four clocks on the top of the cathedral, one pointing in each direction. The clocks have the nickname of the “Four-Faced Liar” because each clock tells a different time, all the time, except on the hour when they somehow sync up to tell the correct time.

You’re able to climb to the top of the cathedral’s bell tower and they actually let you ring the huge church bells (called The Bells of Shandon). They even have music sheets so you can play your favorite song for the whole city to hear.

After Jacob and I perfected “Happy Birthday” (I’m sure to the great annoyance of the church’s neighbors), we donned these fancy headphones for our climb to the top of the tower. You literally climb on top of the bells to get to the top of the tower, so ear protection was necessary (the bells ring every 15 minutes on their own, plus any obnoxious tourist can start ringing “Happy Birthday” whenever they feel like it).

Once we got to the top, though, the view was totally worth it. Cork really is a beautiful city!

The next part of our adventure involved walking back across the river to the other side of the city.

We went to a massive old church (and by old, I mean that there’s been a church here since the early 7th century) called St. Fin Barre’s Cathedral. It was a beautiful building with a lot of history.

After St. Fin Barre’s we hopped in the car and drove about about a mile outside of the city center to the Cork City Gaol (Jail). It was the city’s jail from 1823-1924 and held all of the most notorious crooks and criminals from those days. Plus, it was another impressive structure.

They had jail cells open that you could go inside and see what it would have been like to be a prisoner in those days: cold, cramped, and quiet–they didn’t allow any talking or noise whatsoever. The guards even wore special pads on their shoes so thew wouldn’t make any sound as they walked the hallways. It was a beautiful, disturbing place (or maybe just beautifully disturbing).

Day 4: The Rock of Cashel
After another good night’s sleep we woke up and hit the road for a little town an hour north of Cork called Cashel. Our destination was the Rock of Cashel: an ancient castle on the top of a massive stone extrusion. Wikipedia explains “The Rock” pretty well: “According to local mythology, the Rock of Cashel originated in the Devil’s Bit, a mountain 20 miles (30 km) north of Cashel when St. Patrick banished Satan from a cave, resulting in the Rock’s landing inCashel.[1] Cashel is reputed to be the site of the conversion of the King of Munster by St. Patrick in the 5th century.” How cool is that?!
We drove about an hour and a half north of Cork to get to The Rock. It was fascinating to see such a piece of history firsthand.

We spent some time walking around the grounds and exploring until our fingers and toes were about to fall off due to the frigid winds that were blowing through the area. Honestly, I don’t know how we managed to walk into Siberia. Siberia or not, though, it was really, REALLY cool to see it (no pun intended).

Upon returning to our car I realized that our parking was good all day, so we decided to stay in Cashel town to explore some more. I’m so glad we decided to stay because the town itself was one of the most charming places I’ve ever been. We’d be walking down the road and all of a sudden I’d look up to see…a castle.

This castle was called Kearney Castle and now it’s a hotel and restaurant on Main Street. How crazy is that?!
We also found this little museum that explored the history of Cashel and the surrounding areas. It was technically closed for the winter, but the curator happened to be there doing some spring cleaning. He decided to let me in–for free–and spent the next 2 hours showing me every artifact in the museum and telling me fascinating stories about his precious collection. It was an incredible museum and I am so grateful to this man for taking time out of his day to show me so much.

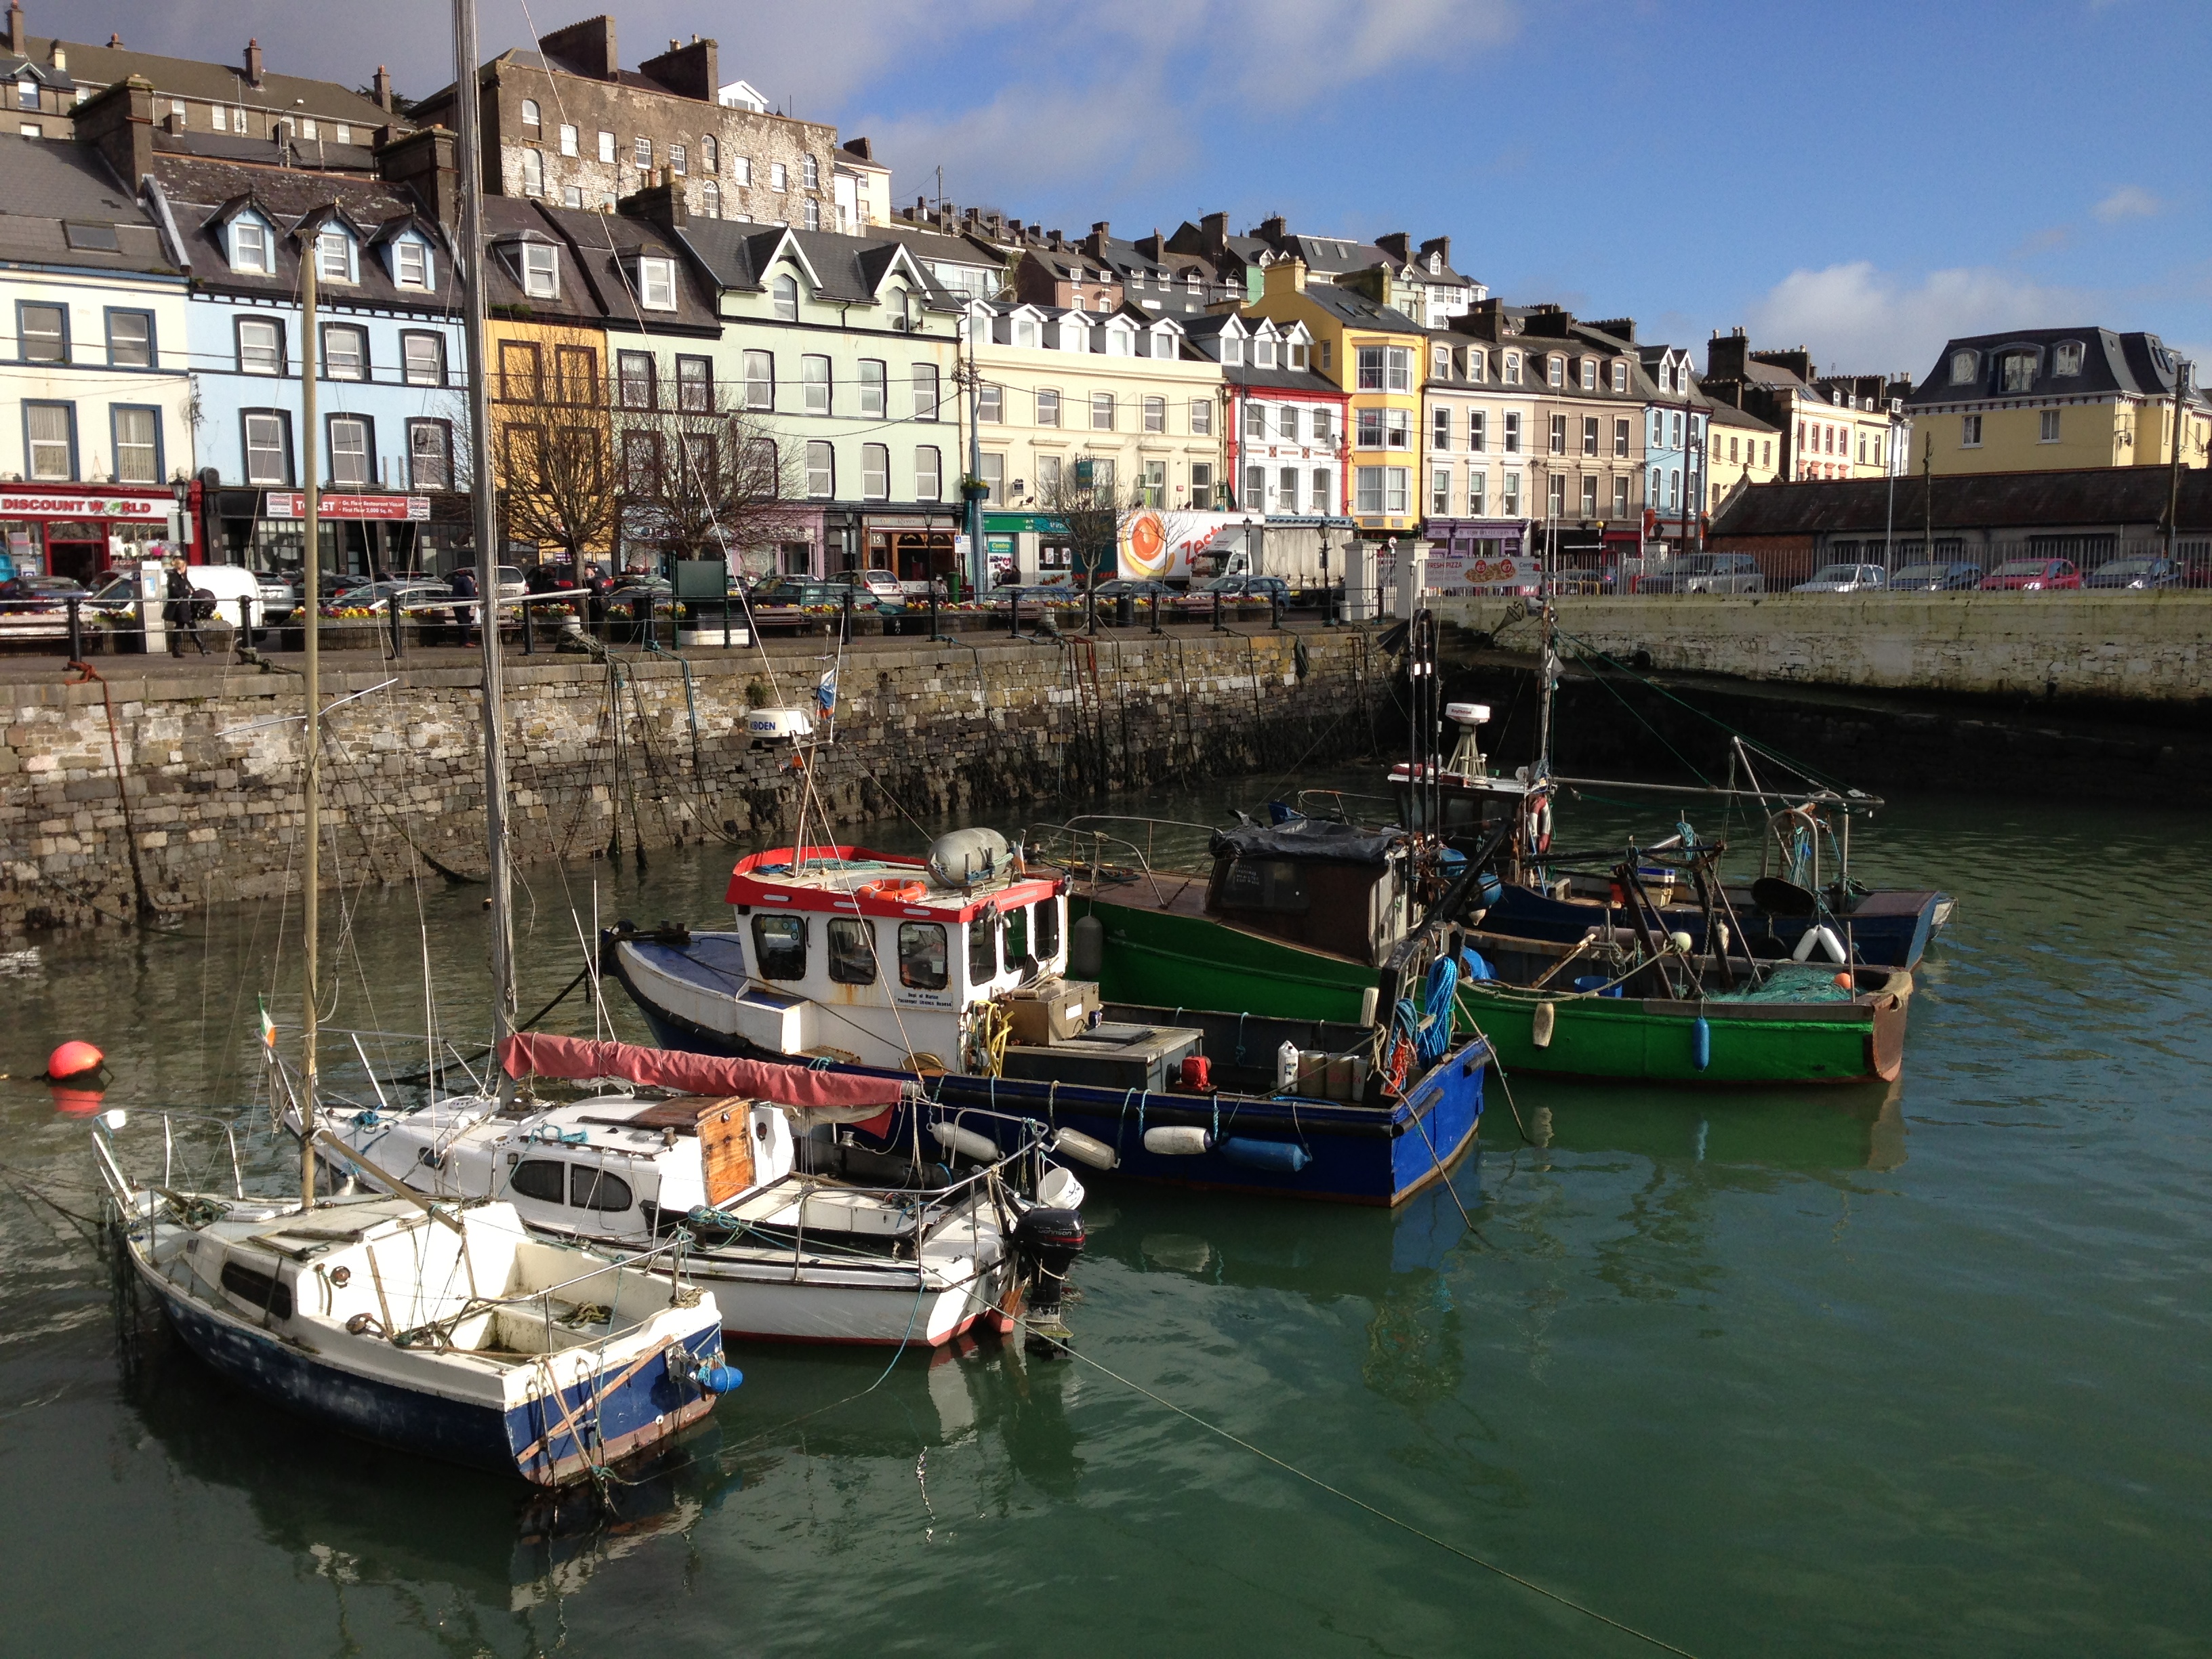
Day 5: Titanic Museum in Cobh
For my final solo day I decided to drive to a little town called Cobh that is about 15 minutes outside of the city. Years ago Cobh was called Queenstown, and it was the final port of call for the most-infamous of all ships: Titanic.

I have always been fascinated by all things “Titanic” so I wasn’t about to pass up the opportunity to see this piece of the ship’s history first-hand. There is a great little museum in Cobh called the Experience Titanic Museum. The museum itself is housed in the old White Star Lines ticket office where the passengers would have actually boarded the ship. When you get to the museum you are given a boarding ticket with the name of an actual passenger who boarded Titanic in Queenstown (Cobh). At the end of the museum they have kiosks where you can learn more about your passenger and whether the survived or perished on that fatal night (I’m pleased to report that my passenger did survive. Unfortunately, Jacob’s passenger–a 15 year old boy–died). It was moving to learn more about the ship from a more personal perspective.
After the museum we walked around the town of Cobh. As with all towns in Ireland, Cobh has a rich history. This is the town where they brought the survivors of the Lusitania–the British ocean liner that was torpedoed by a German U-Boat in 1915 thus beginning the world’s involvement in World War I. Cobh is a beautiful little fishing town with pristine waterfront parks and lots of cute shops lining main street. I would love to come back here on a warm summer day and just spend all day exploring.

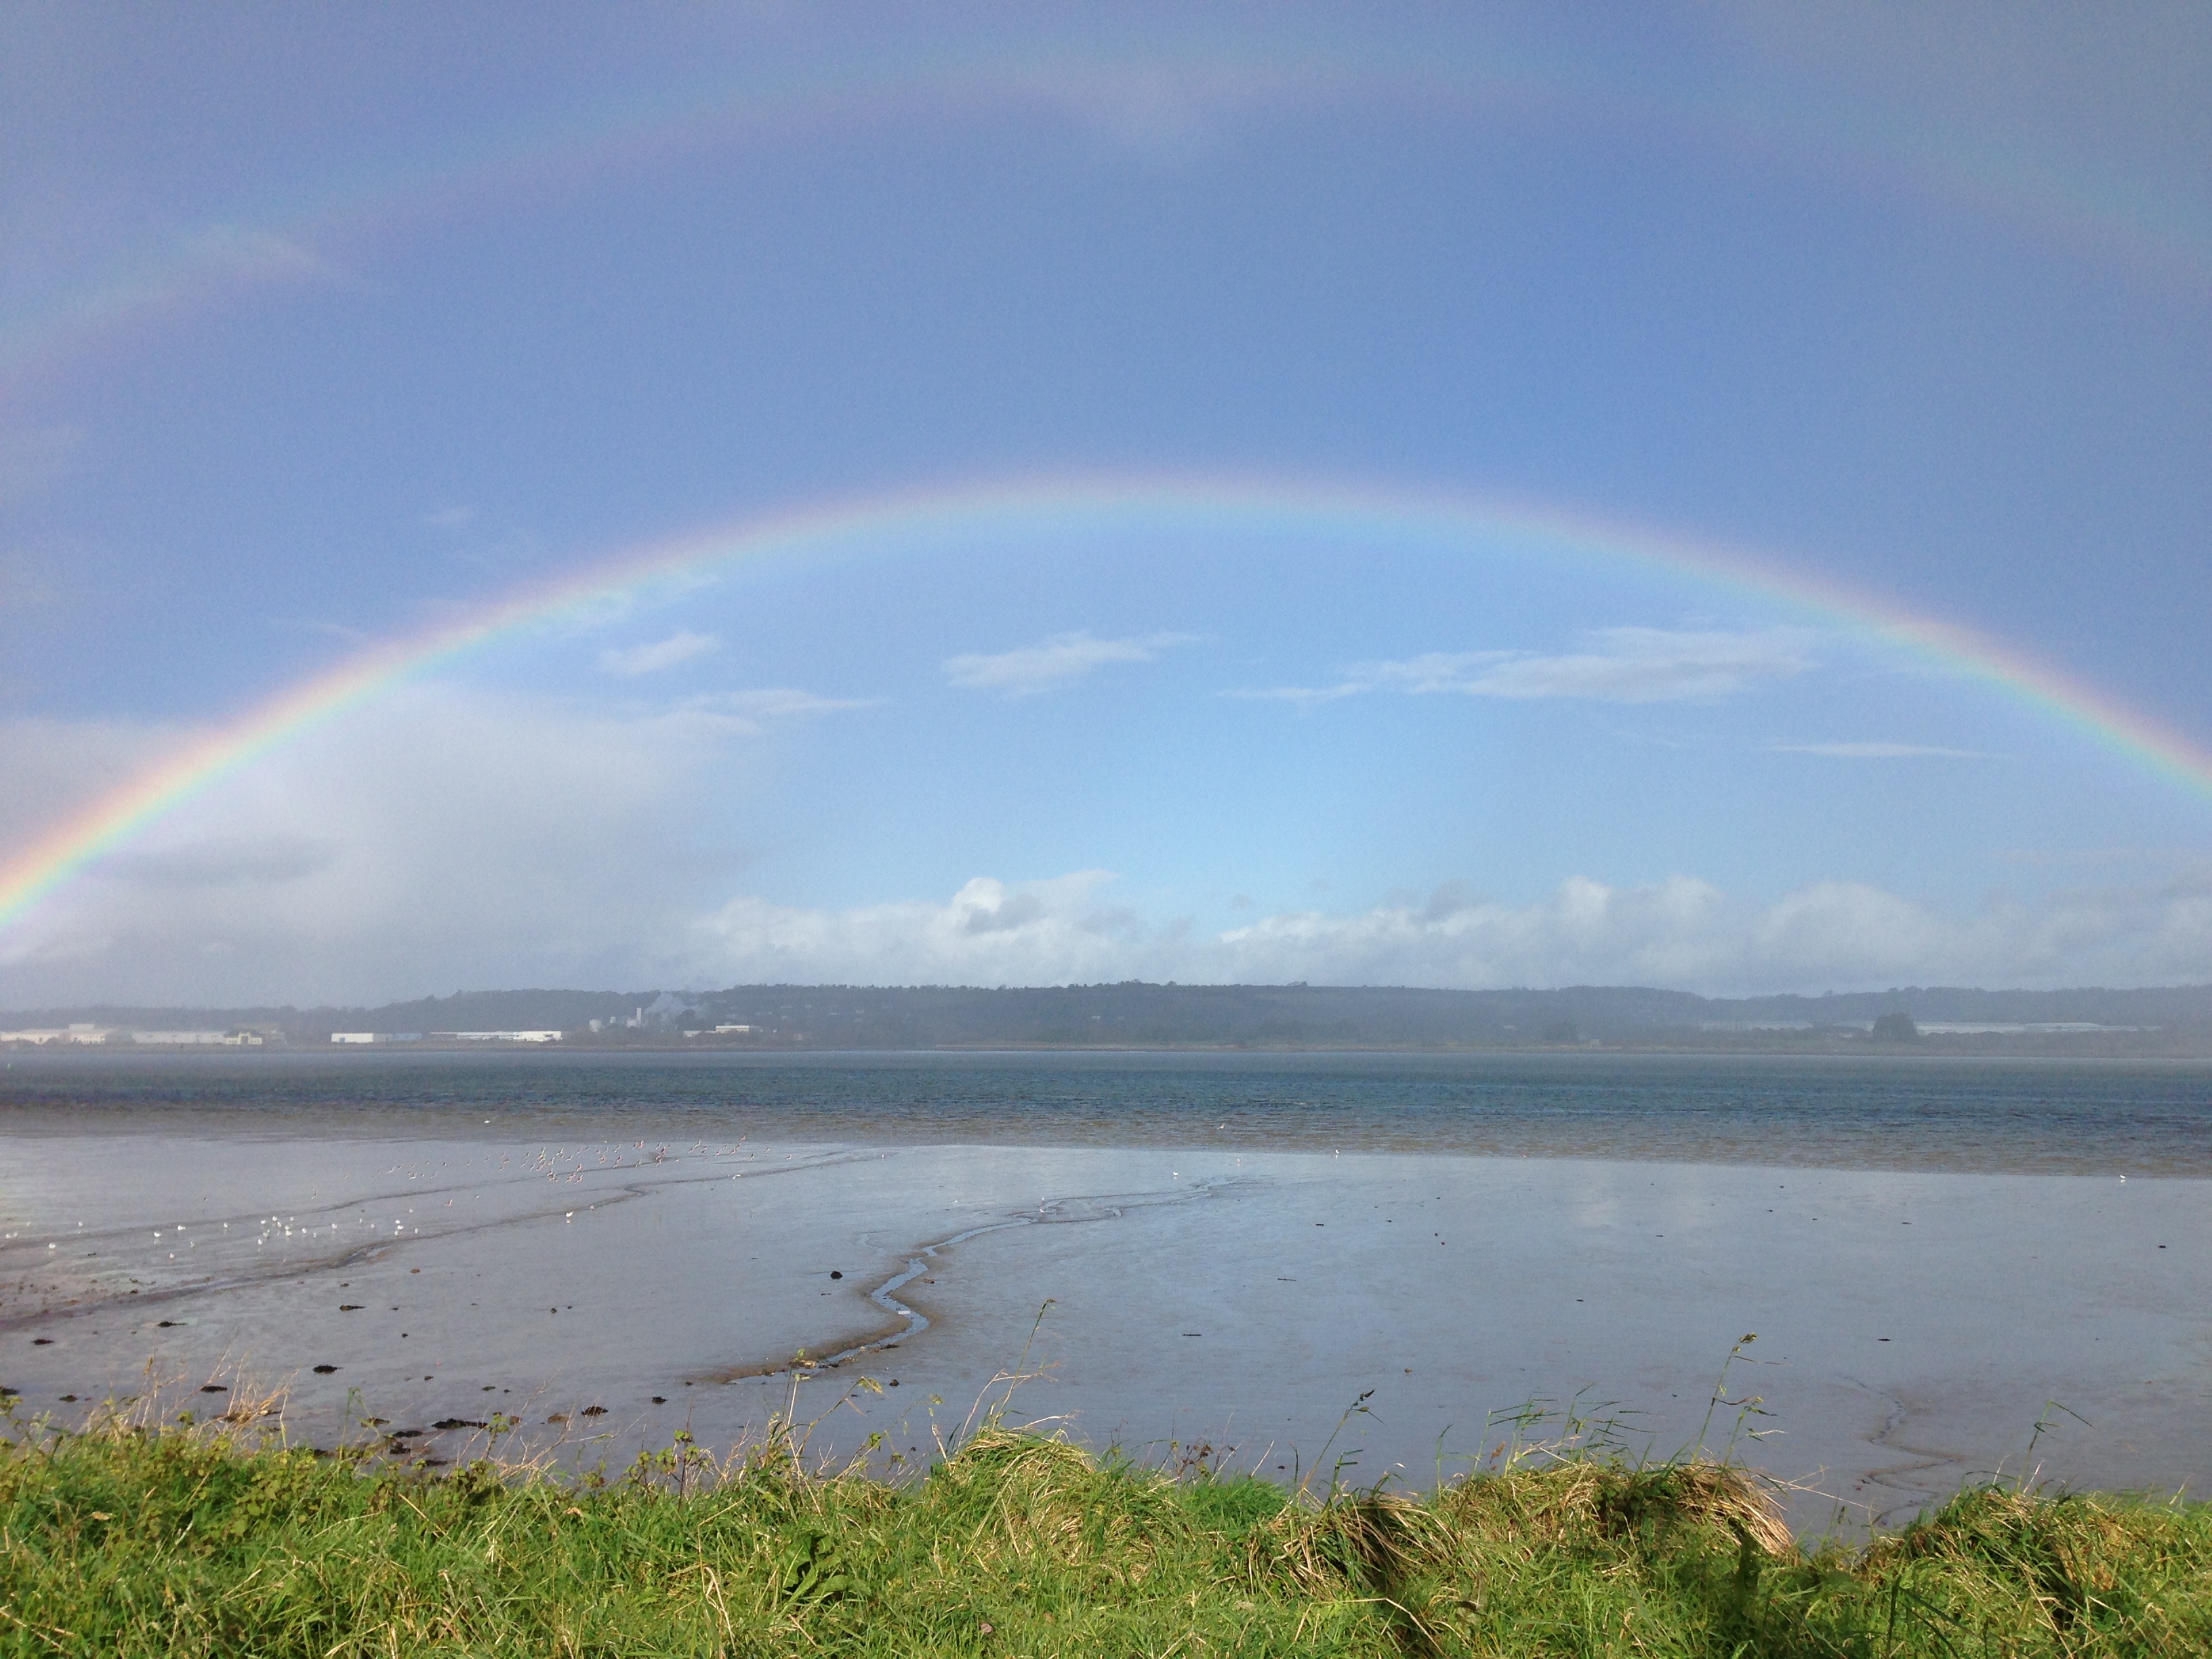
On our way back to the hotel I had to stop in a park to nurse Jacob. While we were sitting there in our car I got a wonderful surprise–a huge double rainbow that stretched across the horizon. I looked for leprechauns and even poked around the car to see if anyone forgot their pot of gold, but to no avail.

Day 6: Blarney Castle and kissing the Blarney Stone
Jon got the afternoon off this day so we wanted to do something special together after his busy week of work. Blarney Castle (which houses the infamous Blarney Stone) is just outside of Cork City. We decided to spend our day exploring the castle and its grounds (which are beautiful, it turns out). The castle originally dates from around the year 1200.

As you walk up the narrow spiral staircase to the top of the castle you can poke into all of the rooms and imagine what it would have been like to live in such a formidable place. It was quite impressive to see all that they were able to build into a massive stone structure.
When you finally reach the top of the castle, you are rewarded with breathtaking views of the surrounding countryside.

You are also greeted with the opportunity to kiss the Blarney Stone. The Blarney Stone is said to give the “gift of gab” to anyone who kisses it. Basically, kissing this rock is supposed to give you eloquent speech, wit, and wisdom (which is probably why it’s been a favorite destination for politicians and world leaders for centuries). This is what the rock looks like (it’s the long gray stone at the bottom of the black bars):

And this is how you kiss it:

You have to grip the black support bars and lean over backward over the battlements to get to the rock that’s underneath the ledge. Oh, and you’re about 100 feet in the air. It’s a bit exhilarating to hang upside down from such a height!
After exploring the castle we spent a good amount of time exploring the gardens, stables, towers, and trails that encompass the grounds. I have to say, Blarney Castle was probably my favorite excursion of the whole trip!

Day 7: Kinsale and the Jameson Whiskey Distillery
We began our final day in Ireland in a little waterfront town called Kinsale.
 Kinsale is known as a foodie capital with great restaurants on every corner. Unfortunately, we got there pretty early before things were really up and going. Double-unfortnuately, we were there in the middle of February–the non-tourist season–so a lot of things were simply shut down for the winter. We did enjoy walking around the town to see all of the brightly colored buildings, and we had a delicious lunch of crepes before we headed out.

On our way out of town we stopped at an old military fort called Charles Fort. It was a key player in the Spanish War of the early 1600’s. We decided not to go inside the fort for the tour, but it was really neat to see the structure (and the view, oh the view from up there!).

We drove from Kinsale straight up to Middleton, home of the Jameson Whiskey Distillery.

We went on a tour of the old distillery (the new, more modern production happens next door). We learned a lot about the whiskey-making process and even got to sample the finished product.

We called it quits early on our last day because we needed to get back to our hotel and pack so we’d be ready for our 3 AM wake-up call the next morning.
The next day was travel day again. We were sad to leave, but also excited to get back home and see our little David who didn’t get to accompany us on this trip. We ended up having a very smooth, uneventful trip back to the states. Jacob was a trooper (as always) and slept for about 7 hours on the plane. I think traveling with a peaceful 6-month old is about as good as it gets!

We had an incredible time in Ireland and truly loved every bit of it that we saw. The country was beautiful, the people were friendly (seriously, some of the nicest people I’ve ever met in my life), the food was good, and the sights were amazing. I can’t wait to go back and see all of the places we missed on this trip!

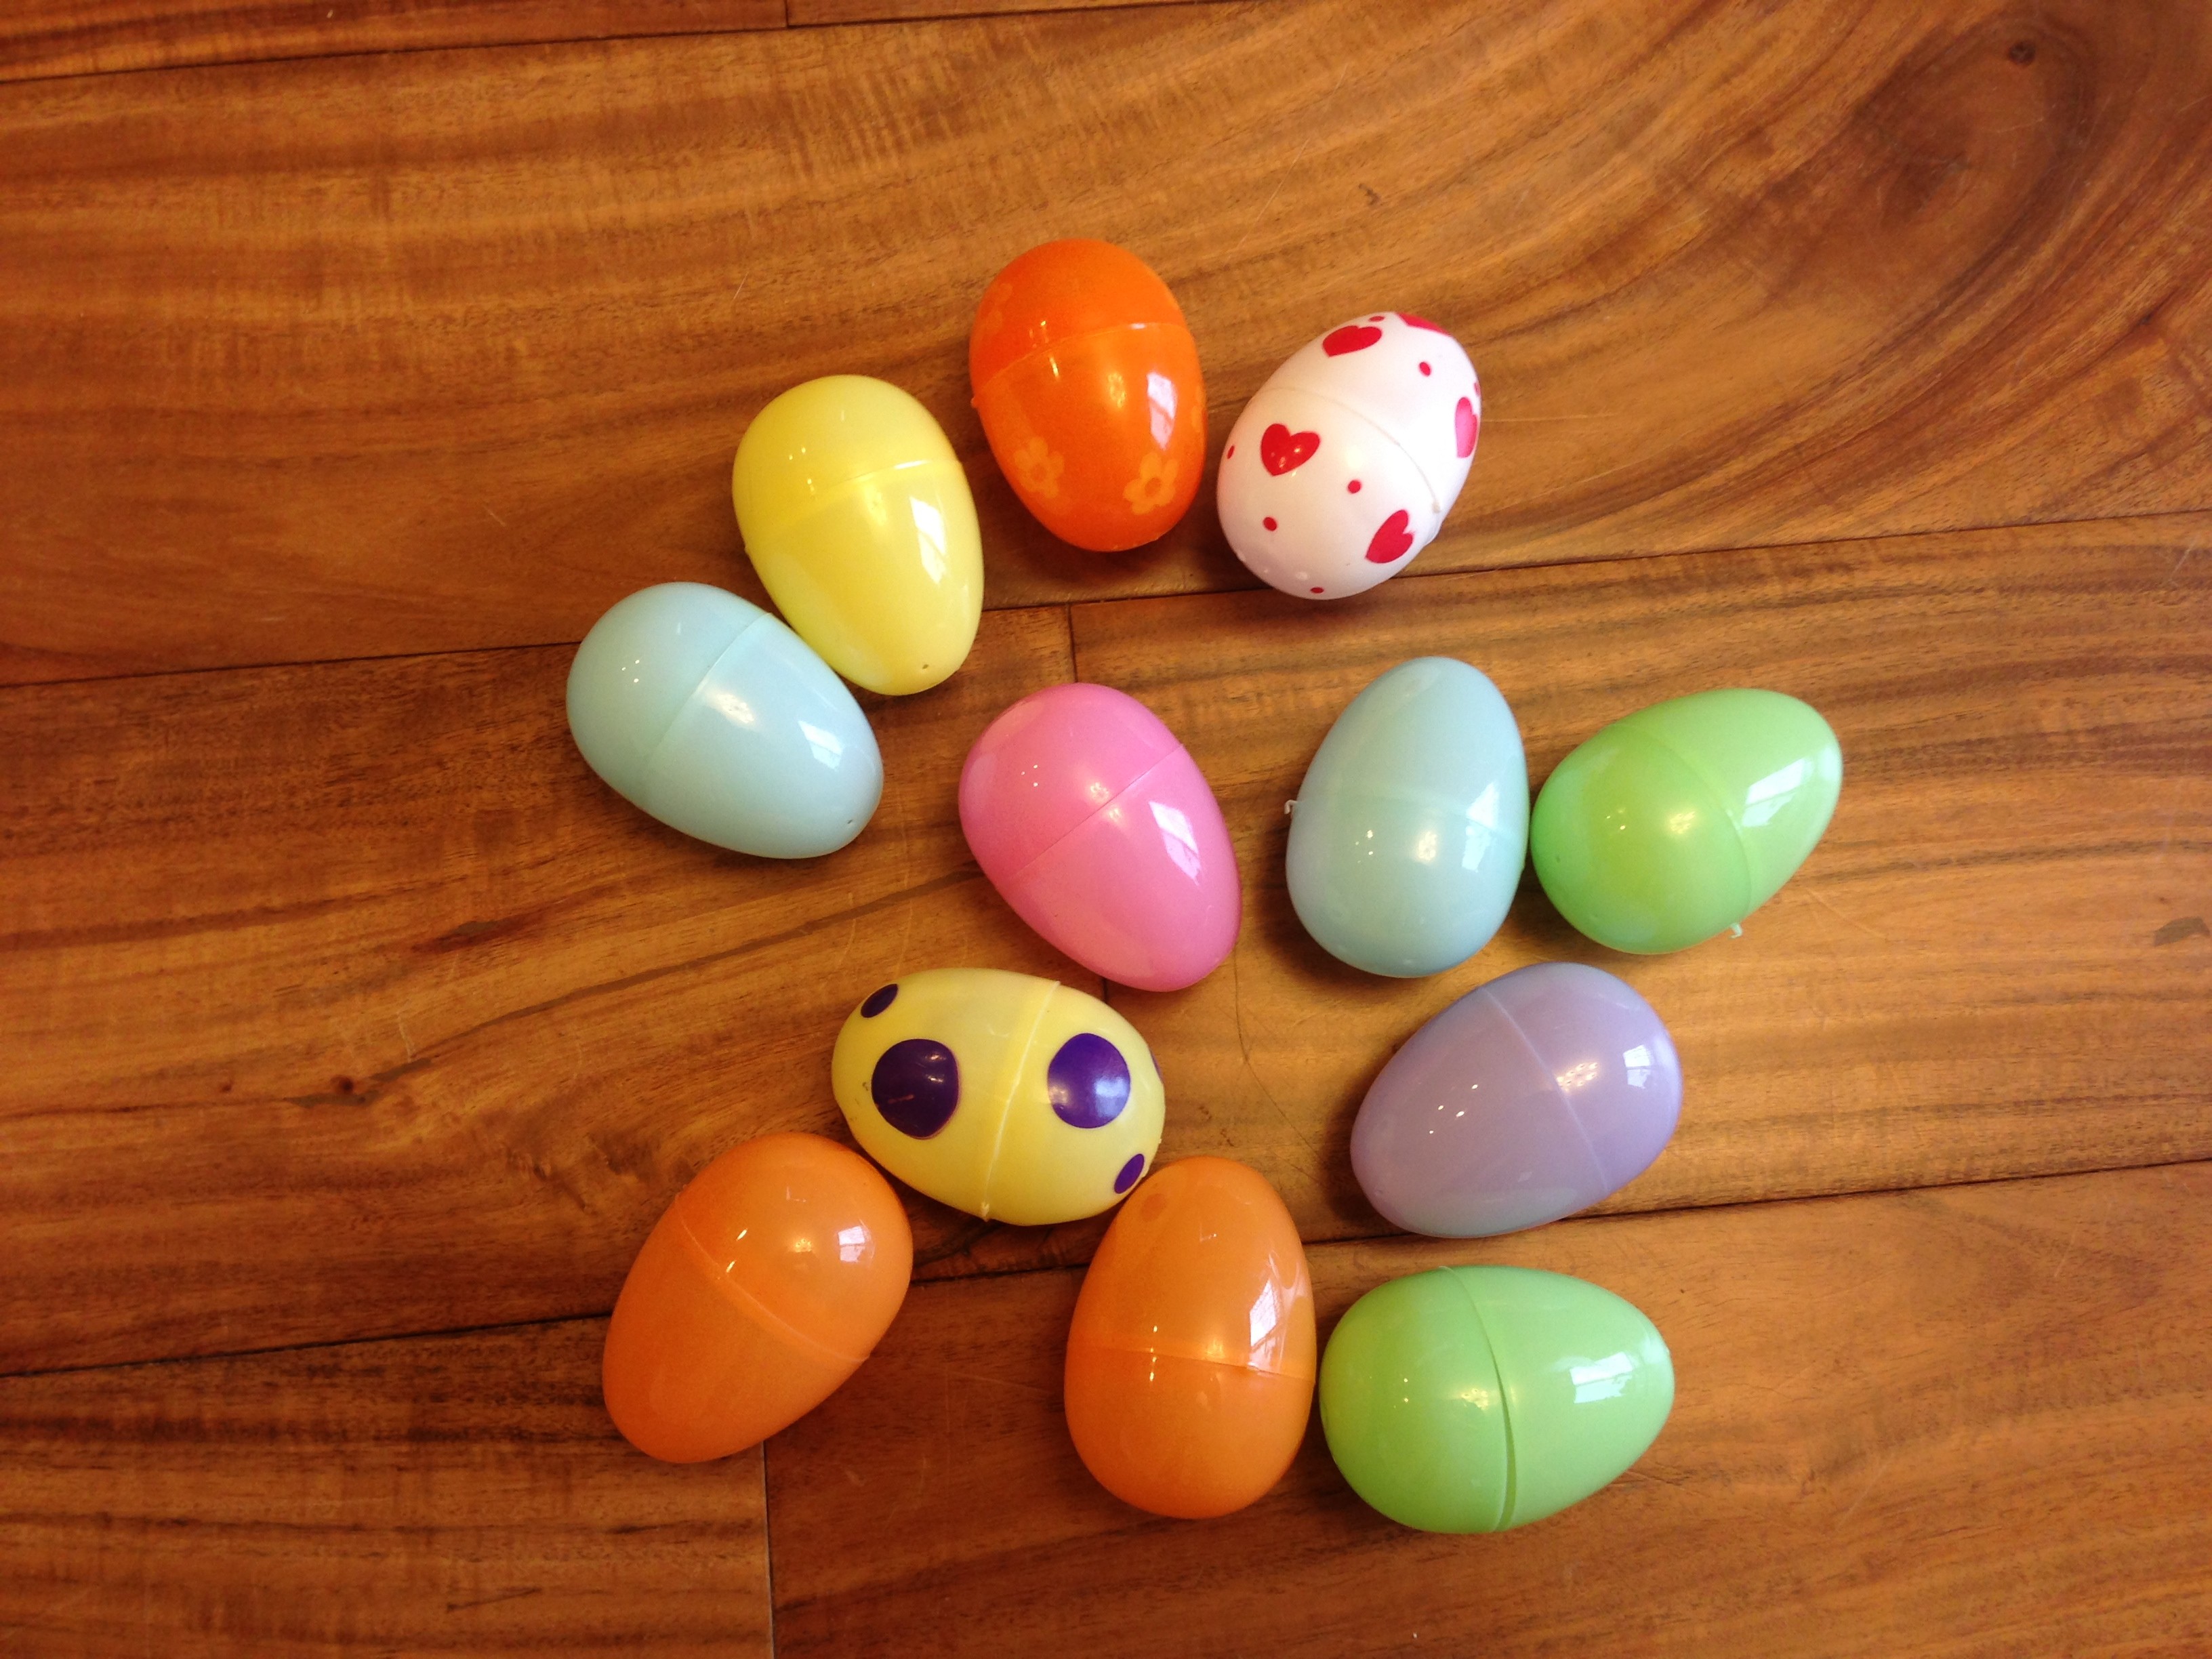 12 objects that correlate with Bible verses. I used the following:
 Bible I like using a physical Bible whenever I can with the little ones. I want them to learn that the Bible is God’s true written Word, and there is something special about having a physical book that they can see and touch and explore. I decided to keep a list of the verses I’ll be using for reference in my Bible and then I hi-lighted each verse in my Bible. I’ll show David the verse in my Bible each day and have him touch the words as I read them to him.
 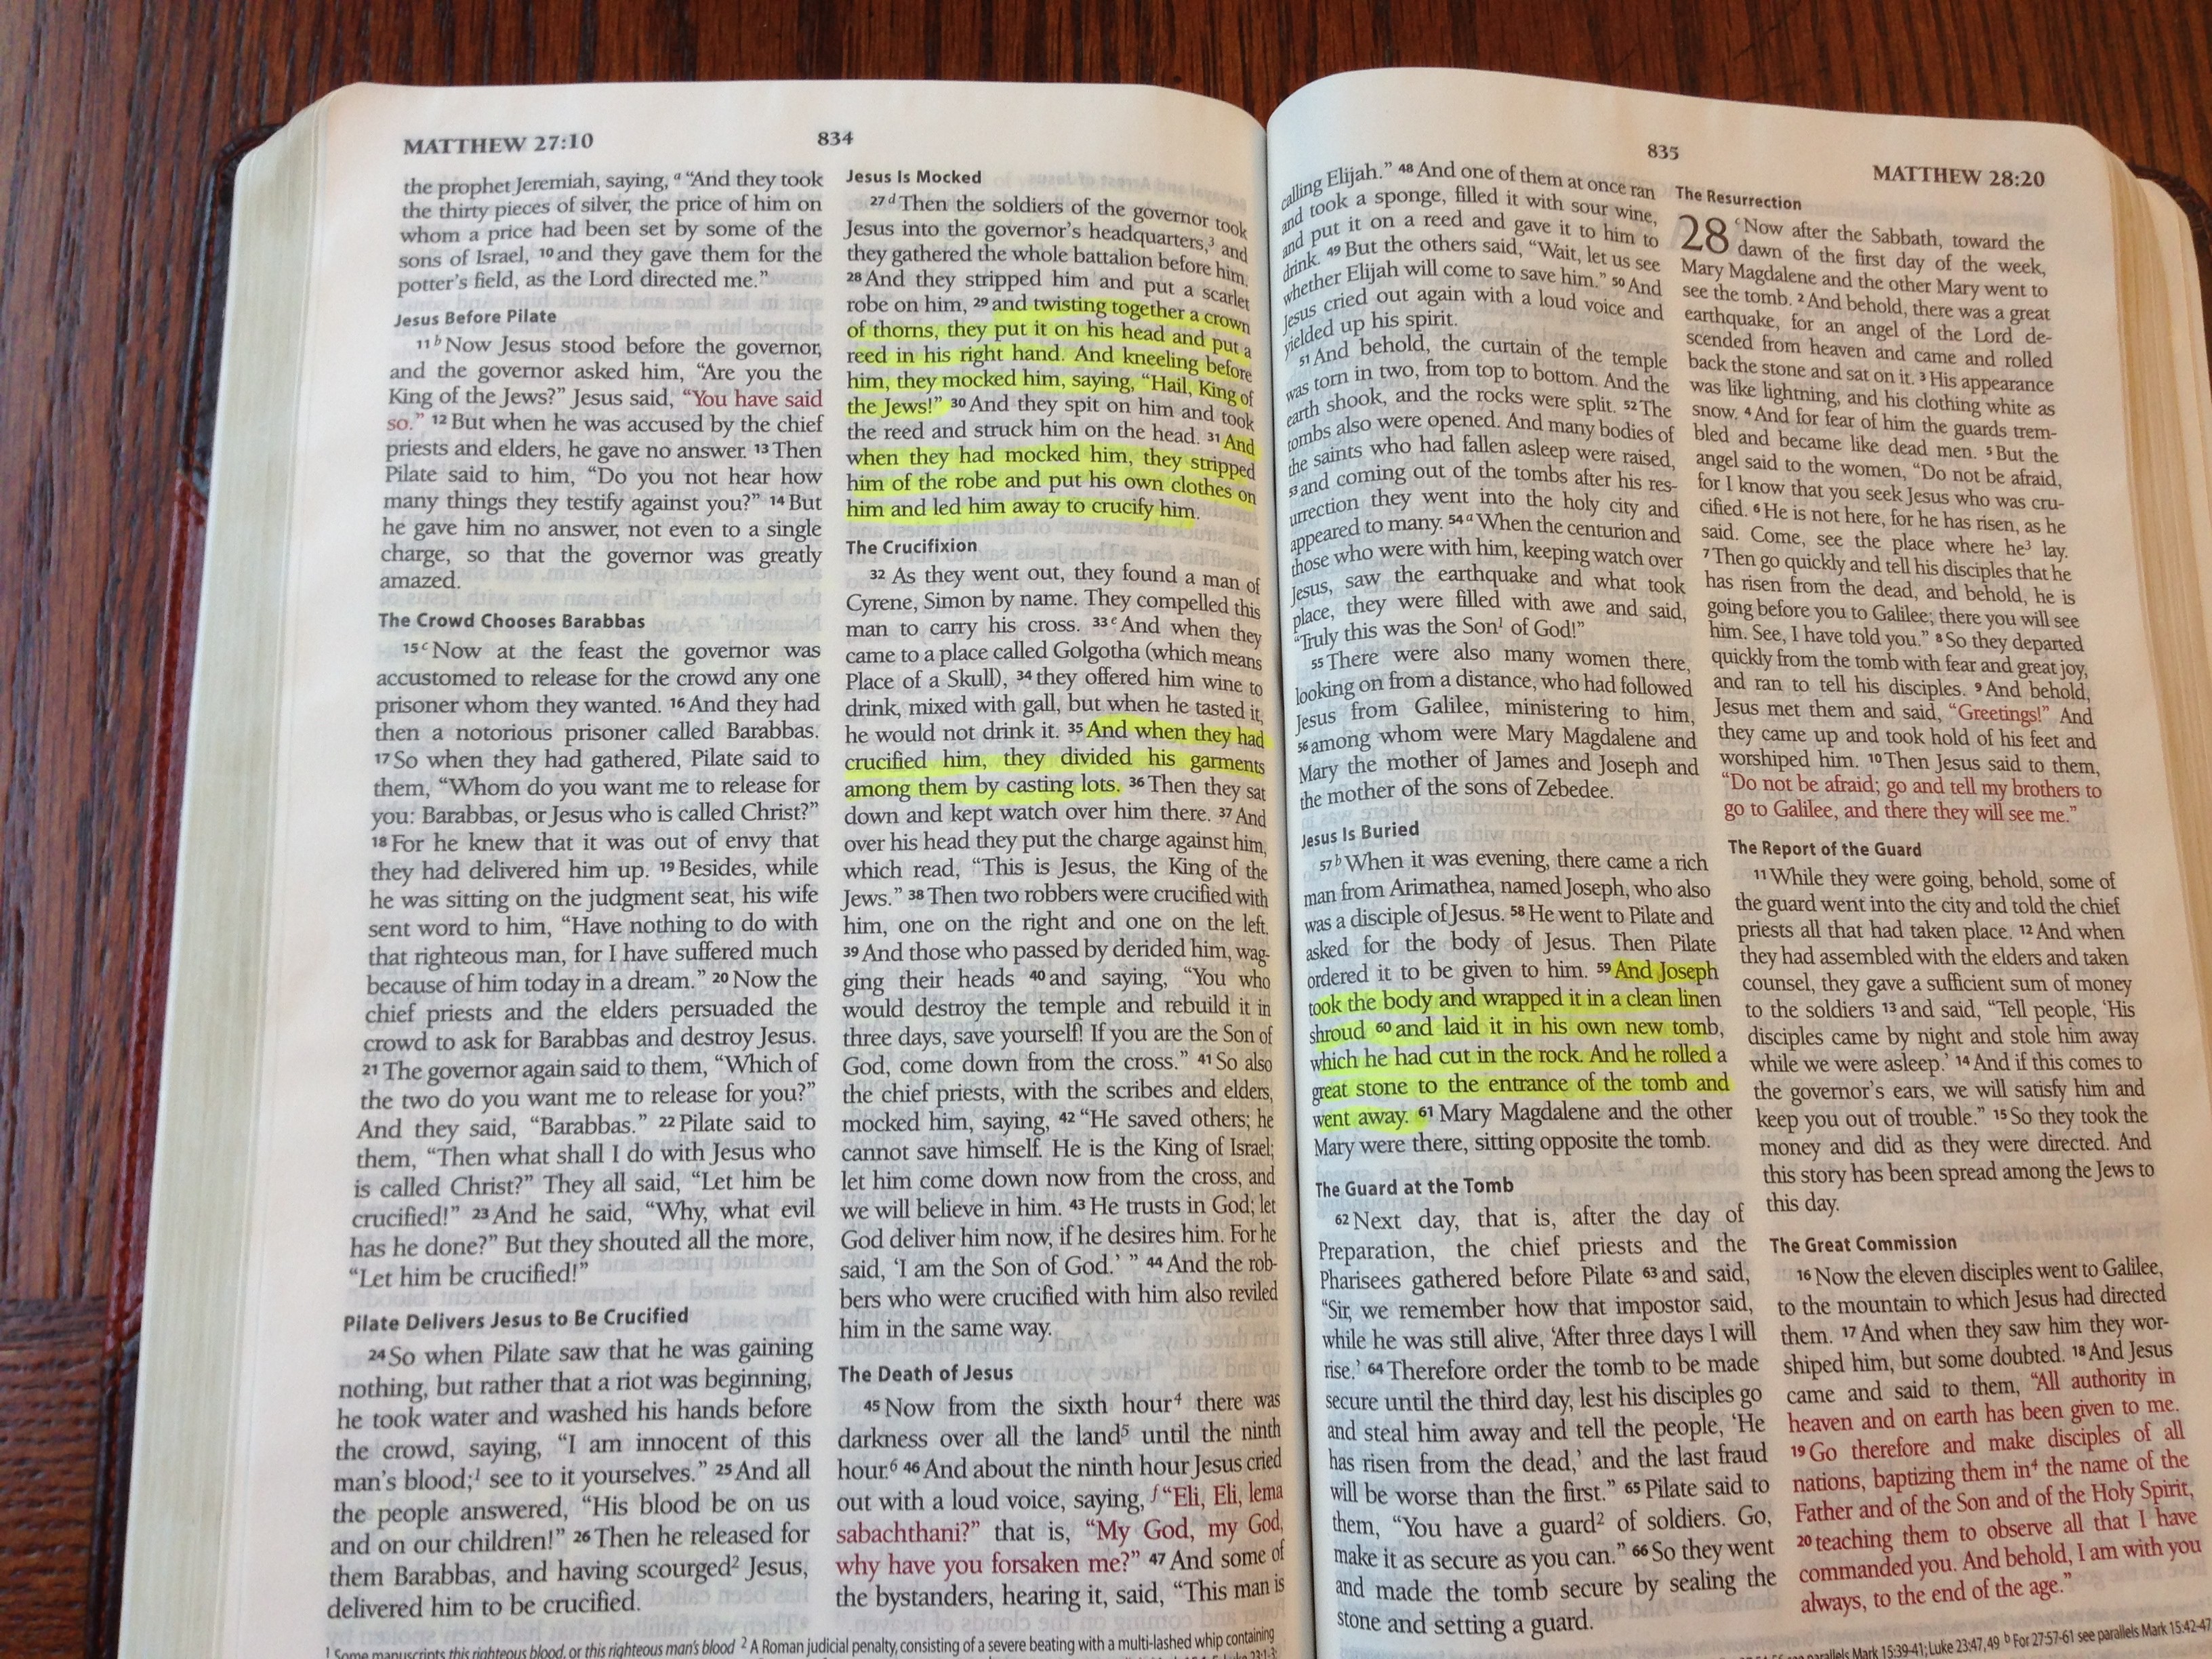 Box or Egg Carton For Storage I just used an empty egg carton to store my eggs in. I used a Sharpie marker to number the eggs 1-12 once I filled them, and then placed them in the correct order.
 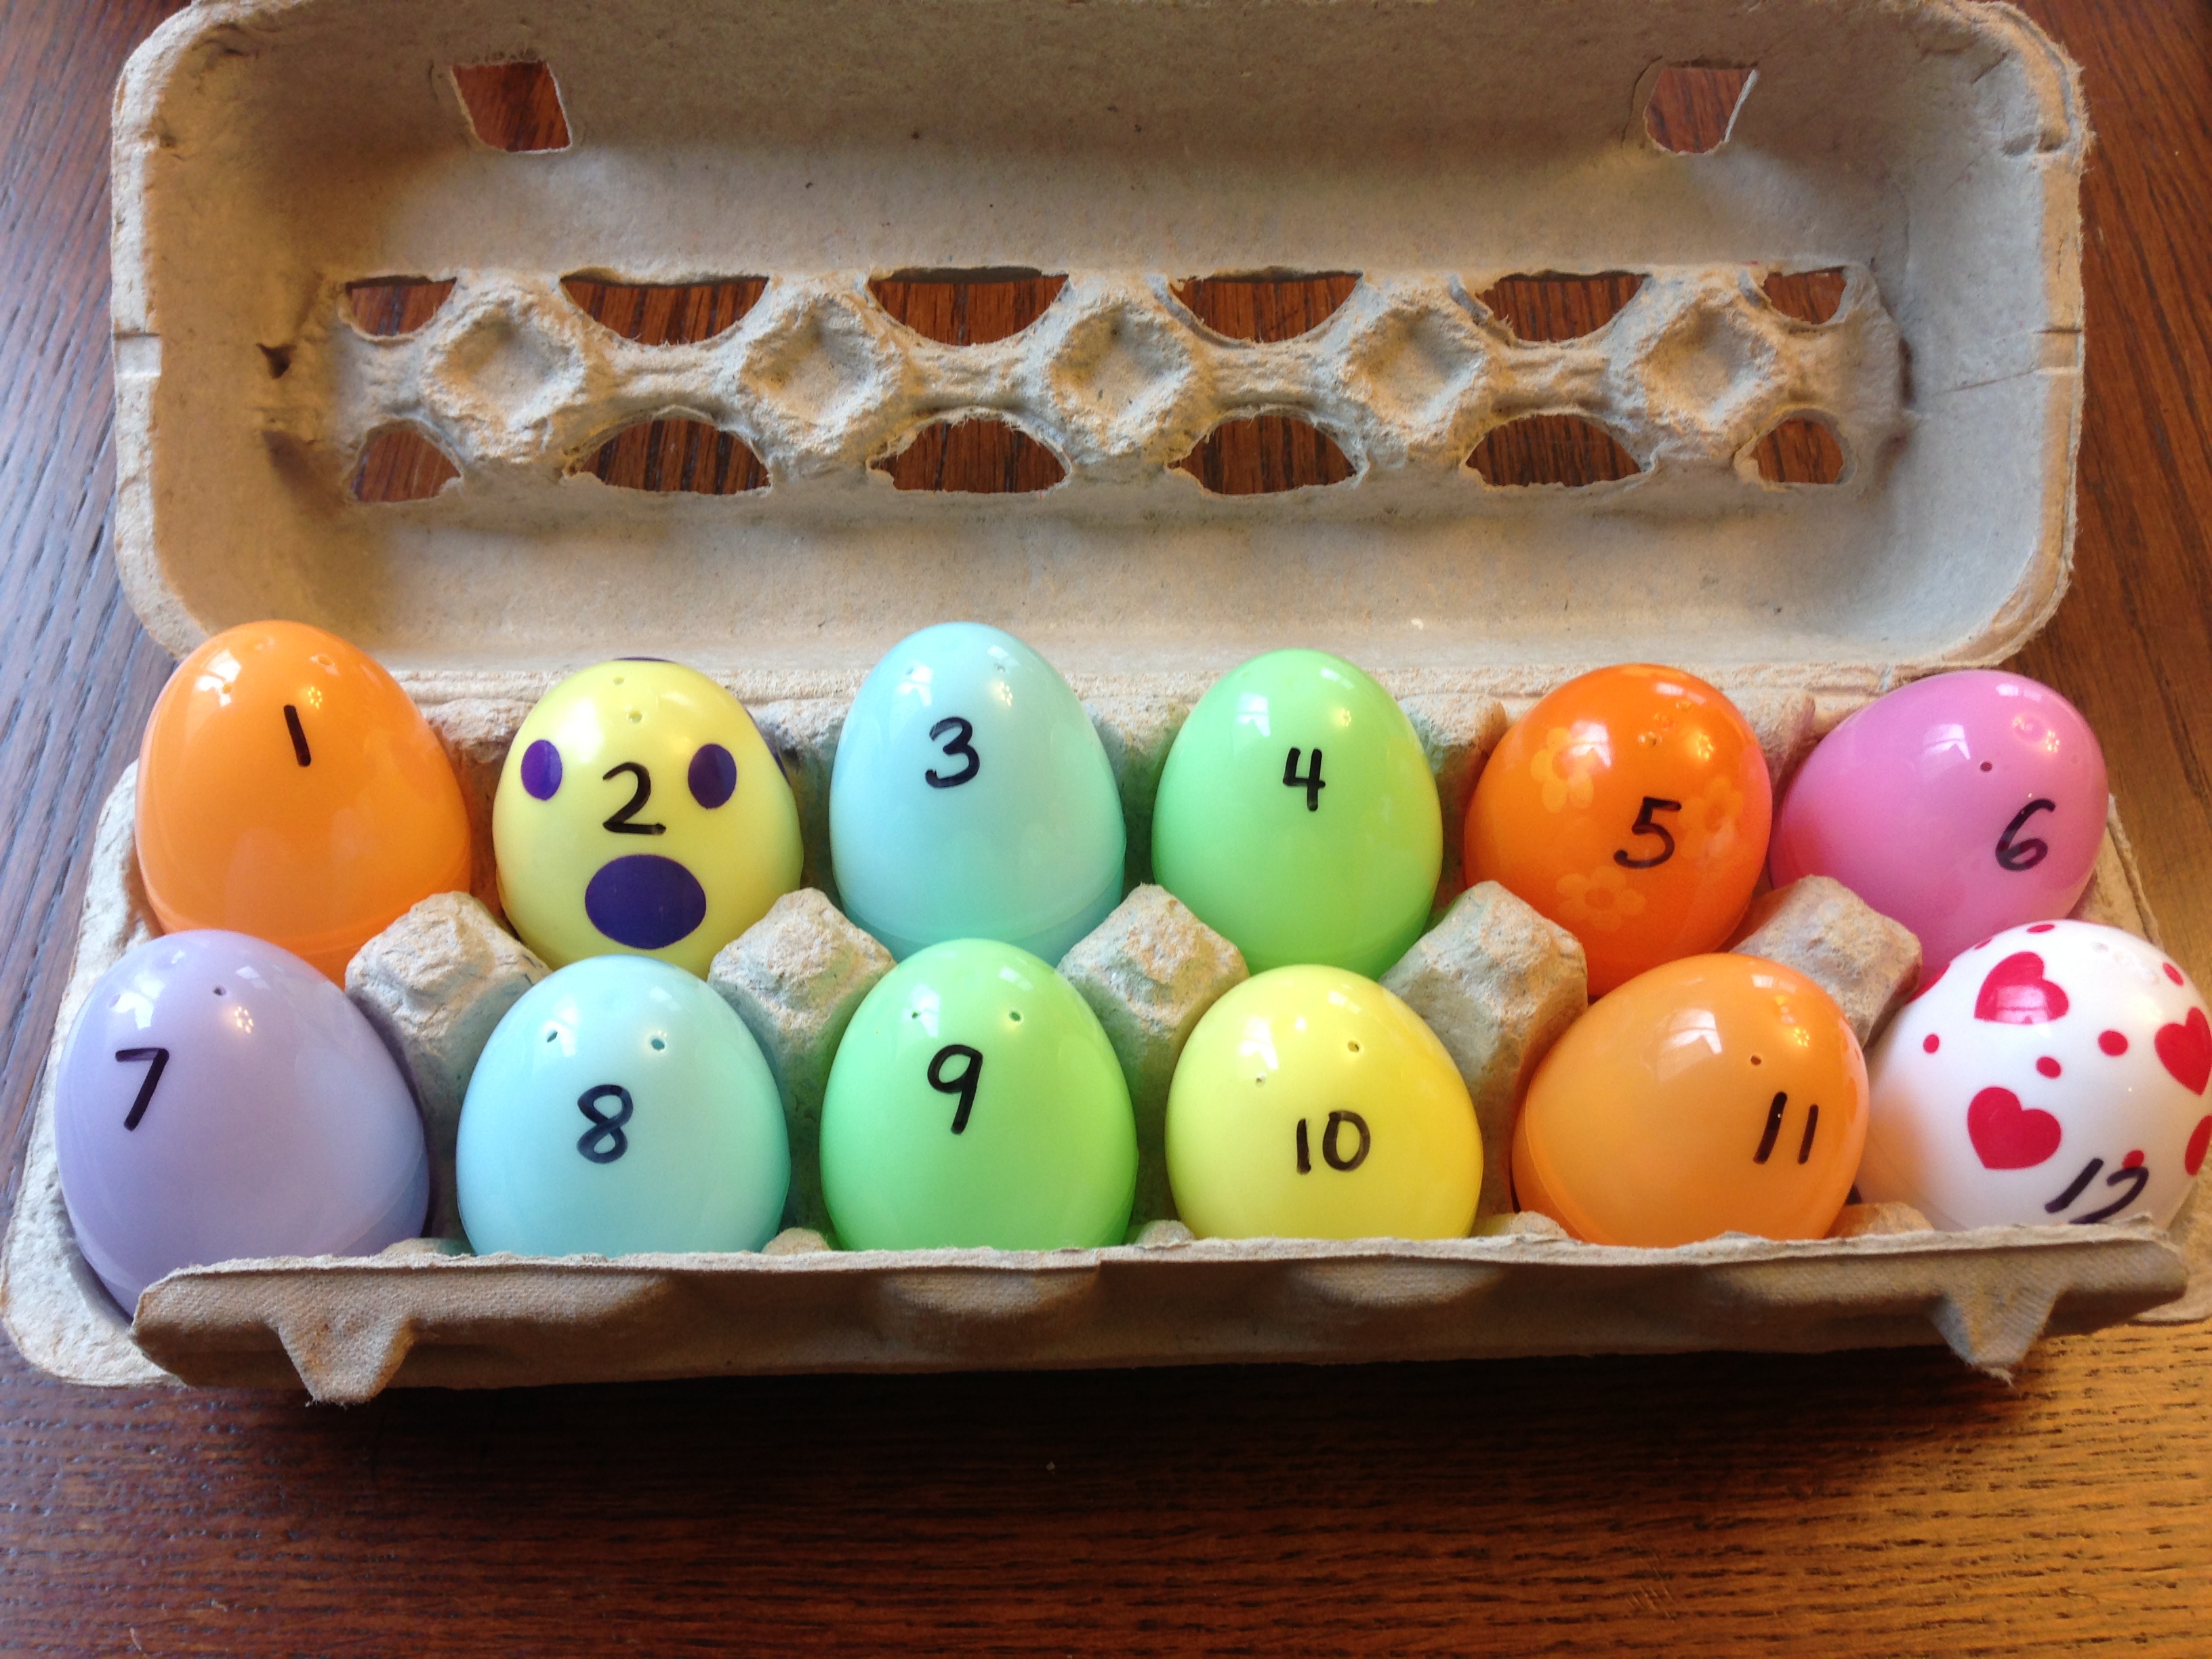 That’s it, we’re ready to go! This year I will begin using the Resurrection Eggs on Wednesday, March 20th (11 days before Easter so we can open egg #12 on Easter). If you want to do more than one egg per day, or even the whole box at once, go for it! The beauty of this activity is that you can go at your own pace and follow your child’s leading.


 Booking Your Flight
