20 Ways My 2-Year Old is Like a Puppy

P1040287

I’m a full-time stay at home mom. I spend my days playing with my kids and my dog–perhaps I spend too much time playing with my kids and my dog. As I was watching my 2-year old playing with our dog the other day it struck me: toddlers and puppies have a lot in common. Here are my top observations in toddler/puppy similarities:

  1. They have endless energy–If we could find a way to harness the energy of 2-year old boys and 7-year old Border Collies I’m pretty sure we could power third world countries.
  2. My primary role as mother/owner is to keep them from killing themselves on a daily basis.
  3. They like to chew on things–especially things that are not meant to be chewed on.
  4. They like getting their heads rubbed.
  5. They enjoy playing in the toilet–putting toys in it, drinking from it, splashing around in the water. Lovely.
  6. They will eat things that really should not be eaten, and look at you like you’re a crazy woman when you jam a finger into their mouth to swipe it out.
  7. They pee on the floor and don’t clean it up. I really wish they would at least clean it up.
  8. They don’t wear out–If they get 5 minutes of rest they’re ready to go again at 100% capacity. No rest for the weary (mom).
  9. They enjoy lying in mud puddles and digging in the dirt. But, really, who doesn’t?
  10. They need regular grooming–see #9
  11. They love balls. Ball?! Did somebody say ball?
  12. They are small, squishy, and cuddly–if you can catch them long enough to squish and cuddle them.
  13. They want to wrestle. All. The. Time.
  14. They spread out on the couch/bed/chair that you were about to sit on–and they lie in such a ridiculous, haphazard position that there’s not a square inch of space left for you to possibly squeeze in.
  15. They like to bite themselves–not quite sure why they find this so enjoyable.
  16. They go crazy at the mention of words like “park” or “treat”.
  17. They need their “claws” trimmed about every 2 seconds.
  18. They make loud, obnoxious noises when they aren’t getting enough attention–and won’t stop until you quit whatever unimportant task you were doing and get down on the floor with them again.
  19. More often than not, they smell a bit funky. True story.
  20. They give unconditional love and I couldn’t imagine the world without them!

Traveling With Bebe, Part 4: How To Get Through Your Flight (Plus 40 Activities To Entertain Your Baby or Toddler During The Flight!)

Az Dec 2012 - 0003

Boarding and Take Off
They will usually invite families traveling with young children to board the plane first. Use your best judgment on this one. If you have a content little baby and think you’ll need some extra time to jockey you and your belongings into position, then go ahead and board early. But beware. If you have a crawler or a toddler who doesn’t like to sit still for more than two micro-seconds, stay in the comfort–and space–of the airport for as long as possible before boarding the plane.

If you are lucky enough to be bringing your car seat onto the plane with you, try to set it up in the window seat so you’re not blocked in. If you’re bringing baby on your lap, most airlines will allow you to keep him strapped into an infant carrier during the flight (with the exception of takeoff and landing times).

During takeoff, try to have your baby sucking or chewing on something. This will help their tiny ears adjust to the air pressure changes. You can nurse your baby, give baby a bottle or a pacifier, or have your toddler chomp on chewy snacks. An added benefit to nursing during takeoff: baby may actually fall asleep. Hello, peaceful flight!

If your little one still gets plugged ears during the flight, try the “cups method” for popping their ears:
-Get two plastic cups (one for each ear), some boiling water and a few paper towels. Just ask your flight attendant for these supplies–they’ll hook you up!
-Dampen the paper towels in the boiling water and place one inside each cup
-Hold the cups containing the dampened towels over the ears for a few minutes.
The steam from the boiling water will generate a small pressure vacuum that will unblock the ears and help relieve pain.

During The Flight
Your baby’s age and mobility-level will determine a lot of what will make your flight time go smoothly. If you have an infant (under 5 months old) who can’t really move yet, your flight should be pretty easy. He’ll probably fall asleep during takeoff or at some point early in your flight with all of that lovely white noise that goes on in an airplane.

If you have a baby who is able to roll over and/or sit (approximately 5-7 months), he’ll probably be content sitting on your lap for a good chunk of time. You can entertain him with songs, books, ripping pages out of those magazines that are in the seatback in front of you. You can nurse him (or give him a bottle) and he may even doze off. If he starts to get fussy, you can bounce with him in the aisles or walk back to the galley with him (usually the flight attendants will take pity on you and let you hang out in their space).

If you have a crawler–or, God forbid, a walker–good luck. That’s all I have to say, because it’s probably going to be a rough flight. Babies who are mobile but have not yet attained an attention span of more than 1 minute are very difficult travel companions. They want to move, and being strapped in to a car seat or a baby carrier for hours on end is not their idea of a happy day. Bring lots of yummy snacks, new books and toys that they haven’t seen before, and a lot of patience. Be prepared to spend a good portion of your flight walking up and down the aisles and/or sitting cross-legged in your seat so your baby can play in the 4 square inches of floor space at your feet. And, if all else fails, just remind yourself that it will all be over soon and you’ll be enjoying that special place that you’re traveling to!

Here are some of my favorite activities to entertain a baby or toddler while on the plane:

  1. Read books
  2. Sing songs and lap bounces
  3. Recite Nursery Rhymes (brush up on these ahead of time)
  4. Do finger plays with the accompanying hand motions
  5. Eat special snacks (I’ve heard that a ring pop can entertain a 2 year old for hours)
  6. Play with window decals on the window (find them on clearance after holidays)
  7. Color with crayons
  8. Magna Doodle
  9. Paint with “Magic Paper” that turns colors when you paint with water (Crayola Color Wonder and Color Magic)
  10. Play with wiki stix
  11. Play with clay or play dough
  12. Play with sticker activity books
  13. Do a lacing project
  14. Play with apps on your iPhone or iPad (I hear the “Duck Duck Moose” and “Peekaboo Wild/Farm/Forest” ones are great)
  15. Watch movies or TV shows on your iPhone or iPad
  16. Go to the bathroom and make silly faces in the mirror
  17. Make a shaker out of two plastic cups taped together at the “mouths” and filled with airplane peanuts (your flight attendant will probably have all of the necessary supplies)
  18. Play with magnet sets
  19. Sort snacks or toys into piles (based on color, size, shape, type, etc.)
  20. Let them braid my hair
  21. Before you leave for your trip, make an “I Spy Bottle” to play with
  22. Draw pictures for your little one and make up stories to go with them
  23. Crumple up and tear paper
  24. Draw letters, shapes, etc. and have your little one trace them
  25. Play with toy cars and airplanes
  26. Do a puzzle
  27. Read the airplane safety pamphlet together and locate all of the exits on your plane, practice buckling seat belts, etc.
  28. Play with Legos
  29. Play Peek-A-Boo
  30. Count things
  31. Visit with other passengers (only the ones who invite you…some people on planes really don’t appreciate happy visits)
  32. Play with ice cubes in an empty cup
  33. Make origami or paper fans with pages from a magazine
  34. Do seat exercises with your baby
  35. Use pipe cleaners to create models of shapes, animals, etc.
  36. Play with a flashlight (yes, there’s an app for that)
  37. Use your camera (or the camera on your phone) to take silly photos of yourselves
  38. (Before or after your flight) Visit the captain in the cockpit (you may even get one of those cool “wings” pins)
  39. Crinkle water bottles
  40. Play “guess which hand it’s in” (“It” can be a snack–if they guess correctly, they get to eat it)

One other little note here. Most people on the plane will be compassionate to your cause and they’ll be willing to help you out if needed. The flight attendants are usually very helpful and will bring your baby juice or water for her bottle, and some will even stop to play with her or hold her so you can go to the bathroom. So, when your baby starts fussing and you start to stress out, just relax. You’re not the only one who’s ever brought a crying baby on a plane and most of the other people remember the days when THEY were the ones holding the crying baby (or are thanking their stars that they are not yet the one who has to hold a crying baby).

Well, that’s it for my tips on flying. Tomorrow we leave for Ireland with baby J, so hopefully I can take my own advice and have a smooth flight! I’ll do another post after we get back from Ireland to let you know how all of this played out on an international flight. I may be MIA on the blog for the next week or so while we’re traveling, but I’ll be sure to update with lots of photos and fun stories when we return. Until then, Bon Voyage!

Traveling With Bebe, Part 3: Getting Through The Airport

Az Dec 2012 - 0080

Yesterday I showed you how I pack for a trip. Today, we get to go on the trip–hooray! I love traveling, but I have to admit it–traveling with kids can be a bit challenging. I used to look forward to the plane ride when I’d get 3 hours all to myself to catch up on reading all of those celebrity magazines that I only read when I’m at an airport. Now, I get to spend travel time anxiously anticipating my child’s every potential need and/or desire before they realize it and throw a temper tantrum at 30,000 feet. Or, I get to spend 3 hours bouncing a baby up and down the aisles as I get nasty stares from that old man who wants to leave his foot dangling out in the walkway right where I can trip over it. Yes, traveling with kids is exhausting and it tests your will as a parent, but in the end it’s always worth the effort. And, there are things you can do to make things go more smoothly for everyone. Today we’ll focus on getting through the airport so you can actually make your flight!

Arriving At The Airport
Always allow a bit of extra time when you’re traveling with kids. It will take you longer to physically move through the airport with little ones and all of their accompanying “stuff”. Plus, you’ll want some extra time to feed, do diaper changes, and run off some energy before your flight. I always bring a small stroller with me, even for my toddler who can walk, because sometimes it’s just easier (or necessary) to strap a kid in and run to your gate. I also try to check in for my flight and print our boarding passes before I arrive at the airport. As long as we’re not checking any bags, this allows us to go straight to security when we arrive–this gives us one less line to wait in and a few more minutes to get where we need to be by the time we need to be there.

Getting Through Security
Getting through airport security with a baby is a bit like competing in a triathlon: it requires training, endurance, speed, and the ability to perform a number of ridiculous tasks. I’ve got this down to a bit of a science now. I always bring baby’s car seat and stroller with me to the gate because you can check them there for free. Plus, if there happens to be an empty seat on your flight, they’ll let you bring the car seat ON the plane so you can let baby have his own seat next to you for free (this will give you empty arms and your baby will have a chance to take a nap in his own space. Glorious.).

The trickiest part of going through the airport with little ones is security because you have to put EVERYTHING through the metal detector (including strollers and car seats, baby not included). Here’s what I do for the baby: I bring a snap-and-go stroller with my “personal item” (a diaper bag) stored underneath it and the car seat snapped on top. When I flew by myself, I decided not to check a bag so I brought a nice rolling suitcase that I could drag behind me. I put the baby in the Ergo carrier as soon as I got out of the car so I could walk through security and not have to jostle him out of the car seat there (I have never had a problem leaving him in the Ergo through the security section, but maybe some airports will make you take baby out for further inspection. Perhaps junior is carrying a samurai sword under his onesie–you just never know).

Once at the security checkpoint, look for a family line. Some airports take pity on parents lugging children through the airport and they give you a little star treatment with a special, shorter line. Kind of like a fast pass at Disney–but instead of flying on Dumbo at the end, you get to walk through the magical metal detector.

Now, get a whole stack of those bins that you’re supposed to empty your pockets into. Excuse yourself to the impatient lady standing behind you, and take over the floor. If you plan on carrying baby through the metal detector in your arms, lay down a blanket or your jacket and set her down in one of the bins so she doesn’t roll away as you’re getting everything ready. Put the diaper bag in one bin. Put your liquids and any other questionable materials in another bin (by the way, if you’re traveling with a baby you are allowed a certain amount of liquid formula or breast milk through security, and I think even some water for you to drink as a mom. Check with your airline or the TSA website for more details). Put your shoes (I hope you’re wearing slip-ons or flip-flops, because good luck untying your shoes with a baby already strapped to your chest!), jacket, loose change, watch, etc. in another bin. Fold up the stroller and put it upside down on the conveyor belt. Make sure the handle is all the way down on your car seat (it won’t fit through the “security tunnel” if it’s not just right) and put it on the conveyor belt. Put your suitcase and all of your bins on the conveyor belt. *Make sure you got your baby out of that bin if you haven’t already!* Run back and forth like a mad-man trying to push all 30 of your items through the conveyor belt so you don’t cause a back-up. Hold baby, and walk calmly through the metal detector–no need to alarm anyone at this point. Yay, you did it! Now, go retrieve your pile of items that have already started spilling onto the floor on the other side of the conveyor belt and start putting everything back together again. Whew!

At The Gate
After you get through security, the rest is pretty easy. Get to your gate a bit early and check to see if they have any empty seats so you can bring your car seat on with you. This will make a world of difference, so it’s always worth checking once you’re there.

If you have a crawler or a toddler, encourage him to run/jump/climb/dance down the hallways–whatever it takes to burn some energy before the long flight ahead. Get a snack or a meal. Change diapers and use the potty yourself–bathroom runs and diaper changes mid-flight are difficult at best. Basically, do anything now that you’re not going to be able to do once you’re on the plane.

We’re almost to the good part now: actually flying to your destination. Check back tomorrow for my tips on flying with your little one!

Traveling With Bebe, Part 2: Pre-Travel Arrangements and Packing

IMG_2635Booking Your Flight
Try to schedule your flight for a good time of day for you and your baby. I have found that it’s best to assume the baby will not nap on the plane, so plan accordingly (nap time + no nap = fussy baby, so try to avoid in-flight nap times). Try to schedule your flight for the morning so you can arrive in your destination before baby’s usual nap time. Or, if you still get 2 solid naps out of your little one, you can try the evening after nap #2, but still try to arrive before baby’s usual bed time. Obviously if you have a really long flight this logic won’t work, so just try to travel at the time of day when your baby is usually happiest (for us, that’s the morning).

If you can choose your seats ahead of time and will be traveling with a “helper”, choose two seats together (the best scenario is to find a row with only 2 seats so you don’t have to split the row with a helpless stranger). I like to sit on the aisle so I can get out easily to tend to baby’s needs, but some people prefer the window seat so they can entertain baby with the view. Also, the back of the plane is usually more kid-friendly–fewer passengers choose the back of the plane so there are usually more empty seats and you’re closer to the bathroom (for diaper changes) and the galley (if you need to stand up and bounce baby around for awhile).

If you will be having a layover, always opt for the longer time over the shorter time (i.e. take the 90 minute layover instead of the 60 minute). It takes longer to get from point A to point B when you’re carting along a stroller, car seat, diaper bag, carry-on, and an infant. Plus, you’ll want some extra time to do diaper changes, use the bathroom, get snacks, and get some wiggles out before the next leg of your journey. Short layovers always induce panic, so just don’t do it.

If you are traveling with a baby under age 2, It’s also a good idea to call your airline the week before you travel to confirm that you will be traveling with a lap infant. That way they can ensure there will be an extra oxygen mask at your seat and that you are seated in an appropriate spot (babies aren’t allowed in exit rows).

Packing
It’s every parent’s worst nightmare–you travel to some far-flung destination with your child, everyone arrives safe and sound, and then you realize that you forgot IT. You know, that one thing that your child NEEDS to survive, that thing that you NEED for your sanity, that very important thing that unless we find it NOW our entire trip will be RUINED!!!! So packing is very important. There are a lot of little things to bring with you when you’re traveling with young ones, and if you don’t pack them, nobody else will.

I have learned that I need to organize my packing well in advance of our travel. Otherwise, that shirt that I needed will be in the dirty laundry hamper or that baby food I needed will already have been eaten. I usually start packing bags about 3 days before we leave. This allows me to have everything I need in one spot, clean and organized. It also allows me a day or two to remember that thing that I forgot.

I keep a packing list stored as a document on my computer, then I print it off before I pack for a trip. Our list is broken down into what each member of our family (including the dog) needs for travel–whether we’re going for an over-nighter or a week-long vacation, we still need to bring most of the same things. If there is something on my list that I don’t need for this particular trip, I just cross it off my list before I start packing. If there is something additional I’ll need for this trip that is not on my usual list, I add it to the list before I start packing. As I’m packing, if I think of something else I might need, I also add it to the list. Then, after each item has been packed, I cross it off the list. Since I pack a few days ahead of time, there are usually a few items that have to be packed last minute (like our toothbrushes and my son’s “lovey” Mimi). I highlight those last minute items on my list and keep it with the bags. Then, at “the last minute”, I grab all of the highlighted items and toss them in the bags as we’re loading up the car. Yes, I realize that I sound really anal about all of this. But it works and I’ve never forgotten Mimi or my underwear.

And now, dear reader, you will get a glimpse into my wonderful world of packing. I don’t include our everyday clothes on this list because I pretty much know that we’ll all need pants and shirts while we’re traveling. Here is my essential packing list, well-refined from years of implementation:

Mom and Dad:

  • Camera
  • Meds and vitamins
  • Cell phone and charger
  • Laptop and charger
  • iPod and charger
  • Sunglasses
  • Hats
  • Running gear: shoes, pants, shirt, socks, bra
  • Swimsuit and flip flops
  • Nursing pads
  • Breastpump and bottles
  • Coats
  • Hair straightener and makeup
  • Sunscreen
  • Entertainment: books, load apps and music
  • Passports

Dog:

  • Food
  • Food bowls
  • Treats
  • Leash
  • Toys
  • Dog bed
  • Pills
Boys:

  • Diapers and wipes
  • Mimi and Gigi
  • Swaddling blanket
  • Extra baby blanket
  • Spit up rags
  • Baby monitor
  • Pac ‘N Play
  • Toys and books
  • Booster seat
  • Bibs
  • Baby food and spoon
  • Sippy cups
  • Toothbrushes and toothpaste
  • Tylenol
  • Snot Sucker
  • Pacifier
  • Snacks
  • Diaper bag
  • Stroller
  • Ergo
  • Coats and hats
  • Copies of birth certificates
  • Passports

Before we leave:

  • Take out garbage
  • Empty diaper pails
  • Turn off heat
  • Check mail
  • Run dishwasher
  • Lights off
  • Doors locked
  • Garage closed

Prepping For Travel Day
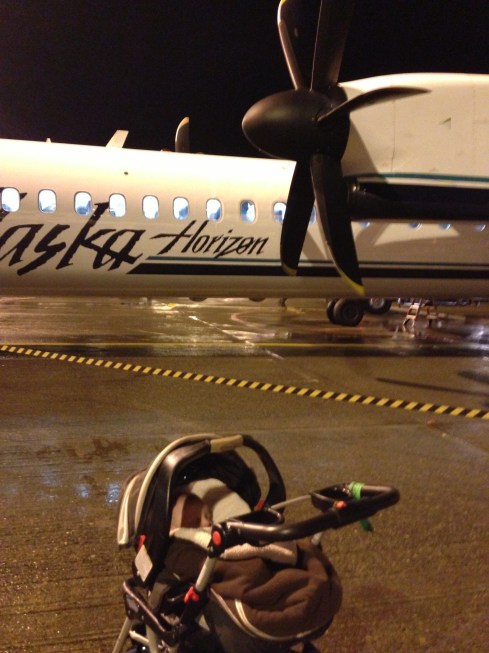
Time is of the essence when you’re traveling with young children. You get about 1 minute per year of their age before some earth-shattering disaster erupts in their world. I try to make our time in the airport go as quickly–and as smoothly–as I possibly can.This means calling the airline a few days ahead of time to notify them that I’ll be traveling with a lap infant (and making photo copies of his birth certificate in case anybody actually questions that my 6-month old is actually older than 2).

This means checking into my flight and printing our boarding passes at home before we leave for the airport. This means practicing how I will carry all of our stuff through the airport (yes, I’ve actually been known to do a trial run in our house with the luggage before the big travel day). This means loading our car as much as possible the night before we leave and keeping good notes on what still needs to be packed so we don’t have any last-minute forgettings of vitally important equipment (like the time I had to wake two sleeping babies at 5 AM to rush a laptop to the airport). Anything you can do ahead of time to minimize time and stress on your travel day is time well spent!

Think ahead to what will *potentially* entertain your baby or toddler on the plane, and make sure you’ve packed it. Snacks are usually the best bet–especially if it’s a special treat that they don’t get to enjoy very often. Also pack a few novel toys that he’s not already bored with. And, if you have a 2-year old boy, maybe even stash some earplugs for you and your fellow passengers. Just sayin’.

Travel Apparel
What you wear on the plane will make a big difference in your comfort on travel day. Here is, in my opinion, the perfect outfit for flying with a baby:

photo (15)

  • A long-sleeved v-neck that is easy to pull down for nursing. Sleeves can be rolled up if it gets hot or pulled down if I’m feeling cold (temperature regulation on planes is always pretty wonky, so I like to dress in layers)
  • A nursing tank (underneath the t-shirt)
  • An extra-large scarf: it can keep me warm, I can pull it off and use it as a lap blanket if my legs get cold, it works as an on-the-go nursing cover, and it makes for a quick game of peek-a-boo if baby gets fussy. And it’s kinda cute.
  • Stretchy leggings that I can pull down easily to pee if I need to carry the baby in the Ergo with me into the cramped little airplane bathroom. Plus they’re oh-so-comfy.
  • Shoes that I can easily slip on with one hand during the security check. No laces, buttons, snaps, etc.
  • I’d probably also bring a light jacket with me in case things get really chilly.

For baby: Dress him in something comfy that is easy to take on and off (if you need to do an in-flight diaper change you’ll be glad you choose a no-fuss outfit). Think: elastic waistbands or zippered pajamas–leave the cute outfit with a thousand buttons in your suitcase.*Note* Not all airplanes have changing tables, so you may be doing mid-flight changes on your lap!

Now that you have your bags packed and your clothes laid out, you’re ready for travel! Check back tomorrow for my tips on getting through the airport with little ones.

Taveling With Bebe, Part 1: We’re Going To Ireland!

Ireland Jons Camera - 0121

I thought this title of “Traveling With Bebe” would be quite fitting for our newest adventure. Next week, we’ll be traveling with our “bebe” (6 month old Jacob) to Ireland! Jon has to travel to Cork in southern Ireland for work and Jacob and I are going to tag along with him on his trip. There are actually some practical reasons why I’m going with him on this trip (more on that later), but it’s also pretty awesome that I’ll get a little mid-winter vacation and that we’ll be there for Valentine’s Day! We’ll just be there for a week, so it will be a quick trip.

Luckily for baby Jacob, he’s still nursing–and we don’t have to buy him his own plane ticket–so he gets to come along with us. Unfortunately for 2-year old David (and fortunately for us–can you imagine flying for 16 hours with a TWO year old?!), he’ll be staying state-side with his grandparents.

We’ve already done quite a bit of traveling with the boys. David rode on his first plane when he was about 9 months old, and I’ve already flown solo with Jacob down to Phoenix. Of the times that we’ve taken the boys on planes, about half of those times have been me by myself, and the other half I’ve had at least one helper. Even though we do have lots of travel experience, we’ve never done a trip quite like this. It will be a very long day of travel (especially by baby standards) and will involve a time change of 8 hours (hello, jet lag!). Plus, we’ll be traveling internationally so there are a few extra precautions that need to be made on that front. Overall, though, it should be a fun little experience for all of us.

There’s a lot to think about when you’re traveling with little people, so I thought I’d share a few things I’ve learned along the way to make things run a bit smoother. First and foremost, just acknowledge that you’re not the one running the show–so don’t get too upset when things don’t work out perfectly. Kids will scream, babies will cry, and things will likely get a bit messy. Just go with the flow, have an adult beverage on the plane, and know that it will all be over in a matter of hours 🙂

This week I’ll get into the nitty-gritty of traveling with the under-two set. Check back tomorrow for my tips on organizing and packing, then later in the week for how we actually get through the airport and our flight.

I’m actually a bit nervous about taking baby on such a long flight, so I’d love to hear about your travel experiences. Feel free to leave a comment if you have any proven travel tips or great stories from your travels with kids!

*Author’s Note* Click here to read about what we did while we were in Cork, Ireland!

DIY Apple Stamp Valentines

Today is February 1st and, with Valentine’s Day just around the corner, I thought it would be fun to make some cards for our loved ones. I much prefer home-made cards to store-bought because they’re more meaningful, they’re fun to make, and they cost less than the off-the-shelf variety. I got my idea for this year’s apple stamp Valentines out of a magazine. For the life of me, I can’t remember which magazine it was and, since I just purged and recycled all of my back-issues a few weeks ago, the world may never know. So, to whichever magazine I borrowed this idea from, thank you!

Apple Stamp Valentines

First, cut an apple in half and trim the bottom to a point so that it looks like a heart. Put some red paint on a plate (we used finger paint because I already had it and it doesn’t stain clothes).

IMG_0851

Dip your apple into the paint and stamp it onto paper (I had pre-folded cardstock into small cards for our project). You don’t need a lot of paint on your apple in order for it to stamp properly. Pull the apple stamp straight up off the paper so you don’t smudge your heart shape.

IMG_0854

Let your stamped paper dry completely.

IMG_0856

After the paint is dry, you can use makers to add a stem, leaves and seeds to your apple hearts. I also added some little sayings to my cards. The sentiments I used were: “You’re the apple of my eye!”, “Love is a fruit in season at all times, and within reach of every hand.  -Mother Teresa”, and “The fruit of the Spirit is love, joy, peace, patience, kindness, goodness, faithfulness, gentleness, and self-control.  -Galatians 5:22-23″.

photo (16)

I have several blank envelopes from a stationery set that I’ll use to mail out our cards. Happy Valentine’s Day!

The Shape-Swat Game

IMG_0846

When I was teaching first grade I used to play  “the fly swatter game” with my students. It’s a great game that you can use to teach and reinforce basically any concept that you want your kids to learn. It’s a lot of fun, takes very little prep time or materials, and can be played for as short or as long a time as you have. You can adapt this game to work with kids as young as 2, but it’s also a lot of fun for older kids (I could even see playing a version of this game with high schoolers!).

IMG_0843To play, all you need is a fly swatter and some cards with your “learning concept” of the moment. For my 2 year old, I decided to focus on shapes and colors, but you could really use anything you want your kids to learn (see variations at the end of this post). My friend Krista told me about a website called mrprintables.com that has lots of fun, high quality free printables. I found some neat shape templates on the website and printed them off.

Then I just cut out the shapes for my “cards”.
*Note* If you want to be able to reuse your cards, glue your shapes onto cardstock or construction paper for some added durability.
IMG_0844

I used blue painter’s tape to tape the shapes up on the wall. Then I gave my little guy his flyswatter and showed him how to swat the shapes on the wall gently (which, in little boy speak, apparently means to strike repeatedly with all your force) .

When it was time to play, I started by saying a shape for him to find: “Find a triangle.” or “Find a square.” and he’d try to swat it. Then we played with colors: “Find a blue shape.” and “Find a yellow shape.”. Then we got really fancy. “Find a green square.”, “Find a round, red shape.” “Find something the same color as the sun.”

The fun thing about this game is that you can really make up whatever questions you want to to keep things interesting. When David would answer incorrectly or have trouble finding what I was asking for, I used it as a teachable moment to show him the correct answer and explain why it was correct. David was having so much fun playing that I doubt he even knew he was learning. Plus, he got to run around the room and hit Mommy’s wall on purpose–every little boys dream come true.

Here are a few variations of the game if you want to play at home with your little ones:

  • If you have 2 or more kids, have a race. Have both kids start at a designated spot with their fly swatters behind their backs. Then call out a card for them to find and have them race to see who can find it first.
  • Hide the cards around the room (but still make them visible without having to move anything) instead of just putting them on the wall. Make your kid run around to find the correct one.
  • Play with animal cards- say an animal’s name or sound and kids have to find the correct picture
  • Play with number cards- say a number or “what comes next: 1,2, __?” and kids have to find the numeral. For older kids, have them find the sum or solution to a math equation (3+2+? , 6-1+?, 3×2=?)
  • Play with letter cards- say a letter’s name or the sound it makes and kids have to find the correct letter. For older kids, you can use letter cards for spelling (find the last letter in the word “chair”).
  • Play with sight words (for ages 4 and up): put a different sight word on each card
  • Play with feelings (as long as you don’t hurt any–hehe!)- do a Google search for people making different faces (happy, sad, surprised, etc.) and print them off for your cards. Have your little one find the different emotions.

The possibilities are endless. Have fun playing with learning!

7 Healthy Habits For Families

296673_10100293000212280_1663846035_n

One of our favorite family past times: the monthly Seattle Adventure Run

A couple of weeks ago at Stroller Strides we were talking about healthy habits that we are trying to implement in our lives. There were so many great ideas, that I thought I’d write a post to share some of them with all of you.

1. Set the example for your kids: I’m really fortunate in this arena because my parents are some of the healthiest, most motivating and inspirational people I know. They have always set a wonderful example of healthy living for me and my sisters. Case in point: My mom got attacked by a dog last summer while she was out running. She broke her shoulder and had to get multiple surgeries on her arm. Three months later she was running a half marathon–with her arm in a sling for all 13.1 miles. Smiling and chatting with other runners the whole way. My dad’s favorite past-times include boogie boarding (yes, he still dons a wetsuit and goes out in the frigid Northwest Pacific Ocean), skim boarding and downhill skiing. They work hard, play hard, and eat well. I learned a lot of healthy habits from my parents, and I hope I can pass those along to my kids–kind of a “pay it forward” for our health.

2. Be Active With Your Kids: My boys are only 2 and 6 months now, so a lot of being active with me involves them riding along in the stroller while I run or walk or exercise. I secretly want to be like “Greenlake Mom”. If you’ve ever been to Seattle’s Greenlake, you know who I’m talking about. She’s the one out there running in the pouring rain with her double jogging stroller in one hand and the dog leash in the other hand while her 5 year old zips ahead on his bike. As the boys get older, I’m looking forward to spending time practicing sports with them, going for family bike rides, hiking, rock climbing, skating–whatever will get us moving and having fun together.

3. Keep bad food out of your house: If you know that you’re tempted to sneak a bite of ice cream every time you open the freezer, it’s probably best to just NOT keep ice cream in your freezer. We have lots of opportunities outside of our homes to eat unhealthy food (parties, dinners out, a quick snack from the vending machine when you’re out and about), so make your home a safe-haven.

4. Keep good food in your house: Replace those food traps with healthy options that you actually like eating. As I’ve mentioned before, I have a huge sweet tooth. I will literally sit down and eat a whole chocolate cake if I’m left un-checked. Seriously. Instead, I fill my fridge and pantry with healthy sweets: yogurt, fresh fruit, berries, raisins and fruit leather and even a bag of chocolate chips (I can eat a few chocolate chips for a chocolate craving and it will usually tide me over so I don’t feel like I need to go and bake myself a cake). That way when the craving hits, I can usually find a healthier option that will satisfy me.

5. Prepare your meals and eat as a family: I consider dinner time to be almost a sacred event. Even when Jon is crazy-busy with work, he makes an effort to be home and at the dinner table by 6:00 every single day. I cook almost all of the food we eat and I even have my toddler “help” in the kitchen. The whole family eats together, talks together, and gets to share a few moments of peace in our otherwise busy lives. Many days, this is the only time that everyone is awake and present in one place at the same time–I wouldn’t give up family meals for anything!

6. Get enough sleep: This is for you and for your little ones. Set a bedtime and come up with a bedtime routine that you do to unwind every single night. 6 AM always comes way too early, so do what you can to make it less terrible!

7. Limit screen time: Everyone knows that watching too much T.V.  or playing too many video games or spending too much time surfing the internet isn’t a great idea. In fact, the American Academy of Pediatrics advises against any screen time for children under age 2. The importance of limiting screen time basically sets you up for a healthier lifestyle in two ways: (1) you aren’t sitting around watching T.V. all day and (2) you’ll have more time to be up doing other things.

The earlier you start incorporating healthy habits in to your life, the earlier your kids can start learning with you.  And, if you’re lucky, maybe your kids will even teach you a thing or two!

Now excuse me while I go watch The Biggest Loser with a brownie and a bowl of Doritos.

20 Things I Do That I Never Thought I Would Do (Now That I’m A Mom)

Motherhood has changed me, for better or worse! A lot has changed in my life since becoming a mom. For instance, before becoming a mom I never thought I would:

  1. photograph poop.
  2. share photos of poop with my friends and family.
  3. eat Mac and Cheese for lunch 5 straight days in a row.
  4. get dressed in the morning–almost EVERY morning–by changing out of black yoga pants (my P.J’s) into black yoga pants (my “outfit”).
  5. count a solo trip to the grocery store as “me time”.
  6. choose a restaurant based on the following criteria: noise level (the louder the better), food selection (chicken nuggets must be on the menu), and whether the high chairs have properly functioning restraint devices.
  7. own 57 balls (and counting…).
  8. actually look forward to dentist visits (one of the only times I get to be by myself, lay in a *relatively* comfy chair and zone out for an hour).
  9. get poop or spit-up on my clothes and debate whether it’s really worth changing my outfit.
  10. spend my few-and-far-between date nights talking about the very children I left just a moment ago.
  11. enjoy folding laundry–sometimes (baby clothes are so cute!).
  12. use plastic party cups to scoop poop out of the tub (in another life those held a nice, cold adult beverage).
  13. schedule my showers like I used to schedule hair appointments–phone calls and calendar entries required.
  14. get a song stuck in my head only to realize it’s the made-up tune played by the baby bouncer or the jumperoo.
  15. forget to shut the bathroom door when guests are in my house.
  16. let the dog lick of the baby’s face after a meal.
  17. wake up to the baby’s cries, get dressed for the day and walk out of my room only to realize that it’s 3 AM
  18. flash an innocent bystander when the baby suddenly rips the nursing cover off of his face.
  19. know every. single. word. in the “Birthday Party” episode of Blue’s Clues.

And, finally–

20. love two tiny people with a love so big that I would give my very life for them.
Jacob week 1 - 0459

DIY “Cloud Dough” For Kids

I found a recipe for “cloud dough” on Pinterest a few weeks ago and had been wanting to make it for David. Since we’ve been hanging out at home all weekend potty training, I thought it would be the perfect novel activity to help pass the time.

This afternoon while David was napping I whipped up a batch of the cloud dough. Basically, you just mix together 8 cups of flour with 1 cup of baby oil (I actually ended up using about 1 1/4 cup baby oil to get the consistency I was looking for, which was about 3/4 of the bottle). I just used the cheapest flour I could find in bulk and a generic brand of baby oil, for a grand total of $2.00 for all “ingredients”. I mixed my cloud dough with my hands in this old Lego Duplos bin that I’d been hanging on to for such a use as this (it’s nice and sturdy and has a good lid that snaps into place so I can use it to store my cloud dough after playing).

IMG_0828

When David woke up from his nap I told him that I’d made him a special surprise–and he loved it! We laid out a quilt on the floor and put some large baking sheets on top for our play surface. Then we used plastic cups to make towers (kind of like sand castles) and our hands to form balls. The cloud dough feels really neat–soft and moldable. It also smells really great because of the baby oil. It does not, however, taste very good (just ask David). David played for a good 45 minutes before he was ready to move on to a new activity–pretty good for a 2 year old who usually gives things about 2 minutes before his attention wears out!

IMG_0830

This worked alright as an indoor activity, but we did get pretty “dusty” and everyone ended up needing to change their clothes after play time. Since it’s just made of flour and baby oil, though, I’m sure it will clean up pretty easily. It would be great to make this stuff in the summer and just go wild outside in the yard. You could probably even have “cloud dough” fights instead of snow ball fights!